2011 MERCEDES-BENZ G-CLASS stop start
[x] Cancel search: stop startPage 50 of 288
Releasing seat belts
Notes
! Make sure that the seat belt is fully rolled
up. Otherwise, the seat belt or belt tongue
will be trapped in the door or in the seat
mechanism. This could damage the door,
the door trim panel and the seat belt.
Damaged seat belts can no longer fulfill
their protective function and must be
replaced. Consult an authorized Mercedes-
Benz Center.
Three-point seat belt, front
XPress release button = and guide belt
tongue ; back towards belt sash guide ?
( Y page 46).
Three-point seat belt in the rear, center
XPress release button B on seat belt buckle
A (Y page 46).XOpen belt buckle ; with a screwdriver or
similar item ( Y page 46).XLet the seat belt roll up to the stop.XGuide both seat belt tongues ? and C
into bracket : one on top of the other.
( Y page 46).GWarning!
To help prevent the possibility of injury,
always store the rear center seat belt latch
plates in the attachment when the rear center
seat belt is not in use.
Belt warning for the driver and front
passenger
The 7 seat belt warning lamp in the
instrument cluster is a reminder for all
occupants to fasten their seat belts.
Regardless of whether the driver and front-
passenger seat belts have already been
fastened, the 7 seat belt warning lamp will
always illuminate for six seconds each time
the engine is started. It then goes out if the
driver and the front passenger have fastened
their seat belts.
If the driver or front-passenger seat belt is not
fastened when the engine is started, an
additional warning tone will sound. This
warning tone ceases after a maximum of six
seconds or when the driver and front
passenger have fastened their seat belts.
If after six seconds, the driver or front
passenger have not fastened their seat belts
and the doors are closed:
R the 7 seat belt warning lamp remains
illuminated as long as either the driver's or
front-passenger seat belt is not fastened.
R the 7 seat belt warning lamp lights up
if the vehicle speed exceeds 15 mph
( 25 km/h). Additionally, a warning tone will
sound with increasing intensity for a
maximum of 60 seconds or until the
driver's or front-passenger seat belt are
fastened.
If the driver or front passenger unfasten their
seat belt while the vehicle is in motion, the
7 seat belt warning lamp lights up and a
warning tone sounds again.
The warning tone ceases even if the driver or
front passenger have still not fastened their
seat belt after 60 seconds. The 7 seat belt
warning lamp stops flashing but remains
illuminated.
After the vehicle comes to a standstill, the
warning tone is reactivated and the 7 seat
belt warning lamp flashes again if the vehicle
speed again exceeds 15 mph (25 km/h) .
The 7 seat belt warning lamp only goes
out if:
R both the driver and the front passenger
have fastened their seat belts.
or
R the vehicle is stationary and a door is open.
i For more information on the 7 seat
belt warning lamp, see "Indicator and
warning lamps in the instrument cluster,
seat belt" ( Y page 184).48Occupant safetySafety
ProCarManuals.com
Page 73 of 288
GWarning!
When closing the door windows, make sure
there is no danger of anyone being harmed by
the closing procedure.
Activate the override switch when children
are riding in the back seats of the vehicle. The
children may otherwise injure themselves,
e.g. by becoming trapped in the window
opening.
The closing of the door windows can be
immediately halted by releasing the switch or
by releasing button & on the SmartKey.
GWarning!
Do not keep any part of your body up against
the window pane when opening a window. The
downward motion of the pane may pull that
part of your body down between the window
pane and the door frame and trap it there. If
there is a risk of entrapment, release the
switch and pull it to close the window.
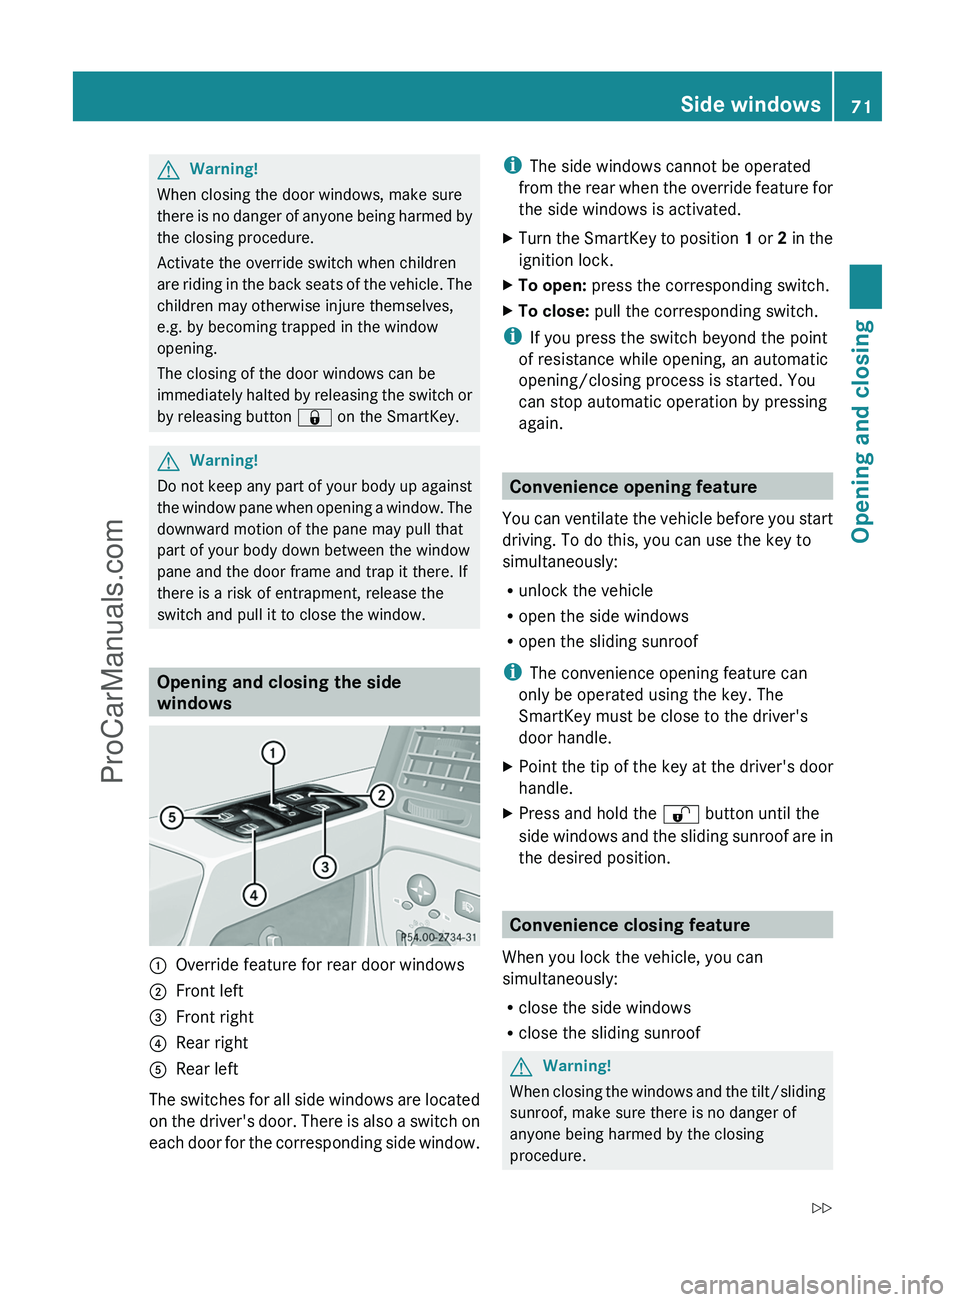
Opening and closing the side
windows
:Override feature for rear door windows;Front left=Front right?Rear rightARear left
The switches for all side windows are located
on the driver's door. There is also a switch on
each door for the corresponding side window.
i The side windows cannot be operated
from the rear when the override feature for
the side windows is activated.XTurn the SmartKey to position 1 or 2 in the
ignition lock.XTo open: press the corresponding switch.XTo close: pull the corresponding switch.
i
If you press the switch beyond the point
of resistance while opening, an automatic
opening/closing process is started. You
can stop automatic operation by pressing
again.
Convenience opening feature
You can ventilate the vehicle before you start
driving. To do this, you can use the key to
simultaneously:
R unlock the vehicle
R open the side windows
R open the sliding sunroof
i The convenience opening feature can
only be operated using the key. The
SmartKey must be close to the driver's
door handle.
XPoint the tip of the key at the driver's door
handle.XPress and hold the % button until the
side windows and the sliding sunroof are in
the desired position.
Convenience closing feature
When you lock the vehicle, you can
simultaneously:
R close the side windows
R close the sliding sunroof
GWarning!
When closing the windows and the tilt/sliding
sunroof, make sure there is no danger of
anyone being harmed by the closing
procedure.
Side windows71Opening and closingZProCarManuals.com
Page 75 of 288
GWarning!
When closing the sliding sunroof, make sure
that there is no danger of anyone being
harmed by the closing procedure.
The opening procedure of the sliding sunroof
can be immediately halted by releasing the
sunroof switch or, if the sunroof switch was
moved past the resistance point and released,
by moving the sunroof switch in any direction.
The closing procedure of the sliding sunroof
can be immediately halted by releasing the
sliding sunroof switch. The closing procedure
of the sliding sunroof can be immediately
reversed by moving the sliding sunroof switch
toward : or ?.
If you are not wearing a seat belt, or are not
wearing it correctly, there is a risk that you
could be thrown through the opening in the
event of the vehicle overturning. An opening
of this kind poses a risk of injury even to
passengers who are wearing their seat belts
correctly, as parts of the body could protrude
from the vehicle interior.
! Only open the sliding sunroof if it is free
of snow and ice. Otherwise, malfunctions
may occur.
Do not allow anything to protrude from the
sliding sunroof. Otherwise, the seals could
be damaged.
! If the sliding sunroof cannot be opened or
closed due to a malfunction, contact a
qualified specialist workshop, e.g. an
authorized Mercedes-Benz Center.
! The weather can change abruptly. It could
start to rain or snow. Make sure that the
sliding sunroof is closed when you leave the
vehicle. The vehicle electronics can be
damaged if water enters the vehicle
interior.
i Resonance noises can occur in addition
to the usual airflow noises when the sliding
sunroof is open. They are caused by minor
pressure fluctuations in the vehicle interior.
Change the position of the sliding sunroof
or open a side window slightly to reduce or
eliminate these noises.
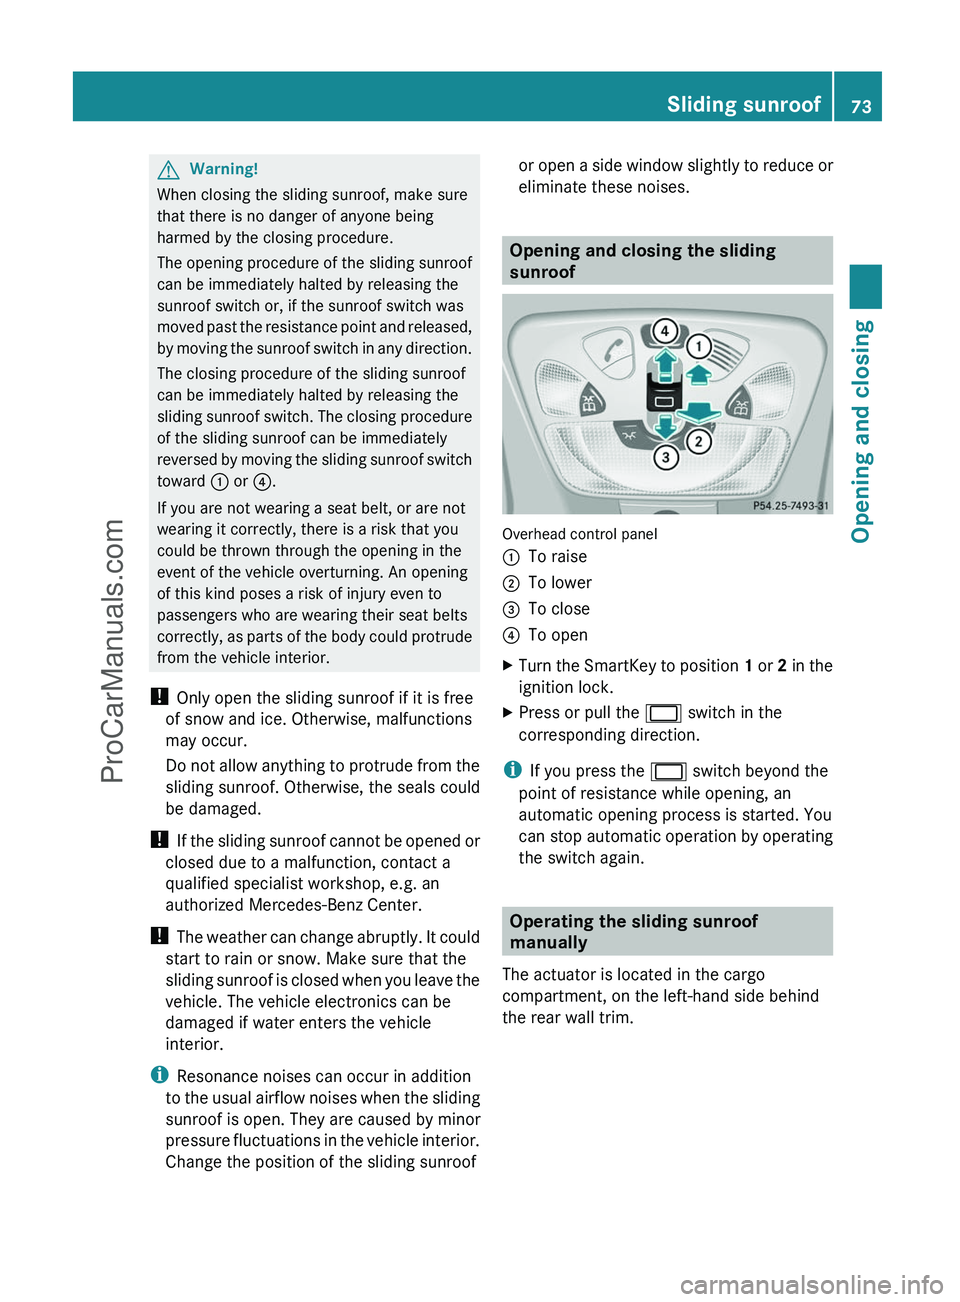
Opening and closing the sliding
sunroof
Overhead control panel
:To raise;To lower=To close?To openXTurn the SmartKey to position 1 or 2 in the
ignition lock.XPress or pull the 2 switch in the
corresponding direction.
i If you press the 2 switch beyond the
point of resistance while opening, an
automatic opening process is started. You
can stop automatic operation by operating
the switch again.
Operating the sliding sunroof
manually
The actuator is located in the cargo
compartment, on the left-hand side behind
the rear wall trim.
Sliding sunroof73Opening and closingZProCarManuals.com
Page 94 of 288
from à to L will briefly switch off the
headlamps. Doing so while driving in low
ambient lighting conditions may result in an
accident.
The automatic headlamp feature is only an aid
to the driver. The driver is responsible for the
operation of the vehicle’s lights at all times.
The parking lamps, low-beam headlamps and
license plate lamp are switched on or off
automatically, depending on the brightness of
the ambient light.XTo switch on: turn the light switch to
à .
SmartKey in position 1 in the ignition lock:
the standing lamps are switched on or off
automatically depending on the brightness
of the ambient light.
When the engine is running: depending on
the ambient light, the parking lamps, the
low-beam headlamps and the license plate
lamp are switched on or off automatically.
When the low-beam headlamps are
switched on, the L indicator lamp in the
instrument cluster lights up.
Canada only: if the light switch is in position
$ or à , you cannot switch on the high-
beam headlamps. However, the high-beam
flasher can always be used. Turn the light
switch to L when driving at night. You can
switch on the high-beam headlamps in this
position.
Front fog lamps and rear fog lamp
Front fog lamps
GWarning
If you suspect that driving conditions will be
foggy, turn the light switch to L before you
start your journey. Your vehicle may
otherwise not be visible and you could
endanger yourself and others.
GWarning
In low ambient lighting or foggy conditions,
only switch from position à to L with
the vehicle at a standstill in a safe location.
Switching from à to L will briefly
switch off the headlamps. Doing so while
driving in low ambient lighting conditions may
result in an accident.
XTo switch on: turn the SmartKey to
position 2 in the ignition lock or start the
engine.XTurn the light switch to L or T . If the
light switch is set to Ã, you cannot
switch on the fog lamps.XPull the light switch out to the first detent.
The green N indicator lamp on the light
switch lights up.XTo switch off: press the light switch in as
far as it will go.
The green N indicator lamp on the light
switch goes out.
Rear fog lamp
XTo switch on: turn the SmartKey to
position 2 in the ignition lock or start the
engine.XTurn the light switch to L or T . When
the light switch is set to Ã, you cannot
switch on the rear fog lamp.XPull the light switch out to the second stop.
The yellow R indicator lamp on the light
switch lights up.XTo switch off: press the light switch in as
far as it will go.
The yellow R indicator lamp on the light
switch goes out.92Exterior lightingLights and windshield wipers
ProCarManuals.com
Page 128 of 288
Problems with the automatic transmissionProblemPossible causes/consequences and M SolutionsThe acceleration ability
is deteriorating.
The transmission no
longer changes gear.The transmission is in emergency mode.
It is only possible to shift into second gear and reverse gear.XStop the vehicle.XShift the transmission to position P.XTurn the SmartKey to position 0 in the ignition lock.XWait at least 10 seconds before restarting the engine.XShift the transmission to position D or R.
If D is selected, the transmission shifts into second gear; if R is
selected, the transmission shifts into reverse gear.XHave the transmission checked at a qualified specialist
workshop, e.g. an authorized Mercedes-Benz Service Center,
immediately.You hear a warning
tone.You have:
R switched off the engine
R opened the driver's door
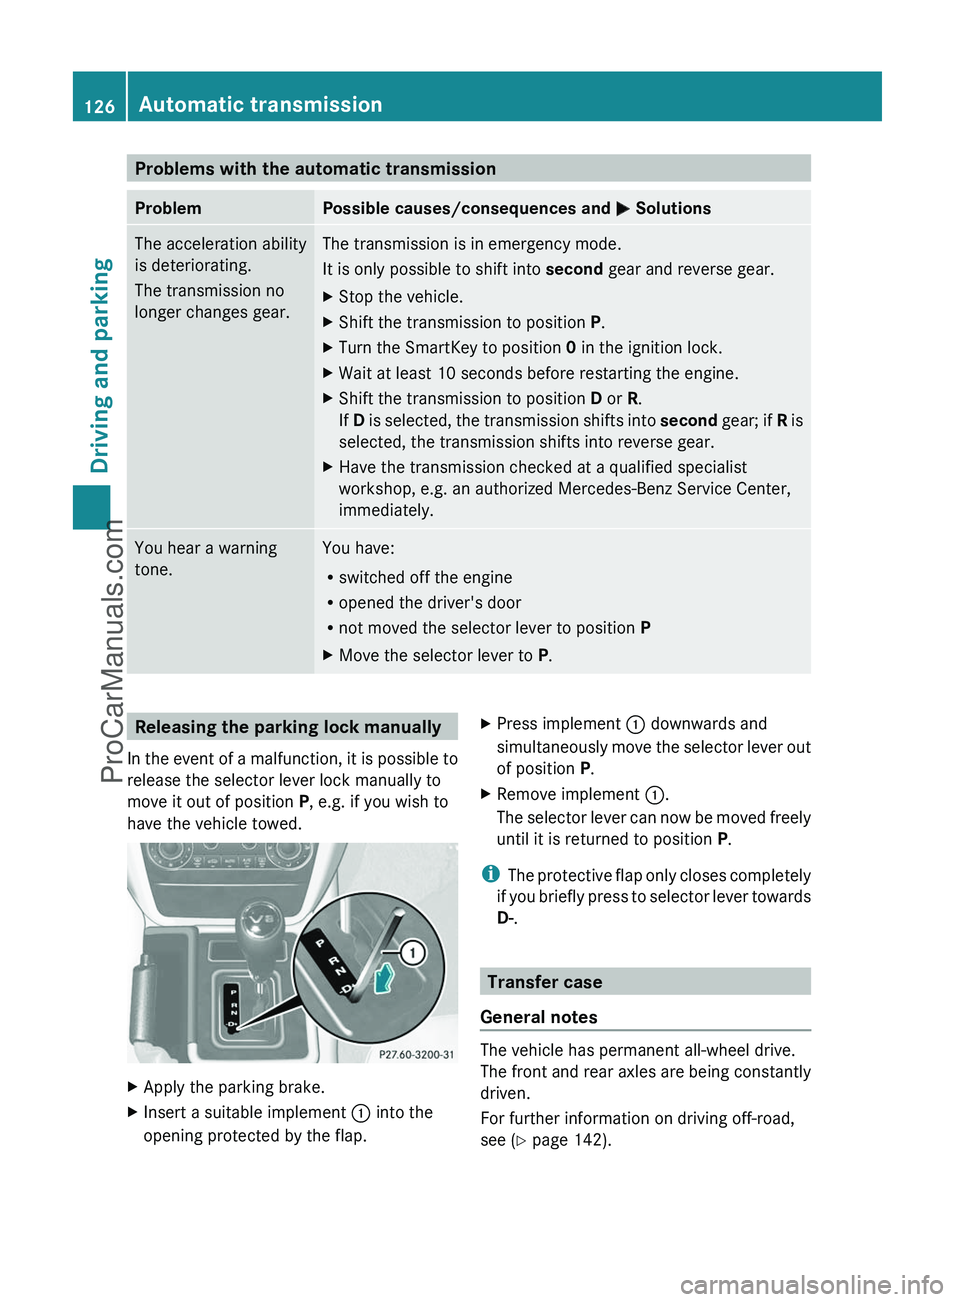
R not moved the selector lever to position PXMove the selector lever to P.Releasing the parking lock manually
In the event of a malfunction, it is possible to
release the selector lever lock manually to
move it out of position P, e.g. if you wish to
have the vehicle towed.XApply the parking brake.XInsert a suitable implement : into the
opening protected by the flap.XPress implement : downwards and
simultaneously move the selector lever out
of position P.XRemove implement :.
The selector lever can now be moved freely
until it is returned to position P.
i
The protective flap only closes completely
if you briefly press to selector lever towards
D- .
Transfer case
General notes
The vehicle has permanent all-wheel drive.
The front and rear axles are being constantly
driven.
For further information on driving off-road,
see ( Y page 142).
126Automatic transmissionDriving and parking
ProCarManuals.com
Page 137 of 288
Rturn the SmartKey in the ignition lock to
position 0 and remove the SmartKey from
the ignition lock.
R take the SmartKey with you and lock the
vehicle when leaving.
Switching off the engine
GWarning
Do not turn off the engine before the vehicle
has come to a complete stop. With the engine
not running, there is no power assistance for
the brake and steering systems. In this case,
it is important to keep in mind that a
considerably higher degree of effort is
necessary to brake and steer the vehicle.
GWarning!
Keep in mind that turning off the engine alone
only will shift AUTOTRONIC into neutral
position N automatically.
Always shift AUTOTRONIC into park position
P before turning off the engine.
Otherwise the vehicle could roll away which
could result in an accident and/or serious
personal injury.
XShift the transmission to position P.XTurn the SmartKey to position 0 in the
ignition lock and remove it.
The immobilizer is activated.XApply the parking brake firmly.
i The SmartKey can only be removed if the
automatic transmission is in position P.
Parking brake
GWarning
Engaging the parking brake while the vehicle
is in motion can cause the rear wheels to lock
up. You could lose control of the vehicle and
cause an accident. In addition, the vehicle's
brake lights do not light up when the parking
brake is engaged.
GWarning!
When leaving the vehicle, always remove the
SmartKey from the starter switch, take it with
you, and lock the vehicle. Do not leave
children unattended in the vehicle, or with
access to an unlocked vehicle. Children could
release the parking brake and/or shift the
automatic transmission out of park position
P , either of which could result in an accident
and/or serious personal injury.
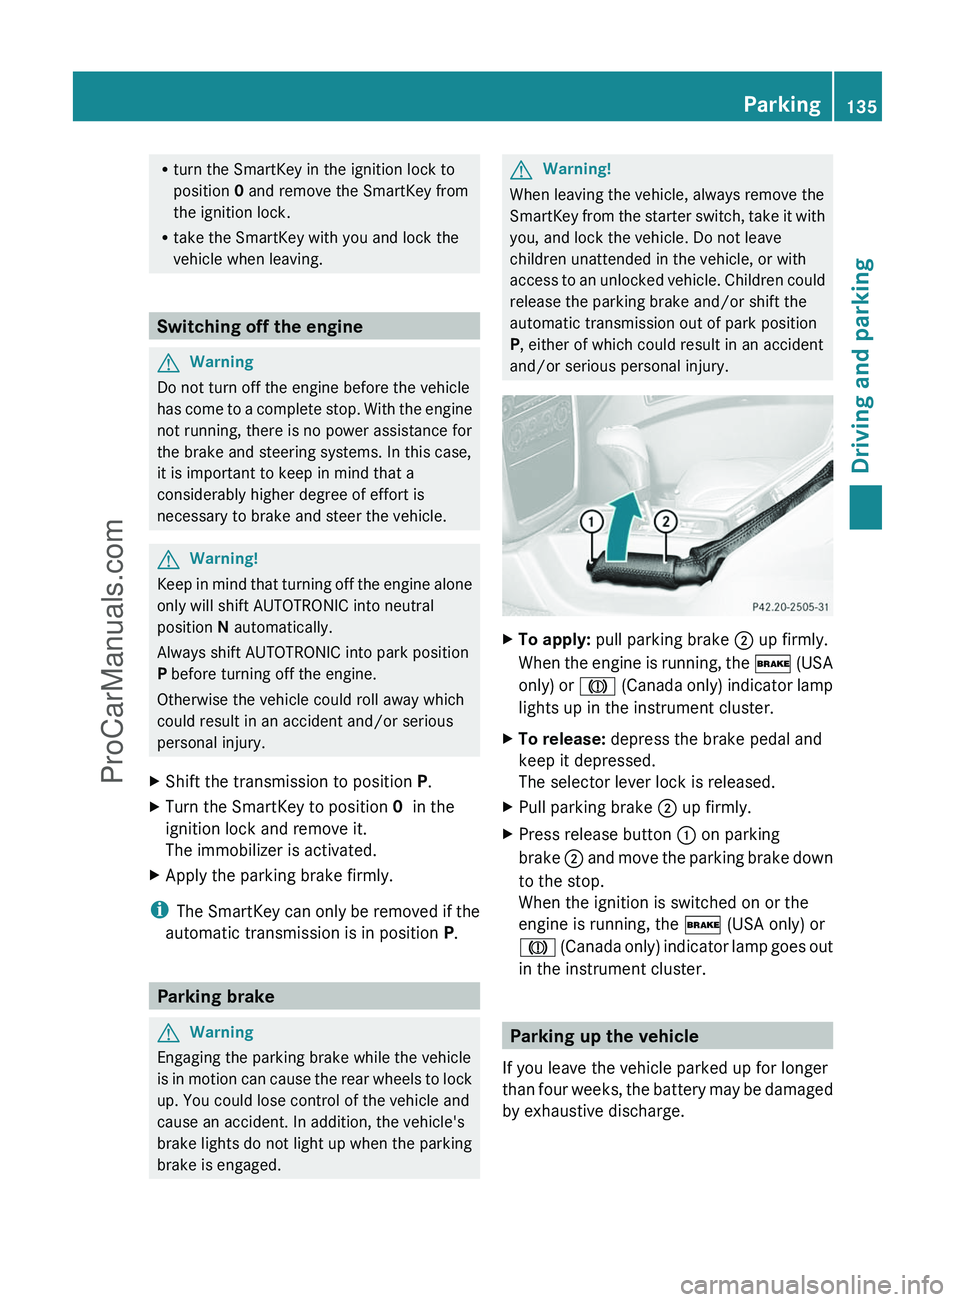
XTo apply: pull parking brake ; up firmly.
When the engine is running, the $ (USA
only) or J (Canada only) indicator lamp
lights up in the instrument cluster.XTo release: depress the brake pedal and
keep it depressed.
The selector lever lock is released.XPull parking brake ; up firmly.XPress release button : on parking
brake ; and move the parking brake down
to the stop.
When the ignition is switched on or the
engine is running, the $ (USA only) or
J (Canada only) indicator lamp goes out
in the instrument cluster.
Parking up the vehicle
If you leave the vehicle parked up for longer
than four weeks, the battery may be damaged
by exhaustive discharge.
Parking135Driving and parkingZProCarManuals.com
Page 167 of 288
XPress the W or X button to activate
or deactivate the Headl. Delayed
Switch Off function.XBefore switching off the engine, turn the
light switch to position Ã.
The exterior lighting delayed switch-off is
activated.XPress the &, V or U button to
select a different display.
Deactivating the delayed switch-off
temporarily:
XBefore leaving the vehicle, turn the key to
position 0 in the ignition lock.XTurn the key to position 2 in the ignition
lock and back to position 0.
The delayed switch-off is deactivated.
Delayed switch-off is reactivated the next
time you start the engine.
Activating/deactivating the interior
lighting delayed switch-off
If the Interior Light. Delay. Sw. Off:
function is activated and you pull the key out
of the ignition lock, the interior lighting
remains on for around 10 seconds.
XPress the V or U button on the
steering wheel to select the Settings
menu.XPress the & button to select submenus.XPress the W or X button to select the
Lighting submenu.XPress the & button to select Interior
Light. Delay Sw. Off .XPress the W or X button to activate
or deactivate Interior Light. Delay.
Sw. Off .XPress the &, V or U button to
select a different display.Vehicle
Activating/deactivating the automatic
door locking feature
If you select the Automatic Locking
function, the vehicle is centrally locked above
a speed of around 9 mph (15 km/h).
i For more information on the automatic
locking feature, see ( Y page 68).
XPress the V or U button on the
steering wheel to select the Settings
menu.XPress the & button to select submenus.XPress the W or X button to select the
Vehicle submenu.XPress the & button to select
Automatic Door Lock .XPress the W or X button to switch
the Automatic Door Lock feature on or
off.XPress the &, V or U button to
select a different display.
Convenience
Activating/deactivating the EASY-
ENTRY/EXIT feature
You can use the Easy-entry Function to
activate or deactivate the EASY-ENTRY/EXIT
feature ( Y page 84).
GWarning!
You must make sure no one can become
trapped or injured by the moving steering
wheel when the easy-entry/exit feature is
activated.
To stop steering wheel movement do one of
the following:
R Move steering wheel adjustment stalk.
R Press one of the memory position buttons.
R Press the memory button.
Do not leave children unattended in the
vehicle, or with access to an unlocked vehicle.
Children could open the driver’s door and
Menus and submenus165On-board computer and displaysZProCarManuals.com
Page 169 of 288
Calling up the rangeXPress the V or U button to select
From Start .XPress the & or * button to select
Range: .
The multifunction display shows the
estimated range of the vehicle, based on
the current driving style and the fuel level.
If there is only a small amount of fuel
remaining in the fuel tank, a gas pump
7 appears instead of the range.
Telephone menu
Introduction
You can establish a Bluetooth ®
connection to
COMAND (see the separate operating
instructions).
GWarning
A driver's attention to the road must always
be his/her primary focus when driving. For
your safety and the safety of others, we
recommend that you pull over to a safe
location and stop before placing or taking a
telephone call. If you choose to use the
telephone while driving, please use the hands-
free device and only use the telephone when
weather, road and traffic conditions permit.
Some jurisdictions prohibit the driver from
using a mobile phone while driving a vehicle.
Bear in mind that at a speed of just 30 mph
(approximately 50 km/h ), your vehicle is
covering a distance of 44 feet (approximately
14 m) every second.
XSwitch on the mobile phone and COMAND
(see the separate operating instructions).XPress the V or U button on the
steering wheel to select the Telephone
menu.
You will see one of the following display
messages in the multifunction display:
R Ready or the name of the network provider:
the mobile phone has found a network and
is ready to receive.
R Bluetooth Ready : the mobile phone is not
yet connected via Bluetooth ®
to COMAND.
R No Service : no network is available.
Accepting a call
If someone calls you when you are in the
Telephone menu, a display message appears
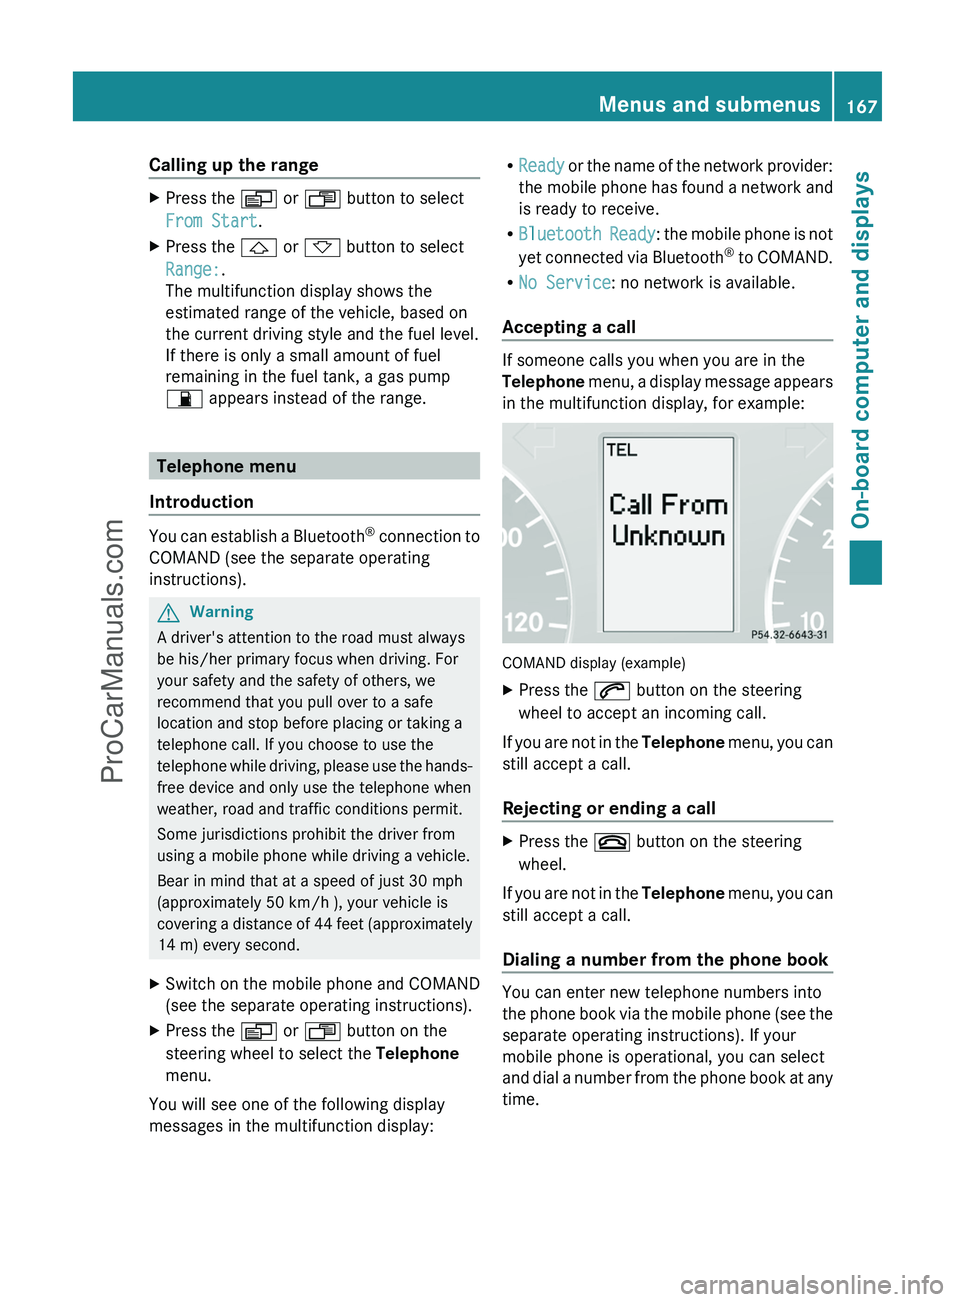
in the multifunction display, for example:
COMAND display (example)
XPress the 6 button on the steering
wheel to accept an incoming call.
If you are not in the Telephone menu, you can
still accept a call.
Rejecting or ending a call
XPress the ~ button on the steering
wheel.
If you are not in the Telephone menu, you can
still accept a call.
Dialing a number from the phone book
You can enter new telephone numbers into
the phone book via the mobile phone (see the
separate operating instructions). If your
mobile phone is operational, you can select
and dial a number from the phone book at any
time.
Menus and submenus167On-board computer and displaysZProCarManuals.com