2011 MERCEDES-BENZ E63AMG park assist
[x] Cancel search: park assistPage 232 of 400

XPress the : or 9 button to select the
Display Unit Speed-/Odometer.
function.
You will see the selected setting: km or
miles .XPress the a button to save the setting.
Selecting the permanent display function
The Permanent Display: function allows
you to choose whether the multifunction
display always shows the outside
temperature or the speed in km/h (USA) or
mph (Canada).
XPress the = or ; button on the
steering wheel to select the Settings
menu.XPress the : or 9 button to select the
Instr. Cluster submenu.XPress the a button to confirm.XPress : or 9 to select the
Permanent Display: function.
You will see the selected setting Outside
Temperature or Speedometer [km/h]: .XPress the a button to save the setting.
Lights
Switching the daytime running lamps on/
off
This function is not available in Canada.
If you have activated the Daytime Running
Lights: function and the light switch is in the
c position the daytime running lamps are
switched on automatically when the engine is
running.
In the dark, the following also light up:
R the low-beam headlamps
R the parking lamps
R the tail lamps
R the license plate lamp
R the side marker lamps
XPress the = or ; button on the
steering wheel to select the Settings
menu.XPress the : or 9 button to select the
Lights submenu.XPress the a button to confirm.XPress the : or 9 button to select the
Daytime Running Lights: function.
You will see the selected setting: Enabled
or Disabled .XPress the a button to save the setting.
Switching Adaptive Highbeam Assist on/
off
XPress the = or ; button on the
steering wheel to select the Settings
menu.XPress the : or 9 button to select the
Lights submenu.XPress the a button to confirm.XPress the : or 9 button to select the
Adaptive Highbeam Assist: function.
You will see the selected setting: Enabled
or Disabled .XPress the a button to save the setting.
Setting the brightness of the ambient
lighting
XPress the = or ; button on the
steering wheel to select the Settings
menu.XPress the : or 9 button to select the
Lights submenu.XPress the a button to confirm.XPress the : or 9 button to select the
Ambient Light Brightness: function.
You will see the selected setting.XPress the a button to confirm.XPress the : or 9 button to adjust the
brightness to any level from Disabled to
Level 5 (bright).XPress the a or % button to save the
setting.230Menus and submenusOn-board computer and displays
BA 212 USA, CA Edition B 2011; 1; 5, en-USdimargiVersion: 3.0.3.62010-05-20T13:33:46+02:00 - Seite 230
Page 244 of 400

Display messagesPossible causes/consequences and M Solutions$ (USA only)
J (Canada only)
EBD, ABS, and ESC
Inoperative See
Operator's ManualGRisk of accident
EBD (Electronic Brake force Distribution), ABS, ESP ®
, BAS, PRE-
SAFE ®
, HOLD and hill start assist are unavailable due to a
malfunction. BAS PLUS and PRE-SAFE ®
Brake may also have
failed. In addition, the ä, å and ! warning lamps in the
instrument cluster light up and a warning tone sounds.
ATTENTION ASSIST is deactivated.
The brake system continues to function normally, but without the
functions listed above. The wheels could therefore lock if you
brake hard, for example.
XDrive on carefully.XVisit a qualified specialist workshop immediately.#
Check Brake Pad
WearThe brake pads/linings have reached their wear limit.XVisit a qualified specialist workshop.$ (USA only)
J (Canada only)
Release Park. BrakeYou are driving with the parking brake engaged. A warning tone
also sounds.XRelease the parking brake.$ (USA only)
J (Canada only)
Check Brake Fluid
LevelGRisk of accident
There is insufficient brake fluid in the brake fluid reservoir.
Additionally, the red $ (USA only)/ J (Canada only)
warning lamp lights up in the instrument cluster and a warning
tone sounds.
XPull over and stop the vehicle safely as soon as possible, paying
attention to road and traffic conditions. Do not continue driving
under any circumstances.XEngage the parking brake.XConsult a qualified specialist workshop.XDo not add brake fluid. This will not rectify the malfunction.GWarning
Driving with the message Check Brake Fluid Level displayed can result in an accident. Have
your brake system checked immediately.
Do not add brake fluid before checking the brake system. Overfilling the brake fluid reservoir can
result in spilling brake fluid on hot engine parts and the brake fluid catching fire. You can be
seriously burned.
242Display messagesOn-board computer and displays
BA 212 USA, CA Edition B 2011; 1; 5, en-USdimargiVersion: 3.0.3.62010-05-20T13:33:46+02:00 - Seite 242
Page 252 of 400

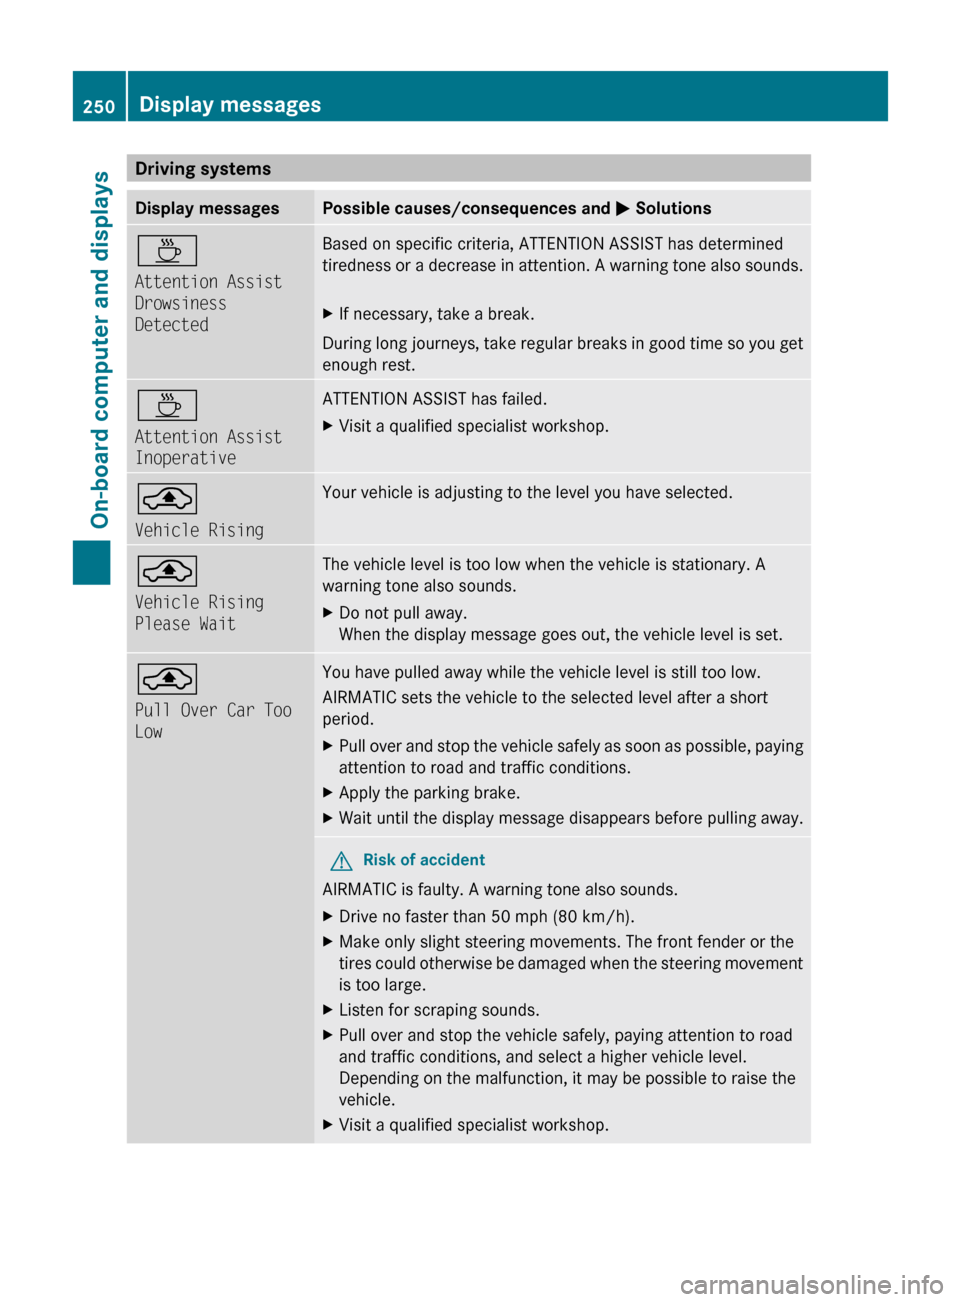
Driving systemsDisplay messagesPossible causes/consequences and M SolutionsÀ
Attention Assist
Drowsiness
DetectedBased on specific criteria, ATTENTION ASSIST has determined
tiredness or a decrease in attention. A warning tone also sounds.XIf necessary, take a break.
During long journeys, take regular breaks in good time so you get
enough rest.
À
Attention Assist
InoperativeATTENTION ASSIST has failed.XVisit a qualified specialist workshop.¨
Vehicle RisingYour vehicle is adjusting to the level you have selected. ¨
Vehicle Rising
Please WaitThe vehicle level is too low when the vehicle is stationary. A
warning tone also sounds.XDo not pull away.
When the display message goes out, the vehicle level is set.¨
Pull Over Car Too
LowYou have pulled away while the vehicle level is still too low.
AIRMATIC sets the vehicle to the selected level after a short
period.XPull over and stop the vehicle safely as soon as possible, paying
attention to road and traffic conditions.XApply the parking brake.XWait until the display message disappears before pulling away.GRisk of accident
AIRMATIC is faulty. A warning tone also sounds.
XDrive no faster than 50 mph (80 km/h).XMake only slight steering movements. The front fender or the
tires could otherwise be damaged when the steering movement
is too large.XListen for scraping sounds.XPull over and stop the vehicle safely, paying attention to road
and traffic conditions, and select a higher vehicle level.
Depending on the malfunction, it may be possible to raise the
vehicle.XVisit a qualified specialist workshop.250Display messagesOn-board computer and displays
BA 212 USA, CA Edition B 2011; 1; 5, en-USdimargiVersion: 3.0.3.62010-05-20T13:33:46+02:00 - Seite 250
Page 254 of 400

Display messagesPossible causes/consequences and M SolutionsBlind Spot Assist
Currently
Unavailable See
Operator's Manual
or
Active Blind Spot
Assist Currently
Unavailable See
Operator's ManualBlind Spot Assist or Active Blind Spot Assist is temporarily
inoperative if:
R the sensors are dirty.
R its function is impaired due to heavy rain or snow.
R the radar sensor system is outside the operating temperature
range.
R the radar sensor system is temporarily inoperative, e.g. due to
electromagnetic radiation emitted by nearby TV or radio
stations or other sources of electromagnetic radiation.
The yellow 9 indicator lamps also light up in the exterior
mirrors.
Blind Spot Assist or Active Blind Spot Assist is operational again
and the display message disappears when:
R the dirt (e.g. slush) drops away while the vehicle is in motion.
R the system detects that the sensors are fully available again.
R the radar sensor system is back within the operating
temperature range.
If the display message continues to be displayed:XClean the sensors ( Y page 317).XRestart the engine.Blind Spot Assist
Inoperative
or
Active Blind Spot
Assist InoperativeBlind Spot Assist or Active Blind Spot Assist is faulty.
The yellow 9 indicator lamps also light up in the exterior
mirrors.XVisit a qualified specialist workshop.Parking Guidance
InoperativeParking Guidance is faulty. XRestart the engine.
If the display message continues to be displayed:
XVisit a qualified specialist workshop.252Display messagesOn-board computer and displays
BA 212 USA, CA Edition B 2011; 1; 5, en-USdimargiVersion: 3.0.3.62010-05-20T13:33:46+02:00 - Seite 252
Page 302 of 400

command for vehicle remote unlocking has
been received.
If you pull the trunk handle for more than
20 seconds before receiving authorization
for remote unlocking, you must wait 15
minutes before you can pull on the handle
of the trunk lid again.
Vehicle remote closing in an emergency
If you forget to lock your vehicle but are no
longer in the vicinity of the vehicle, it can be
locked for you by the Response Center.
The vehicle can be locked remotely up to four
days after the ignition was last switched off.
XContact the following service hotlines:
R USA: Response Center under
866-990-9007
R Canada: Customer Service under
1-888-923-8367
You will be asked for your PIN.
The next time you are in your vehicle and
switch on the ignition, the Tele Aid Doors
locked by remote control message
appears in the multifunction display.
i The vehicle remote locking feature is
available when the relevant mobile phone
network is available and data connection is
possible.
Stolen Vehicle Recovery Services
If your vehicle has been stolen:
XContact the police.
The police will issue an incident report. This
report has a number.XThis number will be forwarded to the
Response Center together with your PIN.
The Response Center will then attempt to
covertly contact the mbrace system. The
Response Center contacts you and the
local law enforcement authority if the
vehicle is located. However, only the law
enforcement authority is informed of the
location of the vehicle.i If the anti-theft alarm system remains
activated for longer than thirty seconds,
mbrace is automatically connected to the
Customer Assistance Center.
Garage door opener
Important safety notes
Up to three different door and gate systems
can be operated using the remote control
integrated in the overhead control panel.
i Certain garage door openers are not
compatible with the integrated remote
control. If you experience difficulties with
the programming of the integrated remote
control, contact an authorized Mercedes-
Benz Center or call the following telephone
assistance service:
R USA: Mercedes-Benz Customer
Assistance Center on
1-800-FOR-MERCedes
R Canada: Customer Service
on1-800-387-0100
GWarning
Before programming the integrated remote
control to a garage door opener or gate
operator, make sure people and objects are
out of the way of the device to prevent
potential harm or damage. When
programming a garage door opener, the door
moves up or down. When programming a gate
operator, the gate opens or closes.
Do not use the integrated remote control with
any garage door opener that lacks safety stop
and reverse features as required by U.S.
federal safety standards (this includes any
garage door opener model manufactured
before April 1, 1982). A garage door that
cannot detect an object - signaling the door
to stop and reverse - does not meet current
U.S. federal safety standards.
When programming a garage door opener,
park vehicle outside the garage.
300FeaturesLoading, stowing and features
BA 212 USA, CA Edition B 2011; 1; 5, en-USdimargiVersion: 3.0.3.62010-05-20T13:33:46+02:00 - Seite 300
Page 329 of 400

recommended that you additionally equip
your vehicle with the TIREFIT kit if you
mount tires that do not feature run-flat
properties, e.g. winter tires. You can obtain
a TIREFIT kit from an authorized Mercedes-
Benz Center, for example.
XVehicles with AIRMATIC: make sure that
"normal" level is selected (Y page 191).
XStop the vehicle as far away as possible
from traffic on solid, non-slippery and level
ground.
XSwitch on the hazard warning lamps.XFirmly depress the parking brake.XBring the front wheels into the straight-
ahead position.
XMove the selector lever/DIRECT SELECT
lever to P.
XSwitch off the engine.XVehicles without KEYLESS-GO: remove
the key from the ignition lock.
XVehicles with KEYLESS-GO: open the
driver's door.
The on-board electronics have status 0,
which is the same as the key having been
removed.
XVehicles with KEYLESS-GO: remove the
Start/Stop button from the ignition lock
(Y page 150).
XAll occupants must get out of the vehicle.
Make sure that they are not endangered as
they get out of the vehicle.
XMake sure that no one is near the danger
area whilst a wheel is being changed.
Anyone who is not directly assisting in the
wheel change should, for example, stand
behind the barrier.
XGet out of the vehicle. Pay attention to
traffic conditions when doing so.
XClose the driver's door.TIREFIT kit
Using the TIREFIT kit
You can use the TIREFIT kit to seal small
punctures, particularly those in the tire tread.
You can use TIREFIT at outside temperatures
down to -4 ‡ (-20 †).
GWarning
TIREFIT is a limited repair device. TIREFIT
cannot be used for cuts or punctures larger
than approximately 0.16 in (4 mm) and tire
damage caused by driving with extremely low
tire inflation pressure, or on a flat tire, or a
damaged wheel.
Do not drive the vehicle under such
circumstances.
Contact the nearest authorized Mercedes-
Benz Center for assistance or call roadside
assistance.
XDo not remove any foreign objects which
have penetrated the tire, e.g. screws or
nails.
XRemove the TIREFIT kit, the accompanying
"max. 80 km/h" sticker and the electric air
pump from the stowage well underneath
the trunk/trunk floor (Y page 324).
XAffix part : of the sticker within the
driver's field of vision.
XAffix part ; of the sticker near the valve
on the wheel with the defective tire.
Flat tire327Roadside AssistanceBA 212 USA, CA Edition B 2011; 1; 5, en-USdimargiVersion: 3.0.3.62010-05-20T13:33:46+02:00 - Seite 327Z
Page 333 of 400

Park your vehicle safely away from the
roadway and contact the nearest authorized
Mercedes-Benz Center or roadside
assistance.
Have the damaged tire replaced.
XCorrect the tire inflation pressure if it is at
least 130 kPa (1.3 bar/26 psi) (for values
see Tire and Load Information placard on
the driver's side B-pillar or tire inflation
pressure table inside the fuel filler flap).
XTo increase the tire pressure: switch on
the electric air pump.
TIREFIT kit version 1
XTo reduce the tire pressure (version 1):
open pressure release screw F on
pressure gauge G.
TIREFIT kit version 2
XTo reduce the tire pressure (version 2):
press pressure release button E next to
pressure gauge F.
XStow the TIREFIT kit and the electric air
pump.
XDrive to the nearest workshop and have the
tire changed there.
XHave the TIREFIT kit replaced as soon as
possible at a qualified specialist workshop,
e.g. at an authorized Mercedes-Benz
Center.
HEnvironmental note
Have the used TIREFIT kit disposed of
professionally, e.g. at an authorized
Mercedes-Benz Center.
XHave the TIREFIT kit replaced every four
years at a qualified specialist workshop,
e.g. an authorized Mercedes-Benz Center.
Changing a wheel and mounting the
spare wheel
Preparing the vehicle
GWarning!
The wheel and tire size of the emergency
spare wheel/spare wheel may differ to that of
the damaged wheel. When using an
emergency spare wheel/spare wheel the
handling characteristics of the vehicle may
change.
Adapt your style of driving accordingly.
Never operate the vehicle with more than one
emergency spare wheel/spare wheel that
differs in size.
Only use an emergency spare wheel/spare
wheel of a differing size briefly and do not
switch off ESP®.
When using an emergency spare wheel, you
must not exceed a maximum speed of 50 mph
(80 km/h).
GWarning!
Have the emergency spare wheel/spare
wheel replaced with a new wheel as soon as
possible at a qualified specialist workshop
which has the necessary specialist knowledge
Flat tire331Roadside AssistanceBA 212 USA, CA Edition B 2011; 1; 5, en-USdimargiVersion: 3.0.3.62010-05-20T13:33:46+02:00 - Seite 331Z
Page 335 of 400

Securing the vehicle on slight downhill gradients(example: Sedan)
XOn downhill gradients: place chocks or
other suitable items in front of the wheels
of the front and rear axle.
Raising the vehicle
GWarning
When jacking up the vehicle, only use the jack
which has been specifically approved by
Mercedes-Benz for your vehicle.
The jack is designed exclusively for jacking up
the vehicle at the jacking points built into both
sides of the vehicle. The jack saddle must be
placed centrally under the jacking point. The
jack must always be vertical when in use,
especially on inclines or declines.
The jack is intended only for lifting the vehicle
briefly for wheel changes. It is not suited for
performing maintenance work under the
vehicle. To help avoid personal injury, use the
jack only to lift the vehicle during a wheel
change.
Never get beneath the vehicle while it is
supported by the jack. Keep hands and feet
away from the area under the lifted vehicle.
Always lower the vehicle onto sufficient
capacity jackstands before working under the
vehicle.
Always firmly engage the parking brake and
block the wheels with wheel chocks or other
sizable objects before raising the vehicle with
the jack. Do not disengage the parking brake
while the vehicle is raised.
Make sure that the ground on which the
vehicle is standing and where you place the
jack is solid, level and not slippery. If
necessary, use a large underlay. On slippery
surfaces, such as tiled floors, you should use
a non-slip underlay, for example a rubber mat.
Do not use wooden blocks or similar objects
as a jack underlay. Otherwise, the jack may
not be able to achieve its load-bearing
capacity if it is not at its full height.
Never start the engine when the vehicle is
raised.
Also observe the notes on the jack.
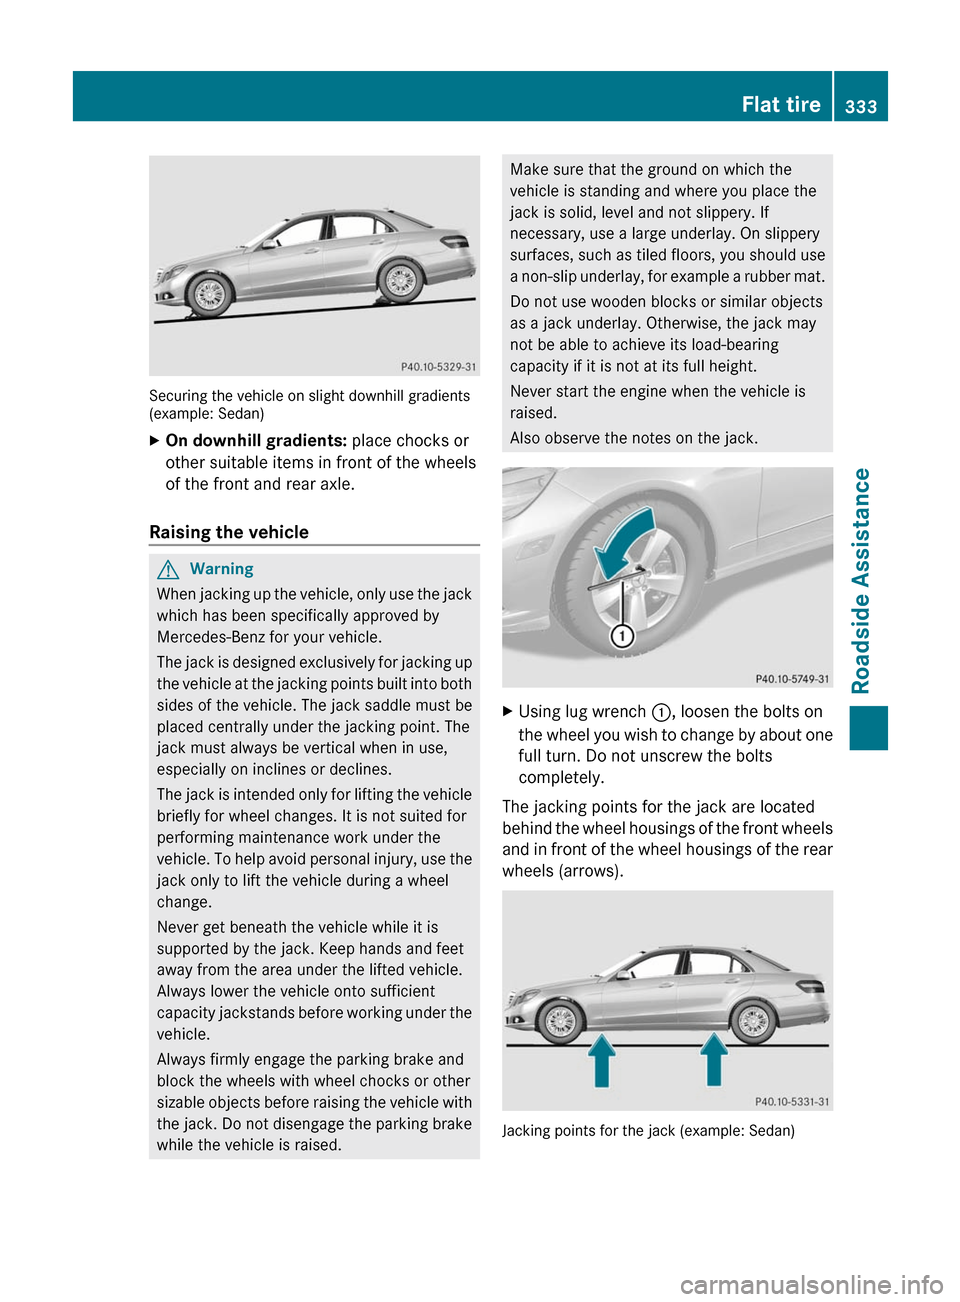
XUsing lug wrench :, loosen the bolts on
the wheel you wish to change by about one
full turn. Do not unscrew the bolts
completely.
The jacking points for the jack are located
behind the wheel housings of the front wheels
and in front of the wheel housings of the rear
wheels (arrows).
Jacking points for the jack (example: Sedan)
Flat tire333Roadside AssistanceBA 212 USA, CA Edition B 2011; 1; 5, en-USdimargiVersion: 3.0.3.62010-05-20T13:33:46+02:00 - Seite 333Z