2011 MERCEDES-BENZ E350 4MATIC steering wheel adjustment
[x] Cancel search: steering wheel adjustmentPage 106 of 400

Do not drive the vehicle without the seat head
restraints. Head restraints are intended to
help reduce injuries during an accident.
! To avoid damage to the seats and the seat
heating, observe the following information:
Rdo not spill any liquids on the seats. If
liquid is spilled on the seats, dry them as
soon as possible.
Rif the seat covers are damp or wet, do not
switch on the seat heating. The seat
heating should also not to be used to dry
the seats.
Rclean the seat covers as recommended;
see the " Interior care" section.
Rdo not transport heavy loads on the
seats. Do not place sharp objects on the
seat cushions, e.g. knives, nails or tools.
The seats should only be occupied by
passengers, if possible.
Rwhen the seat heating is in operation, do
not cover the seats with insulating
materials, e.g. covers, bags, seat covers,
child seats or booster seats.
! When you move the seats, make sure that
there are no objects in the footwell or
behind the seats. Otherwise, you could
damage the seats and the objects.
iThe head restraints in the front seats are
installed with the NECK-PRO system
(Y page 52). For this reason, it is not
possible to remove the head restraints
from the front seats.
Vehicles without the through-loading
feature: the head restraints cannot be
removed from the rear compartment seats.
Please contact an authorized Mercedes-
Benz Center for more information.
iRelated topics:
RThrough-loading feature in the rear
bench seat (Sedan) (Y page 278)
REASY-PACK through-loading feature in
the rear bench seat (Wagon)
(Y page 279)
Adjusting the seats:Head restraint height;Seat cushion angle=Seat height?Seat fore-and-aft adjustmentABackrest angle
iIf PRE-SAFE® is triggered, the front-
passenger seat will be moved to a better
position if it was previously in an
unfavorable position.
iYou can store the seat settings using the
memory function (Y page 115).
iVehicles with the through-loading
feature: if you fold down a rear seat
backrest, the respective front seat is
moved forwards slightly, if necessary, to
prevent contact with the backrest.
104SeatsSeats, steering wheel and mirrors
BA 212 USA, CA Edition B 2011; 1; 5, en-USdimargiVersion: 3.0.3.62010-05-20T13:33:46+02:00 - Seite 104
Page 107 of 400

Adjusting the head restraints
Adjusting the angle of the head
restraints
Example: Sedan
XPush or pull the lower edge of the head
restraint in the direction of the arrow.
Adjusting the height of the head
restraints electrically
XTo adjust the height of the head
restraints: slide the button for head
restraint adjustment (Y page 104) up or
down in the direction of the arrow.
Adjusting the luxury head restraints
GWarning!
When folding back the head restraint side
bolsters, do not put your hands between the
side bolster and the cushion holder. There is
a danger of becoming trapped.
XTo adjust the side bolsters of the head
restraint: push or pull right and/or left-
hand side bolster : into the desired
position.
XTo adjust the angle of the head
restraint: push or pull the head restraint in
the direction of arrow ;.
Rear seat head restraints
GWarning!
For your protection, drive only with properly
positioned head restraints.
Adjust the head restraint in such a way that it
is as close to the head as possible and the
center of the head restraint supports the back
of the head at eye level. This will reduce the
potential for injury to the head and neck in the
event of an accident or similar situation.
With a rear seat occupied, make sure to move
the respective head restraint up from the
lowest non-use position and have the
occupant adjust the head restraint properly.
Do not drive the vehicle without the seat head
restraints installed when the rear seats are
occupied. Head restraints are intended to
help reduce injuries during an accident.
GWarning!
Make sure the rear seat head restraints
engage when placing them upright manually.
Otherwise their protective function cannot be
ensured.
The back of the head will not be supported in
the event of a collision. That could cause
serious or even fatal injuries. Rear seat
occupants can be seriously injured or killed.
Seats105Seats, steering wheel and mirrorsBA 212 USA, CA Edition B 2011; 1; 5, en-USdimargiVersion: 3.0.3.62010-05-20T13:33:46+02:00 - Seite 105Z
Page 113 of 400

Problems with the seat heating
The seat heating has switched itself off
prematurely or cannot be switched on. The
vehicle's electrical system voltage is too low
because too many electrical consumers are
switched on.
XSwitch off electrical consumers which you
do not need, such as the rear window
defroster or interior lighting.
Switching the seat ventilation on/off
Switching on/off
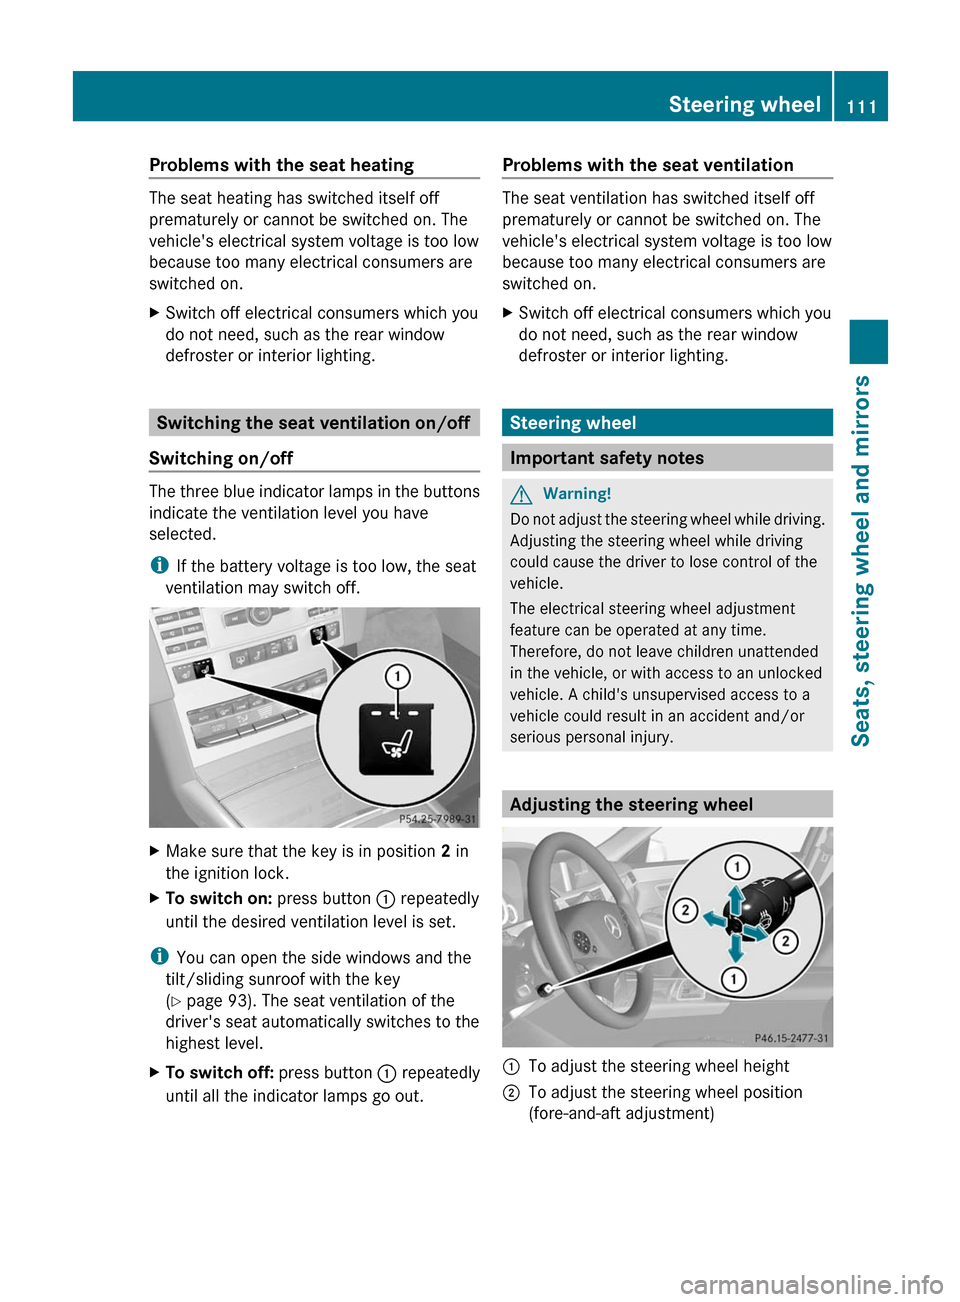
The three blue indicator lamps in the buttons
indicate the ventilation level you have
selected.
iIf the battery voltage is too low, the seat
ventilation may switch off.
XMake sure that the key is in position 2 in
the ignition lock.
XTo switch on: press button : repeatedly
until the desired ventilation level is set.
iYou can open the side windows and the
tilt/sliding sunroof with the key
(Y page 93). The seat ventilation of the
driver's seat automatically switches to the
highest level.
XTo switch off: press button : repeatedly
until all the indicator lamps go out.
Problems with the seat ventilation
The seat ventilation has switched itself off
prematurely or cannot be switched on. The
vehicle's electrical system voltage is too low
because too many electrical consumers are
switched on.
XSwitch off electrical consumers which you
do not need, such as the rear window
defroster or interior lighting.
Steering wheel
Important safety notes
GWarning!
Do not adjust the steering wheel while driving.
Adjusting the steering wheel while driving
could cause the driver to lose control of the
vehicle.
The electrical steering wheel adjustment
feature can be operated at any time.
Therefore, do not leave children unattended
in the vehicle, or with access to an unlocked
vehicle. A child's unsupervised access to a
vehicle could result in an accident and/or
serious personal injury.
Adjusting the steering wheel
:To adjust the steering wheel height;To adjust the steering wheel position
(fore-and-aft adjustment)
Steering wheel111Seats, steering wheel and mirrorsBA 212 USA, CA Edition B 2011; 1; 5, en-USdimargiVersion: 3.0.3.62010-05-20T13:33:46+02:00 - Seite 111Z
Page 114 of 400

iRelated topics:
REASY-ENTRY/EXIT feature
(Y page 112)
Rstoring settings (Y page 115)
Steering wheel heating
Switching on/off
The steering-wheel heating heats the leather
areas of the steering wheel.
XMake sure that the key is in position 2 in
the ignition lock.
XTo switch on/off: turn the lever in the
direction of arrow : or ;.
Indicator lamp = comes on or goes out.
iThe steering wheel heating may switch off
temporarily if:
Rthe temperature inside the vehicle
exceeds 86 °F (30 °C).
Rthe temperature of the steering wheel
exceeds 95 °F (35 °C)
Indicator lamp = remains on.
Vehicles without KEYLESS GO: If you switch
off the ignition, the steering wheel heating is
automatically switched off.
Vehicles with KEYLESS GO: If you remove the
key from the ignition lock and open the
driver's door, the steering wheel heating is
automatically switched off.
Problems with the steering wheel
heating
If the steering wheel heating indicator lamp
on the lower left lever of the steering column
is flashing, the steering wheel heating has
switched off automatically. The vehicle's
electrical system voltage is too low because
too many electrical consumers are switched
on.
XSwitch off electrical consumers which you
do not need, such as the rear window
defroster or interior lighting.
Once the battery is sufficiently charged, the
steering wheel heating will switch back on
automatically.
EASY-ENTRY/EXIT
GWarning!
You must make sure no one can become
trapped or injured by the moving steering
wheel when the easy-entry/exit feature is
activated.
To stop steering wheel movement, move
steering wheel adjustment stalk or press the
memory position switch.
Do not leave children unattended in the
vehicle, or with access to an unlocked vehicle.
Children could open the driver's door and
unintentionally activate the easy-entry/exit
feature, which could result in an accident
and/or serious personal injury.
The EASY-ENTRY/EXIT feature makes getting
in and out of your vehicle easier.
The steering wheel swings upwards when
you:
Rremove the key from the ignition lock.
Ropen the driver's door and KEYLESS-GO is
in position 1
Ropen the driver's door and the key is in
position 0 or 1 in the ignition lock.
112Steering wheelSeats, steering wheel and mirrors
BA 212 USA, CA Edition B 2011; 1; 5, en-USdimargiVersion: 3.0.3.62010-05-20T13:33:46+02:00 - Seite 112
Page 115 of 400

iThe steering wheel only moves upwards if
it has not already reached the upper end
stop.
The steering wheel is moved to the last
selected position when:
Rthe driver's door is closed, and
Ryou insert the key into the ignition lock.
or
Rin vehicles with KEYLESS-GO, you press the
Start/Stop button once.
When you close the driver's door with the
ignition switched on, the steering wheel is
also automatically moved to the previously
set position.
The last position of the steering wheel is
stored after each manual setting or when you
store the setting with the memory function
(Y page 115).
You can activate and deactivate the EASY-
ENTRY/EXIT feature in the on-board
computer (Y page 232).
GWarning
Let the system complete the adjustment
procedure before setting the vehicle in
motion. All steering wheel adjustment must
be completed before setting the vehicle in
motion. Driving off with the steering wheel
still adjusting could cause the driver to lose
control of the vehicle.
iIf the crash-responsive EASY-EXIT feature
is triggered in an accident, the steering
column will move upwards when the
driver's door is opened. This occurs
irrespective of the position of the key in the
ignition lock. This makes it easier to exit the
vehicle and rescue the occupants.
The crash-responsive EASY-EXIT feature is
only operational after an accident if the
EASY-EXIT/ENTRY feature is activated in
the on-board computer.
Mirrors
Rear-view mirror
Rear-view mirror (manual anti-glare)
XAnti-glare mode: flick anti-glare
switch : forwards or back.
Exterior mirrors
Adjusting the exterior mirrors
GWarning
Exercise care when using the passenger-side
exterior rear view mirror. The mirror surface
is convex (outwardly curved surface for a
wider field of view). Objects in mirror are
closer than they appear. Check your interior
rear view mirror and glance over your
shoulder before changing lanes.
The exterior mirrors are automatically heated
if the rear window heating is switched on and
the outside temperature is low.
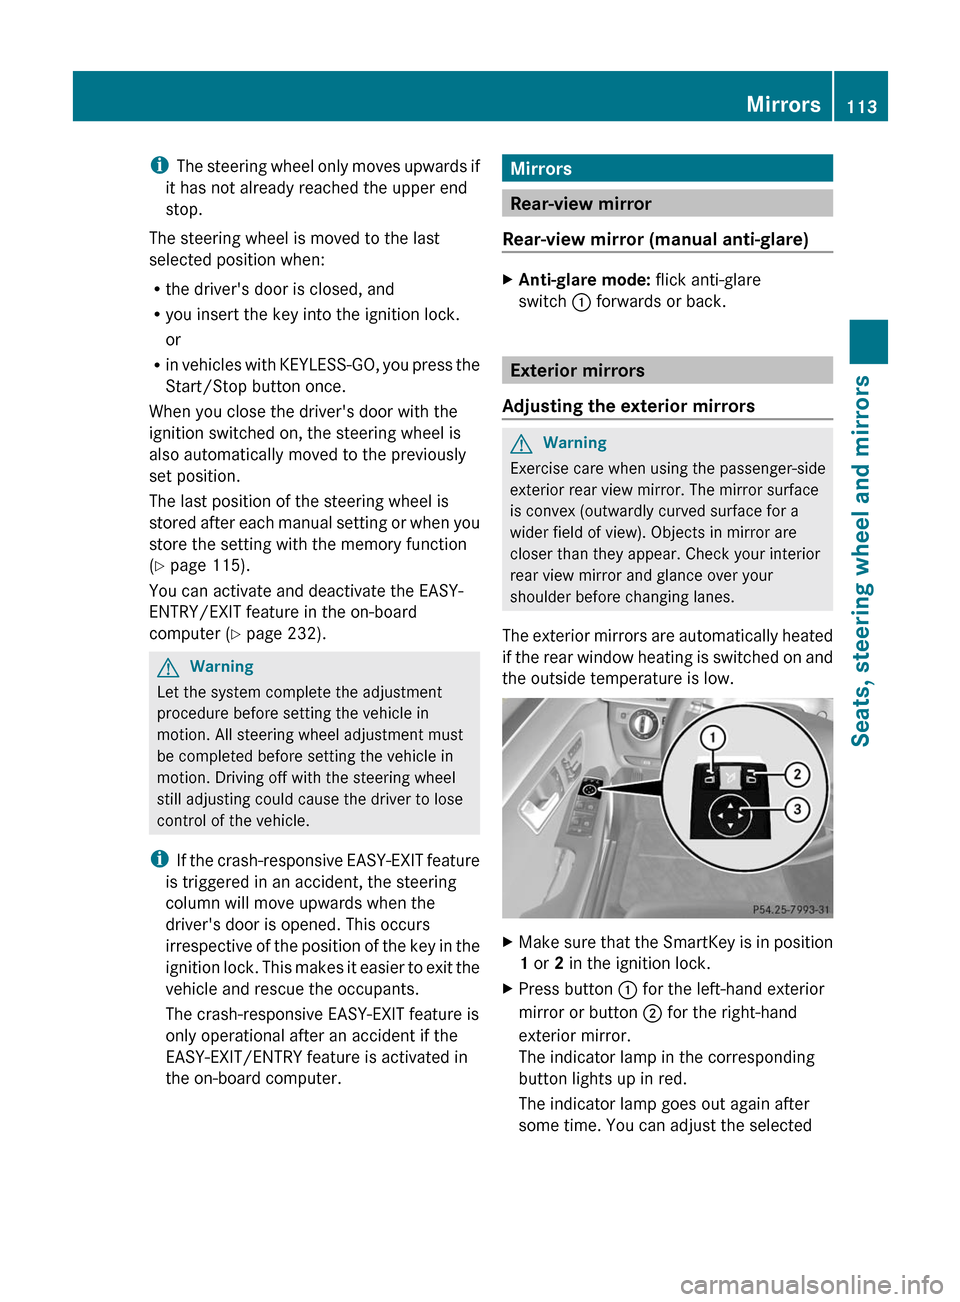
XMake sure that the SmartKey is in position
1 or 2 in the ignition lock.
XPress button : for the left-hand exterior
mirror or button ; for the right-hand
exterior mirror.
The indicator lamp in the corresponding
button lights up in red.
The indicator lamp goes out again after
some time. You can adjust the selected
Mirrors113Seats, steering wheel and mirrorsBA 212 USA, CA Edition B 2011; 1; 5, en-USdimargiVersion: 3.0.3.62010-05-20T13:33:46+02:00 - Seite 113Z
Page 116 of 400

mirror using adjustment button = as long
as the indicator lamp is lit.
XPress adjustment button = up, down, to
the right or to the left until the exterior
mirror is set to a position which provides
you with a good overview of traffic
conditions.
Exterior mirror out of position
If an exterior mirror has been pushed out of
position, proceed as follows:
XMove the exterior mirror into the correct
position manually.
Automatic anti-glare mirrors
GWarning!
The auto dimming function does not react if
incoming light is not aimed directly at sensors
in the interior rear view mirror.
The interior rear view mirror and the exterior
rear view mirror on the driver's side do not
react, for example, if the rear window
sunshade is in raised position.
Light hitting the mirror(s) at certain angles
(incident light) could blind you. As a result,
you may not be able to observe traffic
conditions and could cause an accident.
The rear-view mirror and the exterior mirror
on the driver's side automatically go into anti-
glare mode if the ignition is switched on and
incident light from headlamps strikes the
sensor in the rear-view mirror.
The mirrors do not go into anti-glare mode if
reverse gear is engaged or the interior lighting
is switched on.
Parking position for the exterior
mirror on the front-passenger side
Setting and storing the parking position
You can position the front-passenger side
exterior mirror in such a way that you can see
the rear wheel on that side as soon as you
engage reverse gear. You can store this
position.
XMake sure that the vehicle is stationary and
that the key is in position 2 in the ignition
lock.
XPress button ; for the exterior mirror on
the front-passenger side.
XEngage reverse gear.
The exterior mirror on the front-passenger
side moves to the preset parking position.
XUse adjustment button = to adjust the
exterior mirror to a position which allows
you to see the rear wheel and the curb.
The parking position is stored.
iIf you shift the transmission to another
position, the exterior mirror on the front-
passenger side returns to the driving
position.
iYou can also store the parking position
using memory button M ?.
XWith the key in position 2 in the
ignition lock and with the exterior
mirror on the front-passenger side
activated, use adjustment button = to
114MirrorsSeats, steering wheel and mirrors
BA 212 USA, CA Edition B 2011; 1; 5, en-USdimargiVersion: 3.0.3.62010-05-20T13:33:46+02:00 - Seite 114
Page 117 of 400

set the exterior mirror such that the
rear wheel and curb are visible.
XPress memory button M ? and one of
the arrows on adjustment button =
within three seconds.
The parking position is stored if the
exterior mirror does not move.
If the mirror moves out of position, repeat
the steps.
Calling up a stored parking position
setting
XWith the key in position 2 in the ignition
lock and the exterior mirror on the front-
passenger side activated, engage reverse
gear.
The exterior mirror on the front-passenger
side moves to the stored parking position.
The exterior mirror on the front-passenger
side moves back to its original position:
Ras soon as you exceed a speed of 6 mph
(10 km/h)
Rabout ten seconds after you have
disengaged reverse gear
Rif you press button : for the exterior
mirror on the driver's side
Memory functions
Storing settings
With the memory function, you can store up
to three different settings, e.g. for three
different people.
The following settings are stored as a single
memory preset:
Rposition of the seat, backrest and head
restraint
Ractive multicontour seat: dynamic function
level
Rdriver's side: steering wheel position
Rdriver's side: position of the exterior
mirrors on the driver's and front-passenger
sides
GWarning!
The memory function can still be used when
the key has been removed. For this reason,
children should never be left unsupervised in
the vehicle. They could otherwise become
trapped when adjusting the seat or the
steering wheel.
GWarning!
Only use the memory function on the driver's
side when the vehicle is stationary. You could
otherwise be distracted from the traffic
conditions by the steering wheel and seat
moving of their own accord, and as a result
cause an accident.
XAdjust the seat (Y page 104).XOn the driver's side, adjust the steering
wheel (Y page 111) and the exterior mirrors
(Y page 113).
XPress memory button M and one of the
storage position buttons 1, 2 or 3 within
three seconds.
The settings are stored in the selected
preset position. A tone sounds when the
settings have been completed.
Calling up a stored setting
XPress and hold the relevant storage
position button 1, 2 or 3, until the seat,
steering wheel and exterior mirrors are in
the stored position.
Memory functions115Seats, steering wheel and mirrorsBA 212 USA, CA Edition B 2011; 1; 5, en-USdimargiVersion: 3.0.3.62010-05-20T13:33:46+02:00 - Seite 115Z
Page 235 of 400

wheel when the easy-entry/exit feature is
activated.
To stop steering wheel movement, move
steering wheel adjustment lever or press one
of the memory position buttons.
Do not leave children unattended in the
vehicle, or with access to an unlocked vehicle.
Children could open the driver's door and
unintentionally activate the easy-entry/exit
feature, which could result in an accident
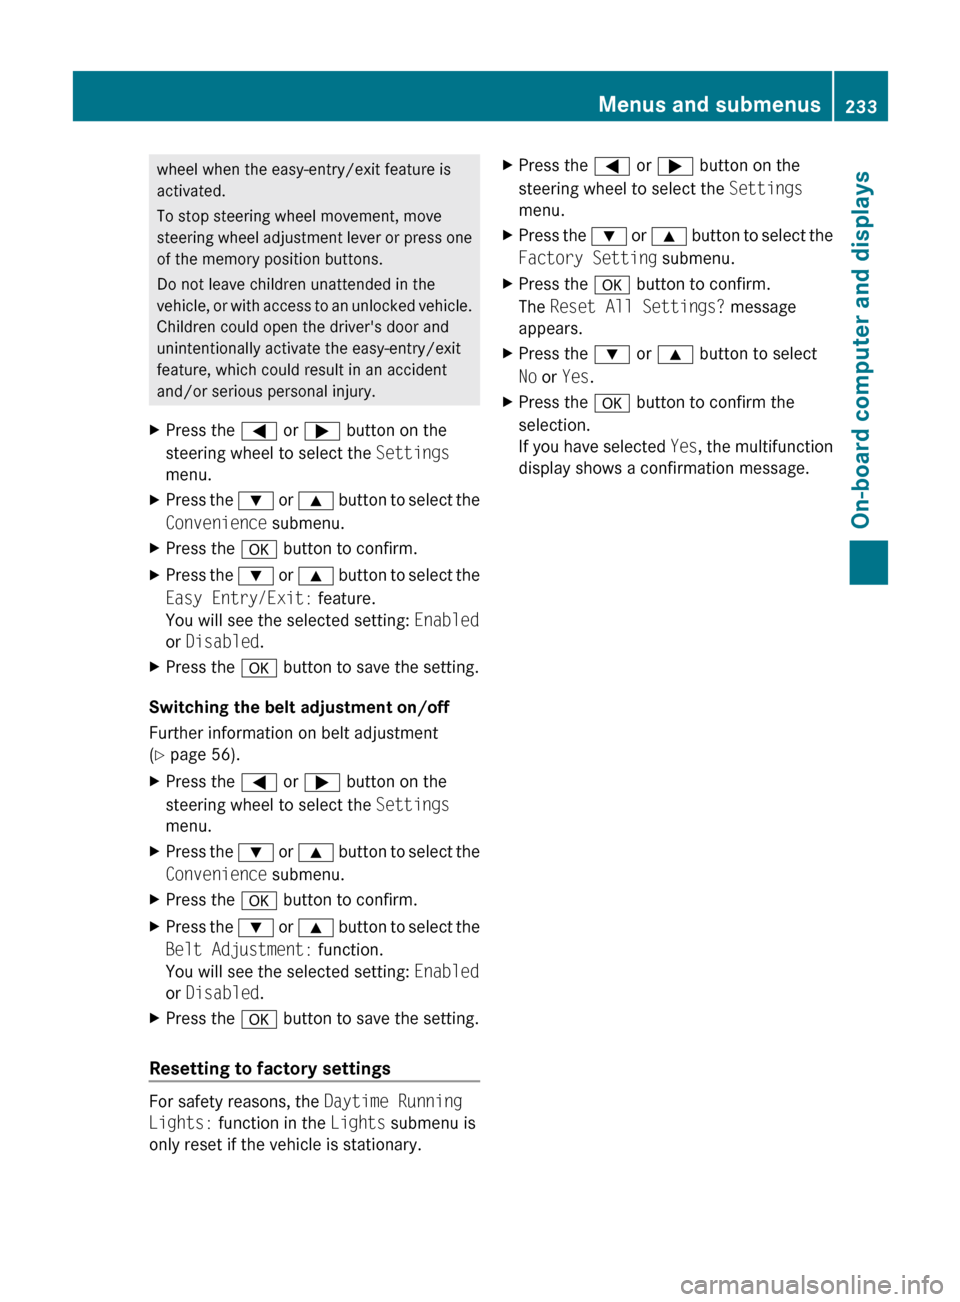
and/or serious personal injury.XPress the = or ; button on the
steering wheel to select the Settings
menu.XPress the : or 9 button to select the
Convenience submenu.XPress the a button to confirm.XPress the : or 9 button to select the
Easy Entry/Exit: feature.
You will see the selected setting: Enabled
or Disabled .XPress the a button to save the setting.
Switching the belt adjustment on/off
Further information on belt adjustment
( Y page 56).
XPress the = or ; button on the
steering wheel to select the Settings
menu.XPress the : or 9 button to select the
Convenience submenu.XPress the a button to confirm.XPress the : or 9 button to select the
Belt Adjustment: function.
You will see the selected setting: Enabled
or Disabled .XPress the a button to save the setting.
Resetting to factory settings
For safety reasons, the Daytime Running
Lights: function in the Lights submenu is
only reset if the vehicle is stationary.
XPress the = or ; button on the
steering wheel to select the Settings
menu.XPress the : or 9 button to select the
Factory Setting submenu.XPress the a button to confirm.
The Reset All Settings? message
appears.XPress the : or 9 button to select
No or Yes .XPress the a button to confirm the
selection.
If you have selected Yes, the multifunction
display shows a confirmation message.Menus and submenus233On-board computer and displaysBA 212 USA, CA Edition B 2011; 1; 5, en-USdimargiVersion: 3.0.3.62010-05-20T13:33:46+02:00 - Seite 233Z