Page 306 of 400

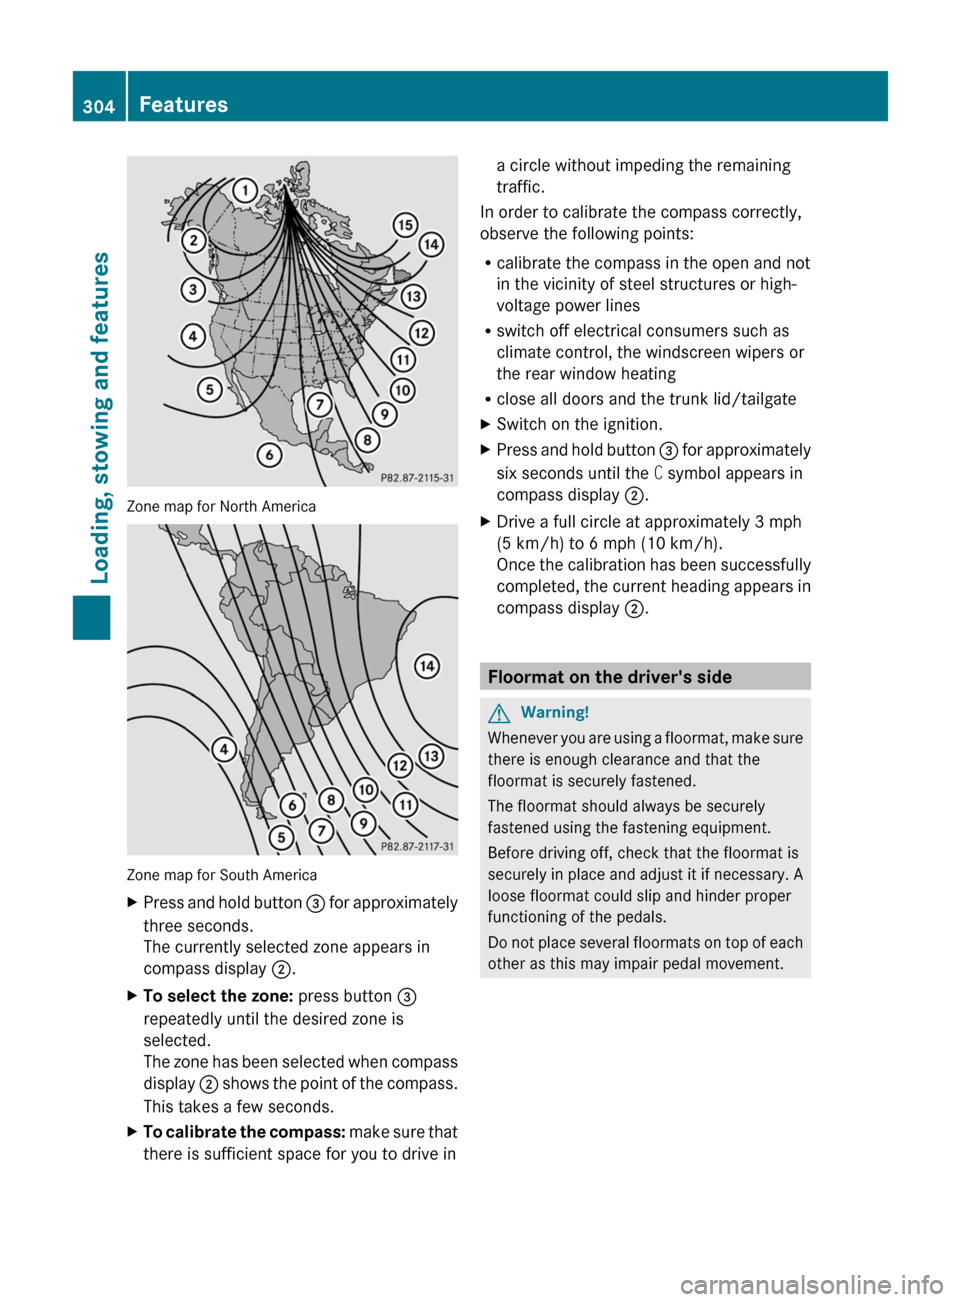
Zone map for North America
Zone map for South America
XPress and hold button = for approximately
three seconds.
The currently selected zone appears in
compass display ;.XTo select the zone: press button =
repeatedly until the desired zone is
selected.
The zone has been selected when compass
display ; shows the point of the compass.
This takes a few seconds.XTo calibrate the compass: make sure that
there is sufficient space for you to drive ina circle without impeding the remaining
traffic.
In order to calibrate the compass correctly,
observe the following points:
R calibrate the compass in the open and not
in the vicinity of steel structures or high-
voltage power lines
R switch off electrical consumers such as
climate control, the windscreen wipers or
the rear window heating
R close all doors and the trunk lid/tailgate
XSwitch on the ignition.XPress and hold button = for approximately
six seconds until the C symbol appears in
compass display ;.XDrive a full circle at approximately 3 mph
(5 km/h) to 6 mph (10 km/h).
Once the calibration has been successfully
completed, the current heading appears in
compass display ;.
Floormat on the driver's side
GWarning!
Whenever you are using a floormat, make sure
there is enough clearance and that the
floormat is securely fastened.
The floormat should always be securely
fastened using the fastening equipment.
Before driving off, check that the floormat is
securely in place and adjust it if necessary. A
loose floormat could slip and hinder proper
functioning of the pedals.
Do not place several floormats on top of each
other as this may impair pedal movement.
304FeaturesLoading, stowing and features
BA 212 USA, CA Edition B 2011; 1; 5, en-USdimargiVersion: 3.0.3.62010-05-20T13:33:46+02:00 - Seite 304
Page 325 of 400

After an accidentProblemPossible causes/consequences and M SolutionsFuel is leaking from the
vehicle.GRisk of explosion or fire
The fuel line or the fuel tank is faulty.
XImmediately turn the key to position 0(Y page 149)in the ignition
lock and remove it.XDo not restart the engine under any circumstances.XConsult a qualified specialist workshop.You are unable to
determine the extent of
the damage.XConsult a qualified specialist workshop.You cannot detect any
damage.XStart the engine as normal.The NECK-PRO head
restraints on the
driver's and front-
passenger seats have
been triggered.Your vehicle has been involved in a rear-end collision.XReset the triggered NECK-PRO head restraints ( Y page 53).Where will I find...?
First-aid kit
Sedan: the first-aid kit is in the right-hand
stowage compartment in the trunk.
XOpen the trunk lid.XSlide down the parcel net.XOpen the stowage compartment.XRelease strap :.XRemove first-aid kit ;.
Wagon: depending on the vehicle's
equipment, the first-aid kit is in the parcel net
or behind the side trim panel.
XOpen the tailgate.
In the parcel net
Where will I find...?323Roadside AssistanceBA 212 USA, CA Edition B 2011; 1; 5, en-USdimargiVersion: 3.0.3.62010-05-20T13:33:46+02:00 - Seite 323Z
Page 348 of 400

The fuses are located in various fuse boxes:
Rfuse box in the engine compartment on the
left-hand side of the vehicle, when viewed
in the direction of travel
Rfuse box in the trunk/cargo compartment
on the right-hand side of the vehicle, when
viewed in the direction of travel
The fuse allocation chart is located in the
vehicle tool kit (Y page 324) in the stowage
compartment under the trunk/trunk floor.
Fuse box in the engine compartment
XMake sure that the windshield wipers are
turned off.
GRisk of injury
Make sure that the windshield wipers are
turned off and the key is pulled out of the
ignition lock before you open the cover of the
fuse box. Otherwise, the windshield wipers
and the wiper rods above the cover could be
set in motion. This could lead to you or others
being injured by the wiper rods.
XOpen the hood (Y page 308).XRemove any existing moisture from the
fuse box using a dry cloth.
XTake lines ; from the guides.XMove aside lines ;. Route the lines behind
connection = to do this.
XTo open: open clamps :.XRemove the fuse box cover forwards.XTo close: check whether the rubber seal is
lying correctly in the cover.
XInsert the cover at the rear of the fuse box
into the retainer.
XFold down the cover and close clamps :.XSecure lines ; in the guides.
! The cover must be seated properly,
otherwise moisture or dirt could impair the
function of the fuses.
XClose the hood (Y page 309).
Fuse box in the trunk
XOpen the trunk lid.XTo open: release cover : at the top right
and left-hand sides with a flat object.
XOpen cover : downwards in the direction
of the arrow.
Fuse box in the cargo compartment
XOpen the tailgate.346FusesRoadside Assistance
BA 212 USA, CA Edition B 2011; 1; 5, en-USdimargiVersion: 3.0.3.62010-05-20T13:33:46+02:00 - Seite 346