2011 MERCEDES-BENZ E-CLASS SALOON transmission
[x] Cancel search: transmissionPage 204 of 409

Example: side view (Saloon)
Example: top view (Saloon)
Front sensors
Centre approximately 100 cm
Corners approximately 60 cm
Rea
rsensors Centre approximately 12
0cm Corners approximately 80 cm
!
When parking, pay particula rattention to
objects above or below the sensors, such
as flower pots or trailer drawbars. PARK-
TRONIC does not detect such objects when
they are in the immediate vicinity of the
vehicle. You could damage the vehicle or
the objects.
The sensors may not detect snow and
objects which absorb ultrasonic sources.
Ultrasonic sources, such as an automatic
car wash, a lorry's compressed-air brakes
or a pneumati cdrill, coul dcause PARK-
TRONIC to malfunction. PARKTRONIC may no
tfunction correctly on
uneven terrain.
Minimum distance Centre approximately 20 cm
Corners approximately 15 cm
If there is an obstacle within this range, the
relevan
twarning displays light up and a warn-
ing tone sounds. If th edistance falls below
the minimum, the distanc emay no longer be
shown.
Warning displays The warning displays show the distance
between the sensors and th
eobstacle. The
warning display for the fron tarea is located
on the dashboard above the centre air vents.
The warning display for the rear area is loca-
ted on the roof lining in the rear compart-
ment. Warning display for the front area
:
Segments on the left-hand side of the
vehicle
; Segments on the right-hand side of the
vehicle
= Segments showing operational readiness
The warning display for each side of the vehi-
cle is divided into five yellow and two red seg-
ments. PARKTRONIC is operational if yellow
segments showing operational readiness =
light up.
The gearl ever position or the transmission
position of the automatic transmission deter- Driving systems
201Driving and parking Z
Page 205 of 409

mines which warning display is active when
the engine is running.
Manual transmission:
Gear leve
rposi-
tion Warning display
Forwards gear
or
Neutral
Front area activated
Reverse gear
Rear and front areas
activated
Automatic transmission:
Transmission
position Warning display
D
Front area activated
R
or N Rear and front areas
activated
P
No areas activated
One or more segments light up as the vehicle
approaches an obstacle, depending on the
vehicle's distance fro mthe obstacle.
From the:
R sixth segment onwards, you will hear an
intermittent warning tone for approx-
imately two seconds.
R seventh segment onwards, you will hear a
warning tone for approximately two sec-
onds. This indicates that you have now
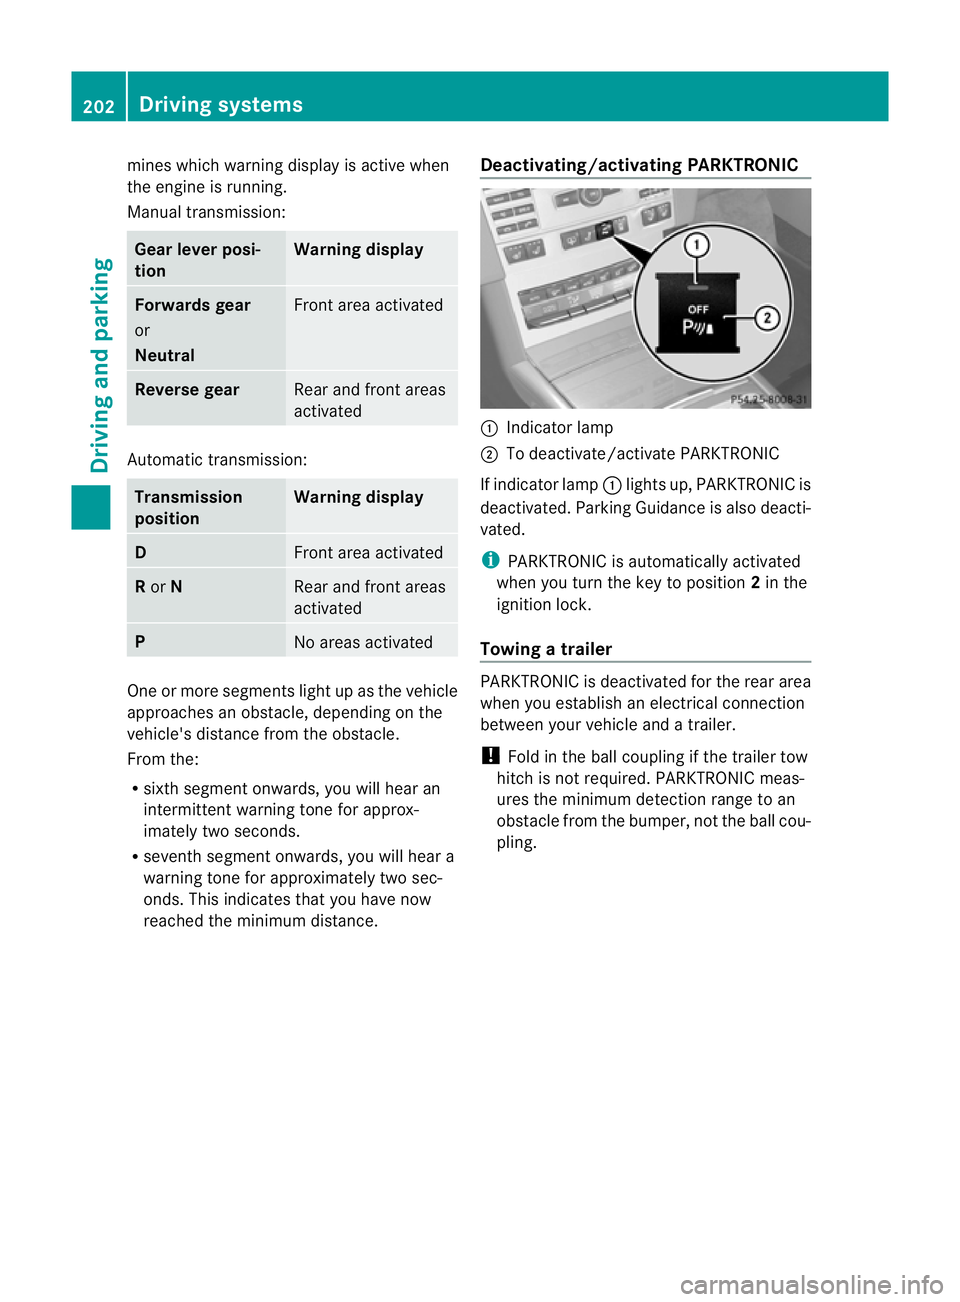
reached the minimum distance. Deactivating/activating PARKTRONIC :
Indicator lamp
; To deactivate/activate PARKTRONIC
If indicator lamp :lights up, PARKTRONIC is
deactivated. Parking Guidance is also deacti-
vated.
i PARKTRONIC is automatically activated
when you turn the key to position 2in the
ignition lock.
Towing atrailer PARKTRONIC is deactivated for the rea
rarea
when you establish an electrical connection
between yourv ehicle and a trailer.
! Fold in the ball coupling if the trailer tow
hitch is not required. PARKTRONIC meas-
ures the minimum detection range to an
obstacle from the bumper, not the ball cou-
pling. 202
Driving systemsDriving and parking
Page 208 of 409

Parking Guidance will only detect parking
spaces:
R
that are parallel to the direction of travel
R that are at least 1.5 m wide
R that are at least 1.3 m longer than your
vehicle
Ap arking space is displayed while you are
driving past it, and until you are approx-
imately 15 m away from it.
Parking G
WARNING
PARKTRONIC and Parking Guidance are
merely parking aids and may no tdetec tall
obstacles. They do not relieve you of the
responsibility of paying attention.
You are always responsible for safety and
must continue to pay attention to your imme-
diate surroundings when parking and
manoeuvring. You could otherwise endanger
yourself and others.
X Stop the vehicle when the parking space
symbol shows the desired parking space in
the instrument cluster.
X Vehicles with manual transmission :shift to
reverse gear.
Vehicles with automatic transmission: shift
into position R.
The following message appears in the mul-
tifunction display: Check vehicle sur‐ roundings Confirm with OK .
X Press the abutton on the multifunction
steering wheel to confirm.
The multifunction display switches to Park-
ing Guidance.
Depending on your distance from the park-
ing space, the Please drive backwards message appears in the multifunction dis-
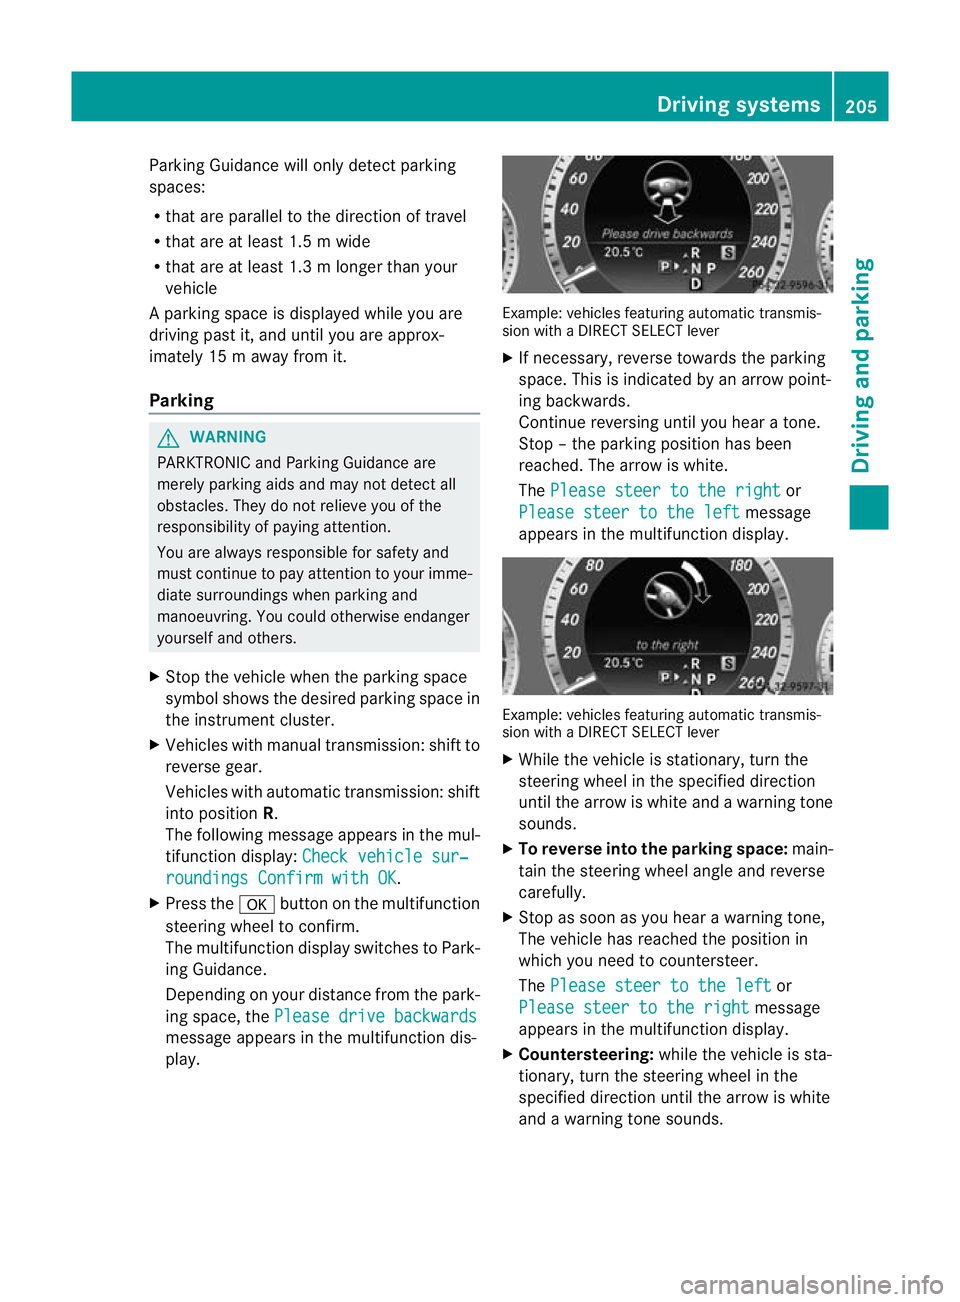
play. Example: vehicles featuring automatic transmis-
sion with a DIRECT SELECT lever
X
If necessary, reverse towards the parking
space. This is indicated by an arrow point-
ing backwards.
Continue reversing until you hear a tone.
Stop –the parking position has been
reached. The arrow is white.
The Please steer to the right or
Please steer to the left message
appears in the multifunction display. Example: vehicles featuring automatic transmis-
sion with a DIRECT SELECT lever
X
While the vehicle is stationary, turn the
steering wheel in the specified direction
until the arrow is white and a warning tone
sounds.
X To reverse into the parking space: main-
tain the steering wheel angle and reverse
carefully.
X Stop as soon as you hear a warning tone,
The vehicle has reached the position in
which you need to countersteer.
The Please steer to the left or
Please steer to the right message
appears in the multifunction display.
X Countersteering: while the vehicle is sta-
tionary, turn the steering wheel in the
specified direction until the arrow is white
and a warning tone sounds. Driving systems
205Driving and parking Z
Page 223 of 409

R
a driving safety system intervenes, such as
ABS, BAS or ESP ®
.
R you have switched on the tur nsignals .In
this event, the warnings are suppressed for
a certai nperiod of time.
Lane-correcting brake application
If you leave your lane under certain circum-
stances, the vehicle will brake briefly on one
side. This is designed to help you bring the
vehicle back into the original lane.
This function is available in the range between
60 km/h and 200 km/h.
A lane-correcting brake application can only
be made after driving over a solid, recognis-
able lane marking. Befor ethis, a warning
must be emitted by means of intermittent
vibration in the steering wheel. In addition, a
lane with lane markings on both sides must
be recognised. The brake application also
slightly reduces driving speed.
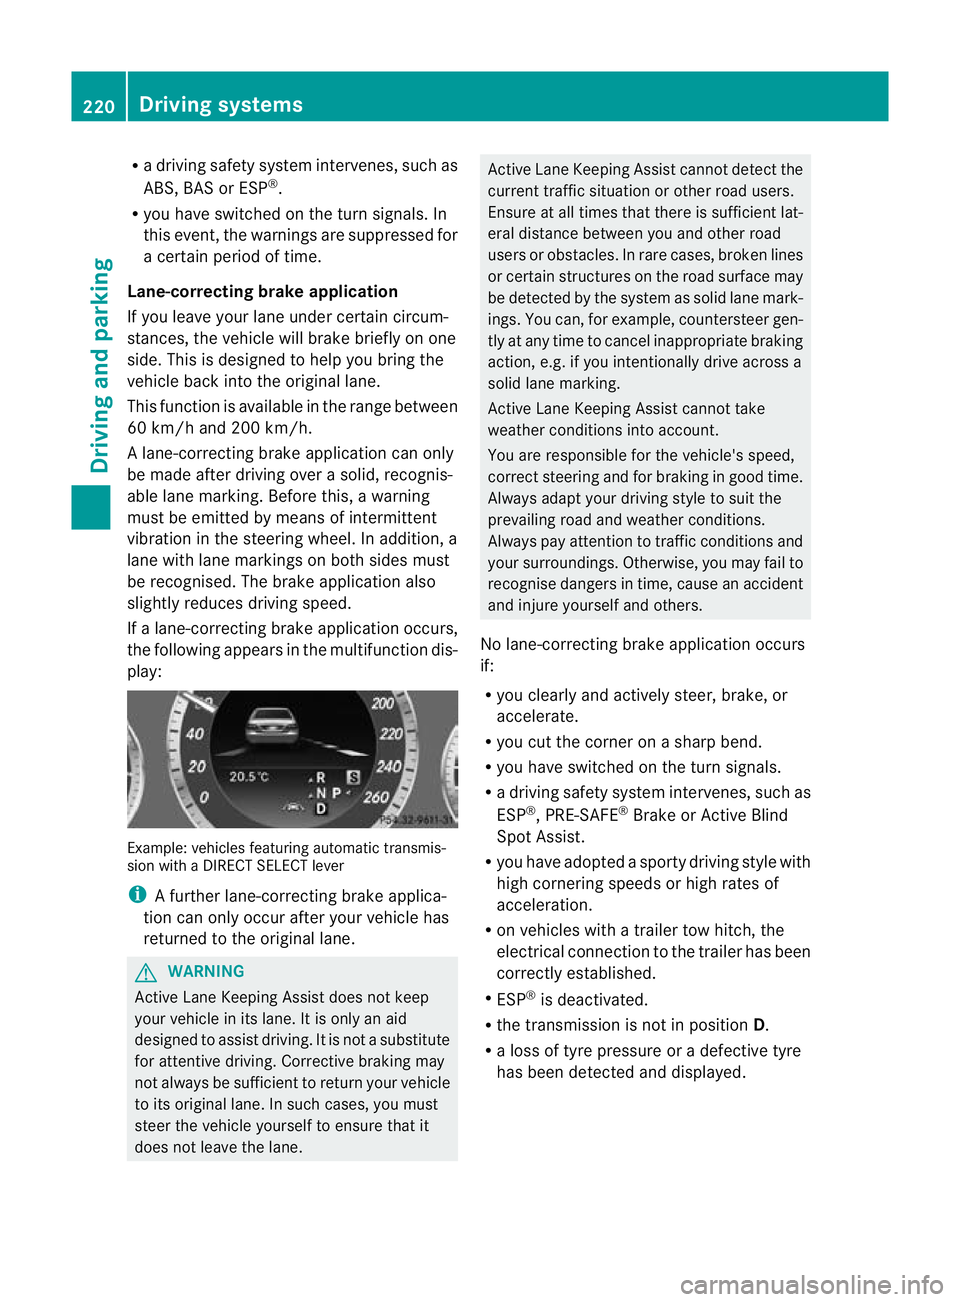
If a lane-correcting brake application occurs,
the following appears in the multifunction dis-
play: Example: vehicles featuring automatic transmis-
sion with a DIRECT SELECT lever
i
A further lane-correcting brake applica-
tion can only occur after your vehicle has
returned to the original lane. G
WARNING
Active Lane Keeping Assist does not keep
your vehicle in its lane. It is only an aid
designed to assist driving. It is not a substitute
for attentive driving. Corrective braking may
not always be sufficient to return your vehicle
to its original lane. In such cases, you must
steer the vehicle yourself to ensure that it
does not leave the lane. Active Lane Keeping Assist cannot detect the
current traffic situation or other road users.
Ensure at all times that there is sufficient lat-
eral distance between you and other road
users or obstacles. In rare cases, broken lines
or certain structures on the road surface may
be detected by the system as solid lane mark-
ings. You can, for example, countersteer gen-
tly at any time to cancel inappropriate braking
action, e.g. if you intentionally drive across a
solid lane marking.
Active Lane Keeping Assist cannot take
weather conditions into account.
You are responsible for the vehicle's speed,
correct steering and for braking in good time.
Always adapt your driving style to suit the
prevailing road and weather conditions.
Always pay attention to traffic conditions and
your surroundings. Otherwise, you may fail to
recognise dangers in time, cause an accident
and injure yourself and others.
No lane-correcting brake application occurs
if:
R you clearly and actively steer, brake, or
accelerate.
R you cut the corner on a sharp bend.
R you have switched on the turn signals.
R a driving safety system intervenes, such as
ESP ®
, PRE-SAFE ®
Brake or Active Blind
Spot Assist.
R you have adopted a sporty driving style with
high cornering speeds or high rates of
acceleration.
R on vehicles with a trailer tow hitch, the
electrical connection to the trailer has been
correctly established.
R ESP ®
is deactivated.
R the transmission is not in position D.
R a loss of tyre pressure or a defective tyre
has been detected and displayed. 220
Driving systemsDriving and parking
Page 226 of 409

Driving tips
i
Observe the notes on ESP ®
trailer stabi-
lisation (Y page 75).
The maximum permissible speed fo rvehicle/
trailer combinations depends on the type of
trailer. Before beginning the journey, check
the trailer's documents to see what the max-
imum permitted speed is. Observe the legally
prescribed maximum speed in the relevant
country.
For certain Mercedes-Benzv ehicles, the max-
imum permissible rear axle load is increased
when towing a trailer. Refer to the "Technical
data" section to find out whether this applies
to your vehicle. If you utilise any of the added
maximum rear axle load when towing a trailer,
the vehicle/trailer combination may not
exceed a maximum speed of 100 km/h for
reasons concerning the operating permit.
This also applies in countries in which the
permissible maximum speed for vehicle/
trailer combinations is above 100 km/h.
When towing a trailer, your vehicle's handling
characteristics will be differen tincomparison
to when driving without a trailer and it will
consume more fuel.
On long and steep downhill gradients, you
must shift to a lower gear in good time, or on
vehicles with automatic transmission, select
the shift range 1,2or 3.
i This also applies if you have activated
cruise control, SPEEDTRONIC or DIS-
TRONIC PLUS.
This will use the braking effect of the engine,
so less braking will be required to prevent the
vehicle from gaining speed. This relieves the
load on the brake system and prevents the
brakes from overheating and wearing too
quickly. If you need additional braking,
depress the brake pedal repeatedly rather
than continuously. Driving tips R
Maintain a greater distance from the vehi-
cle in front than when driving without a
trailer.
R Avoid braking abruptly. If possible, brake
gently at first to allow the trailer to run on.
Then, increase the braking force rapidly.
R The values given for gradient-climbing
capabilities from a standstill refer to sea
level. When driving in mountainous areas,
note that the power output of the engine,
and consequently the vehicle's gradient-
climbing capability, decrease with increas-
ing altitude.
If the trailer swings from side to side:
X Do not accelerate.
X Do not counter-steer.
X Brake if necessary. Folding out the ball coupling
Before you can tow a trailer with your vehicle,
you must fold out the ball coupling.
The release wheel is located behind the left-
hand side trim panel in the boot/luggage
compartment. G
WARNING
Make sure that the ball coupling is engaged,
either in its folded-out or folded-in position,
and that the indicator lamp is off.
Do not turn the release wheel when a trailer
is coupled up. Otherwise, the trailer might
detach. Towing
atrailer
223Driving an d parking Z
Page 227 of 409

Saloon
Estate
X
To open the cover (Saloon): push down
luggage net ;.
X Turn handle :anti-clockwise and fold
dow ncover =.
X To open the cover (Estate): pull han-
dle :in the direction of the arrow and fold
down cover ;. X
Grip release wheel ;so that your thumb
lies on the thumb rest.
X Turn release wheel ;anti-clockwise until
the ball coupling releases and folds out from under the rear bumper. Indicator
lamp
:flashes. X
Pull the ball coupling in the direction of the
arrow until it engages in a vertical position.
Indicator lamp :goes out.
The multifunction display shows the
Check trailer hitch lock message
until the ball coupling is engaged.
X Remove the protective covering from the
ball coupling and store it in a safe place.
X Make sure that the ball of the ball coupling
is clean and that it is either greased or dry
(grease free), depending on the instruc-
tions for the trailer.
The power socket is integrated in the ball
coupling. Coupling up a trailer
G
WARNING
Do not disconnect a trailer with an engaged
overrun brake. Otherwise, your hand could
become trapped between the bumper and
trailer drawbar.
X Make sure that the transmission is in posi-
tion P.
X Apply the parking brake.
X Position the trailer level behind the vehicle.
X Couple up the trailer. 224
Towing
atrailerDriving an d parking
Page 228 of 409

X
Establish the electrical connection
between the vehicle and the trailer.
X Check tha tthe trailer lighting system is
working. Decoupling
atrailer G
WARNING
As soon as you raise the trailer drawbar, the
unladen vehicle rises slightly. The vehicle then
lowers to driving level.
Make sure tha tnobody is in the vicinity of the
wheel arch or the underbody. You could oth-
erwise trap yourself or others. G
WARNING
The vehicle is lowered as soon as you discon-
nect the trailer cable. Make sure that nobody
is in the vicinity of the wheel arch or the
underbody. You could otherwise trap yourself
or others.
As soon as you decouple the trailer, the unla-
den vehicle rises slightly. Make sure that you
or others are not injured in the process.
! Do not disconnect a trailer with an
engaged overrun brake. Otherwise, your
vehicle could be damaged by the rebound-
ing of the overrun brake.
X Make sure that the transmission is in posi-
tion P.
X Apply the parking brake.
X Secure the trailer against rolling away.
X Remove the trailer cable and decouple the
trailer. Folding in the ball coupling
i Fold the ball coupling back in if you are
not using the trailer tow hitch. G
WARNING
Make sure that no persons or animals are in
the pivoting range of the ball coupling. Other-
wise, they could be injured. X
Place the protective cap on the ball cou-
pling.
The release wheel is located behind the left-
hand side trim panel in the boot/luggage
compartment. Saloon
Estate
X
To open the cover (Saloon): push down
luggage net ;.
X Turn handle :anti-clockwise and fold
down cover =.
X To open the cover (Estate): pull han-
dle :in the direction of the arrow and fold
down cover ;. Towing
atrailer
225Driving an d parking Z
Page 235 of 409

9
:
Press and hold:
R
In the Audio menu: selects the
previous/next station or selects
an audio track or a video scene
using rapid scrolling
R In the Tel (telephone) menu:
starts rapid scrolling through the
phone book a R
Confirms selection/display mes-
sage
R In the Tel (telephone) menu:
switches to the telephone book
and starts dialling the selected
number
R In the Audio menu: stops the
station search function at the
desired station Right control panel
~ R
Rejects or ends a call
R Exits telephone book/redial
memory 6 R
Makes or accepts a call
R Switches to the redial memory W
X R
Adjusts the volume 8 R
Mute Back button
%
Press briefly:
R
Back
R Switches off LINGUATRONIC;
see the separate operating
instructions
R Hides display messages or calls
up the last Trip menu function
used
R Exits the telephone book/redial
memory %
Press and hold:
R
Calls up the standard display in
the Trip menu
Multifunction display
Values and settings as well as display mes-
sages are shown in the multifunction display. Example: DIRECT SELECT automatic transmission
multifunction display
:
Description field
; Menu bar
= Drive program
? Transmission position
A Outside temperature or speed
(Ypage 243)
X To show menu bar ;:press the =
or ; button on the steering wheel.
The indicators in the lower part of the display
differ from those shown here, depending on
the transmission. 232
Displays and operationOn-board computer and displays