2011 MERCEDES-BENZ E-CLASS ESTATE fold seats
[x] Cancel search: fold seatsPage 116 of 409
X
Press release catch :and push the head
restraints in fully.
X Fold backrest ;of the folding bench seat
into its original position until it engages. Switching the seat heating on/off
Switching on/off G
WARNING
Repeatedly setting the seat heating to level
3 may result in excessive seat temperatures.
The health of passengers that have limited
temperature sensitivity or a limited ability to
react to excessively high temperatures may
be affected or they may even suffer burn-like
injuries. Therefore, do not use seat heating
level 3repeatedly.
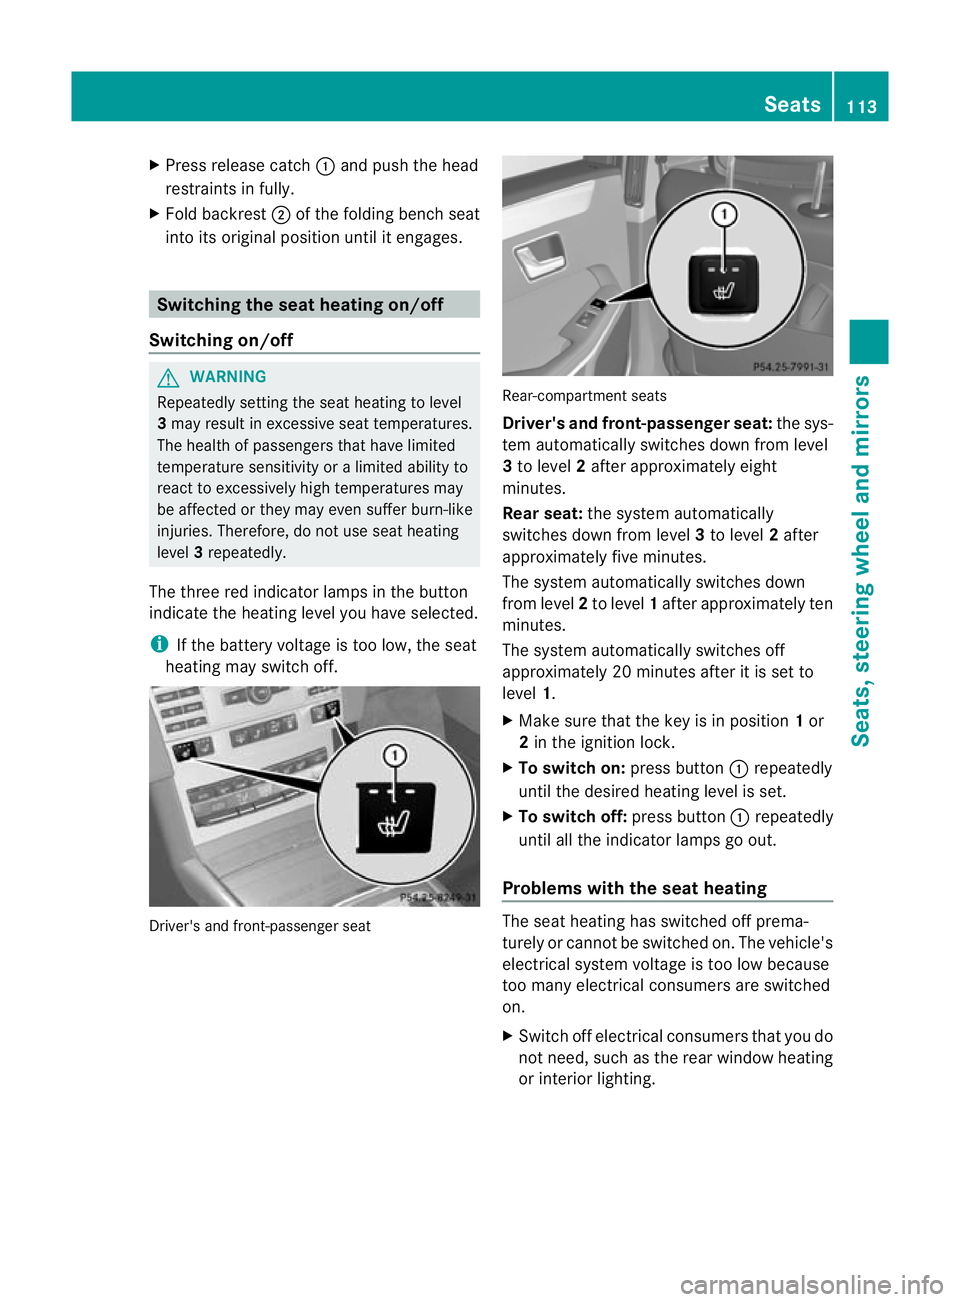
The three red indicator lamps in the button
indicate the heating level you have selected.
i If the battery voltage is too low, the seat
heating may switch off. Driver's and front-passenger seat Rear-compartment seats
Driver's and front-passenger seat:
the sys-
tem automatically switches down from level
3 to level 2after approximately eight
minutes.
Rear seat: the system automatically
switches down from level 3to level 2after
approximately five minutes.
The system automatically switches down
from level 2to level 1after approximately ten
minutes.
The system automatically switches off
approximately 20 minutes after it is set to
level 1.
X Make sure that the key is in position 1or
2 in the ignition lock.
X To switch on: press button:repeatedly
until the desired heating level is set.
X To switch off: press button:repeatedly
until all the indicator lamps go out.
Problems with the seat heating The seat heating has switched off prema-
turely or cannot be switched on. The vehicle's
electrical system voltage is too low because
too many electrical consumers are switched
on.
X
Switch off electrical consumers that you do
not need, such as the rear window heating
or interior lighting. Seats
113Seats, steering wheel and mirrors Z
Page 120 of 409
Exterior mirrors
Adjusting the exterior mirrors G
WARNING
The exterior mirrors reduce the size of the
image .Objects are actually closer than they
appear. You could misjudge the distance from
vehicles driving behind and cause an acci-
dent, e.g. when changing lane. For this rea-
son, make sure of the actual distance from the
vehicle driving behind by glancing over your
shoulder.
The convex exterior mirrors provide a larger
field of vision.
The exterior mirrors are automatically heated
if the rear window heating is switched on and
the outside temperature is low. X
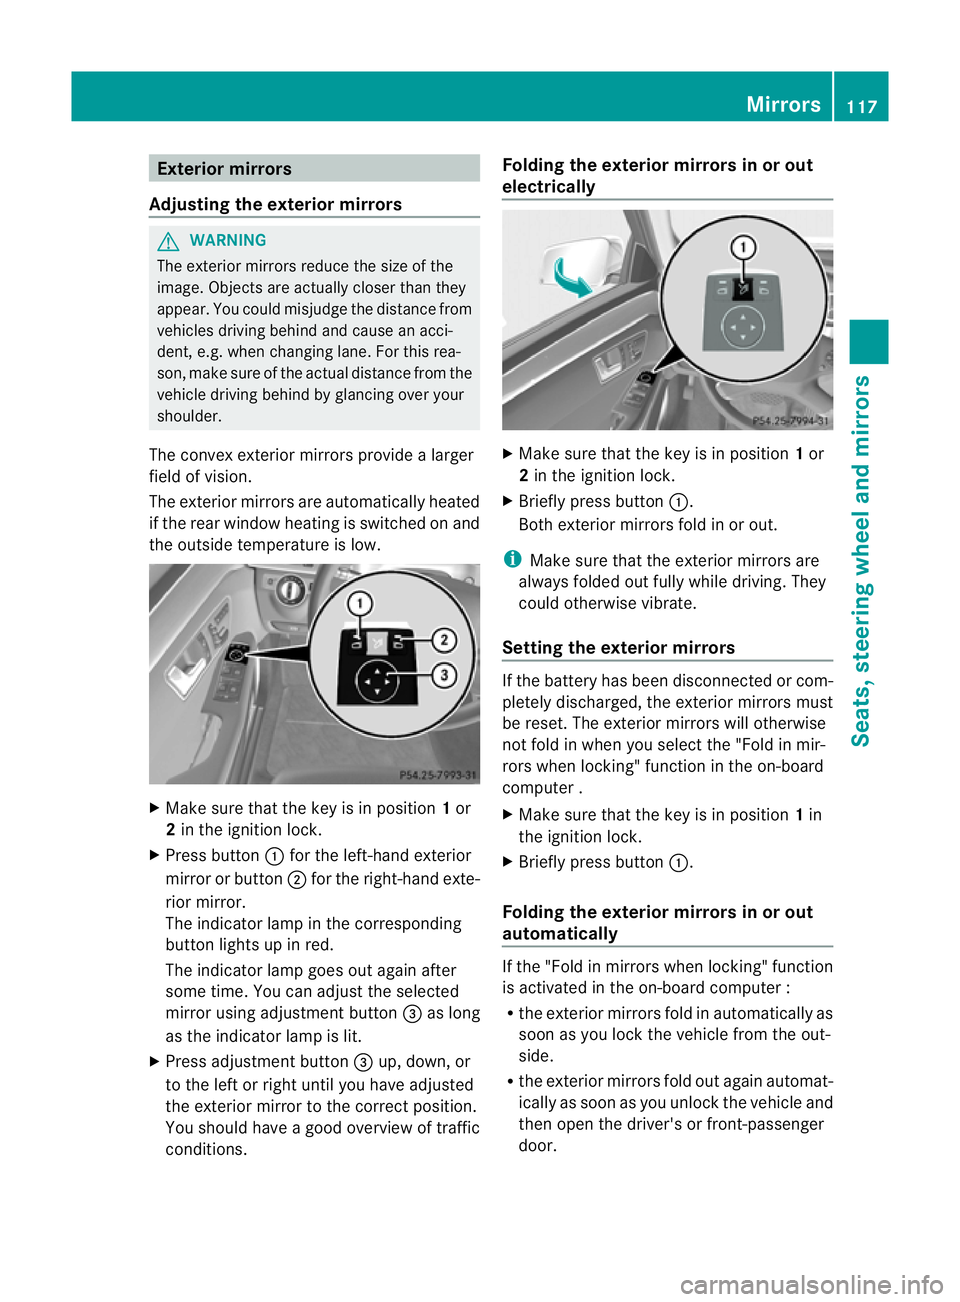
Make sure that the key is in position 1or
2 in the ignition lock.
X Press button :for the left-hand exterior
mirror or button ;for the right-hand exte-
rior mirror.
The indicator lamp in the corresponding
butto nlights up in red.
The indicator lamp goes out again after
some time. You can adjust the selected
mirror using adjustment button =as long
as the indicator lamp is lit.
X Press adjustmen tbutton =up, down, or
to the left or right until you have adjusted
the exterior mirror to the correct position.
You should have a good overview of traffic
conditions. Folding the exterior mirrors in or out
electrically
X
Make sure that the key is in position 1or
2 in the ignition lock.
X Briefly press button :.
Both exterior mirrors fold in or out.
i Make sure that the exterior mirrors are
always folded out fully while driving .They
could otherwise vibrate.
Setting the exterior mirrors If the battery has been disconnected or com-
pletely discharged, the exterior mirrors must
be reset. The exterior mirrors will otherwise
not fold in when you select the "Fold in mir-
rors when locking" function in the on-board
computer .
X
Make sure that the key is in position 1in
the ignition lock.
X Briefly press button :.
Folding the exterior mirrors in or out
automatically If the "Fold in mirrors when locking" function
is activated in the on-board computer :
R
the exterior mirrors fold in automatically as
soon as you lock the vehicle from the out-
side.
R the exterior mirrors fold out again automat-
ically as soon as you unlock the vehicle and
then open the driver's or front-passenger
door. Mirrors
117Seats, steering wheel and mirrors Z
Page 121 of 409
i
If the exterior mirrors have been folded in
manually, they do not fold out.
Exterior mirror out of position If an exterior mirror has been pushed out of
position, proceed as follows:
X
Vehicles without electricall yfolding
exterior mirrors: move the exterior mirror
into the correc tposition manually.
X Vehicles with electrically folding exte-
rior mirrors: press the mirror-folding but-
ton (Y page 117) repeatedly until you hear
the mirror engage in position.
The mirror housing is engaged again and
you can adjust the exterior mirrors as usual
(Y page 117). Automatic anti-dazzle mirrors
G
WARNING
If incident light from headlamps is prevented
from striking the sensor in the rear-view mir-
ror, for instance, by luggage piled too high in
the vehicle, the mirror's automatic anti-dazzle
function will not operate.
Incident light could then blind you. This may
distract you from the traffic conditions and,
as a result, you may cause an accident.
The rear-view mirror and the exterior mirror
on the driver's side automatically go into anti-
dazzle mode if the ignition is switched on and
incident light from headlamps strikes the sen-
sor in the rear-view mirror.
The mirrors do not go into anti-dazzle mode if
reverse gear is engaged or the interior lighting
is switched on. Parking position for the exterior mir-
ror on the front-passenger side
Setting and storing the parking position You can position the front-passenger side
exterior mirror in such a way that you can see the rear wheel on that side as soon as you
engage reverse gear. You can store this posi-
tion.
X
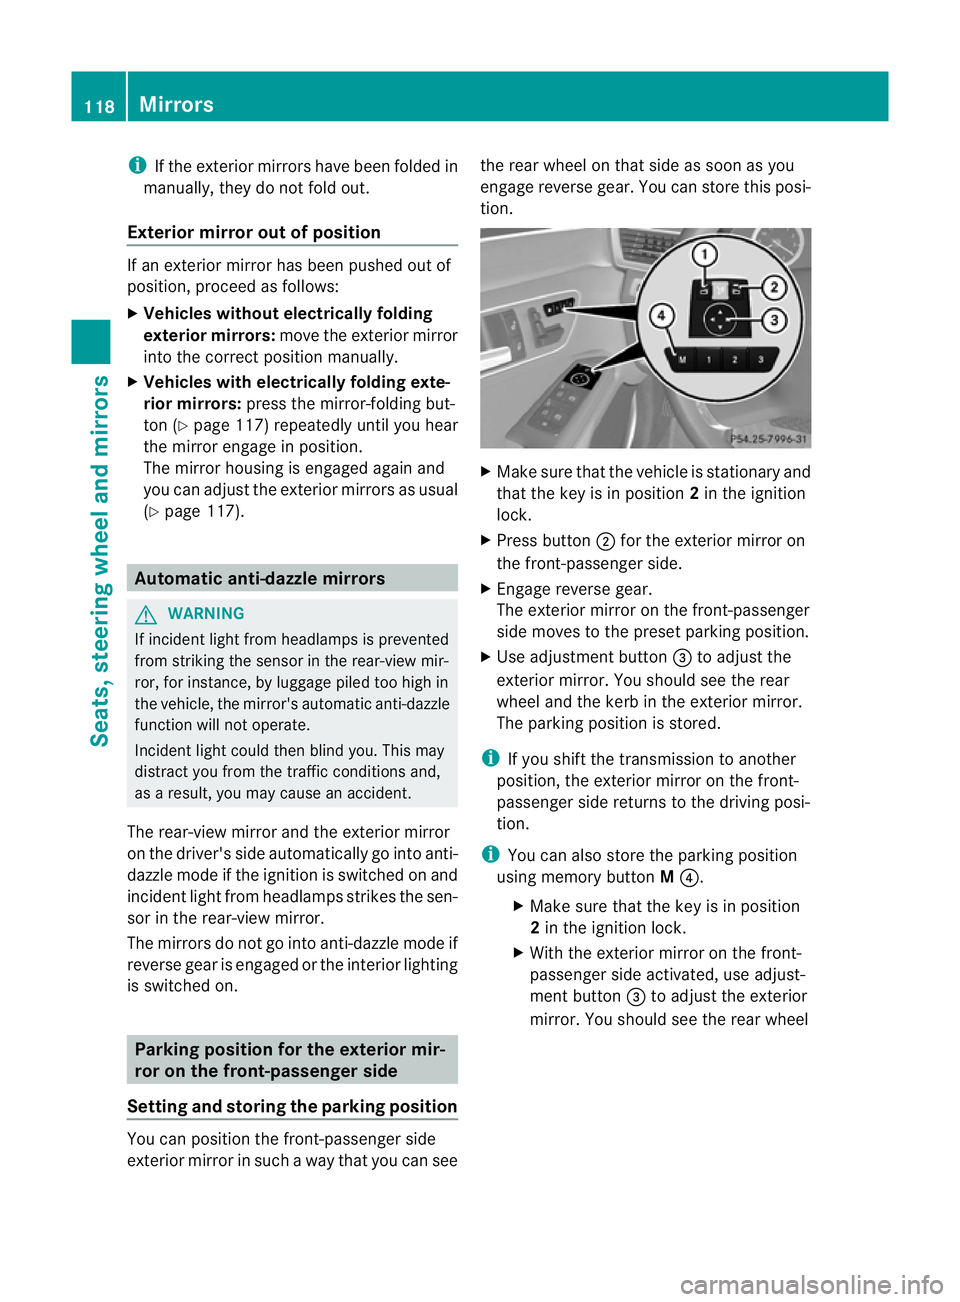
Make sure that the vehicle is stationary and
that the key is in position 2in the ignition
lock.
X Press button ;for the exterior mirror on
the front-passenger side.
X Engage reverse gear.
The exterior mirror on the front-passenger
side moves to the preset parking position.
X Use adjustment button =to adjust the
exterior mirror. You should see the rear
wheel and the kerb in the exterior mirror.
The parking position is stored.
i If you shift the transmission to another
position, the exterior mirror on the front-
passenger side returns to the driving posi-
tion.
i You can also store the parking position
using memory button M?.
X Make sure that the key is in position
2 in the ignition lock.
X With the exterior mirror on the front-
passenger side activated, use adjust-
ment button =to adjust the exterior
mirror. You should see the rear wheel 118
MirrorsSeats, steering wheel and mirrors
Page 296 of 409
X
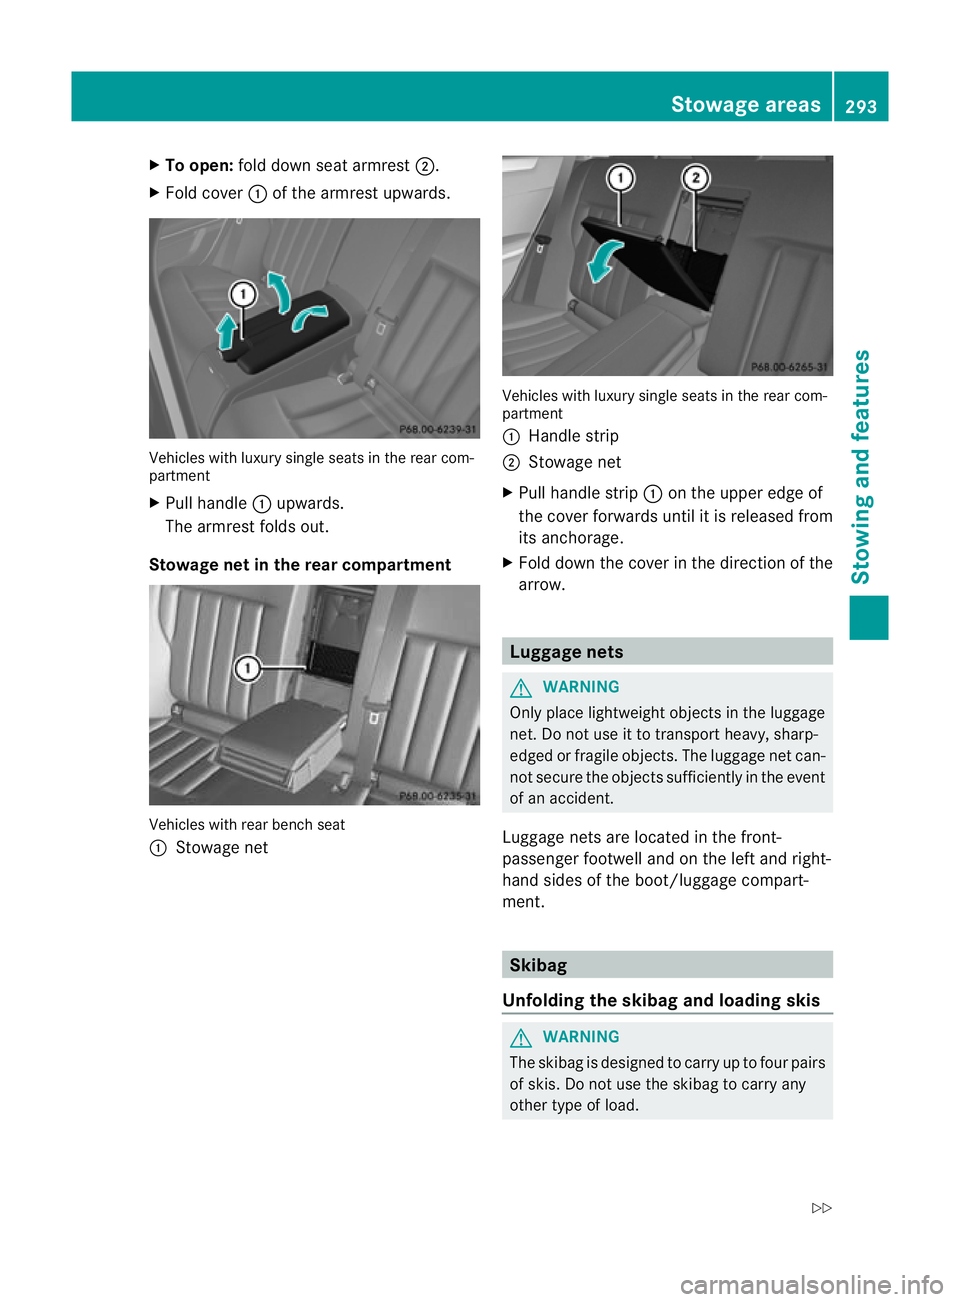
To open: fold down sea tarmrest ;.
X Fold cover :of the armrest upwards. Vehicles with luxury single seats in the rear com-
partment
X Pull handle :upwards.
The armrest folds out.
Stowage net in the rear compartment Vehicles with rear bench seat
:
Stowage net Vehicles with luxury single seats in the rear com-
partment
:
Handle strip
; Stowage net
X Pull handle strip :on the upper edge of
the cover forwards until it is released from
its anchorage.
X Fold downt he cover in the direction of the
arrow. Luggage nets
G
WARNING
Only place lightweight objectsint he luggage
net. Do not use it to transport heavy, sharp-
edged or fragile objects. The luggage net can-
not secure the objects sufficiently in the event
of an accident.
Luggage nets are located in the front-
passenger footwell and on the left and right-
hand sides of the boot/luggage compart-
ment. Skibag
Unfolding the skibag and loading skis G
WARNING
The skibag is designed to carry up to four pairs
of skis. Do not use the skibag to carry any
other type of load. Stowage areas
293Stowing and features
Z
Page 300 of 409
G
WARNING
Always drive with the tailgate closed .Exhaust
fumes could otherwise enter the vehicle inte-
rior.
Folding the rear seat backrest forward The left-hand and right-hand rea
rseat backr-
ests can be folded forwards separately to
increase the luggage compartment capacity.
The combined luggage cover and net can
remain installed.
! Before you fold down the rear seat back-
rest, remove the side head restraints for
the integrated child seat; see the "Side
head restraints for integrated child seat"
section. The side head restraints could oth-
erwise be damaged.
! When folding the rear seat backrest for-
wards, ensure that there are no items lying
on the seat cushions .These items could
otherwise be damaged or could themselves
damage the rear seats.
i When you fold one or both parts of the
rear seat backrests forwards, the headr-
ests are also lowered if necessary. In the
case of vehicles with memory function, the
respective front seat is moved forwards
slightly to avoid contact with the seat
behind it. X
Vehicles without memory function: if nec-
essary, move the driver's or front-
passenger seat forwards.
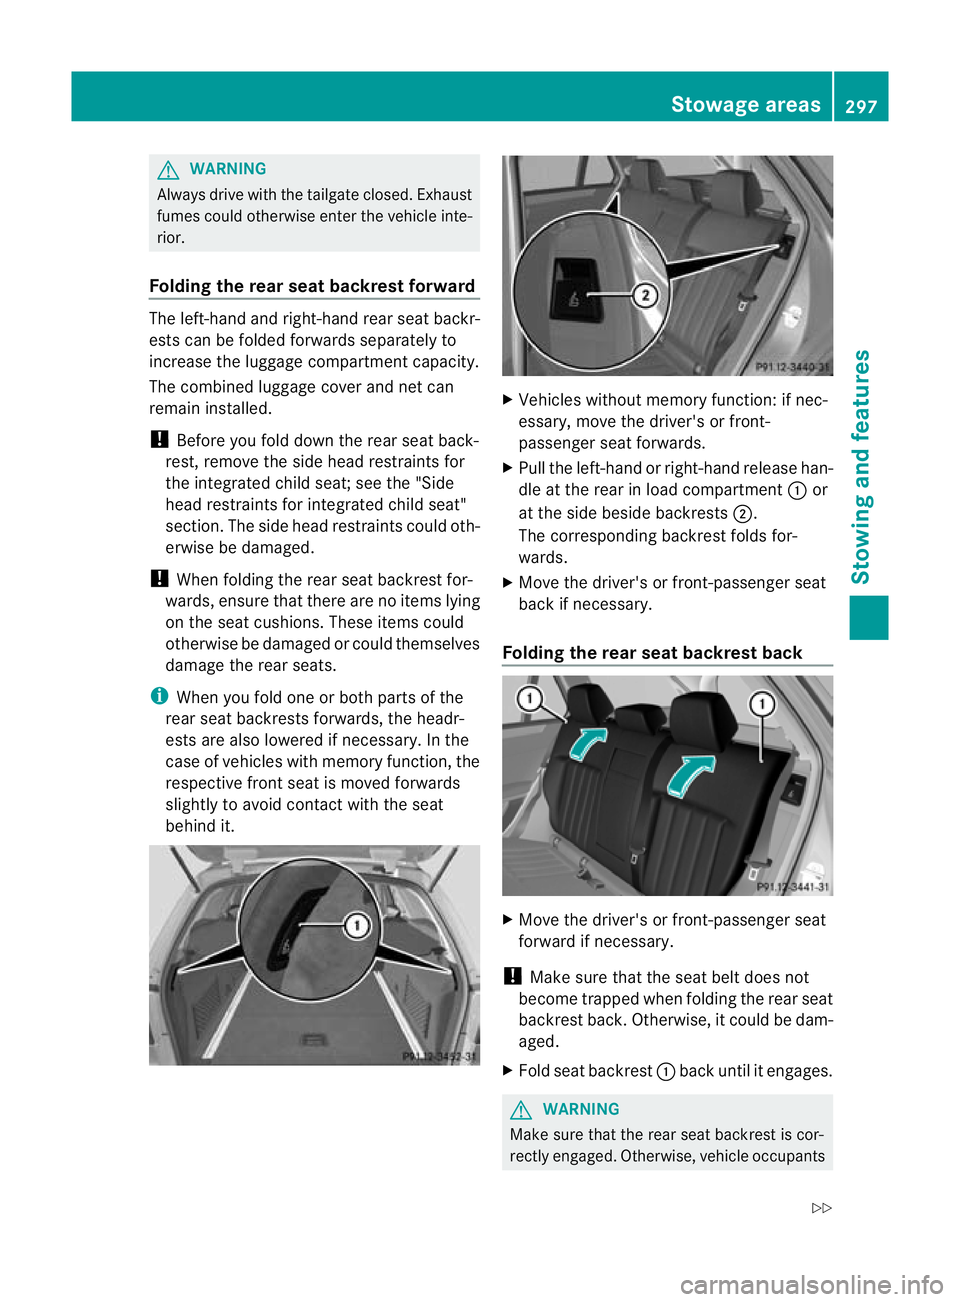
X Pull the left-hand or right-hand release han-
dle at the rear in load compartment :or
at the side beside backrests ;.
The corresponding backrest folds for-
wards.
X Move the driver's or front-passenger seat
back if necessary.
Folding the rear seat backrest back X
Move the driver's or front-passenger seat
forward if necessary.
! Make sure that the seat belt does not
become trapped when folding the rear seat
backrest back. Otherwise, it could be dam-
aged.
X Fold seat backrest :back until it engages. G
WARNING
Make sure that the rear seat backrest is cor-
rectly engaged. Otherwise, vehicle occupants Stowage areas
297Stowing and features
Z
Page 311 of 409
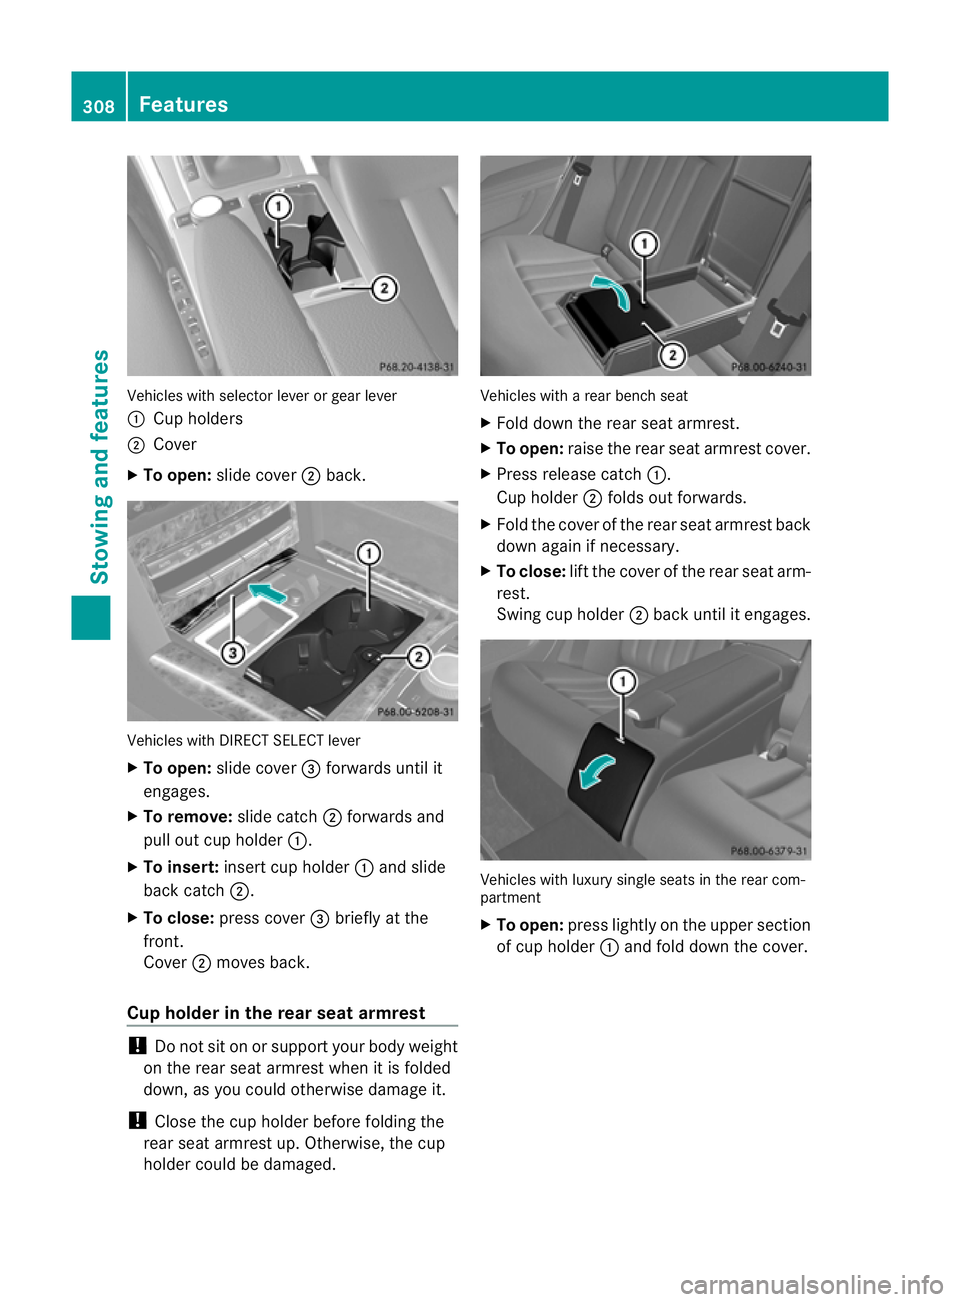
Vehicles with selector lever or gear lever
: Cup holders
; Cover
X To open: slide cover ;back. Vehicles with DIRECT SELECT lever
X
To open: slide cover =forwards until it
engages.
X To remove: slide catch;forwards and
pull out cup holder :.
X To insert: insert cup holder :and slide
back catch ;.
X To close: press cover =briefly at the
front.
Cover ;moves back.
Cup holder in the rear seat armrest !
Do not sit on or support yourb ody weight
on the rear seat armrest when it is folded
down, as you could otherwise damage it.
! Close the cup holder before folding the
rear seat armrest up. Otherwise, the cup
holder could be damaged. Vehicles with a rear bench seat
X
Fold down the rear seat armrest.
X To open: raise the rear seat armrest cover.
X Press release catch :.
Cup holder ;folds out forwards.
X Fold the cover of the rear seat armrest back
down again if necessary.
X To close: lift the cover of the rear seat arm-
rest.
Swing cup holder ;back until it engages. Vehicles with luxury single seats in the rear com-
partment
X
To open: press lightly on the upper section
of cup holder :and fold down the cover. 308
FeaturesStowing and features