2011 MERCEDES-BENZ C-CLASS ESTATE warning light
[x] Cancel search: warning lightPage 218 of 401
X
Activate Active Lane Keeping Assist using
the on-board compute r(Ypage 238).
Symbol :appears in the multifunction
display.
If you drive at speeds above 60 km/h and
lane markings are detected, symbol :is
shown in green .Active Lane Keeping Assist
is ready for use.
Trailer towing
If you attach a trailer, make sure that you have
correctly established the electrical connec-
tion. This can be accomplished by checking
the traile rlighting. Towing
atrailer Notes on towing
atrailer
Important safety notes G
WARNING
When reversing the vehicle towards the
trailer, make sure there is nobody between
the trailer and the vehicle.
Couple and uncouple the trailer carefully .If
you do no tcouple the trailer to the towing
vehicle correctly, the trailer could become
detached.
Make sure that the following values are not
exceeded:
R the permissible trailer drawbar noseweight
R the permissible trailer load
R the permissible rear axle load of the towing
vehicle
R the maximum permissible gross vehicle
weight of both the towing vehicle and the
trailer
You will find the applicable permissible val-
ues, which must not be exceeded, in the vehi-
cle documents.
You will find the values approved by the man-
ufacturer on the vehicle identification plates
and those for the towing vehicle in the "Tech-
nical data" section. G
WARNING
If the Check trailer hitch locking mechanism message appears in the multi-
function display while the vehicle is in motion,
pull over immediately and check whether the
ball coupling is correctly engaged. G
WARNING
Always observe the maximum speed permit-
ted in Germany for vehicle/trailer combina-
tions, even in countries where higher speeds
are permitted. This lowers the risk of an acci-
dent. G
WARNING
Never depress the brake pedal continuously
while the vehicle is in motion, e.g. never cause
the brakes to rub by applying constant slight
pedal pressure. This causes the brake system
to overheat, increases the braking distance
and can lead to the brakes failing completely. G
WARNING
On no account should you attempt to draw the
vehicle/trailer combination out by increasing
speed. G
WARNING
If you exceed the maximum noseweight when
using a carrier system on the ball coupling:
R the carrier system may be thrown around.
R the ball coupling and the carrier system
may become detached from the vehicle.
As a result, you may injure others or cause an
accident.
Do not exceed the maximum noseweight.
When driving with a loaded carrier system,
always adjust your driving style to the prevail-
ing road, traffic and weather conditions and
drive particularly carefully.
You can use carrier systems, e.g. bicycle
racks or load-bearing implements on the ball
coupling. The maximum noseweight of 75 kg
applies when using carrier systems on the ball
coupling. Towing
atrailer
215Driving an d parking Z
Page 221 of 401
X
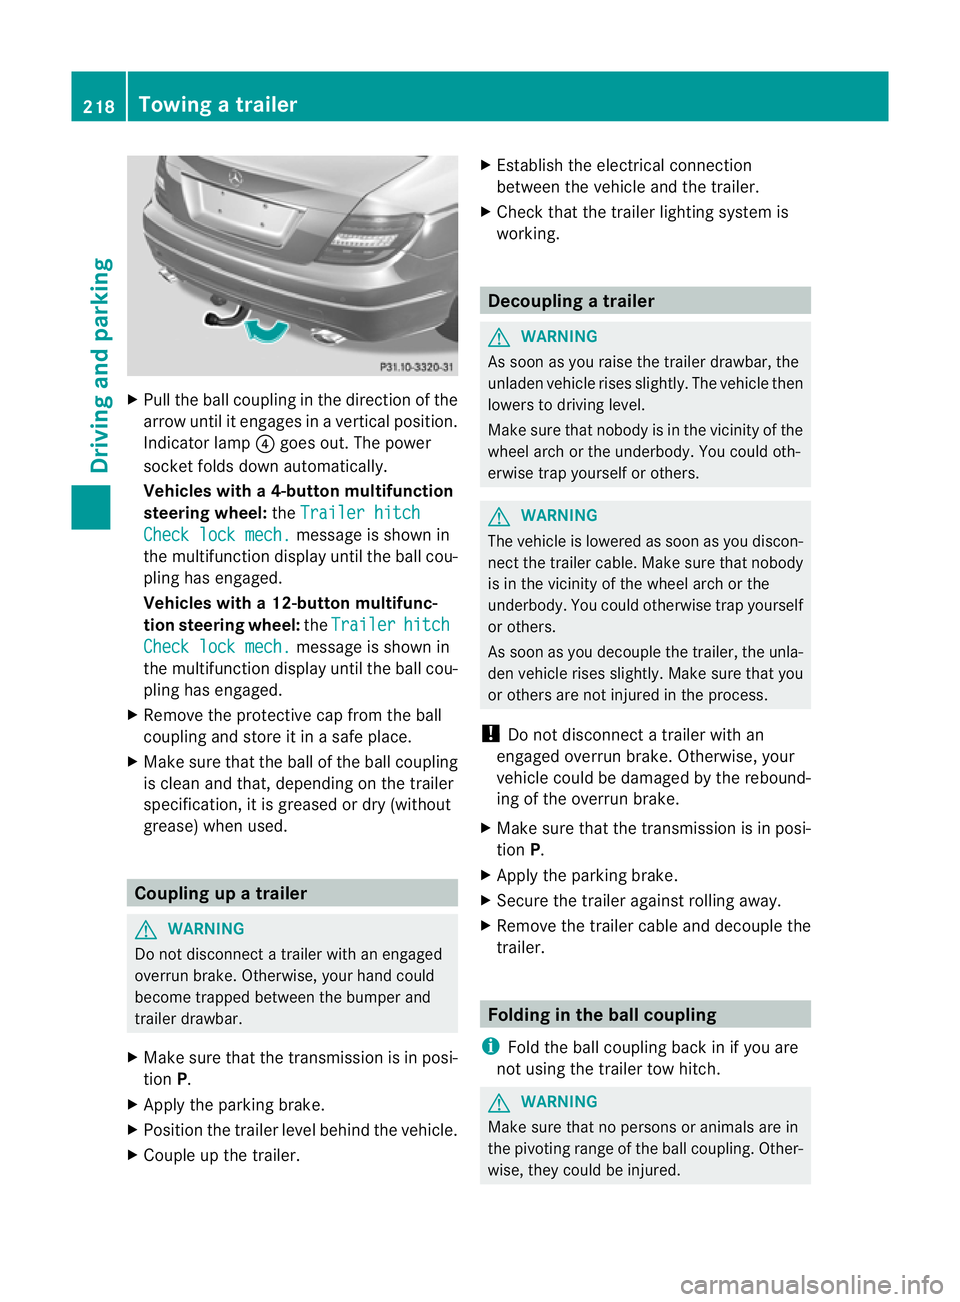
Pull the ball coupling in the direction of the
arrow until it engages in a vertical position.
Indicator lamp ?goes out. The power
socket folds down automatically.
Vehicles with a4-button multifunction
steering wheel: theTrailer hitch Check lock mech. message is show
nin
the multifunctio ndisplay until the ball cou-
pling has engaged.
Vehicles with a 12-button multifunc-
tion steering wheel: theTrailer hitch
Check lock mech. message is shown in
the multifunction display until the ball cou-
pling has engaged.
X Remove the protective cap fro mthe ball
coupling and store it in a safe place.
X Make sure that the ball of the ball coupling
is clean and that, depending on the trailer
specification, it is greased or dry (without
grease) when used. Coupling up a trailer
G
WARNING
Do not disconnect a trailer with an engaged
overrun brake. Otherwise, your hand could
become trapped between the bumper and
trailer drawbar.
X Make sure that the transmission is in posi-
tion P.
X Apply the parking brake.
X Position the trailer level behind the vehicle.
X Couple up the trailer. X
Establish the electrical connection
between the vehicle and the trailer.
X Check that the trailer lighting system is
working. Decoupling
atrailer G
WARNING
As soon as you raise the trailer drawbar, the
unladen vehicle rises slightly. The vehicle then
lowers to driving level.
Make sure tha tnobody is in the vicinity of the
wheel arch or the underbody. You could oth-
erwise trap yourself or others. G
WARNING
The vehicle is lowered as soon as you discon-
nect the trailer cable. Make sure that nobody
is in the vicinity of the wheel arch or the
underbody. You could otherwise trap yourself
or others.
As soon as you decouple the trailer, the unla-
den vehicle rises slightly. Make sure that you
or others are not injured in the process.
! Do not disconnect a trailer with an
engaged overrun brake. Otherwise, your
vehicle could be damaged by the rebound-
ing of the overrun brake.
X Make sure that the transmission is in posi-
tion P.
X Apply the parking brake.
X Secure the trailer against rolling away.
X Remove the trailer cable and decouple the
trailer. Folding in the ball coupling
i Fold the ball coupling back in if you are
not using the trailer tow hitch. G
WARNING
Make sure that no persons or animals are in
the pivoting range of the ball coupling. Other-
wise, they could be injured. 218
Towing
atrailerDriving an d parking
Page 226 of 401
G
WARNING
At temperatures just above freezing point, the
street may be icy, especially in wooded areas
or on bridges. If you do not adapt yourd riving
style to the conditions, the vehicle could skid.
For this reason, adapt yourd riving style and
speed to the weather conditions.
Changes in the outside temperature are dis-
played after a short delay. Operating the on-board computer
The on-board computer is activated as soon
as you turn the key to position 1in the ignition
lock. You can use the on-board computer to
call up informatio nrelating to your vehicle
and to make and adjust settings.
i You can have certain functions set at a
qualified specialist workshop, e.g. a
Mercedes-Benz Service Centre.
Example:
R automatic door lock
R speed limit for winter tyres
You can obtain information about this at
any Mercedes-Benz Service Centre.
You can control the multifunction display and
the settings in the on-board computer using
the buttons on the multifunction steering
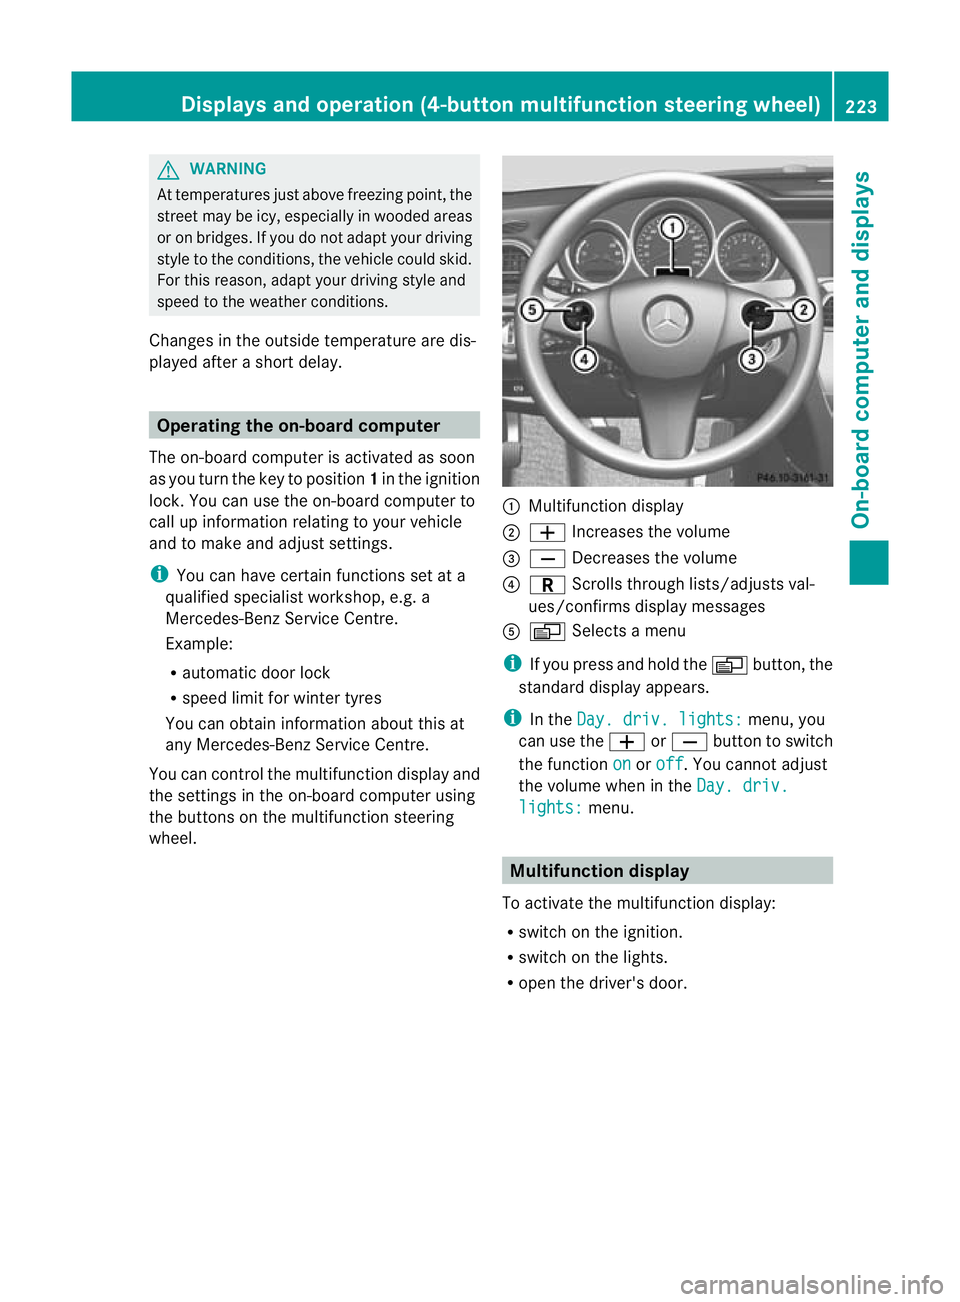
wheel. :
Multifunction display
; W Increases the volume
= X Decreases the volume
? C Scrolls through lists/adjusts val-
ues/confirms display messages
A V Selects a menu
i If you press and hold the Vbutton, the
standard display appears.
i In the Day. driv. lights: menu, you
can use the WorX button to switch
the function on or
off .Y
ou cannot adjust
the volume when in the Day. driv. lights: menu.
Multifunction display
To activate the multifunction display:
R switch on the ignition.
R switch on the lights.
R open the driver's door. Displays and operation (4-button multifunction steering wheel)
223On-board computer and displays Z
Page 230 of 401
Outside temperature display
The outside temperature display is in the mul-
tifunction display (Y page 228). G
WARNING
At temperatures just above freezing point, the
street may be icy, especially in wooded areas
or on bridges. If you do not adapt your driving
style to the conditions ,the vehicle could skid.
For this reason, adapt your driving style and
speed to the weather conditions.
Changes in the outside temperature are dis-
played after a short delay. Speedometer with segments
The segments in the speedometer indicate
which speed range is available.
Cruise control (Y page 178) activated:
The segments light up from the stored speed
to the maximum speed.
Variable SPEEDTRONIC (Y page 180) activa-
ted:
The segments light up from the start of the
scale to the selected limit speed.
DISTRONIC PLUS (Y page 183) activated:
One or two segments in the set speed range
light up.
DISTRONIC PLUS detects a vehicle in front:
The segments between the speed of the vehi-
cle in front and the stored speed light up. Operating the on-board computer
Overview The on-board computer is activated as soon
as you turn the key to position 1in the ignition
lock.
You can control the multifunction display and
the settings in the on-board computer using
the buttons on the multifunction steering
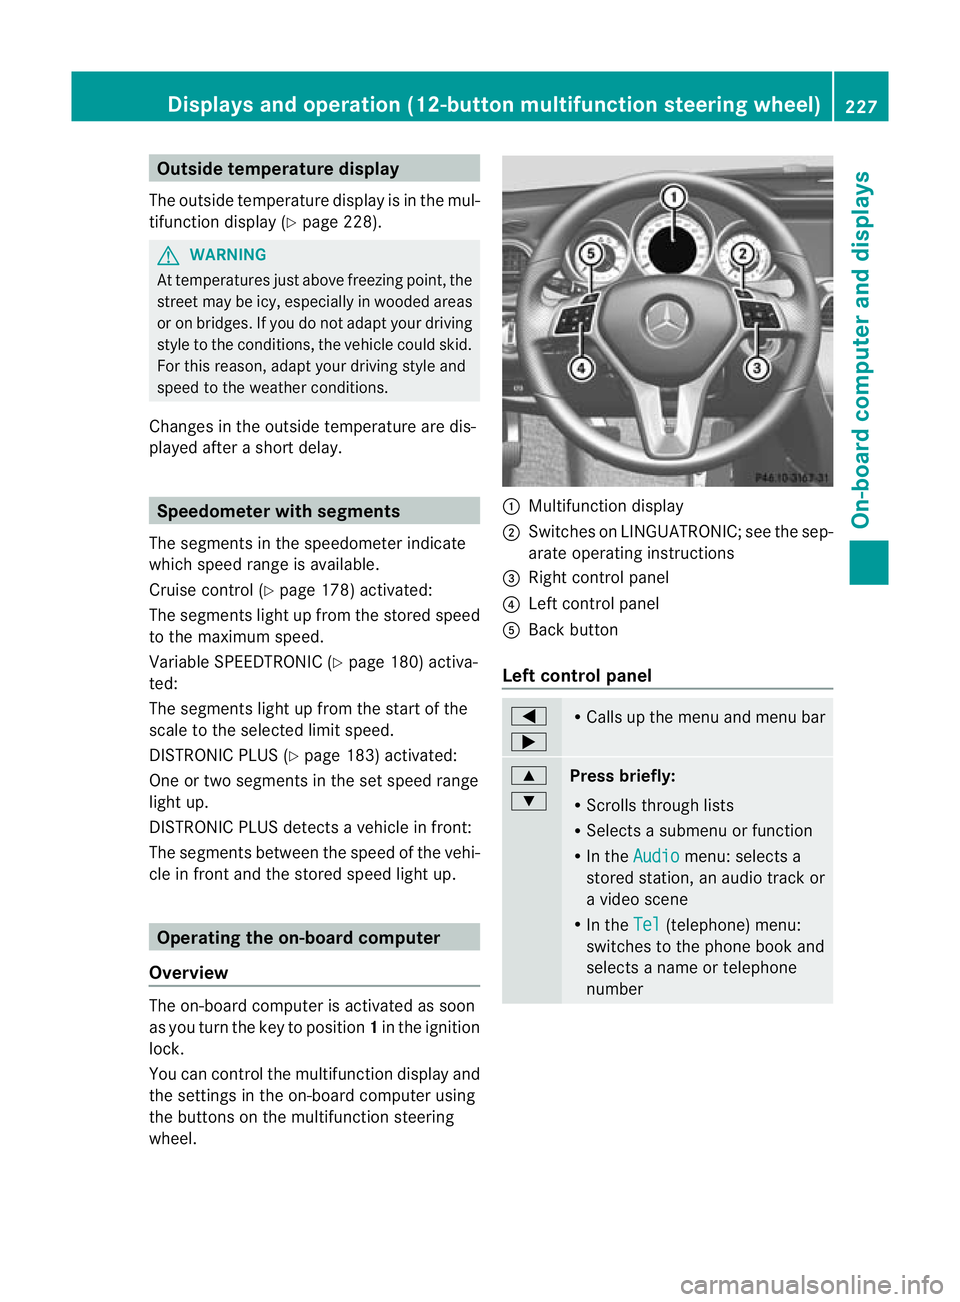
wheel. :
Multifunction display
; Switches on LINGUATRONIC; see the sep-
arate operating instructions
= Right control panel
? Left control panel
A Back button
Left control panel =
; R
Calls up the menu and menu bar 9
:
Press briefly:
R
Scrolls through lists
R Selects a submenu or function
R In the Audio menu: selects a
stored station, an audio track or
a video scene
R In the Tel (telephone) menu:
switches to the phone book and
selects a name or telephone
number Displays and operation (12-button multifunction steering wheel)
227On-board computer and displays Z
Page 233 of 401
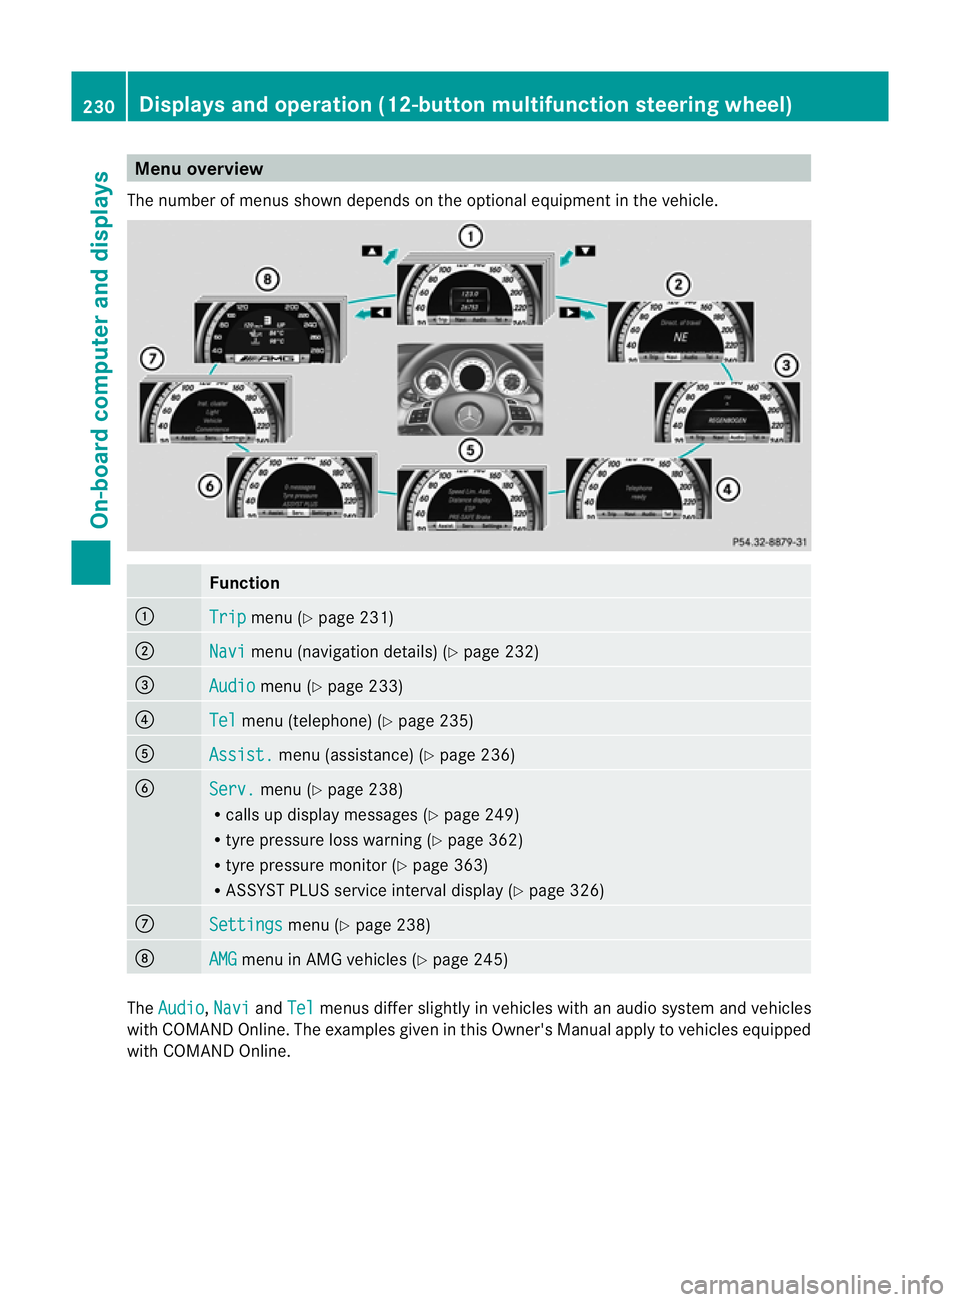
Menu overview
The number of menus show ndepends on the optional equipment in the vehicle. Function
:
Trip menu (Y
page 231) ;
Navi menu (navigation details) (Y
page 232)=
Audio menu (Y
page 233) ?
Tel menu (telephone) (Y
page 235)A
Assist. menu (assistance) (Y
page 236)B
Serv. menu (Y
page 238)
R calls up display messages ( Ypage 249)
R tyre pressure loss warning (Y page 362)
R tyre pressure monitor (Y page 363)
R ASSYST PLUS service interval display (Y page 326)C
Settings menu (Y
page 238) D
AMG menu in AMG vehicles (Y
page 245)The
Audio ,
Navi and
Tel menus differ slightly in vehicles with an audio system and vehicles
with COMAND Online. The examples given in this Owner's Manual apply to vehicles equipped
with COMAND Online. 230
Displays and operation (12-button multifunction steering wheel)On-board computer and displays
Page 240 of 401
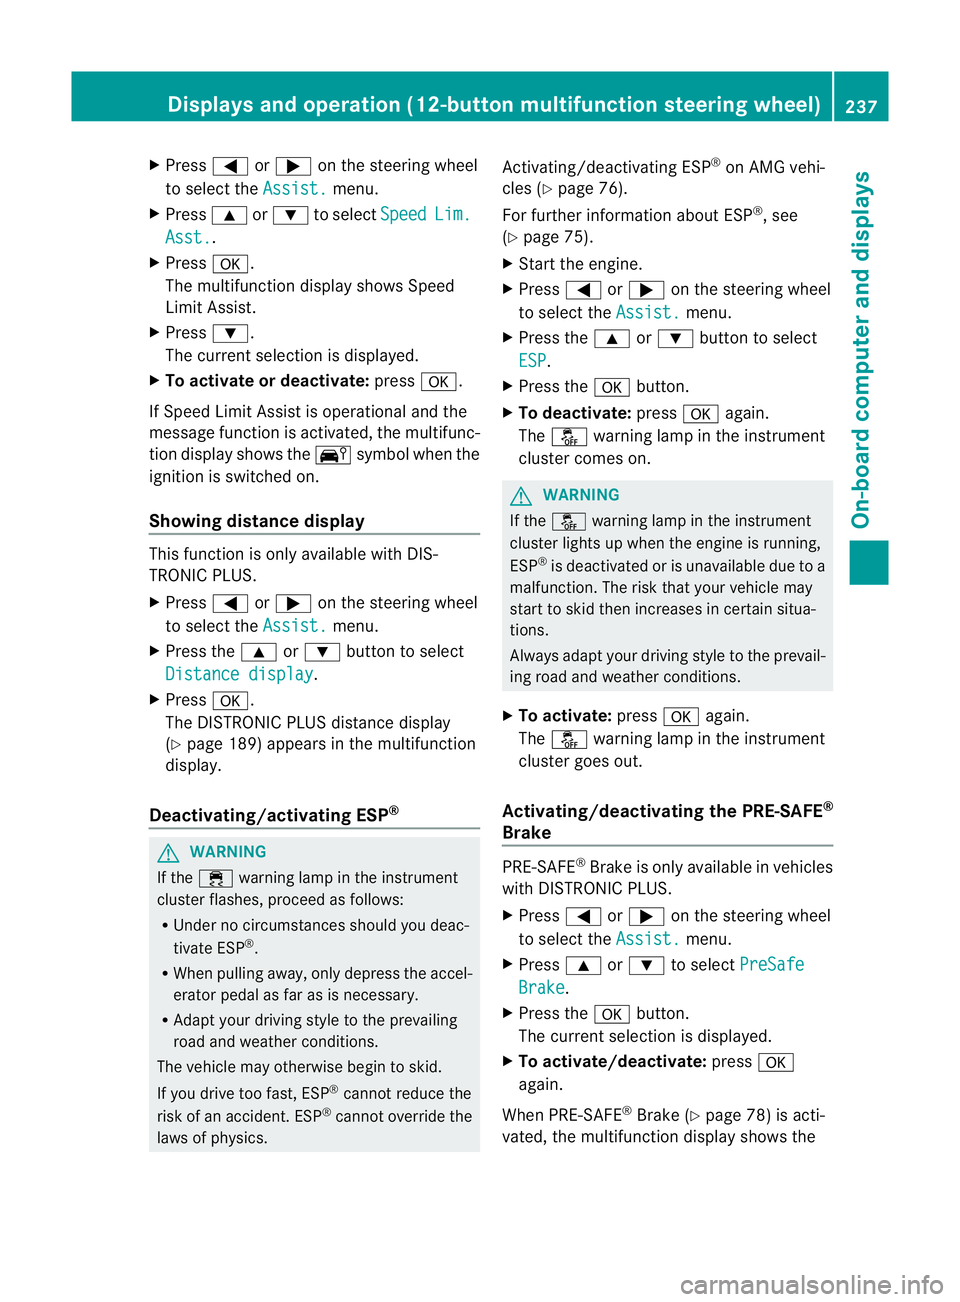
X
Press =or; on the steering wheel
to select the Assist. menu.
X Press 9or: to select Speed Lim.
Asst. .
X Press a.
The multifunction display shows Speed
Limit Assist.
X Press :.
The curren tselection is displayed.
X To activate or deactivate: pressa.
If Speed Limit Assist is operational and the
message function is activated, the multifunc-
tion display shows the Äsymbol when the
ignition is switched on.
Showing distance display This function is only available with DIS-
TRONIC PLUS.
X
Press =or; on the steering wheel
to select the Assist. menu.
X Press the 9or: button to select
Distance display .
X Press a.
The DISTRONIC PLUS distance display
(Y page 189) appears in the multifunction
display.
Deactivating/activating ESP ®G
WARNING
If the ÷ warning lamp in the instrument
cluster flashes, proceed as follows:
R Under no circumstances should you deac-
tivate ESP ®
.
R When pulling away, only depress the accel-
erator pedal as far as is necessary.
R Adapt your driving style to the prevailing
road and weather conditions.
The vehicle may otherwise begin to skid.
If you drive too fast, ESP ®
cannot reduce the
risk of an accident. ESP ®
cannot override the
laws of physics. Activating/deactivating ESP
®
on AMG vehi-
cles (Y page 76).
For further information about ESP ®
, see
(Y page 75).
X Start the engine.
X Press =or; on the steering wheel
to select the Assist. menu.
X Press the 9or: button to select
ESP .
X Press the abutton.
X To deactivate: pressaagain.
The å warning lamp in the instrument
cluster comes on. G
WARNING
If the å warning lamp in the instrument
cluster lights up when the engine is running,
ESP ®
is deactivated or is unavailable due to a
malfunction. The risk that your vehicle may
start to skid then increases in certain situa-
tions.
Always adapt your driving style to the prevail-
ing road and weather conditions.
X To activate: pressaagain.
The å warning lamp in the instrument
cluster goes out.
Activating/deactivating the PRE-SAFE ®
Brake PRE-SAFE
®
Brake is only available in vehicles
with DISTRONIC PLUS.
X Press =or; on the steering wheel
to select the Assist. menu.
X Press 9or: to select PreSafe Brake .
X Press the abutton.
The curren tselection is displayed.
X To activate/deactivate: pressa
again.
When PRE-SAFE ®
Brake (Y page 78) is acti-
vated, the multifunction display shows the Displays and operation (12-button multifunction steering wheel)
237On-board computer and displays Z
Page 241 of 401
Ä
symbol as long as the HOLD function is
not activated (Y page 193).
Vehicles with Parking Guidance: if PARK-
TRONIC is activated and you are driving at a
speed under 35 km/h, the jParking Guid-
ance symbol is shown instead of the Ä
symbol.
Activating/deactivating ATTENTION
ASSIST X
Press =or; on the steering wheel
to select the Assist. menu.
X Press the 9or: button to select
Attention Asst. .
X Press a.
The current selection is displayed.
X To activate/deactivate: pressa
again.
When ATTENTION ASSIST (Y page 203) is
activated, the Àsymbol appears in the
multifunction display when the ignition is on.
Activating/deactivating Blind Spot
Assist You can use the
Blind Spot Asst. function
to activate or deactivate Blind Spot Assist
(Y page 205) or Active Blind Spot Assist
(Y page 209).
X Press =or; on the steering wheel
to select the Assist. menu.
X Press 9or: to select Blind Spot
Asst. .
X Press a.
If the function is activated, the monitored
areas in the multifunction display light up
red.
X To activate/deactivate: pressa
again.
Activating/deactivating Lane Keeping
Assist You can use the
Lane Keep. Asst. function
to activate/deactivate Lane Keeping Assist (Y
page 208) or Active Lane Keeping Assist
(Y page 212).
X Press =or; on the steering wheel
to select the Assist. menu.
X Press 9or: to select Lane Keep.
Asst. .
X Press a.
If the function is activated, the lane marking
symbol in the multifunction display lights
up red.
X To activate/deactivate: pressa
again.
When Lane Keeping Assist or Active Lane
Keeping Assist is activated, the Ãsymbol
appears in the multifunction display when the
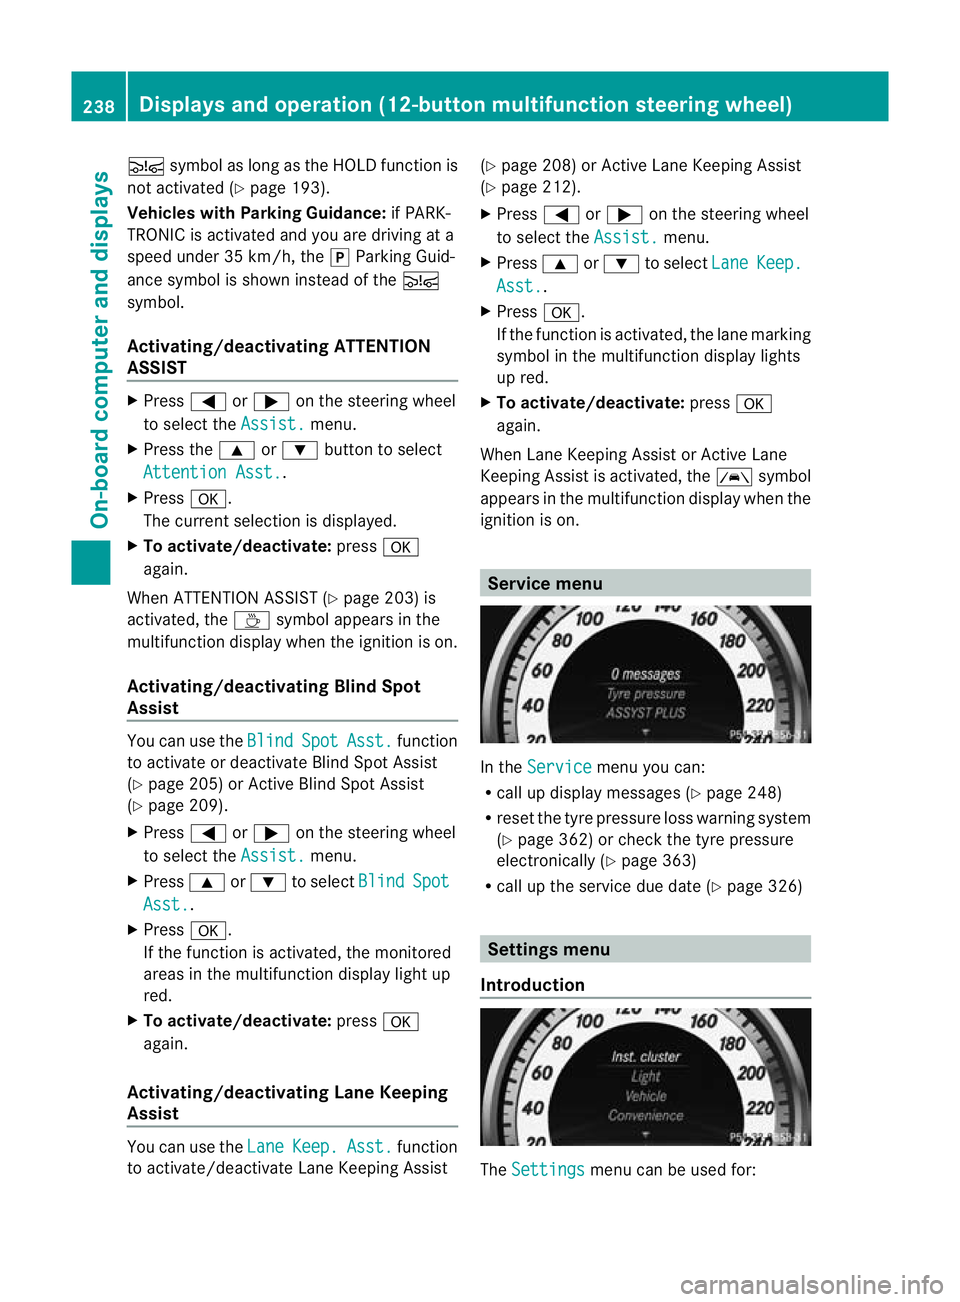
ignition is on. Service menu
In the
Service menu you can:
R call up display messages (Y page 248)
R reset the tyre pressure loss warning system
(Y page 362) or check the tyre pressure
electronically (Y page 363)
R call up the service due date (Y page 326) Settings menu
Introduction The
Settings menu can be used for:238
Displays and operation (12-button multifunction steering wheel)On-board computer and displays
Page 246 of 401
The auxiliary heating timer function calcu-
lates the switch-on time according to the out-
side temperature so that the vehicle is pre-
heated by the departure time. When the
departure time is reached, the auxiliary heat-
ing continues to heat for a further five
minutes and then switches off. The auxiliary
heating adopts the THERMATIC or
THERMOTRONIC temperature setting.
You can switch off the auxiliary heating by
using the remote control or the auxiliary heat-
ing button on the centre console. G
WARNING
Exhaust fumes are produced when the auxili-
ary heating is in operation. Inhaling these
exhaust fumes can be poisonous. You should
therefore switch off the auxiliary heating in
confined spaces without an extraction sys-
tem, e.g. a garage. G
WARNING
When operating the auxiliary heating parts of
the vehicle can get very hot. Make sure that
the exhaust system does not under any cir-
cumstances come into contact with easily
ignitable material such as dry grass or fuels.
The material could otherwise ignite and set
the vehicle alight. Choose your parking spot
accordingly.
Operating the auxiliary heating is thus pro-
hibited at filling stations or when your vehicle
is being refuelled. You must therefore switch
off the auxiliary heating at filling stations.
! Operating the auxiliary heating/ventila-
tion draws on the vehicle battery. After you
have heated or ventilated the vehicle a
maximum of two times, drive for a longer
distance.
i Switch the auxiliary heating on regularly
once a month for about 10 minutes. Selecting the departure time or deactivat-
ing a selected departure time
X
Press the =or; button on the steer-
ing wheel to select the Settings menu.
X Press the :or9 button to select the
Heating submenu.
X Press the abutton to confirm.
You will see the selected setting.
X Press the abutton to confirm.
X Press the :or9 button to select
one of the three departure times or Timer off (no timer active).
X Press the abutton to confirm.
When a departure time is selected, the yel-
low indicator lamp lights up on the auxiliary
heating button.
Changing the departure time
X Press the =or; button on the steer-
ing wheel to select the Settings menu.
X Press the :or9 button to select the
Heating submenu.
X Press the abutton to confirm.
You will see the selected setting.
X Press the abutton to confirm.
X Press the :or9 button to select
Change A ,
B or
C .
X Press the abutton to confirm.
You can now change the departure time.
X Press the =or; button to select the
display to be changed: hours, minutes.
X Press the :or9 button to set the
selected display.
X Press the abutton to store the entry.
The yellow indicator lamp on the auxiliary
heating button lights up.
Convenience Activating/deactivating the EASY-
ENTRY/EXIT feature
You can use the
Easy Entry/Exit: function
to activate or deactivate the EASY ENTRY/
EXIT feature (Y page 111). Displays and operation (12-button multifunction steering wheel)
243On-board computer and displays Z