2011 MERCEDES-BENZ C-CLASS ESTATE change wheel
[x] Cancel search: change wheelPage 243 of 401
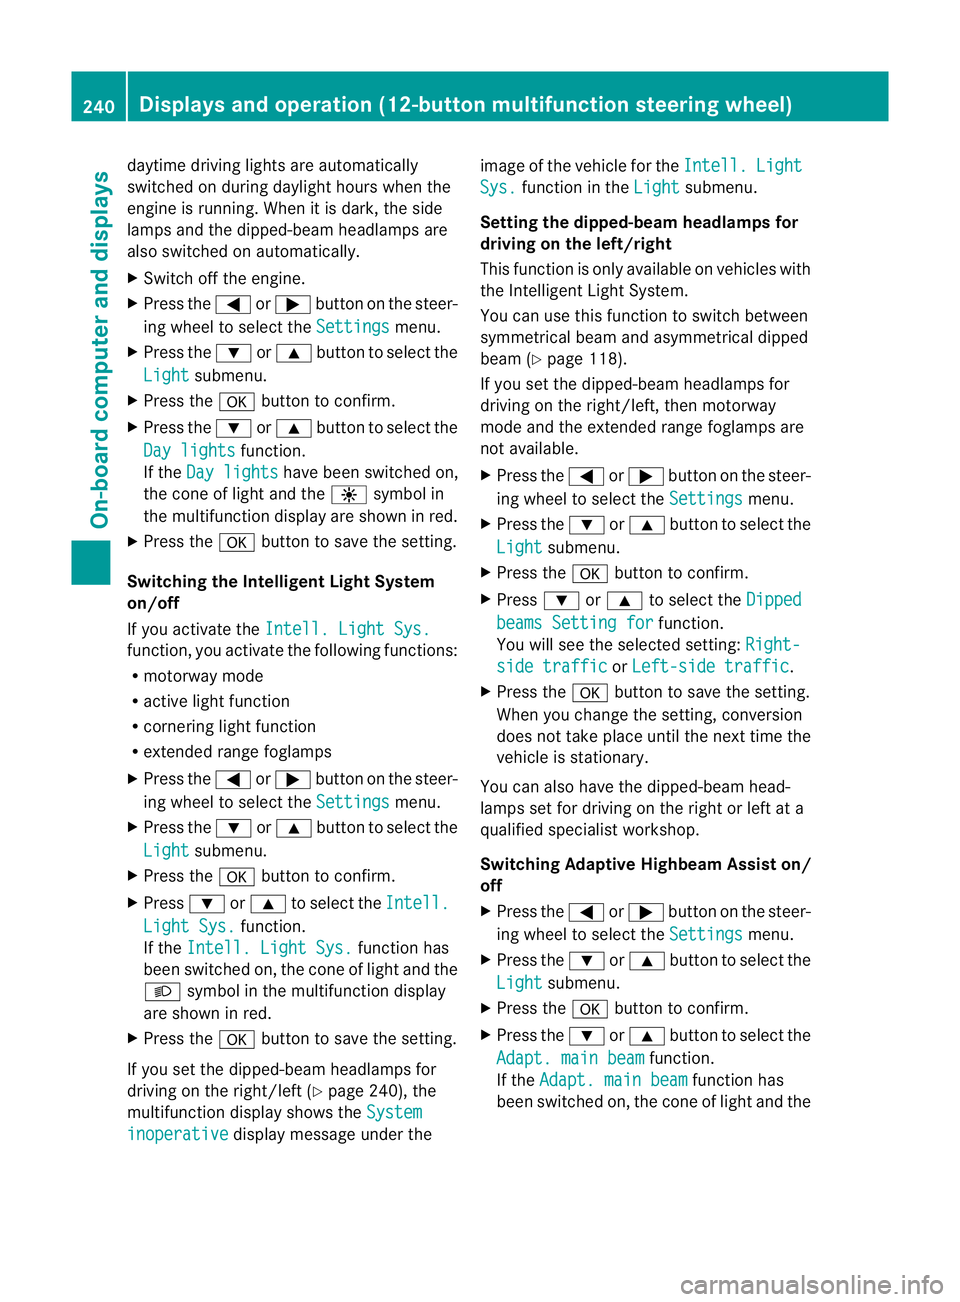
daytime driving lights are automatically
switched on during daylight hours when the
engine is running. When it is dark, the side
lamps and the dipped-beam headlamps are
also switched on automatically.
X
Switch off the engine.
X Press the =or; button on the steer-
ing wheel to select the Settings menu.
X Press the :or9 button to select the
Light submenu.
X Press the abutton to confirm.
X Press the :or9 button to select the
Day lights function.
If the Day lights have been switched on,
the cone of light and the Wsymbol in
the multifunction display are shown in red.
X Press the abutton to save the setting.
Switching the Intelligent Light System
on/off
If you activate the Intell. Light Sys.function, you activate the following functions:
R
motorway mode
R active light function
R cornering light function
R extended range foglamps
X Press the =or; button on the steer-
ing wheel to select the Settings menu.
X Press the :or9 button to select the
Light submenu.
X Press the abutton to confirm.
X Press :or9 to select the Intell. Light Sys. function.
If the Intell. Light Sys. function has
been switched on, the cone of light and the
L symbol in the multifunction display
are shown in red.
X Press the abutton to save the setting.
If you set the dipped-beam headlamps for
driving on the right/left (Y page 240), the
multifunction display shows the Systeminoperative display message under the image of the vehicle for the
Intell. Light
Sys. function in the
Light submenu.
Setting the dipped-beam headlamps for
driving on the left/right
This function is only available on vehicles with
the Intelligent Light System.
You can use this function to switch between
symmetrical beam and asymmetrical dipped
beam (Y page 118).
If you set the dipped-beam headlamps for
driving on the right/left, then motorway
mode and the extended range foglamps are
not available.
X Press the =or; button on the steer-
ing wheel to select the Settings menu.
X Press the :or9 button to select the
Light submenu.
X Press the abutton to confirm.
X Press :or9 to select the Dipped beams Setting for function.
You will see the selected setting: Right- side traffic or
Left-side traffic .
X Press the abutton to save the setting.
When you change the setting, conversion
does not take place until the nex ttime the
vehicle is stationary.
You can also have the dipped-beam head-
lamps set for driving on the right or left at a
qualified specialist workshop.
Switching Adaptive Highbeam Assist on/
off
X Press the =or; button on the steer-
ing wheel to selec tthe Settings menu.
X Press the :or9 button to select the
Light submenu.
X Press the abutton to confirm.
X Press the :or9 button to select the
Adapt. main beam function.
If the Adapt. main beam function has
been switched on, the cone of light and the 240
Displays and operation (12-button multifunction steering wheel)On-board computer and displays
Page 245 of 401
X
Press the abutton to confirm.
X Press :or9 to adjust permanent
SPEEDTRONIC in increments of 10
(230 km/h to
160 km/h ). The
Off setting
switches permanent SPEEDTRONIC off.
X Press the abutton to store the entry.
Switching the automatic locking feature
on/off
If you select the Automatic door lock func-
tion, the vehicle is centrally locked above a
speed of around 15 km/h.
i For further information on the automatic
locking feature, see (Y page 90).
X Press the =or; button on the steer-
ing wheel to select the Settings menu.
X Press the :or9 button to select the
Vehicle submenu.
X Press the abutton to confirm.
X Press the :or9 button to select the
Automatic door lock function.
When the Automatic door locks func-
tion is activated, the vehicle doors are dis-
played in red in the multifunction display.
X Press the abutton to save the setting.
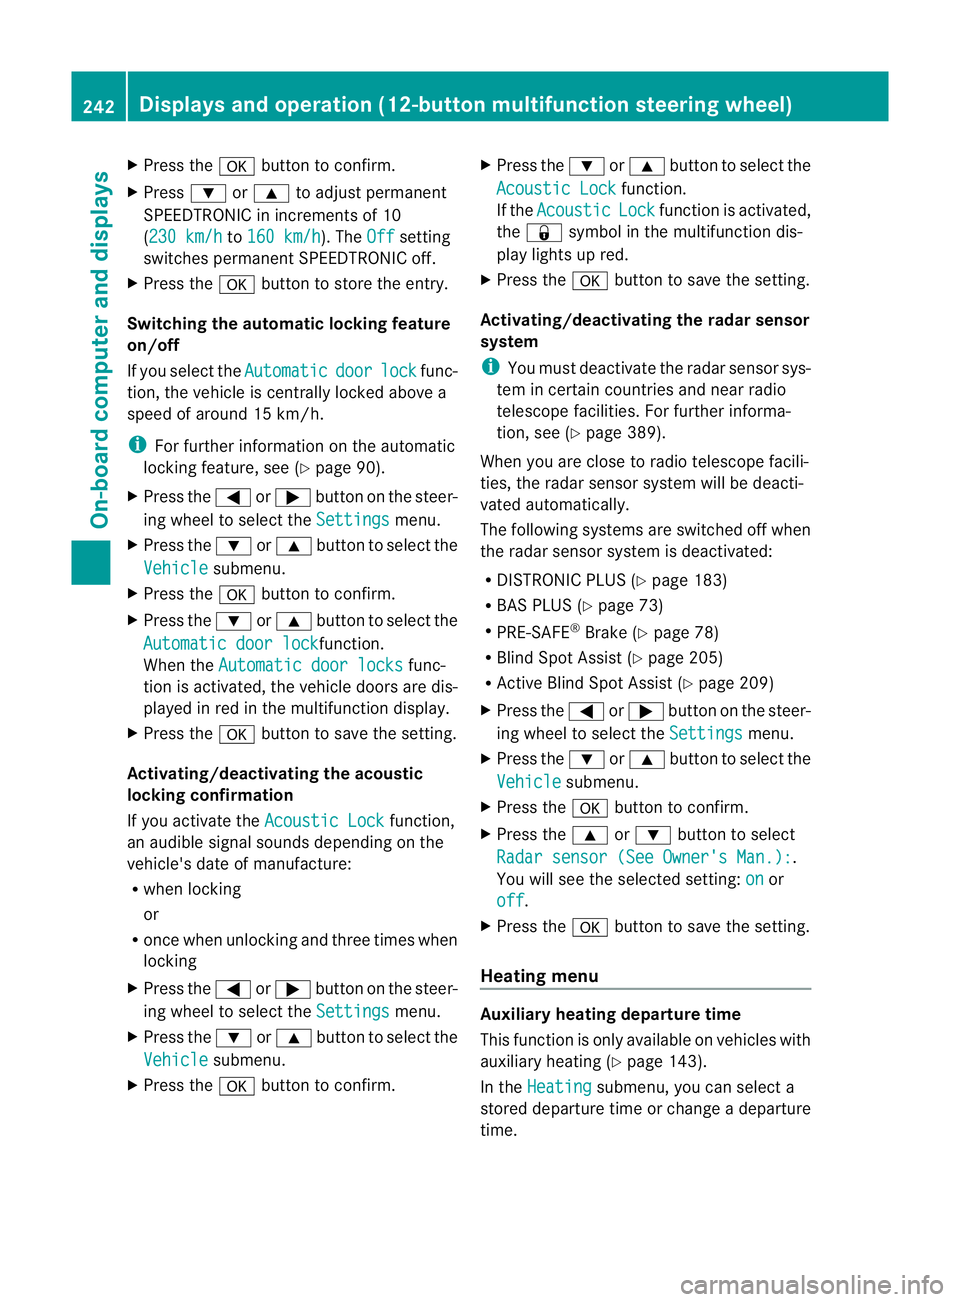
Activating/deactivating the acoustic
locking confirmation
If you activate the Acoustic Lock function,
an audible signal sounds depending on the
vehicle's date of manufacture:
R when locking
or
R once when unlocking and three times when
locking
X Press the =or; button on the steer-
ing wheel to select the Settings menu.
X Press the :or9 button to select the
Vehicle submenu.
X Press the abutton to confirm. X
Press the :or9 button to select the
Acoustic Lock function.
If the Acoustic Lock function is activated,
the & symbol in the multifunction dis-
play lights up red.
X Press the abutton to save the setting.
Activating/deactivating the radar sensor
system
i You must deactivate the radar sensor sys-
tem in certain countries and near radio
telescope facilities. For further informa-
tion, see (Y page 389).
When you are close to radio telescope facili-
ties, the radar sensor system will be deacti-
vated automatically.
The following systems are switched off when
the radar sensor system is deactivated:
R DISTRONIC PLUS (Y page 183)
R BAS PLUS (Y page 73)
R PRE-SAFE ®
Brake (Y page 78)
R Blind Spot Assist (Y page 205)
R Active Blind Spot Assist (Y page 209)
X Press the =or; button on the steer-
ing wheel to select the Settings menu.
X Press the :or9 button to select the
Vehicle submenu.
X Press the abutton to confirm.
X Press the 9or: button to select
Radar sensor (See Owner's Man.): .
You will see the selected setting: on or
off .
X Press the abutton to save the setting.
Heating menu Auxiliary heating departure time
This function is only available on vehicles with
auxiliary heating (Y
page 143).
In the Heating submenu, you can select a
stored departure time or change a departure
time. 242
Displays and operation (12-button multifunction steering wheel)On-board computer and displays
Page 246 of 401
The auxiliary heating timer function calcu-
lates the switch-on time according to the out-
side temperature so that the vehicle is pre-
heated by the departure time. When the
departure time is reached, the auxiliary heat-
ing continues to heat for a further five
minutes and then switches off. The auxiliary
heating adopts the THERMATIC or
THERMOTRONIC temperature setting.
You can switch off the auxiliary heating by
using the remote control or the auxiliary heat-
ing button on the centre console. G
WARNING
Exhaust fumes are produced when the auxili-
ary heating is in operation. Inhaling these
exhaust fumes can be poisonous. You should
therefore switch off the auxiliary heating in
confined spaces without an extraction sys-
tem, e.g. a garage. G
WARNING
When operating the auxiliary heating parts of
the vehicle can get very hot. Make sure that
the exhaust system does not under any cir-
cumstances come into contact with easily
ignitable material such as dry grass or fuels.
The material could otherwise ignite and set
the vehicle alight. Choose your parking spot
accordingly.
Operating the auxiliary heating is thus pro-
hibited at filling stations or when your vehicle
is being refuelled. You must therefore switch
off the auxiliary heating at filling stations.
! Operating the auxiliary heating/ventila-
tion draws on the vehicle battery. After you
have heated or ventilated the vehicle a
maximum of two times, drive for a longer
distance.
i Switch the auxiliary heating on regularly
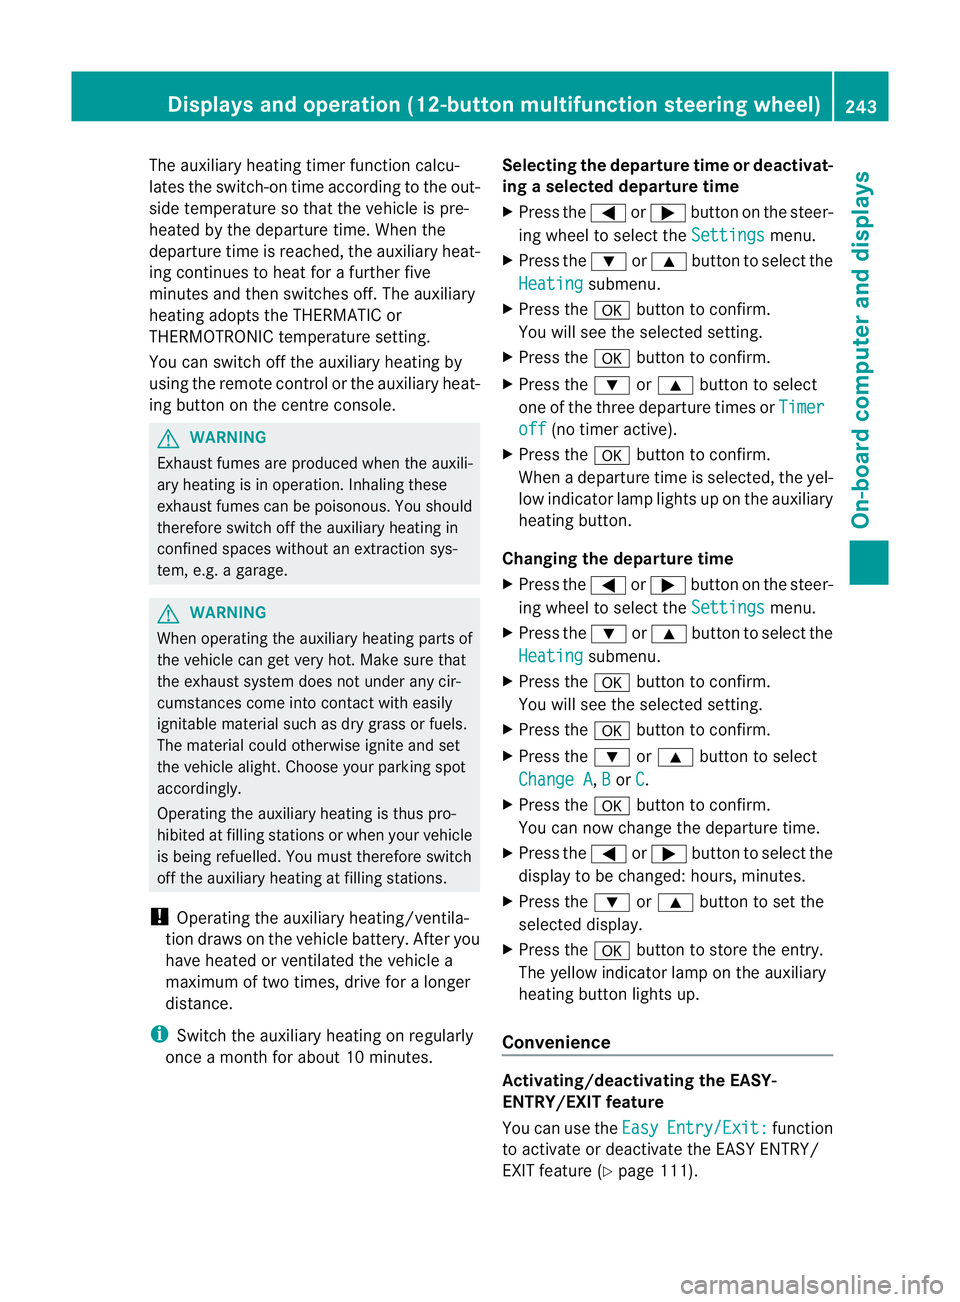
once a month for about 10 minutes. Selecting the departure time or deactivat-
ing a selected departure time
X
Press the =or; button on the steer-
ing wheel to select the Settings menu.
X Press the :or9 button to select the
Heating submenu.
X Press the abutton to confirm.
You will see the selected setting.
X Press the abutton to confirm.
X Press the :or9 button to select
one of the three departure times or Timer off (no timer active).
X Press the abutton to confirm.
When a departure time is selected, the yel-
low indicator lamp lights up on the auxiliary
heating button.
Changing the departure time
X Press the =or; button on the steer-
ing wheel to select the Settings menu.
X Press the :or9 button to select the
Heating submenu.
X Press the abutton to confirm.
You will see the selected setting.
X Press the abutton to confirm.
X Press the :or9 button to select
Change A ,
B or
C .
X Press the abutton to confirm.
You can now change the departure time.
X Press the =or; button to select the
display to be changed: hours, minutes.
X Press the :or9 button to set the
selected display.
X Press the abutton to store the entry.
The yellow indicator lamp on the auxiliary
heating button lights up.
Convenience Activating/deactivating the EASY-
ENTRY/EXIT feature
You can use the
Easy Entry/Exit: function
to activate or deactivate the EASY ENTRY/
EXIT feature (Y page 111). Displays and operation (12-button multifunction steering wheel)
243On-board computer and displays Z
Page 264 of 401

Display messages Possible causes/consequences and
M Solutions
6
Rear centre mal‐
function Consult
workshop G
Risk of injury
SRS has malfunctioned at the rear centre. The 6warning lamp
also lights up in the instrumen tcluster.
X Visit a qualified specialist workshop. 6
Left
windowbag mal‐
function Consult
workshop orRight
windowbag malfunc‐
tion Consult work‐
shop G
Risk of injury
There is a malfunction in the left-hand and/or right-hand window-
bag. The 6warning lamp also lights up in the instrumen tclus-
ter.
X Visit a qualified specialist workshop. Lights (4-button multifunction steering wheel)
i Display messages about LEDs:
This display message will only appear if all LEDs have failed. Displa
ymessages Possible causes/consequences and
M Solutions
b
Left corner. light
or
Right corner. light The left or right-hand cornering light is faulty.
X
Chec kwhether you are permitted to change the bulb yourself
(Y page 125).
or
X Visit a qualified specialist workshop. b
Left dipped beam
or
Right dipped-beam The left or right-hand dipped-beamh
eadlamp is faulty.
X Check whether you are permitted to change the bulb yourself
(Y page 125).
or
X Visit a qualified specialist workshop. b
Trailer left tail
lamp or
Trailer right tail lamp The left or right-hand trailer tail lamp is faulty.
X
Check whether you are permitted to change the bulb yourself.
or
X Visit a qualified specialist workshop. b
Trailer
left indic.
or
Trailer right indic. The left or right-hand trailer turn signal lamp is faulty.
X
Check whether you are permitted to change the bulb yourself.
or
X Visit a qualified specialist workshop. Display messages
261On-board computer and displays Z
Page 267 of 401
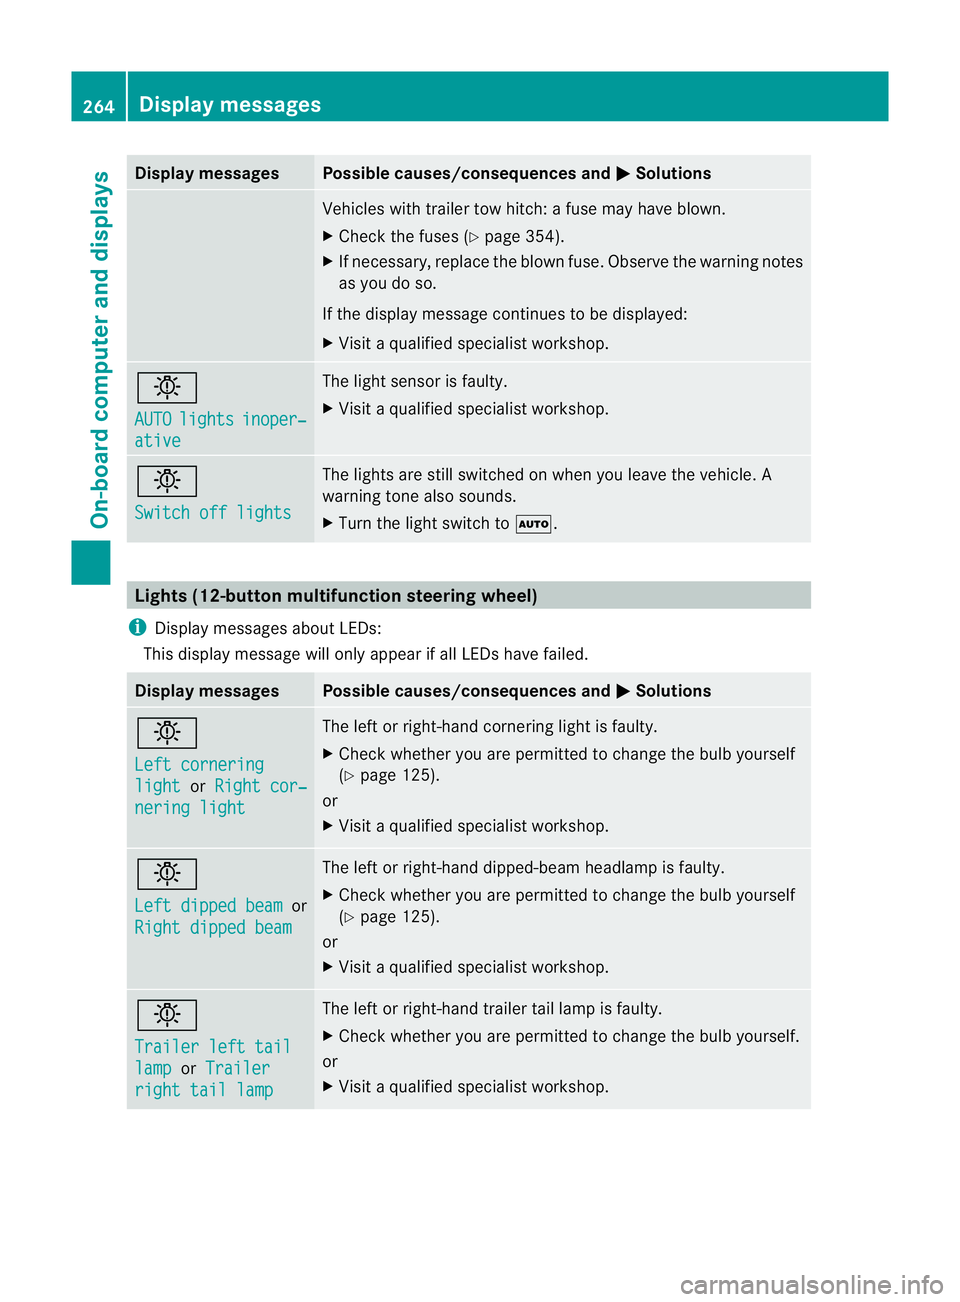
Display messages Possible causes/consequences and
M Solutions
Vehicles with trailer tow hitch
:afuse may have blown.
X Check the fuses (Y page 354).
X If necessary, replace the blown fuse .Observe the warning notes
as you do so.
If the display message continues to be displayed:
X Visit a qualified specialist workshop. b
AUTO
lights inoper‐
ative The light senso
ris faulty.
X Visit a qualified specialist workshop. b
Switch off lights The lights are still switched on when you leave the vehicle. A
warning tone also sounds.
X
Turn the light switch to Ã.Lights (12-button multifunction steering wheel)
i Display messages aboutL EDs:
This display message will only appear if all LEDs have failed. Display messages Possible causes/consequences and
M Solutions
b
Left cornering
light or
Right cor‐ nering light The left or right-hand cornering ligh
tis faulty.
X Check whether you are permitted to change the bulb yourself
(Y page 125).
or
X Visit a qualified specialist workshop. b
Left dipped beam
or
Right dipped beam The left or right-hand dipped-beam headlamp is faulty.
X
Check whether you are permitted to change the bulb yourself
(Y page 125).
or
X Visit a qualified specialist workshop. b
Trailer left tail
lamp or
Trailer right tail lamp The left or right-hand trailer tail lamp is faulty.
X
Check whether you are permitted to change the bulb yourself.
or
X Visit a qualified specialist workshop. 264
Display messagesOn-board computer and displays
Page 283 of 401
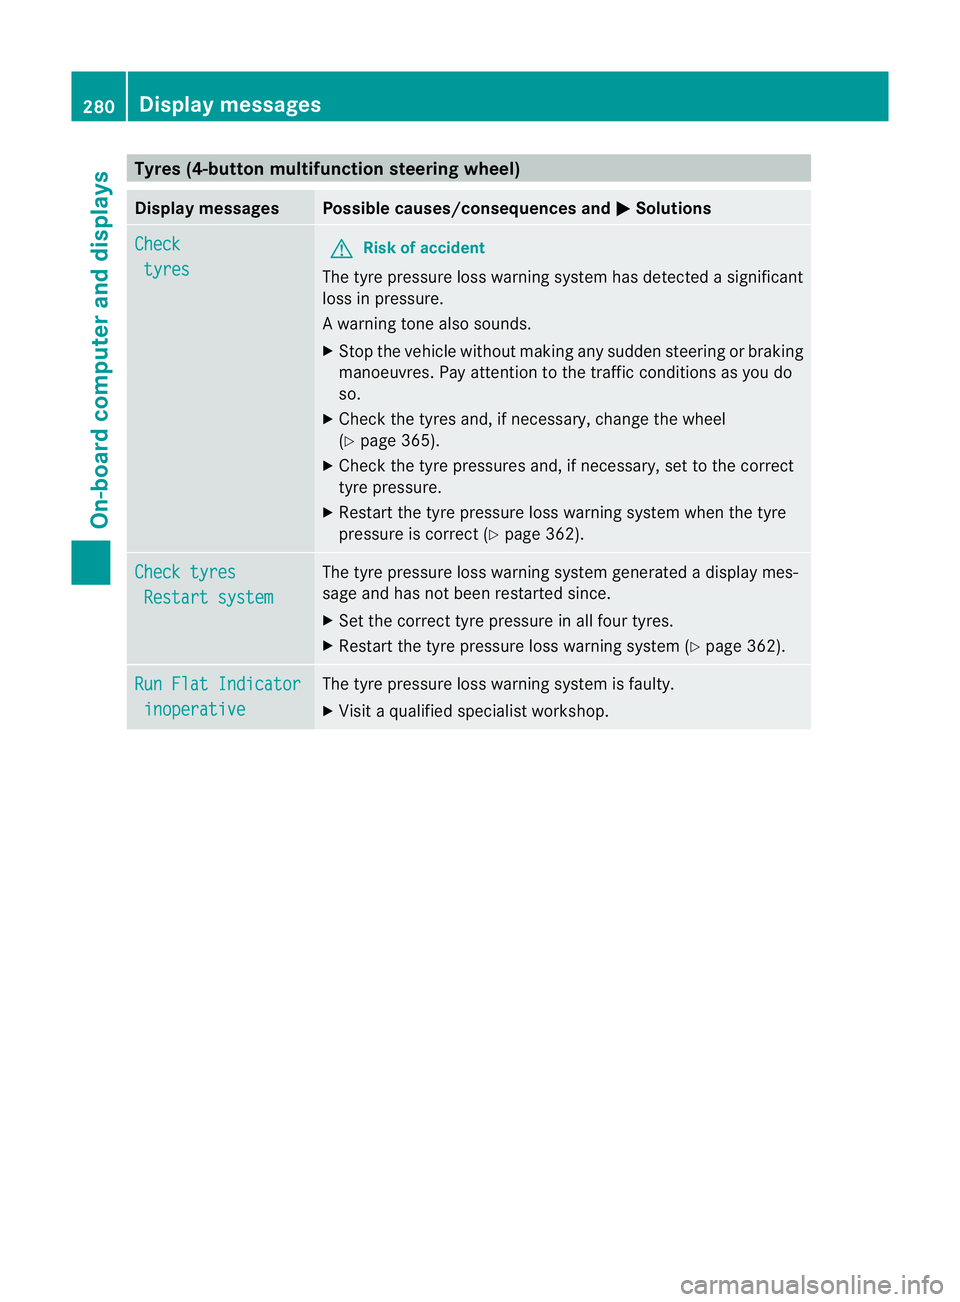
Tyres (4-button multifunction steering wheel)
Display messages Possible causes/consequences and
M Solutions
Check
tyres G
Ris
kofa ccident
The tyre pressure loss warning system has detected a significant
loss in pressure.
Aw arning tone also sounds.
X Stop the vehicle without making any sudde nsteering or braking
manoeuvres .Pay attentio nto the traffic conditions as you do
so.
X Check the tyres and, if necessary, change the wheel
(Y page 365).
X Check the tyre pressures and, if necessary, set to the correct
tyre pressure.
X Restart the tyre pressure loss warning system when the tyre
pressure is correc t(Ypage 362). Check tyres
Restart system The tyre pressure loss warning system generated a display mes-
sage and has not been restarted since.
X
Set the correct tyre pressure in all four tyres.
X Restart the tyre pressure loss warning system (Y page 362).Run Flat Indicator
inoperative The tyre pressure loss warning system is faulty.
X
Visit a qualified specialist workshop. 280
Display messagesOn-board computer and displays
Page 284 of 401
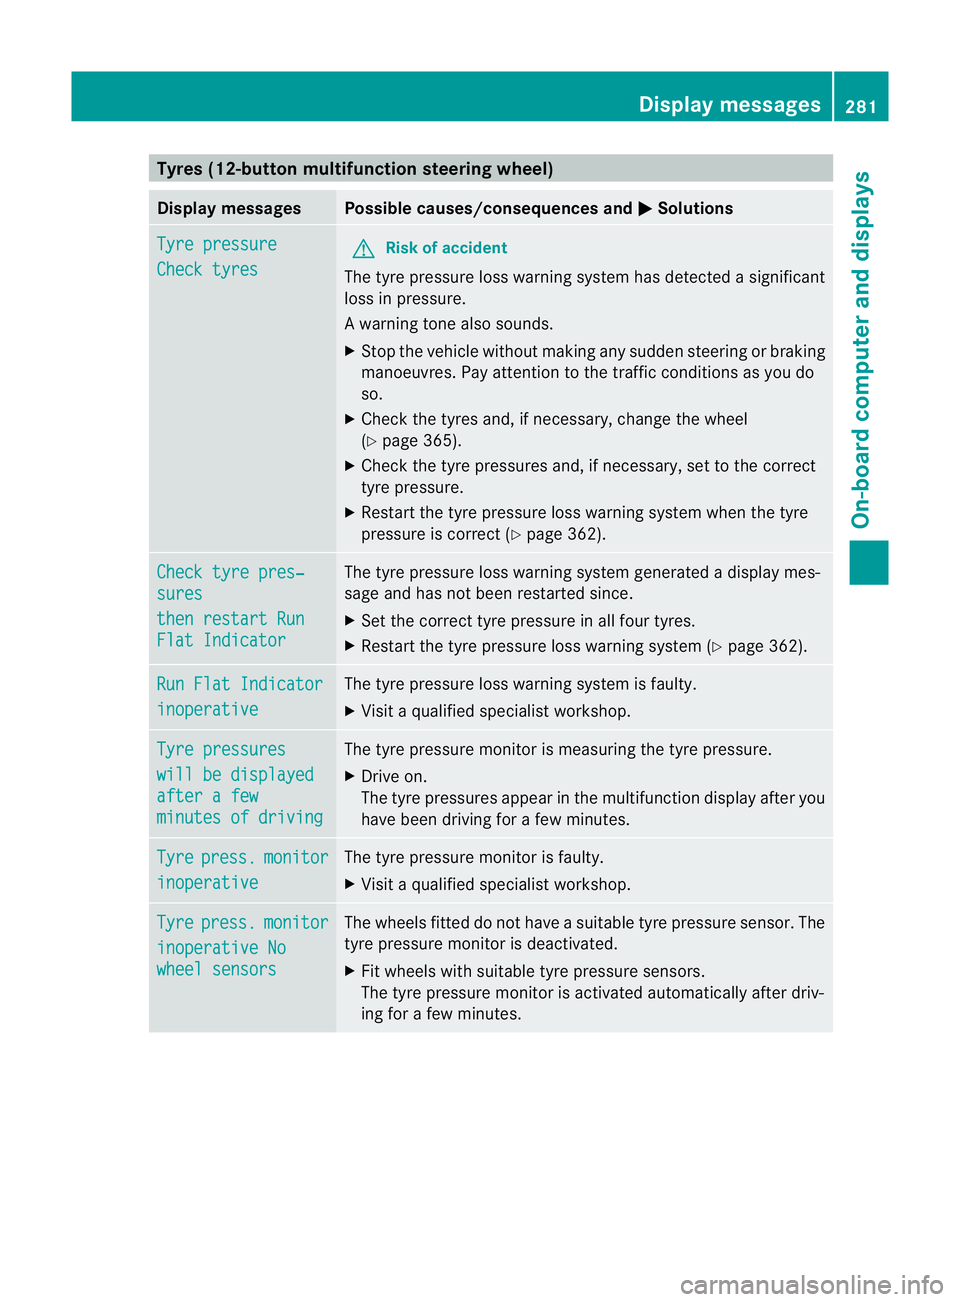
Tyres (12-button multifunction steering wheel)
Display messages Possible causes/consequences and
M Solutions
Tyre pressure
Check tyres G
Ris
kofa ccident
The tyre pressure loss warning system has detected a significant
loss in pressure.
Aw arning tone also sounds.
X Stop the vehicle without making any sudde nsteering or braking
manoeuvres .Pay attentio nto the traffic conditions as you do
so.
X Check the tyres and, if necessary, change the wheel
(Y page 365).
X Check the tyre pressures and, if necessary, set to the correct
tyre pressure.
X Restart the tyre pressure loss warning system when the tyre
pressure is correc t(Ypage 362). Check tyre pres‐
sures
then restart Run
Flat Indicator The tyre pressure loss warning system generated a display mes-
sage and has not been restarted since.
X
Set the correct tyre pressure in all four tyres.
X Restart the tyre pressure loss warning system (Y page 362).Run Flat Indicator
inoperative The tyre pressure loss warning system is faulty.
X
Visit a qualified specialist workshop. Tyre pressures
will be displayed
after a few
minutes of driving The tyre pressure monitor is measuring the tyre pressure.
X
Drive on.
The tyre pressures appear in the multifunction display after you
have been driving for a few minutes. Tyre press. monitor
inoperative The tyre pressure monitor is faulty.
X
Visit a qualified specialist workshop. Tyre press. monitor
inoperative No
wheel sensors The wheels fitted do not have a suitable tyre pressure sensor. The
tyre pressure monitor is deactivated.
X
Fit wheels with suitable tyre pressure sensors.
The tyre pressure monitor is activated automatically after driv-
ing for a few minutes. Display messages
281On-board computer and displays Z
Page 285 of 401
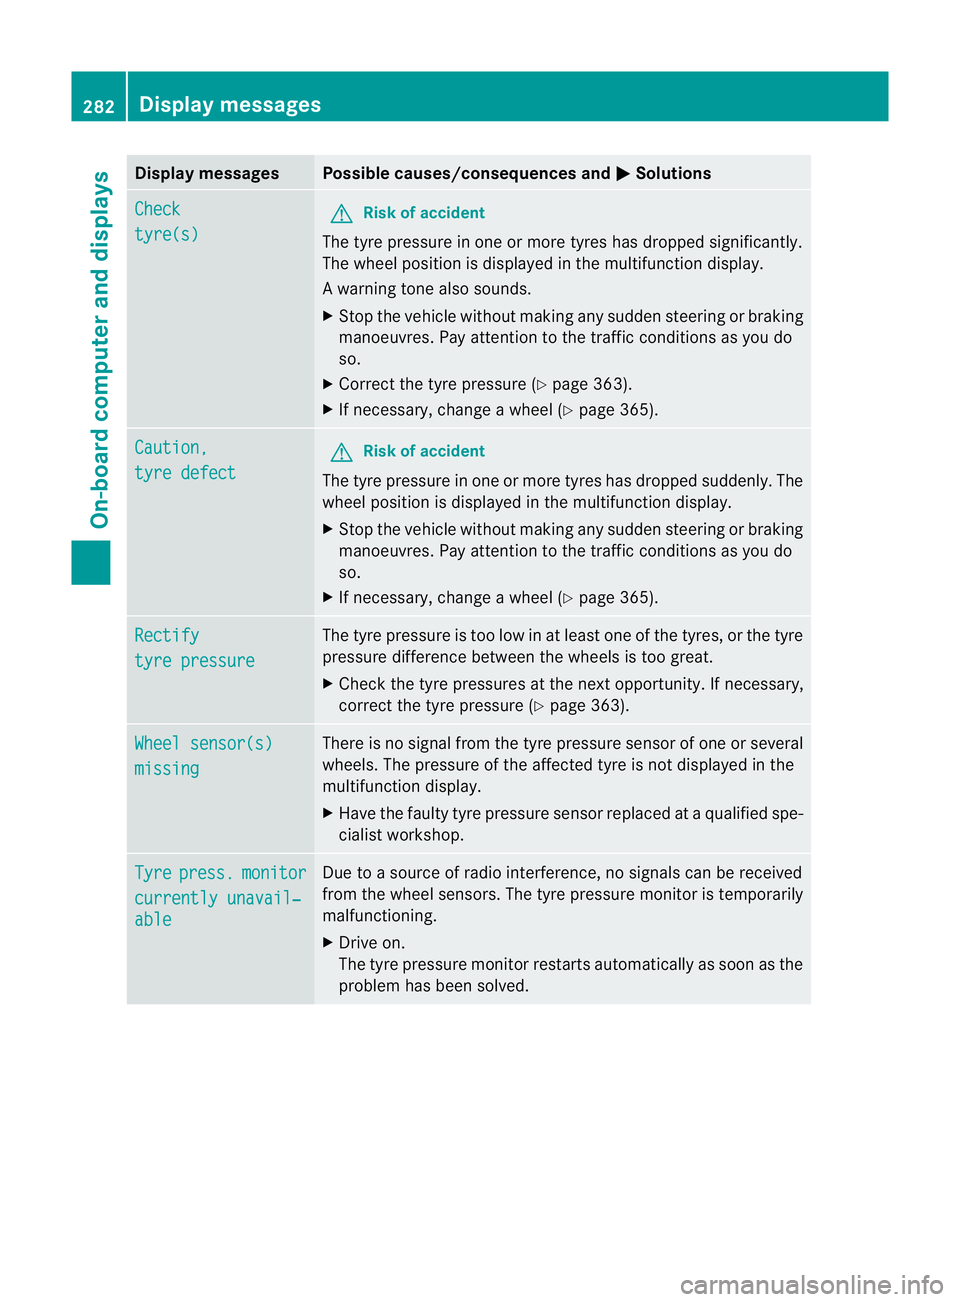
Display messages Possible causes/consequences and
M Solutions
Check
tyre(s) G
Risk of accident
The tyre pressure in one or more tyres has dropped significantly.
The wheel position is displayed in the multifunction display.
Aw arning tone also sounds.
X Stop the vehicle without making any sudde nsteering or braking
manoeuvres .Pay attentio nto the traffic conditions as you do
so.
X Correct the tyre pressure (Y page 363).
X If necessary, change a wheel (Y page 365).Caution,
tyre defect G
Risk of accident
The tyre pressure in one or more tyres has dropped suddenly. The
wheel position is displayed in the multifunction display.
X Stop the vehicle without making any sudden steering or braking
manoeuvres. Pay attention to the traffic conditions as you do
so.
X If necessary, change a wheel (Y page 365).Rectify
tyre pressure The tyre pressure is too low in at least one of the tyres, or the tyre
pressure difference between the wheels is too great.
X
Check the tyre pressures at the next opportunity. If necessary,
correct the tyre pressure (Y page 363).Wheel sensor(s)
missing There is no signal from the tyre pressure sensor of one or several
wheels. The pressure of the affected tyre is not displayed in the
multifunction display.
X
Have the faulty tyre pressure sensor replaced at a qualified spe-
cialist workshop. Tyre press. monitor
currently unavail‐
able Due to a source of radio interference, no signals can be received
from the wheel sensors. The tyre pressure monitor is temporarily
malfunctioning.
X
Drive on.
The tyre pressure monitor restarts automatically as soon as the
problem has been solved. 282
Display messagesOn-board computer and displays