2011 MERCEDES-BENZ C-CLASS ESTATE lights
[x] Cancel search: lightsPage 79 of 401
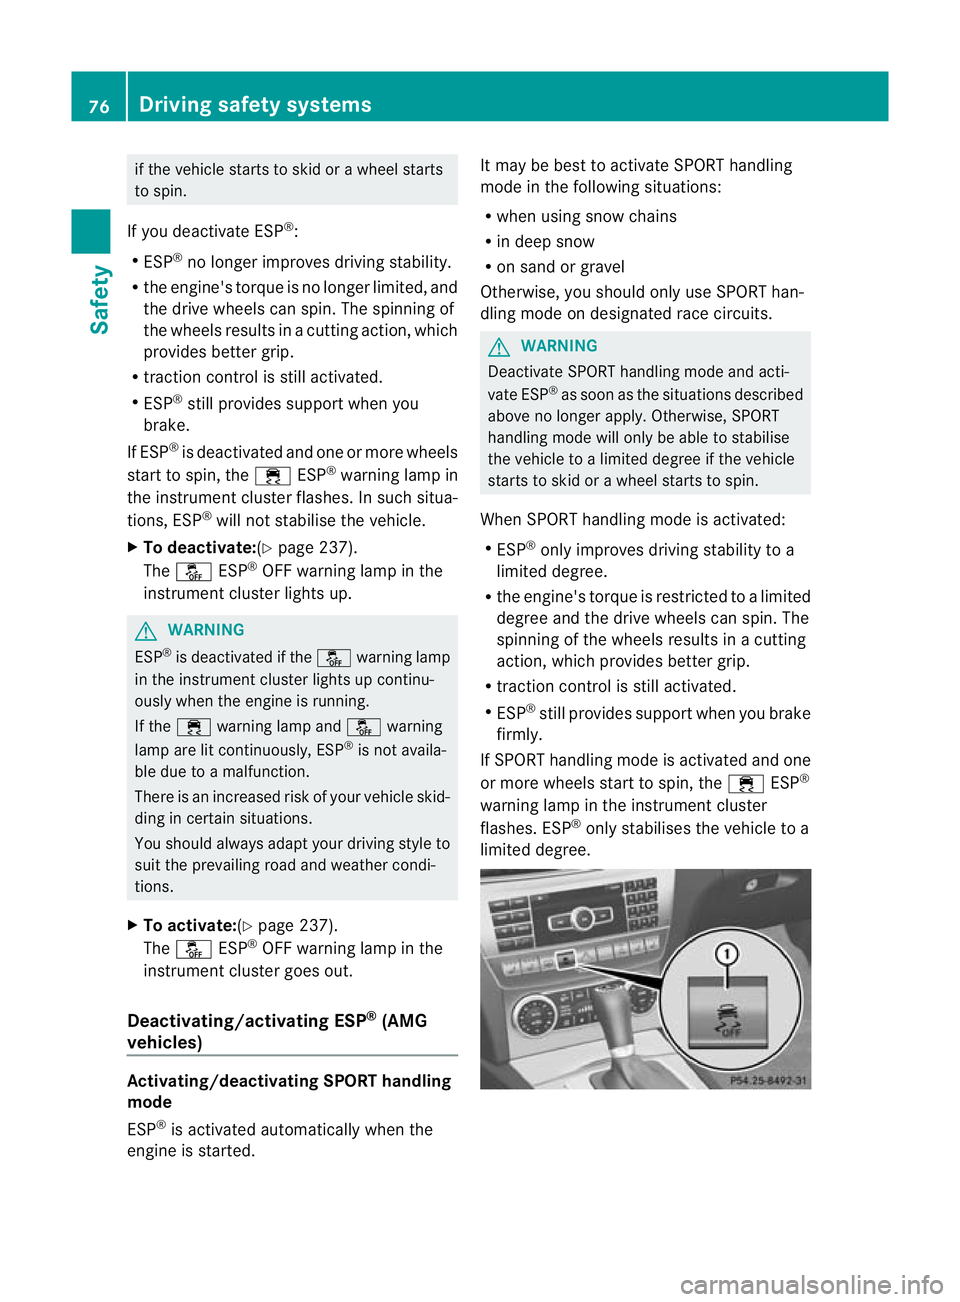
if the vehicle starts to skid or a wheel starts
to spin.
If you deactivate ESP ®
:
R ESP ®
no longer improves driving stability.
R the engine's torque is no longer limited, and
the drive wheels can spin. The spinning of
the wheels results in a cutting action, which
provides better grip.
R traction control is still activated.
R ESP ®
still provides support when you
brake.
If ESP ®
is deactivated and one or more wheels
star tto spin, the ÷ESP®
warning lamp in
the instrument cluster flashes. In such situa-
tions, ESP ®
will not stabilise the vehicle.
X To deactivate:(Y page 237).
The å ESP®
OFF warning lamp in the
instrument cluster lights up. G
WARNING
ESP ®
is deactivated if the åwarning lamp
in the instrument cluster lights up continu-
ously when the engine is running.
If the ÷ warning lamp and åwarning
lamp are lit continuously, ESP ®
is not availa-
ble due to a malfunction.
There is an increased risk of your vehicle skid-
ding in certain situations.
You should always adapt your driving style to
suit the prevailing road and weather condi-
tions.
X To activate:(Y page 237).
The å ESP®
OFF warning lamp in the
instrument cluster goes out.
Deactivating/activating ESP ®
(AMG
vehicles) Activating/deactivating SPORT handling
mode
ESP ®
is activated automatically when the
engine is started. It may be best to activate SPORT handling
mode in the following situations:
R
when using snow chains
R in deep snow
R on sand or gravel
Otherwise, you should only use SPORT han-
dling mode on designated race circuits. G
WARNING
Deactivate SPORT handling mode and acti-
vate ESP ®
as soon as the situations described
above no longer apply. Otherwise, SPORT
handling mode will only be able to stabilise
the vehicle to a limited degree if the vehicle
starts to skid or a wheel starts to spin.
When SPORT handling mode is activated:
R ESP ®
only improves driving stability to a
limited degree.
R the engine's torque is restricted to a limited
degree and the drive wheels can spin. The
spinning of the wheels results in a cutting
action, which provides better grip.
R traction control is still activated.
R ESP ®
still provides support when you brake
firmly.
If SPORT handling mode is activated and one
or more wheels start to spin, the ÷ESP®
warning lamp in the instrument cluster
flashes. ESP ®
only stabilises the vehicle to a
limited degree. 76
Driving safety systemsSafety
Page 80 of 401
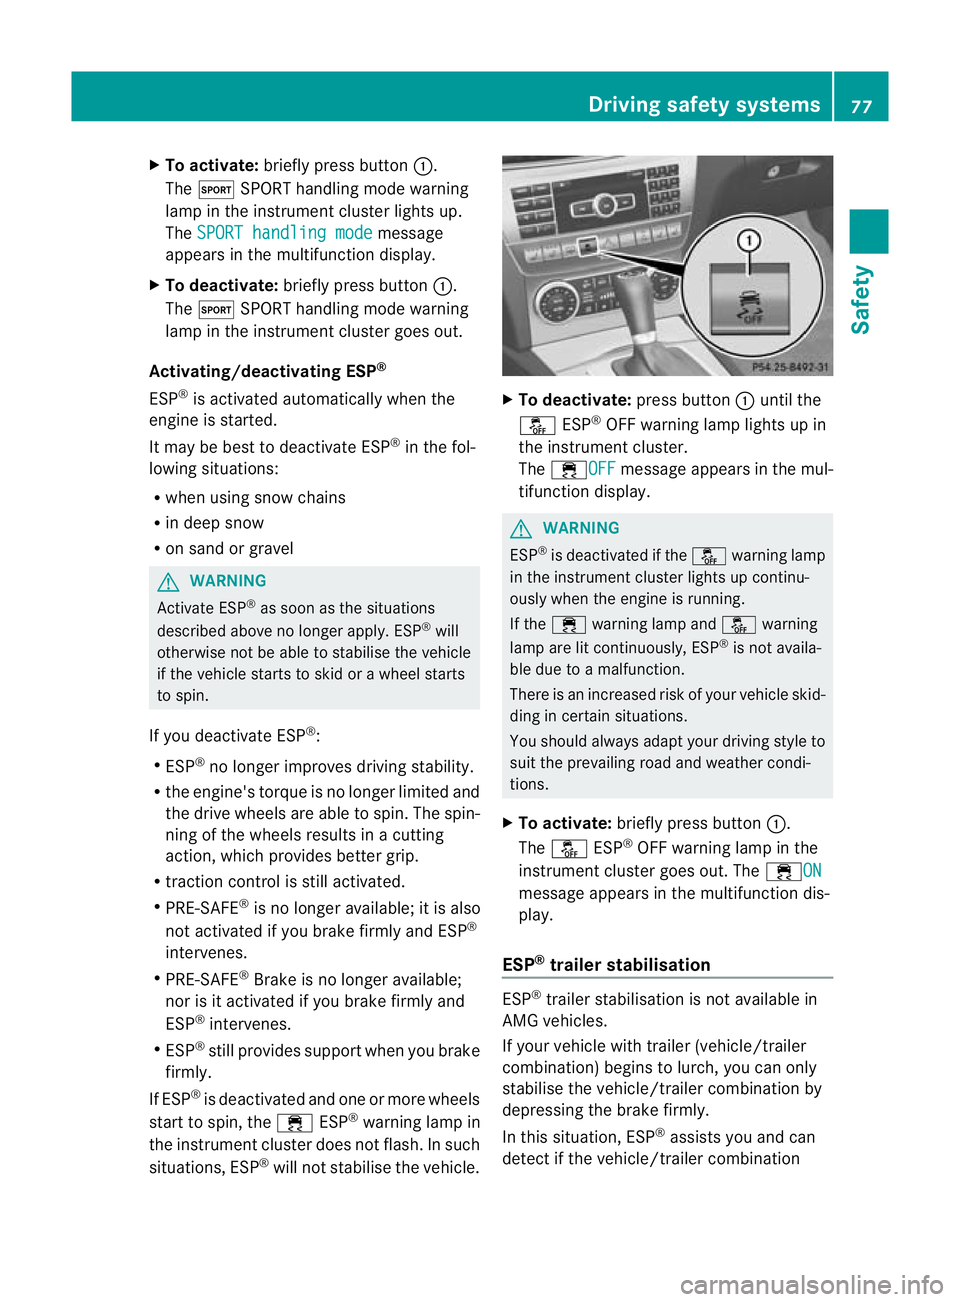
X
To activate: briefly press button :.
The M SPORT handling mode warning
lamp in the instrument cluster lights up.
The SPORT handling mode message
appears in the multifunctio ndisplay.
X To deactivate: briefly press button :.
The M SPORT handling mode warning
lamp in the instrumen tcluster goes out.
Activating/deactivating ESP ®
ESP ®
is activated automatically when the
engine is started.
It may be best to deactivate ESP ®
in the fol-
lowing situations:
R when using snow chains
R in deep snow
R on sand or gravel G
WARNING
Activate ESP ®
as soon as the situations
described above no longer apply. ESP ®
will
otherwise not be able to stabilise the vehicle
if the vehicle starts to skid or a wheel starts
to spin.
If you deactivate ESP ®
:
R ESP ®
no longer improves driving stability.
R the engine's torque is no longer limited and
the drive wheels are able to spin .The spin-
ning of the wheels results in a cutting
action, which provides better grip.
R traction control is still activated.
R PRE-SAFE ®
is no longer available; it is also
not activated if you brake firmly and ESP ®
intervenes.
R PRE-SAFE ®
Brake is no longer available;
nor is it activated if you brake firmly and
ESP ®
intervenes.
R ESP ®
still provides support when you brake
firmly.
If ESP ®
is deactivated and one or more wheels
start to spin, the ÷ESP®
warning lamp in
the instrumentc luster does not flash. In such
situations, ESP ®
will not stabilise the vehicle. X
To deactivate: press button:until the
å ESP®
OFF warning lamp light sup in
the instrument cluster.
The ÷OFF message appears in the mul-
tifunction display. G
WARNING
ESP ®
is deactivated if the åwarning lamp
in the instrument cluster lights up continu-
ously when the engine is running.
If the ÷ warning lamp and åwarning
lamp are lit continuously, ESP ®
is not availa-
ble due to a malfunction.
There is an increased risk of your vehicle skid-
ding in certain situations.
You should always adapt your driving style to
suit the prevailing road and weather condi-
tions.
X To activate: briefly press button :.
The å ESP®
OFF warning lamp in the
instrument cluster goes out. The ÷ON message appears in the multifunction dis-
play.
ESP ®
trailer stabilisation ESP
®
trailer stabilisation is not available in
AMG vehicles.
If your vehicle with trailer (vehicle/trailer
combination) begins to lurch, you can only
stabilise the vehicle/trailer combination by
depressing the brake firmly.
In this situation, ESP ®
assists you and can
detec tifthe vehicle/trailer combination Driving safety systems
77Safety Z
Page 81 of 401
begins to lurch. ESP
®
slows the vehicle down
by braking and limiting the engine output until
the vehicle/trailer combination has stabi-
lised.
Trailer stabilisation is active above speeds of
about 65 km/h. G
WARNING
If road and weather conditions are poor,
trailer stabilisation will not be able to prevent
the trailer from swervin gand will thus be
unable to reduce the ris kofanaccident. Trail-
ers with a high centre of gravity can tip over
before ESP ®
can detect this.
Trailer stabilisation does not work if ESP ®
is
deactivated or disabled because of a mal-
function. EBD (electronic brake forc
edistribu-
tion)
i Observe the "Importan tsafety notes" sec-
tion (Y page 72).
EBD monitors and controls the brake pres-
sure on the rear wheels to improve driving
stability while braking. G
WARNING
If EB Dhas malfunctioned, the braking system
remains available with full brake boosting
effect .However, the rear wheels can still lock,
e.g. under full braking. This could cause you
to lose control of your vehicle and cause an
accident .You should therefore adapt your
driving style to the different handling charac-
teristics.
X Observe the notes on warning and indicator
lamps (Y page 293) as well as display mes-
sages (Y page 251) (4-button multifunc-
tion steering wheel) and ( Ypage 257) (12-
button multifunction steering wheel). ADAPTIVE BRAKE
ADAPTIVE BRAKE enhances braking safety
and offers increased braking comfort. In addi-
tion to the braking function, ADAPTIVE BRAKE
also has the HOLD function (Y page 193) and
hill start assist (Y page 156). For further
information, see Driving tips (Y page 175). PRE-SAFE
®
Brake
PRE-SAFE ®
Brake is only available in vehicles
with DISTRONIC PLUS.
i Observe the "Important safety notes" sec-
tion (Y page 72).
PRE-SAFE ®
Brake can help you to minimise
the risk of a frontal collision with a vehicle
ahead or reduce the effect sofsuch a colli-
sion. If PRE-SAFE ®
Brake has detected a risk
of collision, you will be warned visually and
acoustically as well as by automatic braking.
PRE-SAFE ®
Brake cannot prevent a collision
without your intervention.
This function will issue a warning at speeds of
around 30 km/h or more if:
R for a period of several seconds, the dis-
tance to the vehicle in fron tis too short for
the speed at which you are travelling. The
· distance warning lamp then lights up
in the instrument cluster.
R you are rapidly approaching the vehicle in
front. An intermittent warning tone will
then sound and the ·distance warning
lamp will light up in the instrument cluster.
X Brake immediately in order to increase the
distance from the vehicle in front.
or
X Take evasive action provided it is safe to do
so. 78
Driving safety systemsSafety
Page 84 of 401
X
To stop the alarm using the key: insert
the key into the ignition lock.
The alar mis switched off.
or
X Press the %or& button on the key.
The alarm is switched off.
X To stop the alarm using KEYLESS-GO:
grasp the outside door handle. The key
must be outside the vehicle.
The alarm is switched off.
or
X Press the Start/Stop button on the dash-
board. The key must be inside the vehicle.
The alarm is switched off. Tow-away protection
An audible and visual alarm is triggered if your
vehicle's angle of inclination is altered while
tow-away protection is primed. This occurs if
the vehicle is jacked up on one side, for exam-
ple.
X To prime: lock the vehicle with the key or
KEYLESS-GO.
Tow-away protection is primed after
approximately 30 seconds.
X To deactivate: unlock the vehicle with the
key or KEYLESS-GO.
Tow-away protection is deactivated auto-
matically.
To prevent a false alarm, deactivate tow-away
protection manually if your vehicle:
R is being transported
R is being loaded onto a ferry or car trans-
porter, for example
R is parked on a movable surface, e.g. in a
split-level garage
Deactivating:
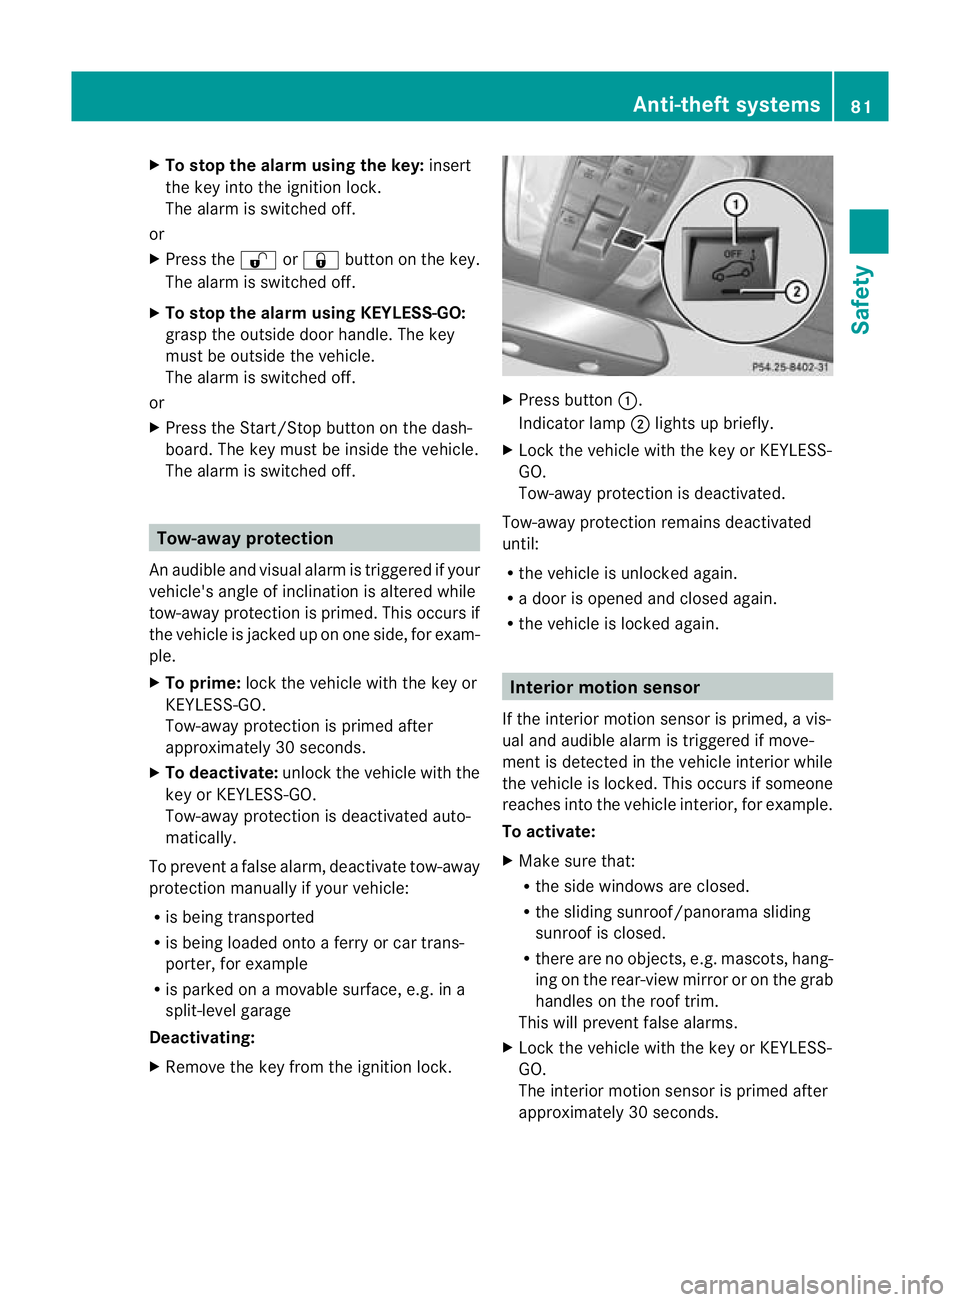
X Remove the key from the ignition lock. X
Press button :.
Indicator lamp ;lights up briefly.
X Lock the vehicle with the key or KEYLESS-
GO.
Tow-away protection is deactivated.
Tow-away protection remains deactivated
until:
R the vehicle is unlocked again.
R a door is opened and closed again.
R the vehicle is locked again. Interior motion sensor
If the interior motion sensor is primed, a vis-
ual and audible alarm is triggered if move-
ment is detected in the vehicle interior while
the vehicle is locked. This occurs if someone
reaches into the vehicle interior, for example.
To activate:
X Make sure that:
R
the side windows are closed.
R the sliding sunroof/panorama sliding
sunroof is closed.
R there are no objects, e.g. mascots, hang-
ing on the rear-view mirror or on the grab
handles on the roof trim.
This will prevent false alarms.
X Lock the vehicle with the key or KEYLESS-
GO.
The interior motion sensor is primed after
approximately 30 seconds. Anti-theft systems
81Safety Z
Page 90 of 401
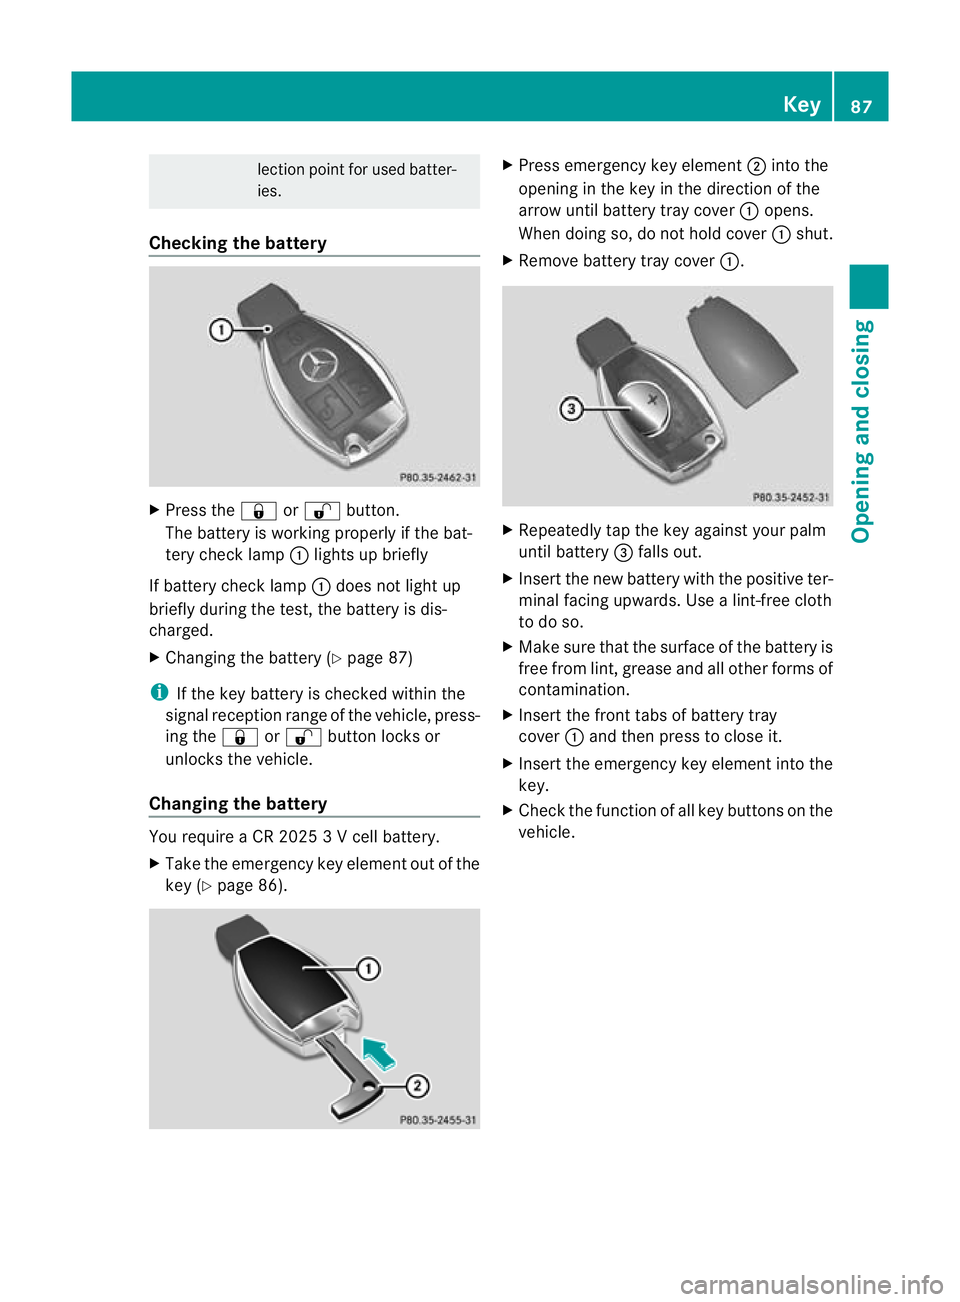
lection point for used batter-
ies.
Checking the battery X
Press the &or% button.
The battery is working properly if the bat-
tery check lamp :lights up briefly
If battery check lamp :does not light up
briefly during the test, the battery is dis-
charged.
X Changing the battery (Y page 87)
i If the key battery is checked within the
signal receptio nrange of the vehicle, press-
ing the &or% button locks or
unlocks the vehicle.
Changing the battery You require a CR 2025 3 V cell battery.
X Take the emergency key elemen tout of the
key (Y page 86). X
Press emergency key element ;into the
opening in the key in the direction of the
arrow until battery tray cover :opens.
When doing so, do no thold cover :shut.
X Remove battery tray cover :. X
Repeatedly tap the key against your palm
until battery =falls out.
X Insert the new battery with the positive ter-
minal facing upwards. Use a lint-free cloth
to do so.
X Make sure that the surface of the battery is
free from lint, grease and all other forms of
contamination.
X Insert the front tabs of battery tray
cover :and then press to close it.
X Insert the emergency key element into the
key.
X Check the function of all key buttons on the
vehicle. Key
87Opening and closing Z
Page 116 of 401
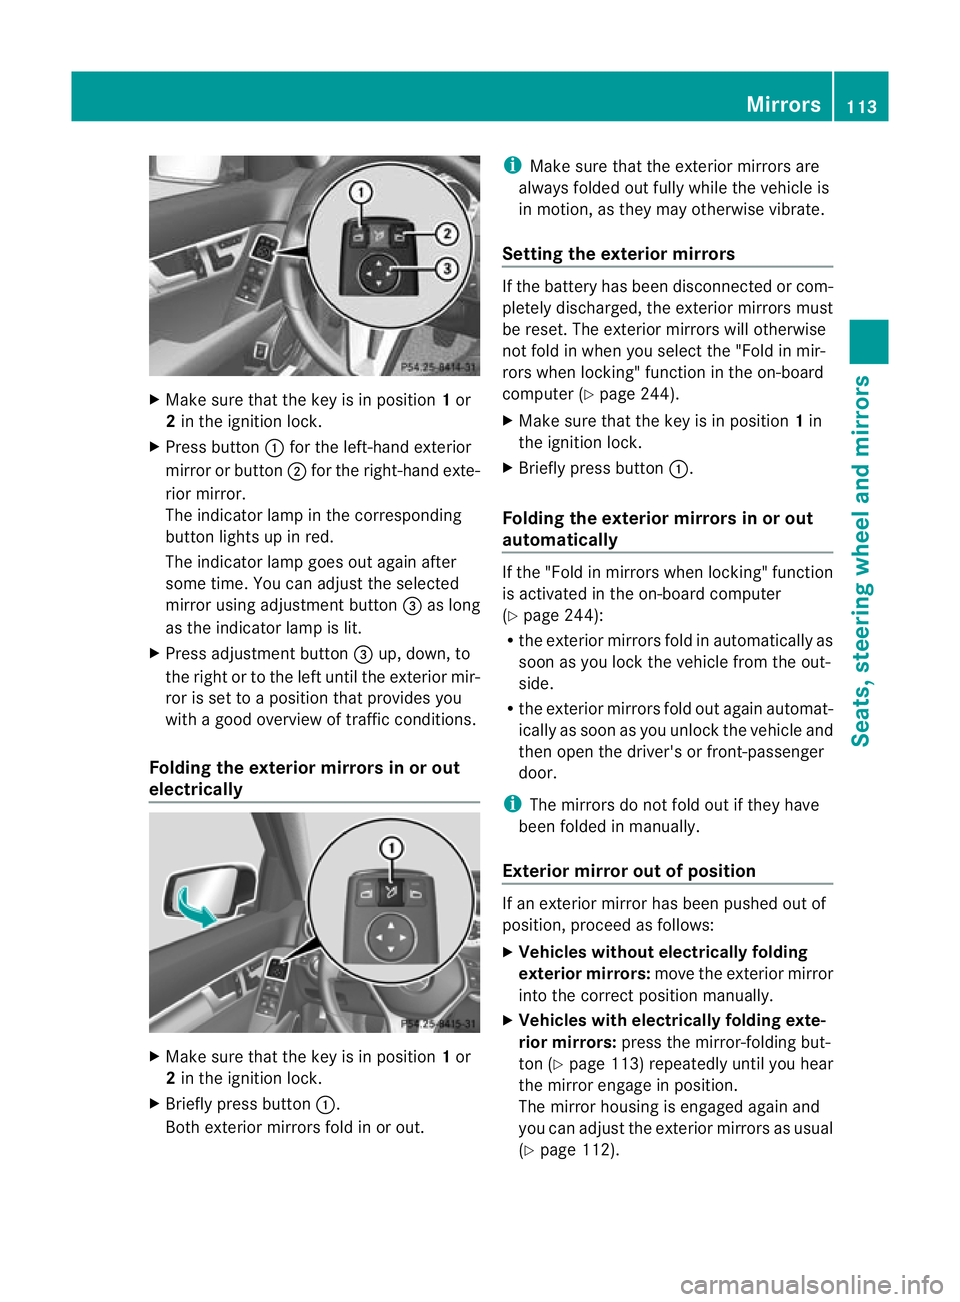
X
Make sure that the key is in position 1or
2 in the ignition lock.
X Press button :for the left-hand exterior
mirror or button ;for the right-hand exte-
rior mirror.
The indicator lamp in the corresponding
button lights up in red.
The indicator lamp goes out again after
some time. You can adjust the selected
mirror using adjustment button =as long
as the indicator lamp is lit.
X Press adjustment button =up, down, to
the right or to the left until the exterior mir-
ror is set to a position that provides you
with a good overview of traffic conditions.
Folding the exterior mirrors in or out
electrically X
Make sure that the key is in position 1or
2 in the ignition lock.
X Briefly press button :.
Both exterior mirrors fold in or out. i
Make sure that the exterior mirrors are
always folded out fully while the vehicle is
in motion, as they may otherwise vibrate.
Setting the exterior mirrors If the battery has been disconnected or com-
pletely discharged, the exterior mirrors must
be reset. The exterior mirrors will otherwise
not fold in when you select the "Fold in mir-
rors when locking" function in the on-board
computer (Y
page 244).
X Make sure that the key is in position 1in
the ignition lock.
X Briefly press button :.
Folding the exterior mirrors in or out
automatically If the "Fold in mirrors when locking" function
is activated in the on-board computer
(Y
page 244):
R the exterior mirrors fold in automatically as
soon as you lock the vehicle from the out-
side.
R the exterior mirrors fold out again automat-
ically as soon as you unlock the vehicle and
then open the driver's or front-passenger
door.
i The mirrors do not fold out if they have
been folded in manually.
Exterior mirror out of position If an exterior mirror has been pushed out of
position, proceed as follows:
X
Vehicles without electrically folding
exterior mirrors: move the exterior mirror
into the correct position manually.
X Vehicles with electrically folding exte-
rior mirrors: press the mirror-folding but-
ton (Y page 113) repeatedly until you hear
the mirror engage in position.
The mirror housing is engaged again and
you can adjust the exterior mirrors as usual
(Y page 112). Mirrors
113Seats, steering wheel and mirrors Z
Page 120 of 401
Useful information
............................118
Exterior lighting ................................ 118
Interior lighting ................................. 124
Changing bulbs ................................. 125
Windscreen wipers ...........................129 117Lights and windscreen wipers
Page 121 of 401
Useful information
i This Owner's Manual describes all models
and all standard and optional equipment
available to your vehicle at the time of pub-
lication of the Owner's Manual. Country-
specific deviations are possible. Please
note that your vehicle may not be equipped
with all features described. This also
applies to safety-relevan tsystems and
functions.
i Please read the information on qualified
specialist workshops (Y page 28).Exterior lighting
Important safety notes
Fo rreasons of safety, Mercedes-Benzr ecom-
mends that you drive with the lights switched
on even during the daytime. In some coun-
tries, operation of the headlamps varies due
to legal requirements and self-imposed obli-
gations. Notes on driving abroad
Convert to symmetrical dipped beam
when driving abroad: switch the headlamps
to symmetrical dipped beam in countries in
which traffic drives on the opposite side of the
road to the country where the vehicle is reg-
istered. This prevents glare to oncoming traf-
fic. Symmetrical lights do not illuminate as
large an area of the edge of the carriageway.
Convert the headlamps as close to the border
as possible before driving in these countries
(Y page 240).
Convert to asymmetrical dipped beam
after returning: convert the headlamps back
to asymmetrical dipped beam as soon as pos-
sible after crossing the border when returning
(Y page 240). If the headlamps are converted to symmetri-
cal dipped beam, the "motorway mode" and
"extended range foglamps" functions (Intelli-
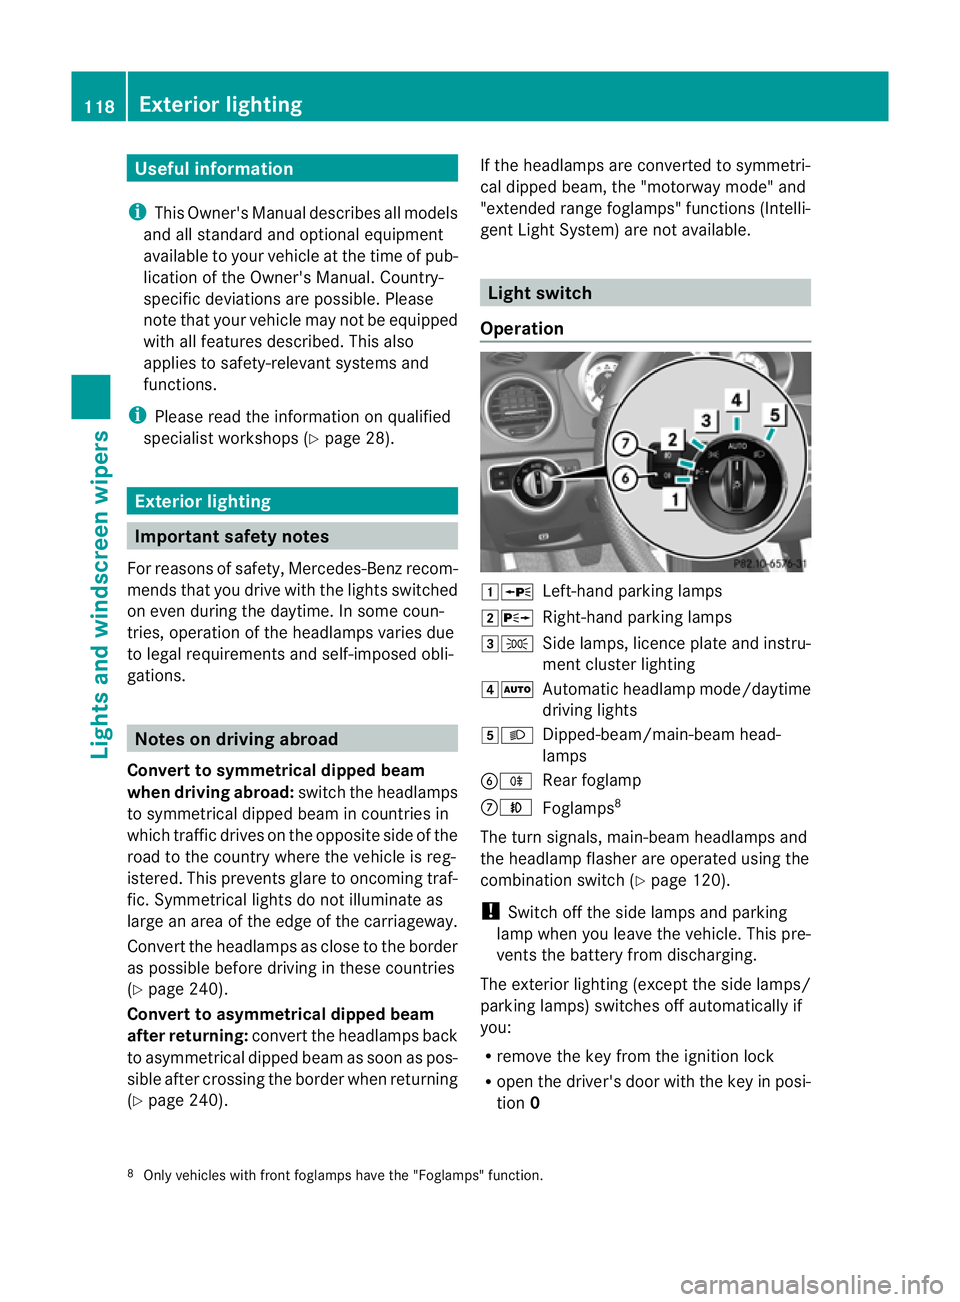
gent Light System) are not available. Light switch
Operation 1W
Left-hand parking lamps
2X Right-hand parking lamps
3T Side lamps, licence plate and instru-
ment cluster lighting
4Ã Automatic headlamp mode/daytime
driving lights
5L Dipped-beam/main-beam head-
lamps
BR Rear foglamp
CN Foglamps 8
The turn signals, main-beam headlamps and
the headlamp flasher are operated using the
combination switch (Y page 120).
! Switch off the side lamps and parking
lamp when you leave the vehicle. This pre-
vents the battery from discharging.
The exterior lighting (except the side lamps/
parking lamps) switches off automatically if
you:
R remove the key from the ignition lock
R open the driver's door with the key in posi-
tion 0
8 Only vehicles with fron tfoglamps have the "Foglamps" function. 118
Exterior lightingLights and windscreen wipers