2011 MERCEDES-BENZ B-CLASS HATCHBACK seats
[x] Cancel search: seatsPage 93 of 329

X
Press release catch :and pull the head
restraint out of the guides.
X To refit: insert the head restraint so that
the notches on the bar are on the left when
viewed in the direction of travel.
X Push the head restraint down until you hear
it engage in position. Adjusting the 4-way lumbar support
You can adjust the contour of the front seat
backrests individually to provide optimum
support for your back. :
To raise the backrest contour
; To soften the backrest contour
= To lower the backrest contour
? To harden the backrest contour Switching the seat heating on/off
Switching on/off G
WARNING
Repeatedly setting the seat heating to level
3 may result in excessive seat temperatures.
The health of passengers that have limited
temperature sensitivity or a limited ability to
react to excessively high temperatures may
be affected or they may even suffer burn-like
injuries. Therefore, do not use seat heating
level 3repeatedly. The three red indicator lamps in the button
indicate the heating level you have selected.
The system automatically switches down
from level
3to level 2after approximately
eight minutes.
The system automatically switches down
from level 2to level 1after approximately ten
minutes.
The system automatically switches off
approximately 20 minutes after it is set to
level 1.
X Make sure that the key is in position 1or
2 in the ignition lock.
X To switch on: press button:repeatedly
until the desired heating level is set.
X To switch off: press button:repeatedly
until all the indicator lamps go out.
i If the battery voltage is too low, the seat
heating may switch off.
Problems with the seat heating The seat heating has switched off prema-
turely or cannot be switched on. The vehicle's
electrical system voltage is too low because
too many electrical consumers are switched
on.
X Switch off electrical consumers that you do
not need, such as the rear window heating
or interior lighting. 90
SeatsSeats, steering wheel and mirrors
Page 94 of 329

Steering wheel
Important safety notes
G
WARNING
Only adjust the steering wheel when the vehi-
cle is stationary and make sure that it is
locked securely in position before driving off.
Driving without the steering wheel adjust-
ment mechanism being locked in position
may cause the steering wheel to move unex-
pectedly. As a result, the driver could lose
control of the vehicle. Before driving off make
sure that the steering wheel is properly locked
in position by trying to move it up and down. Adjusting the steering wheel
:
Release lever
; To adjust the steering wheel height
= To adjust the steering wheel position
(fore-and-aft adjustment)
X Push release lever :down completely.
The steering column is unlocked.
X Adjust the steering wheel to the desired
position.
X Push release lever :up completely.
The steering column is locked.
X Check if the steering column is locked.
When doing so, try to push the steering
wheel up or down or try to move it in the
fore-and-aft direction. Mirrors
Rear-view mirror
X
Anti-dazzle mode: flick anti-dazzle
switch :forwards or back. Exterior mirrors
Adjusting the exterior mirrors G
WARNING
The exterior mirrors reduce the size of the
image. Objects are actually closer than they
appear. You could misjudge the distance from
vehicles driving behind and cause an acci-
dent, e.g. when changing lane. For this rea-
son, make sure of the actual distance from the
vehicle driving behind by glancing over your
shoulder. Mirrors
91Seats, steering wheel and mirrors Z
Page 95 of 329
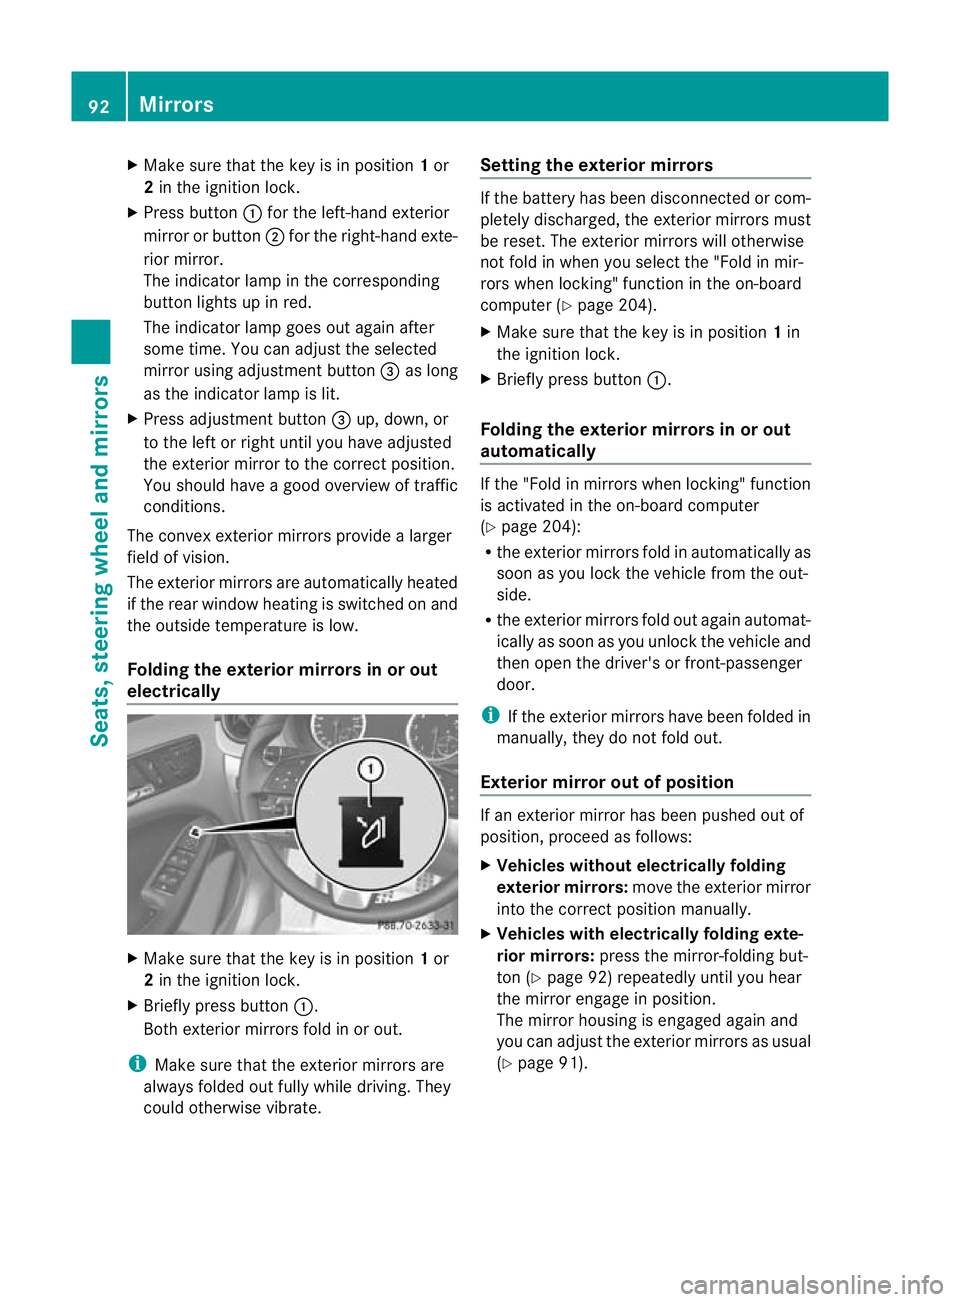
X
Make sure that the key is in position 1or
2 in the ignition lock.
X Press button :for the left-hand exterior
mirror or button ;for the right-hand exte-
rior mirror.
The indicator lamp in the corresponding
button lights up in red.
The indicator lamp goes out again after
some time. You can adjust the selected
mirror using adjustment button =as long
as the indicator lamp is lit.
X Press adjustment button =up, down, or
to the left or right until you have adjusted
the exterior mirror to the correct position.
You should have a good overview of traffic
conditions.
The convex exterior mirrors provide a larger
field of vision.
The exterior mirrors are automatically heated
if the rear window heating is switched on and
the outside temperature is low.
Folding the exterior mirrors in or out
electrically X
Make sure that the key is in position 1or
2 in the ignition lock.
X Briefly press button :.
Both exterior mirrors fold in or out.
i Make sure that the exterior mirrors are
always folded out fully while driving. They
could otherwise vibrate. Setting the exterior mirrors If the battery has been disconnected or com-
pletely discharged, the exterior mirrors must
be reset. The exterior mirrors will otherwise
not fold in when you select the "Fold in mir-
rors when locking" function in the on-board
computer (Y
page 204).
X Make sure that the key is in position 1in
the ignition lock.
X Briefly press button :.
Folding the exterior mirrors in or out
automatically If the "Fold in mirrors when locking" function
is activated in the on-board computer
(Y
page 204):
R the exterior mirrors fold in automatically as
soon as you lock the vehicle from the out-
side.
R the exterior mirrors fold out again automat-
ically as soon as you unlock the vehicle and
then open the driver's or front-passenger
door.
i If the exterior mirrors have been folded in
manually, they do not fold out.
Exterior mirror out of position If an exterior mirror has been pushed out of
position, proceed as follows:
X
Vehicles without electrically folding
exterior mirrors: move the exterior mirror
into the correct position manually.
X Vehicles with electrically folding exte-
rior mirrors: press the mirror-folding but-
ton (Y page 92) repeatedly until you hear
the mirror engage in position.
The mirror housing is engaged again and
you can adjust the exterior mirrors as usual
(Y page 91). 92
MirrorsSeats, steering wheel and mirrors
Page 96 of 329

Automatic anti-dazzle mirrors
G
WARNING
If inciden tlight fro mheadlamps is prevented
from striking the sensor in the rear-view mir-
ror, for instance, by luggage piled too high in
the vehicle, the mirror's automatic anti-dazzle
function will not operate.
Incident light could then blind you. This may
distract you from the traffic conditions and,
as a result, you may cause an accident.
The rear-view mirror and the exterior mirror
on the driver's side automatically go into anti-
dazzle mode if the ignition is switched on and
inciden tlight fro mheadlamps strikes the sen-
sor in the rear-view mirror.
The mirrors do not go into anti-dazzle mode if
reverse gear is engaged or if the interior light-
ing is switched on. Parking position for the exterior mir-
ror on the front-passenger side
Setting and storing the parking position You can position the front-passenger side
exterior mirror in such a way that you can see
the rear wheel on that side as soon as you
engage reverse gear. You can store this posi-
tion. X
Make sure that the vehicle is stationary and
that the key is in position 2in the ignition
lock.
X Press button ;for the exterior mirror on
the front-passenger side. X
Engage reverse gear.
The exterior mirror on the front-passenger
side moves to the preset parking position.
X Use adjustment button =to adjust the
exterior mirror .You should see the rear
wheel and the kerb in the exterior mirror.
The parking position is stored.
i If you shift the transmission to another
position, the exterior mirror on the front-
passenger side returns to the driving posi-
tion.
i You can also store the parking position
using memory button M?.
X Make sure that the key is in position
2in the ignition lock.
X With the exterior mirror on the front-
passenger side activated, use adjust-
ment button =to adjust the exterior
mirror. You should see the rear wheel
and the kerb in the exterior mirror.
X Press memory button M? and one of
the arrows on adjustment button =
within three seconds.
The parking position is stored if the
exterior mirror does not move.
If the mirror moves out of position, repeat
the steps.
Calling up astore dparking position set-
ting X
Tur nthe key to position 2in the ignition
lock.
X Adjust the exterior mirror on the front-
passenger side with the corresponding but-
ton (Y page 91).
X Engage reverse gear.
The exterior mirror on the front-passenger
side moves to the stored parking position. Mirrors
93Seats, steering wheel and mirrors Z
Page 97 of 329

The exterior mirror on the front-passenger
side moves back to its original position:
R
as soon as you exceed a speed of
15 km/h
R about ten seconds after you have disen-
gaged reverse gear
R if you press button :for the exterior mir-
ror on the driver's side Memory functions
Storing settings
G
WARNING
Only use the memory function on the driver's
side when the vehicle is stationary. You could
otherwise be distracted from the traffic con-
ditions by the seat moving of its own accord,
and as a result cause an accident. G
WARNING
The memory function can still be used if the
key has been removed. For this reason, chil-
dren should never be left unsupervised in the
vehicle. Otherwise, they could adjust the
seats and become trapped.
With the memory function, you can store up
to three different settings, e.g. for three dif-
ferent people.
The following settings are stored as a single
memory preset:
R position of the seat, backrest and head
restraint
R driver's side: position of the exterior mir-
rors on the driver's and front-passenger
sides X
Adjust the seat (Y page 88).
X Adjust the exterior mirror on the driver's
side (Y page 91).
X Briefly press the Mmemory button and
then press storage position button 1,2or
3 within three seconds.
The settings are stored in the selected pre-
set position. Atone sounds when the set-
tings have been completed. Calling up
astore dsetting
X Press and hold the relevant storage posi-
tion button 1,2or 3until the seat and
exterio rmirrors are in the stored position.
i The setting procedure is interrupted as
soon as you release the storage position
button. 94
Memory functionsSeats, steering wheel and mirrors
Page 101 of 329

Rear foglamp
X To switch on the rear foglamp: turn the
key in the ignition lock to position 2or start
the engine.
X Turn the light switch to LorÃ.
X Press the Rbutton.
The yellow Rindicator lamp in the
instrument cluster lights up.
X To switch off the rear foglamp: press the
R button.
The yellow Rindicator lamp in the
instrument cluster goes out.
Vehicles with front foglamps: when the light
switch is in the Tposition, the rea rfog-
lamp can only be switched on if the foglamps
(without dipped-beam headlamps) are
switched on.
Adjusting the headlam prange (halogen
headlamps) The headlamp range control allows you to
adjust the cone of light from the headlamps
to sui tthe vehicle load. Headlamp range control
g
Driver's seat and front-passenger seat
occupied
1 Driver's seat, front-passenger seat and
rear seats occupied
2 Driver's seat, front-passenger seat and
rear seats occupied, luggage compart-
ment laden
3 Driver's and front-passenger seats occu-
pied and maximum permissible rear axle
load utilised, e.g. when towing a trailer X
Start the engine.
X Turn the headlamp range control to the
position which corresponds to the load in
your vehicle.
Headlampc leaning system The headlamps are cleaned automatically if
the "Wipe with washer fluid" function is oper-
ated five times while the lights are on and the
engine is running (Y
page 108). When you
switch off the ignition, the automatic head-
lamp cleaning syste mis reset and counting is
resumed from 0. Combination switch
Turn signals :
Main-beam headlamps
; Turn signal, right
= Headlamp flasher
? Turn signal, left
X To indicate briefly: press the combination
switch briefly to the pressure point in the
direction of arrow ;or?.
The corresponding turn signal flashes three
times.
X To indicate: press the combination switch
beyond the pressure point in the direction
of arrow ;or?. 98
Exterior lightingLights and windscreen wipers
Page 247 of 329

Useful information
i This Owner's Manual describes all models
and all standard and optional equipment
available to your vehicle at the time of pub-
lication of the Owner's Manual. Country-
specific deviations are possible. Please
note that your vehicle may not be equipped
with all features described. This also
applies to safety-relevan tsystems and
functions.
i Please read the information on qualified
specialist workshops (Y page 22).Loading guidelines
G
WARNING
Secure and position the load as described in
the loading guidelines.
Otherwise, vehicle occupants could
be injured by the load being throw naround in
the event of sharp braking, a sudden change
in direction or an accident.
You will find further informatio ninthe "Secur-
ing a load" section.
Even if you follow all the loading guidelines,
the load will increase the risk of injury in the
event of an accident. G
WARNING
Keep the tailgate closed when the engine is
running. Otherwise, you could be poisoned by
exhaust fumes entering the vehicle.
The handling characteristics of a laden vehi-
cle are dependent on the distribution of the
load within the vehicle. For this reason, you
should observe the following notes when
transporting a load:
R when transporting a load, never exceed the
maximum permissible gross vehicle weight or the permissible axle loads for the vehicle
(including occupants).
R position heavy loads as far forwards as pos-
sible and as low down in the load compart-
ment as possible.
R the load must not protrude above the upper
edge of the seat backrests.
R always place the load against the rear or
front seat backrests. Make sure that the
seat backrests are securely locked into
place.
R hook in the safety net when loading.
R the maximum load capacity of the stowage
well under the luggage compartmentf loor
is 25 kg.
R always place the load behind unoccupied
seats if possible.
R secure the load with sufficiently strong and
wear-resistan tlashing material. Pad sharp
edges for protection.
i Lashing material is available at any quali-
fied specialist workshop.
! Do no tposition the load on one part of the
folding luggage compartment floor only.
The maximum load capacity of the folding
luggage compartment floor is 100 kg.
Spread the weight evenly to avoid damag-
ing the luggage compartment floor. Place a
solid board under the load if necessary.
Please note that the load on the luggage
compartment floor will be increased when
the load is lashed down. Stowage areas
Stowage compartments
Important safety notes G
WARNING
The stowage compartments must be closed
when items are stored in them. Luggage nets
are not designed to secure heavy items of
luggage. 244
Stowage areasStowing and features
Page 253 of 329

X
Swing backrest :back.
X Adjust the backres tto the desired angle by
pulling the loop (Y page 250).
X Adjust the head restraints if necessary
(Y page 89).
X Move the driver's or front-passenger seat
back if necessary.
Notes on using the luggage compartment Load position
Making the best use of your luggage com-
partment:
R Load capacity is increased when back-
rest :is set to the load position (90°)
(Y page 250).
R Vehicles with a height-adjustable luggage
compartment floor: a level load surface can
be obtained by moving the luggage com-
partmen tfloor to the upper position
(Y page 254).
R Al arge rload area can be obtained by mov-
ing the rear bench seat as far forward as
possible (Y page 250).
R The load area can be lengthened by folding
forward the folding backrest of the front-
passenger seat (Y page 247) and the cor-
responding backrest in the rear.
Adjusting the angle of the rear seat backr-
ests
You can set the angle of the seat backrests
to one of 13 detent positions. X
Pull right or left release loop ;forwards in
the direction of the arrow.
Corresponding seat backrest :is
released.
X Push backrest :forward in the direction
of the arrow, or push it back and let it
engage.
X To ensure that the backrest has engaged,
lean firmly against backrest :.
Seat fore-and-aft adjustment
! When moving the rear seats back, make
sure there are no objects in the footwell or
behind the seats. The rear seats and/or the
objects could otherwise be damaged. X
Lift the left or right release handle and slide
the corresponding seat forwards or back-
wards.
X Let go of the release handle again.
Make sure that you hear the seat engage in
position. 250
Stowage areasStowing and features