2011 MAZDA MODEL MX-5 MIATA PRHT turn signal
[x] Cancel search: turn signalPage 209 of 454

Black plate (209,1)
Cruise Set Indicator Light (Green)
The indicator light illuminates green when
a cruising speed has been set.
qTurn-Signal/Hazard Warning
Indicator Lights
When operating the turn signal lights, the
left or right turn signal indicator light
flashes to indicate which turn signal light
is operating (page 5-59).
When operating the hazard warning
lights, both turn signal indicator lights
flash (page 5-62).
NOTE
If an indicator light remains illuminated (does
not flash) or if it flashes abnormally, one of the
turn signal bulbs may be burned out.
Beep Sounds
qSeat Belt Warning Beep
If the driver's seat belt is not fastened
when the ignition is switched ON, a beep
sound will be heard for about 6 seconds.
If the driver's seat belt is not fastened and
the vehicle is driven at a speed faster than
about 20 km/h (12 mph), a beep sound
will be heard again for a specified period
of time.
Refer to Seat Belt Warning Light/Beep on
page 5-47.
qIgnition Key Reminder
If the ignition is switched off or the
ignition is switched to ACC with the key
inserted, a continuous beep sound will be
heard when the driver's door is opened.
qLights-On Reminder
If lights are on and the key is removed
from the ignition switch, a continuous
beep sound will be heard when the
driver's door is opened.
NOTE
When the advanced keyless function is used
and the start knob is in the ACC position, the
Start Knob Not in Lock Warning Beep (page
3-19) overrides the lights-on reminder.
Driving Your Mazda
Warning/Indicator Lights and Beep Sounds
5-55
MX-5_8BR3-EA-10F_Edition3 Page209
Wednesday, March 2 2011 5:26 PM
Form No.8BR3-EA-10F
Page 213 of 454

Black plate (213,1)
Turn and Lane-Change
Signals
Turn Signals
Move the signal lever down (for a left
turn) or up (for a right turn) to the stop
position. The signal will self-cancel after
the turn is completed.
If the indicator light continues to flash
after a turn, manually return the lever to
its original position.
Right turnLeft turn
Right lane change
Left lane change OFF
Green indicators on the dashboard show
which signal is working.
Lane-change signals
Move the lever slightly toward the
direction of the change
―until the
indicator flashes ―and hold it there. It
will return to the off position when
released.
NOTE
If an indicator light stays on without flashing
or if it flashes abnormally, one of the turn
signal bulbs may be burned out.
Fog Lightsí
Use this switch to turn on the fog lights.
They help you to see as well as to be seen.
To turn the fog lights on, rotate the fog
light switch to the
position.
The headlight switch must be in the
position before turning on the fog lights.
Fog light switch
To turn them off, rotate the fog light
switch to the OFF position or turn the
headlight switch to the
or OFF
position.
NOTE
The fog lights will turn off when the headlights
are set at high beam.
Driving Your Mazda
Switches and Controls
5-59íSome models.
MX-5_8BR3-EA-10F_Edition3 Page213
Wednesday, March 2 2011 5:26 PM
Form No.8BR3-EA-10F
Page 216 of 454

Black plate (216,1)
Horn
To sound the horn, press themark on
the steering wheel.
Hazard Warning Flasher
The hazard warning lights should always
be used when you stop on or near a
roadway in an emergency.
The hazard warning lights warn other
drivers that your vehicle is a traffic hazard
and that they must take extreme caution
when near it.
Depress the hazard warning flasher and all
the turn signals will flash.
NOTE
lThe turn signals do not work when the
hazard warning lights are on.
lCheck local regulations about the use of
hazard warning lights while the vehicle is
being towed to verify that it is not in
violation of the law.
5-62
Driving Your Mazda
Switches and Controls
MX-5_8BR3-EA-10F_Edition3 Page216
Wednesday, March 2 2011 5:26 PM
Form No.8BR3-EA-10F
Page 219 of 454

Black plate (219,1)
5. Press and hold the just-trainedHomeLink button and observe the
indicator light.
If the indicator light stays on constantly,
programming is complete and your
device should activate when the
HomeLink button is pressed and released.
NOTE
To program the remaining two HomeLink
buttons, begin with “Programming ”― step 2.
Do not repeat step 1.
If the indicator light blinks rapidly for
two seconds and then turns to a
constant light, continue with
“ Programming ”steps 6 ―8to complete
the programming of a rolling code
equipped device (most commonly a
garage door opener).
6. At the garage door opener receiver (motor-head unit) in the garage, locate
the “learn ”or “smart ”button. This can
usually be found where the hanging
antenna wire is attached to the motor-
head unit.
7. Firmly press and release the “learn ”or
“ smart ”button. (The name and color of
the button may vary by manufacturer.)
NOTE
There are 30 seconds in which to initiate step
8.
8. Return to the vehicle and firmly press,
hold for two seconds and release the
programmed HomeLink button. Repeat
the “press/hold/release ”sequence a
second time, and, depending on the
brand of the garage door opener (or
other rolling code equipped device),
repeat this sequence a third time to
complete the programming process. HomeLink should now activate your
rolling code equipped device.
NOTE
To program the remaining two HomeLink
buttons, begin with
“Programming ”― step 2.
Do not repeat step 1.
For questions or comments, please contact
HomeLink at www.homelink.com or1-
800-355-3515.
q Gate operator/Canadian
Programming
Canadian radio-frequency laws require
transmitter signals to “time-out ”(or quit)
after several seconds of transmission ―
which may not be long enough for
HomeLink to pick up the signal during
programming. Similar to this Canadian
law, some U.S. gate operators are
designed to “time-out ”in the same
manner.
If you live in Canada or you are having
difficulties programming a gate operator
by using the “Programming ”procedures
(regardless of where you live), replace
“ Programming HomeLink ”step 3 with
the following:
NOTE
If programming a garage door opener or gate
operator, it is advised to unplug the device
during the “cycling ”process to prevent
possible overheating.
Driving Your Mazda
Switches and Controls
5-65
MX-5_8BR3-EA-10F_Edition3 Page219
Wednesday, March 2 2011 5:26 PM
Form No.8BR3-EA-10F
Page 234 of 454

Black plate (234,1)
Antenna
qAM/FM Radio Antenna
To remove the antenna, turn it
counterclockwise.
To install the antenna, turn it clockwise.
Make sure the antenna is securely
installed.
Remove
Install
CAUTION
To prevent damage to the antenna,
remove it before entering a car wash
facility or passing beneath a low
overhead clearance.
NOTE
When leaving your vehicle unattended, we
recommend that you remove the antenna and
store it inside the vehicle.
q Satellite Radio Antennaí
The satellite radio antenna receives
SIRIUS signals.
Satellite radio antenna
6-14
Interior Comfort
íSome models.
Audio System
MX-5_8BR3-EA-10F_Edition3 Page234
Wednesday, March 2 2011 5:26 PM
Form No.8BR3-EA-10F
Page 237 of 454

Black plate (237,1)
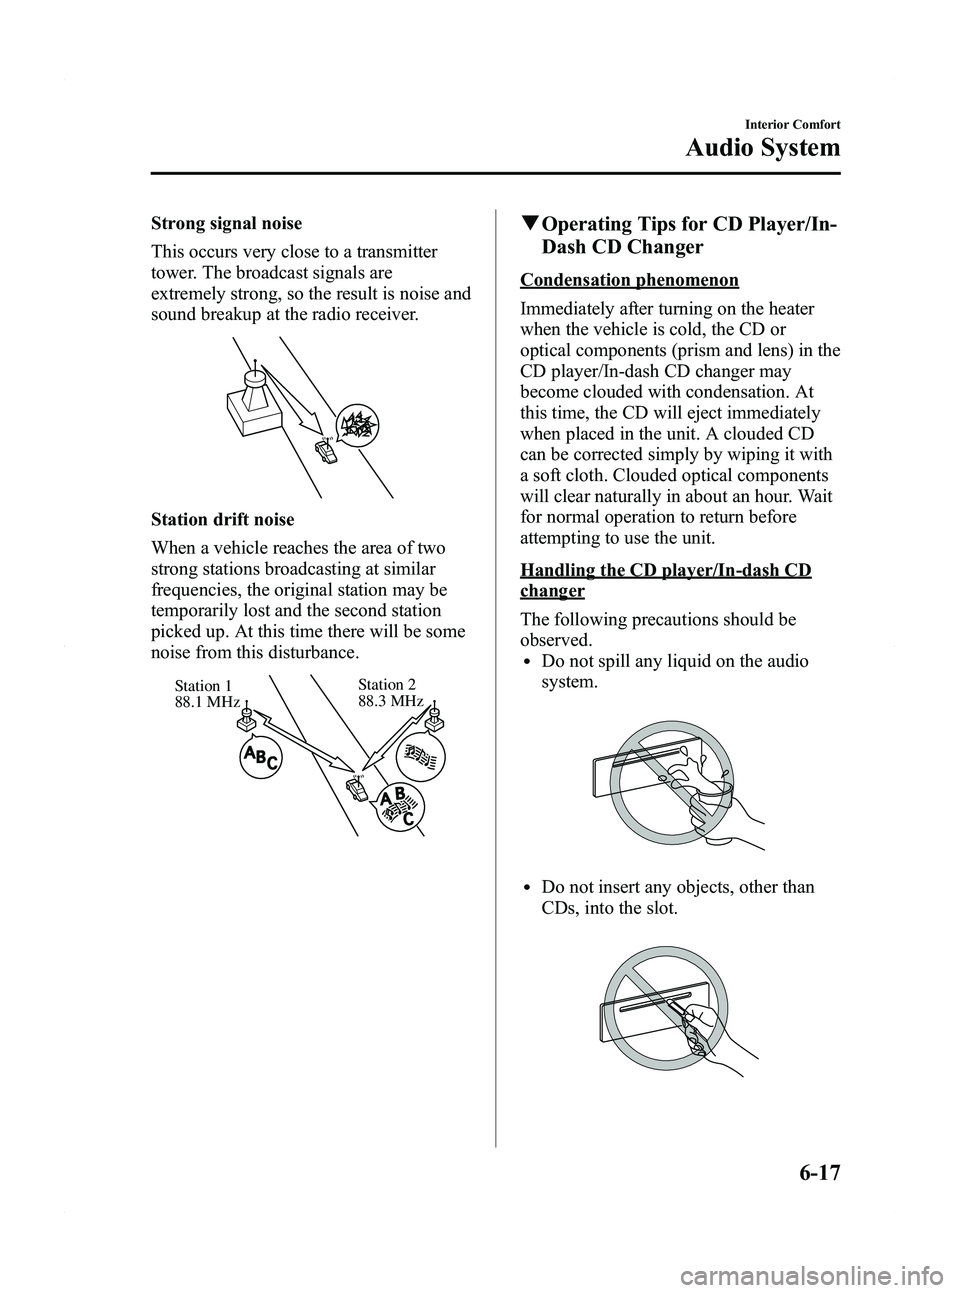
Strong signal noise
This occurs very close to a transmitter
tower. The broadcast signals are
extremely strong, so the result is noise and
sound breakup at the radio receiver.
Station drift noise
When a vehicle reaches the area of two
strong stations broadcasting at similar
frequencies, the original station may be
temporarily lost and the second station
picked up. At this time there will be some
noise from this disturbance.
Station 2
88.3 MHz
Station 1
88.1 MHz
q
Operating Tips for CD Player/In-
Dash CD Changer
Condensation phenomenon
Immediately after turning on the heater
when the vehicle is cold, the CD or
optical components (prism and lens) in the
CD player/In-dash CD changer may
become clouded with condensation. At
this time, the CD will eject immediately
when placed in the unit. A clouded CD
can be corrected simply by wiping it with
a soft cloth. Clouded optical components
will clear naturally in about an hour. Wait
for normal operation to return before
attempting to use the unit.
Handling the CD player/In-dash CD
changer
The following precautions should be
observed.
lDo not spill any liquid on the audio
system.
lDo not insert any objects, other than
CDs, into the slot.
Interior Comfort
Audio System
6-17
MX-5_8BR3-EA-10F_Edition3 Page237
Wednesday, March 2 2011 5:26 PM
Form No.8BR3-EA-10F
Page 252 of 454

Black plate (252,1)
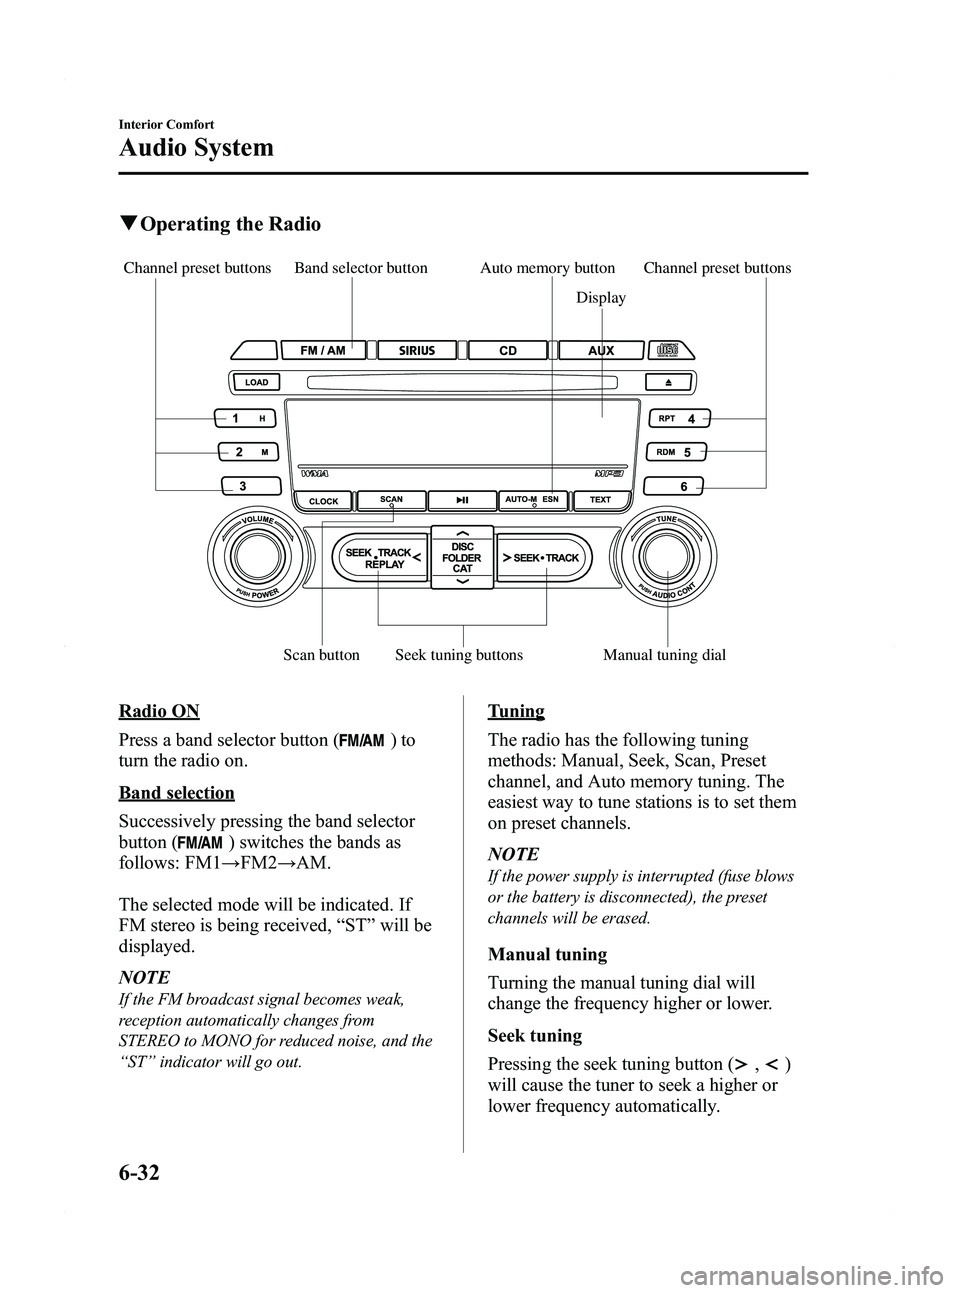
qOperating the Radio
Band selector button
Seek tuning buttons
Scan button Display
Auto memory button Channel preset buttons
Channel preset buttons
Manual tuning dial
Radio ON
Press a band selector button (
)to
turn the radio on.
Band selection
Successively pressing the band selector
button (
) switches the bands as
follows: FM1 →FM2 →AM.
The selected mode will be indicated. If
FM stereo is being received, “ST ”will be
displayed.
NOTE
If the FM broadcast signal becomes weak,
reception automatically changes from
STEREO to MONO for reduced noise, and the
“ ST ”indicator will go out.
Tuning
The radio has the following tuning
methods: Manual, Seek, Scan, Preset
channel, and Auto memory tuning. The
easiest way to tune stations is to set them
on preset channels.
NOTE
If the power supply is interrupted (fuse blows
or the battery is disconnected), the preset
channels will be erased.
Manual tuning
Turning the manual tuning dial will
change the frequency higher or lower.
Seek tuning
Pressing the seek tuning button (
,)
will cause the tuner to seek a higher or
lower frequency automatically.
6-32
Interior Comfort
Audio System
MX-5_8BR3-EA-10F_Edition3 Page252
Wednesday, March 2 2011 5:26 PM
Form No.8BR3-EA-10F
Page 283 of 454

Black plate (283,1)
Audio unit
The audio unit is used for adjusting the
volume.
qVoice
To prevent the deterioration in voice
recognition rate and voice quality, the
following points must be observed:
lIt is not necessary to face the
microphone or approach it. Speak the
voice commands while maintaining a
safe driving position.
lClose the windows and/or the
moonroof to reduce loud noises from
outside the vehicle, or turn down the
airflow of the climate control system
while Bluetooth Hands-Free is being
used. Voice recognition may not
function correctly or voice quality may
deteriorate under the following
conditions.
lA passenger is speaking.lDriving with the window and/or the
moonroof open.
lDriving on bumpy roads.lNoise outside of the vehicle is loud.
(Construction sites, inside tunnels,
excess oncoming traffic, or heavy
rain.)
lOperation noise from turn signals,
wipers, or the horn is heard.
lA/C airflow is strong or wind is
blowing on the microphone.
lThere is noise coming from cargo
loaded in the vehicle.
lVoice commands may not be
recognized depending on the voice. If
the voice commands are not recognized
correctly, repeat the commands in a
louder voice, at a natural pace, as if
speaking to another person.
lDialects or different wording other than
hands-free prompts cannot be
recognized by voice recognition. Speak
in the wording specified by the voice
commands.
NOTE
If the voice recognition performance is not
satisfactory, refer to “Voice Recognition
Learning Function (Speaker Enrollment) ”
(page 6-76).
Please be aware that the voice recognition
may still make an error despite following
the above points.
q Function restrictions while using
Bluetooth Hands-Free
Some functions are limited while
Bluetooth Hands-Free is being used. They
include:
lBeep sound and voice guidance related
to the audio unit are not heard.
lBeep sound related to the A/C
operation is not heard.
qHow to use this section
Descriptions in the text are as follows:
Say: Voice commands to be spoken by
you.
Prompt: Voice guidance output from the
speaker.
NOTE
Say voice commands after the beep sound
[Beep] is heard.
Example)
Say: [Beep] “Dial ”
Prompt: “Number, please ”
Say: [Beep] “XXXXXXXXXXX (Ex.
“ 555-1234 ”) (Telephone number) ”
Interior Comfort
Bluetooth Hands-Free
6-63
MX-5_8BR3-EA-10F_Edition3 Page283
Wednesday, March 2 2011 5:27 PM
Form No.8BR3-EA-10F