Page 291 of 576

291
3-4. Using the hands-free phone system (for mobile phones)
3
Interior features
Using the hands-free phone system for the first time
Before using the hands-free phone sy stem, it is necessary to register a
mobile phone in the system. The sy stem will enter phone registration
mode automatically when starting th e system with no mobile phone reg-
istered. Follow the procedure below to register (pair) a mobile phone:
Press the off-hook switch or the talk switch.
The introductory guidance and phone name registration instructions are
heard.
Select “Pair Phone” using a voice command or , and
.
Register a phone name by either of the following methods:
a. Select “Record Name” using , and , and say the name to be registered.
b. Press the talk switch and say the name to be registered.
A voice guidance instruction to confirm the input is heard.
Select “Confirm” using a voice command or , and .
A passkey is displayed and heard, an d a voice guidance instruction for
inputting the passkey into the mobile phone is heard.
Input the passkey into the mobile phone.
Refer to the manual that comes with the mobile phone for the operation
of the phone.
Guidance for registration completion is heard.
If the mobile phone has a Bluetooth
® audio player, the audio player can
be registered at the same time. A voic e guidance instruction to register a
Bluetooth
® audio player is heard.
Select “Yes” or “No” using a voice command or ,
and . (Bluetooth
® audio player P. 266)
STEP1
STEP2
STEP3
STEP4
STEP5
STEP6
Page 295 of 576
295
3-4. Using the hands-free phone system (for mobile phones)
3
Interior features
■Automatic volume adjustment
When vehicle speed reaches 50 mph (80 km/h) or more, the volume automati-
cally increases. The volume returns to the previous volume setting when vehicle
speed drops to 43 mph (70 km/h) or less.
■When using a voice command
For numbers, say a combination of single digits from zero to nine, # (pound),
(star), and + (plus).
Say the command correctly and clearly.
■Situations in which the system may not recognize your voice
●When driving on rough roads
●When driving at high speeds
●When air is blowing out of the vents onto the microphone
●When the air conditioning fan emits a loud noise
■Operations that cannot be performed while driving
●Operating the system with , and
●Registering a mobile phone to the system
■Changing the passkey
P. 3 0 3
Page 315 of 576
315
3
Interior features
3-5. Using the interior lights
Interior lights list
Your Lexus is equipped with the illuminated entry system to assist in enter-
ing the vehicle. Owing to the function of the system, the lights shown in the
following illustration automatically turn on/off according to the presence of
the electronic key, whether the doors are locked/unlocked, whether the
doors are opened/closed, and the “ENGINE START STOP” switch mode.
Front personal lights ( P. 317)
Front interior lights ( P. 317)
Rear personal lights ( P. 317)
Rear interior light
Rear overhead courtesy light
Shift lever light (when the “ENGINE START STOP” switch is in
ACCESSORY or IGNITION ON mode)
Front footwell lights
Page 316 of 576
316
3-5. Using the interior lights
■To prevent the battery from being discharged
If the interior lights remain on when the door is not fully closed and the interior light
switch (door position on/off) is on, the lights will go off automatically after 20 min-
utes.
■Customization that can be configured at Lexus dealer
Setting (e.g. The time elapsed before lights turn off) can be changed. (Customiz-
able features
P. 5 4 0 )
Front door courtesy light
Front scuff lights (if equipped)
Outer foot lights
Turning the instrument panel light contro l knob fully to the left disables the
shift lever lights and front footwell lights.
Page 335 of 576
335
3-7. Other interior features
3
Interior features
Seat heaters
: If equipped
Vehicles with an automatic transmissionHeats the seats
The indicator light comes on.
The higher the number, the
warmer the seats become.Front
passenger’s
seat
Driver’s
seat
Page 338 of 576
338
3-7. Other interior features
Seat heaters and ventilators
The seat heaters and ventilators heat the seats and maintain good airflow
by blowing air from the seats.
Vehicles with an automatic transmission
Heats the seats
The indicator light (amber)
comes on.
The higher the number, the
warmer the seats become.
Blows air from the seats
The indicator light (green)
comes on.
The higher the number, the
stronger the airflow becomes.
Driver’s
seat
Front
passenger’s
seat
: If equipped
Page 342 of 576
342
3-7. Other interior features
Rear sunshade
■Reverse operation feature
This function will become operational after the vehicle has been driven at 9 mph (15
km/h) or more with the rear sunshade in the raised position.
To ensure adequate rear visibility, the sunshade automatically lowers when the shift
lever is shifted to R and the function is in an operational condition.
However, the rear sunshade is raised again if either of the following occurs:
●The switch is pressed again.
●The shift lever is shifted out of R, and the vehicle reaches a speed of 9 mph (15
km/h).
If the engine is turned off when the rear sunshade has been lowered due to the
reverse operation feature, it will not be raised even when the engine is turned on
again and the vehicle reaches a speed of 9 mph (15 km/h). To raise the sunshade
again, press the switch.
■The rear sunshade can be used when
The “ENGINE START STOP” switch is in IGNITION ON mode.
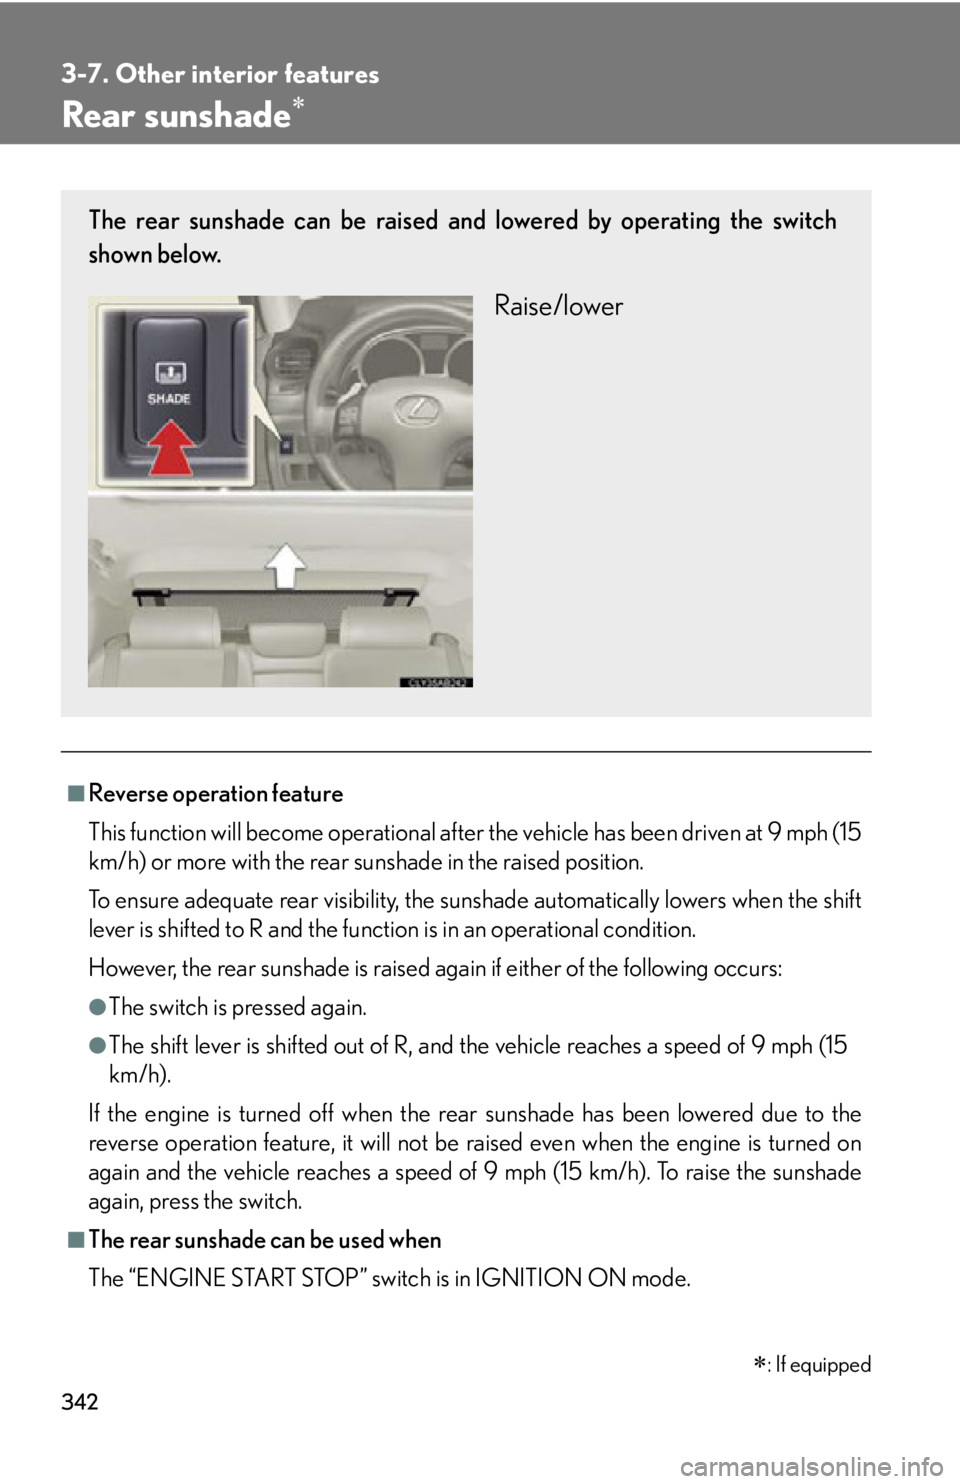
The rear sunshade can be raised and lowered by operating the switch
shown below.
Raise/lower
: If equipped
Page 346 of 576

346
3-7. Other interior features
Floor mat
CAUTION
Observe the following precautions.
Failure to do so may cause the driver's floor mat to slip, possibly interfering with the
pedals while driving. An unexpectedly high speed may result or it may become diffi-
cult to stop the vehicle, leading to a serious accident.
■When installing the driver's floor mat
●Do not use floor mats designed for other models or different model year vehicles,
even if they are Lexus Genuine floor mats.
●Only use floor mats designed for the driver's seat.
●Always install the floor mat securely using the retaining hooks (clips) provided.
●Do not use two or more floor mats on top of each other.
●Do not place the floor mat bo ttom-side up or upside-down.
■Before driving
Use only floor mats designed specifically for vehicles of the same model
and model year as your vehicle. Fix them securely in plac e onto the carpet.
Fix the floor mat in place using
the retaining hooks (clips) pro-
vided.
For details, refer to the floor mat
retention clip installation
instructions supplied with the
clips.
●Check that the floor mat is securely fixed in
the right place with all the provided retain-
ing hooks (clips). Be especially careful to
perform this check after cleaning the floor.
●With the engine stopped and the shift lever
in P (automatic transmission) or N (manual
transmission), fully depress each pedal to
the floor to make sure it does not interfere
with the floor mat.