2011 KIA VENGA parking brake
[x] Cancel search: parking brakePage 285 of 761
Maintenance
22
7
Cooling system
Check cooling system components, such
as radiator, coolant reservoir, hoses and
connections for leakage and damage.
Replace any damaged parts. Coolant The coolant should be changed at the
intervals specified in the maintenance
schedule.
Manual transaxle fluid (if equipped)
Inspect the manual transaxle fluid
according to the maintenance schedule. Automatic transaxle fluid (if equipped)
The fluid level should be in the "HOT"
range of the dipstick, after the engine
and transaxle are at normal operating
temperature. Check the automatic
transaxle fluid level with the engine run-
ning and the transaxle in neutral, with the
parking brake properly applied. Brake hoses and lines
Visually check for proper installation,
chafing, cracks, deterioration and any
leakage. Replace any deteriorated or
damaged parts immediately. Brake fluid
Check brake fluid level in the brake fluid
reservoir. The level should be between
“MIN” and “MAX” marks on the side of
the reservoir. Use only hydraulic brake
fluid conforming to DOT 3 or DOT 4specification.Parking brake
Inspect the parking brake system includ-
ing the parking brake pedal and cables.
Brake discs, pads, calipers and
rotors
Check the pads for excessive wear, discs
for run out and wear, and calipers for fluid
leakage. Suspension mounting bolts
Check the suspension connections for
looseness or damage. Retighten to the
specified torque.
Page 292 of 761
729
Maintenance
AUTOMATIC TRANSAXLE FLUID (IF EQUIPPED)
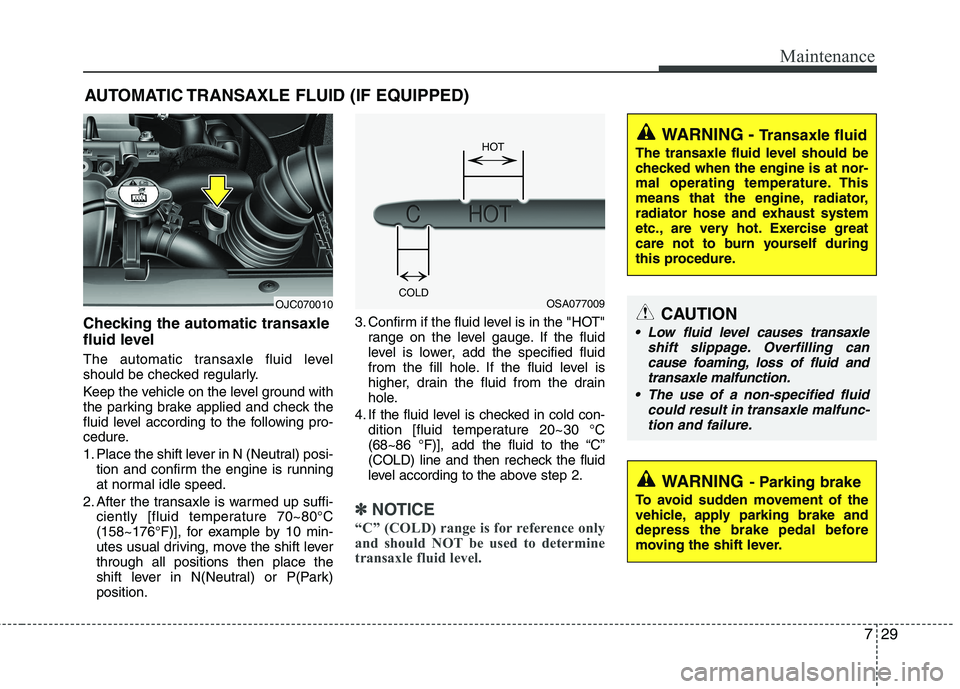
Checking the automatic transaxle
fluid level
The automatic transaxle fluid level
should be checked regularly.
Keep the vehicle on the level ground with
the parking brake applied and check the
fluid level according to the following pro-
cedure.
1. Place the shift lever in N (Neutral) posi- tion and confirm the engine is running
at normal idle speed.
2. After the transaxle is warmed up suffi- ciently [fluid temperature 70~80°C
(158~176°F)], for example by 10 min-
utes usual driving, move the shift leverthrough all positions then place the
shift lever in N(Neutral) or P(Park)position. 3. Confirm if the fluid level is in the "HOT"
range on the level gauge. If the fluid
level is lower, add the specified fluid
from the fill hole. If the fluid level is
higher, drain the fluid from the drain
hole.
4. If the fluid level is checked in cold con- dition [fluid temperature 20~30 °C
(68~86 °F)], add the fluid to the “C”
(COLD) line and then recheck the fluid
level according to the above step 2.
✽✽
NOTICE
“C” (COLD) range is for reference only
and should NOT be used to determine
transaxle fluid level.
WARNING - Transaxle fluid
The transaxle fluid level should be
checked when the engine is at nor-
mal operating temperature. This
means that the engine, radiator,
radiator hose and exhaust system
etc., are very hot. Exercise great
care not to burn yourself during
this procedure.
WARNING - Parking brake
To avoid sudden movement of the
vehicle, apply parking brake and
depress the brake pedal before
moving the shift lever.
CAUTION
Low fluid level causes transaxle shift slippage. Overfilling cancause foaming, loss of fluid andtransaxle malfunction.
The use of a non-specified fluid could result in transaxle malfunc-tion and failure.
OJC070010OSA077009
COLD HOT
�
�
Page 294 of 761
731
Maintenance
WASHER FLUID
Checking the washer fluid level
Check the fluid level in the washer fluid
reservoir and add fluid if necessary. Plain
water may be used if washer fluid is not
available. However, use washer solvent
with antifreeze characteristics in cold cli-
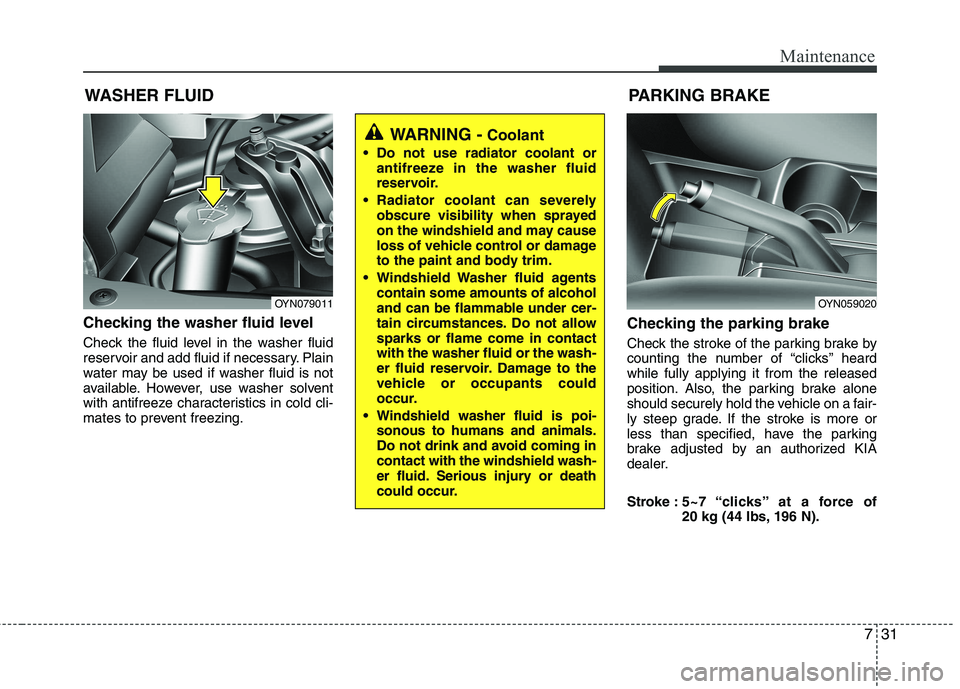
mates to prevent freezing. Checking the parking brake
Check the stroke of the parking brake by
counting the number of “clicks’’ heardwhile fully applying it from the released
position. Also, the parking brake alone
should securely hold the vehicle on a fair-
ly steep grade. If the stroke is more or
less than specified, have the parking
brake adjusted by an authorized KIA
dealer.
Stroke :
5~7 “clicks’’ at a force of
20 kg (44 lbs, 196 N).
PARKING BRAKE
WARNING -
Coolant
Do not use radiator coolant or antifreeze in the washer fluid
reservoir.
Radiator coolant can severely obscure visibility when sprayed
on the windshield and may cause
loss of vehicle control or damage
to the paint and body trim.
Windshield Washer fluid agents contain some amounts of alcohol
and can be flammable under cer-
tain circumstances. Do not allowsparks or flame come in contactwith the washer fluid or the wash-
er fluid reservoir. Damage to the
vehicle or occupants could
occur.
Windshield washer fluid is poi- sonous to humans and animals.
Do not drink and avoid coming incontact with the windshield wash-
er fluid. Serious injury or death
could occur.
OYN059020OYN079011
Page 324 of 761

761
Maintenance
LIGHT BULBS
Use only the bulbs of the specifiedwattage.
✽✽ NOTICE
After heavy, driving rain or washing,
headlight and taillight lenses could
appear frosty. This condition is caused by
the temperature difference between the
lamp inside and outside. This is similar
to the condensation on your windows
inside your vehicle during the rain and
doesn’t indicate a problem with your
vehicle. If the water leaks into the lamp
bulb circuitry, have the vehicle checked
by an authorized KIA dealer.
Headlight, position light, turn sig-
nal light, front fog light bulbreplacement
(1) Headlight (Low) (2) Headlight (High)
(3) Position light
(4) Front turn signal light
(5) Front fog light (if equipped)
* The actual lamp in the vehicle may differ from the illustration.
WARNING - Working on
the lights
Prior to working on the light, firmly
apply the parking brake, ensure
that the ignition switch is turned tothe LOCK position and turn off the
lights to avoid sudden movement
of the vehicle and burning your fin-
gers or receiving an electric shock.
CAUTION
Be sure to replace the burned-out bulb with one of the same wattagerating. Otherwise, it may cause
damage to the fuse or electric wiring system.
CAUTION
If you don’t have necessary tools,the correct bulbs and the expertise,
consult an authorized KIA dealer. Inmany cases, it is difficult to replacevehicle light bulbs because other parts of the vehicle must be
removed before you can get to thebulb. This is especially true if youhave to remove the headlight
assembly to
get to the bulb(s).
Removing/installingthe headlight
assembly can result in damage to the vehicle.OYN079027
Page 358 of 761

Introduction
6
1
INDICATOR SYMBOLS ON THE INSTRUMENT CLUSTER
Engine coolant temperature
warning light
Seat belt warning light
High beam indicator
Turn signal indicator
ABS warning light*
Parking brake & Brake fluid
warning light
Malfunction indicator*
Immobiliser indicator*
Glow indicator (Diesel only)
Fuel filter warning light (Diesel only)
Tailgate open warning light*
❈ For more detailed explanations, refer to “Instrument cluster” in section 4.
Charging system warning light
Door ajar warning light*
ESP indicator*
ESP OFF indicator*
Front fog light indicator*
Engine oil pressure warning light
Electric power steering (EPS)
system warning light*
Air bag warning light*
Low tyre pressure telltale* / TPMS malfunction indicator*
Rear fog light indicator*
Cruise SET indicator*
Speed limit indicator* AUTO STOP for ISG system indicator*
Cruise indicator*
AUTOSTOP
KEY OUT indicator*KEY
OUT
Light on indicator
Automatic transaxle shift pattern indicator*
Manual transaxle shift pattern indicator*
* if equipped
Door open position indicator*
Low fuel level warning light Low tyre pressure position telltale*
YN RHD 1.QXP 6/1/2010 4:00 PM Page 6
Page 361 of 761
23
Your vehicle at a glance
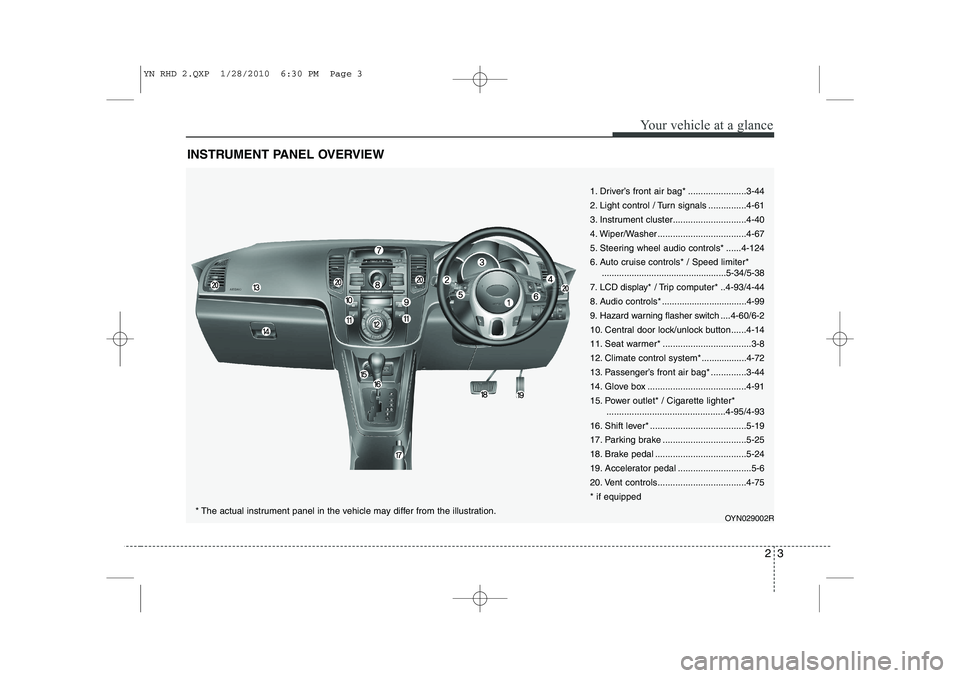
INSTRUMENT PANEL OVERVIEW
1. Driver’s front air bag* .......................3-44
2. Light control / Turn signals ...............4-61
3. Instrument cluster.............................4-40
4. Wiper/Washer ...................................4-67
5. Steering wheel audio controls* ......4-124
6. Auto cruise controls* / Speed limiter*..................................................5-34/5-38
7. LCD display* / Trip computer* ..4-93/4-44
8. Audio controls * ..................................4-99
9. Hazard warning flasher switch ....4-60/6-2
10. Central door lock/unlock button......4-14
11. Seat warmer* ...................................3-8
12. Climate control system*..................4-72
13. Passenger’s front air bag* ..............3-44
14. Glove box .......................................4-91
15. Power outlet* / Cigarette lighter* ...............................................4-95/4-93
16. Shift lever* ......................................5-19
17. Parking brake .................................5-25
18. Brake pedal ....................................5-24
19. Accelerator pedal .............................5-6
20. Vent controls...................................4-75* if equipped
OYN029002R
* The actual instrument panel in the vehicle may differ from the illustration.
YN RHD 2.QXP 1/28/2010 6:30 PM Page 3
Page 373 of 761
311
Safety features of your vehicle
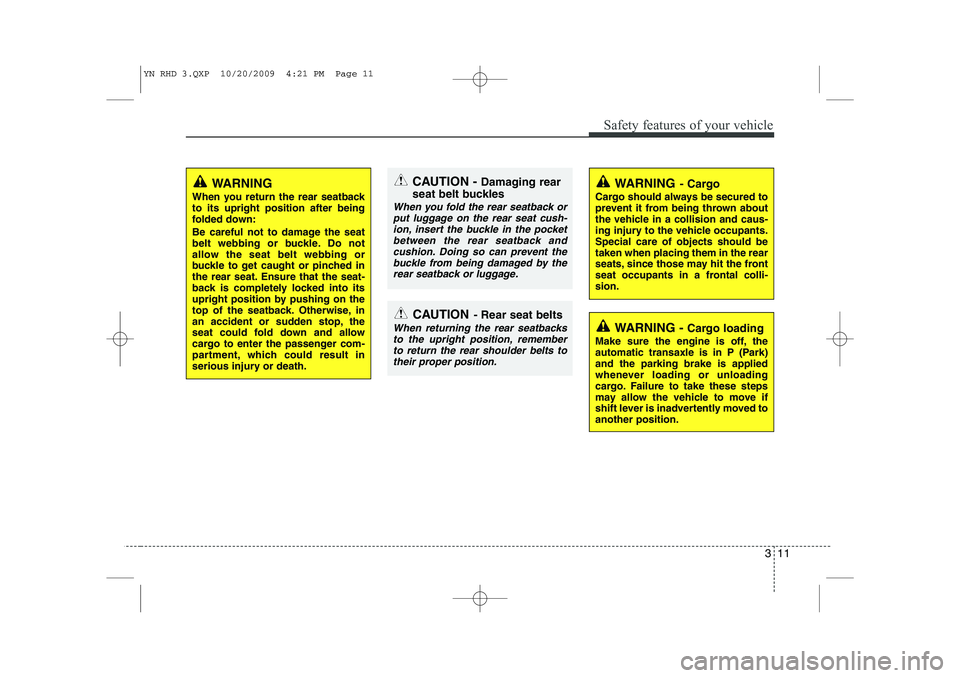
WARNING
When you return the rear seatback to its upright position after being
folded down:
Be careful not to damage the seat
belt webbing or buckle. Do not
allow the seat belt webbing or
buckle to get caught or pinched in
the rear seat. Ensure that the seat-
back is completely locked into its
upright position by pushing on the
top of the seatback. Otherwise, in
an accident or sudden stop, the
seat could fold down and allow
cargo to enter the passenger com-
partment, which could result in
serious injury or death.CAUTION - Damaging rear
seat belt buckles
When you fold the rear seatback or put luggage on the rear seat cush-
ion, insert the buckle in the pocket between the rear seatback andcushion. Doing so can prevent the buckle from being damaged by the
rear seatback or luggage.
WARNING - Cargo loading
Make sure the engine is off, the
automatic transaxle is in P (Park)and the parking brake is applied
whenever loading or unloading
cargo. Failure to take these steps
may allow the vehicle to move if
shift lever is inadvertently moved toanother position.
WARNING - Cargo
Cargo should always be secured to
prevent it from being thrown about
the vehicle in a collision and caus-
ing injury to the vehicle occupants.Special care of objects should betaken when placing them in the rear
seats, since those may hit the front
seat occupants in a frontal colli-sion.
CAUTION - Rear seat belts
When returning the rear seatbacks
to the upright position, remember
to return the rear shoulder belts totheir proper position.
YN RHD 3.QXP 10/20/2009 4:21 PM Page 11
Page 436 of 761
415
Features of your vehicle
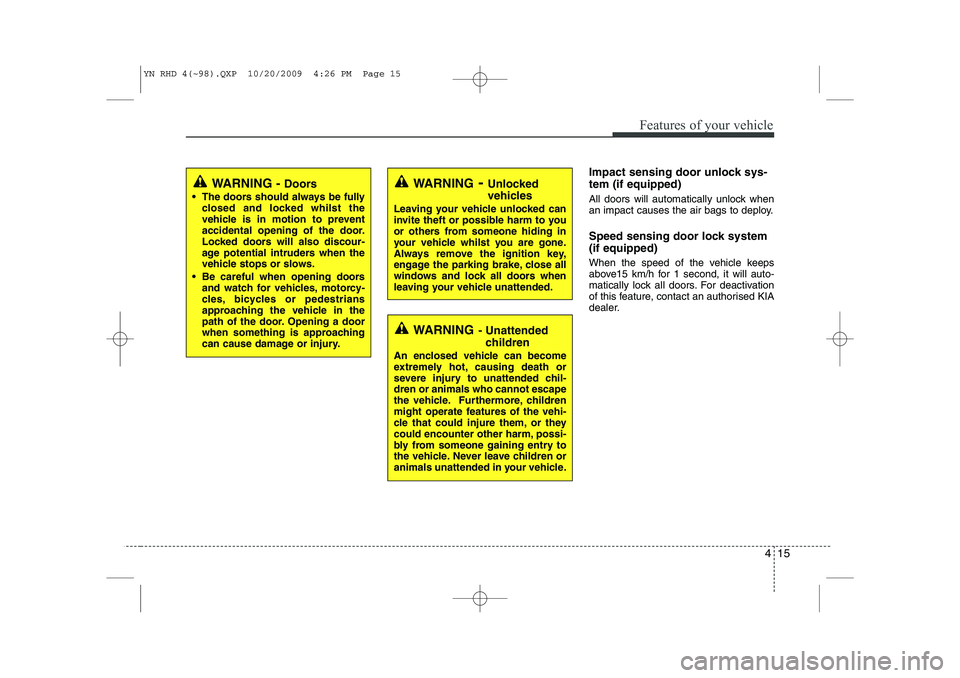
Impact sensing door unlock sys- tem (if equipped)
All doors will automatically unlock when
an impact causes the air bags to deploy.
Speed sensing door lock system (if equipped)
When the speed of the vehicle keeps
above15 km/h for 1 second, it will auto-
matically lock all doors. For deactivation
of this feature, contact an authorised KIA
dealer.
WARNING- Unlocked
vehicles
Leaving your vehicle unlocked can
invite theft or possible harm to you
or others from someone hiding in
your vehicle whilst you are gone.
Always remove the ignition key,
engage the parking brake, close all
windows and lock all doors when
leaving your vehicle unattended.
WARNING - Unattended
children
An enclosed vehicle can become
extremely hot, causing death or
severe injury to unattended chil-dren or animals who cannot escape
the vehicle. Furthermore, children
might operate features of the vehi-
cle that could injure them, or they
could encounter other harm, possi-
bly from someone gaining entry to
the vehicle. Never leave children or
animals unattended in your vehicle.
WARNING - Doors
The doors should always be fully closed and locked whilst the
vehicle is in motion to prevent
accidental opening of the door.
Locked doors will also discour-
age potential intruders when the
vehicle stops or slows.
Be careful when opening doors and watch for vehicles, motorcy-
cles, bicycles or pedestrians
approaching the vehicle in the
path of the door. Opening a door
when something is approaching
can cause damage or injury.
YN RHD 4(~98).QXP 10/20/2009 4:26 PM Page 15