2011 KIA VENGA oil
[x] Cancel search: oilPage 283 of 761
Maintenance
20
7
EXPLANATION OF SCHEDULED MAINTENANCE ITEMS
Engine oil and filter The engine oil and filter should be
changed at the intervals specified in the
maintenance schedule. If the car is being
driven in severe conditions, more fre-quent oil and filter changes are required. Drive belts
Inspect all drive belts for evidence of
cuts, cracks, excessive wear or oil satu-
ration and replace if necessary. Drive
belts should be checked periodically forproper tension and adjusted as neces-
sary. Fuel filter (cartridge) A clogged filter can limit the speed at
which the vehicle may be driven, damage
the emission system and cause multiple
issues such as hard starting. If an exces-
sive amount of foreign matter accumu-
lates in the fuel tank, the filter may
require replacement more frequently.
After installing a new filter, run the engine
for several minutes, and check for leaks
at the connections. Fuel filters should be
installed by an authorized KIA dealer.
Fuel lines, fuel hoses and con- nections
Check the fuel lines, fuel hoses and con-
nections for leakage and damage. Have
an authorized KIA dealer replace any
damaged or leaking parts immediately.
WARNING -
Diesel only
Never work on injection system with engine running or within 30
seconds after shutting off engine.
High pressure pump, rail, injectorsand high pressure pipes are sub-
ject to high pressure even after the
engine stopped. The fuel jet pro-
duced by fuel leaks may cause seri-
ous injury, if it touch the body.
People using pacemakers should
not move than 30cm closer to theECU or wiring harness within the
engine room while engine is run-
ning, since the high currents in the
Common Rail system produce con-
siderable magnetic fields.
Page 287 of 761
Maintenance
24
7
ENGINE OIL
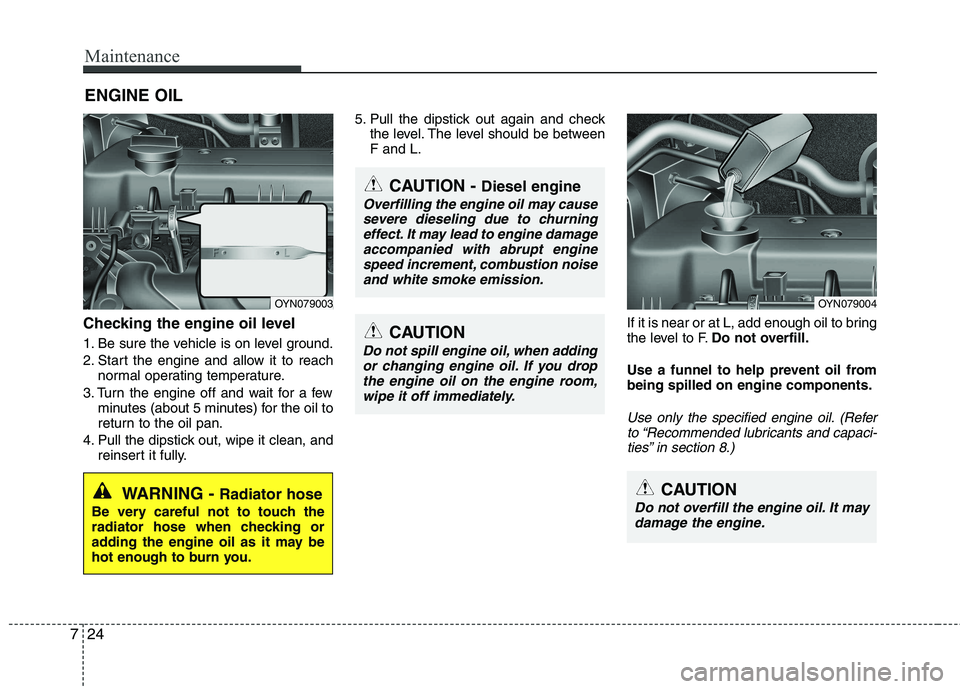
Checking the engine oil level
1. Be sure the vehicle is on level ground.
2. Start the engine and allow it to reach normal operating temperature.
3. Turn the engine off and wait for a few minutes (about 5 minutes) for the oil to
return to the oil pan.
4. Pull the dipstick out, wipe it clean, and reinsert it fully. 5. Pull the dipstick out again and check
the level. The level should be betweenF and L.
If it is near or at L, add enough oil to bring
the level to F.Do not overfill.
Use a funnel to help prevent oil frombeing spilled on engine components.
Use only the specified engine oil. (Refer to “Recommended lubricants and capaci- ties” in section 8.)
WARNING - Radiator hose
Be very careful not to touch the
radiator hose when checking or
adding the engine oil as it may be
hot enough to burn you.CAUTION
Do not overfill the engine oil. It may damage the engine.
CAUTION - Diesel engine
Overfilling the engine oil may cause
severe dieseling due to churningeffect. It may lead to engine damageaccompanied with abrupt enginespeed increment, combustion noise
and white smoke emission.
OYN079003OYN079004
CAUTION
Do not spill engine oil, when addingor changing engine oil. If you dropthe engine oil on the engine room,
wipe it off immediately.
Page 288 of 761
725
Maintenance
Changing the engine oil and filter
Have the engine oil and filter changed by
an authorized KIA dealer according tothe Maintenance Schedule at the begin-ning of this section.The high-pressure cooling system has a
reservoir filled with year-round antifreeze
coolant. The reservoir is filled at the fac-
tory.
Check the antifreeze protection and
coolant level at least once a year, at thebeginning of the winter season, and
before traveling to a colder climate.
Checking the coolant level
WARNING
Used engine oil may cause skin irri- tation or cancer if left in contact
with the skin for prolonged periods
of time. Used engine oil contains
chemicals that have caused cancer
in laboratory animals. Always pro-
tect your skin by washing your
hands thoroughly with soap and
warm water as soon as possibleafter handling used oil.
ENGINE COOLANT
WARNING
Removing radiator cap
Never attempt to remove the radi- ator cap while the engine is oper-
ating or hot. Doing so might leadto cooling system and engine
damage. Also hot coolant orsteam could cause serious per-
sonal injury.
(Continued)
(Continued)
Turn the engine off and wait untilit cools down. Use extreme care
when removing the radiator cap.
Wrap a thick towel around it, and
turn it counterclockwise slowly to
the first stop. Step back while the
pressure is released from thecooling system.
When you are sure all the pres-
sure has been released, press
down on the cap, using a thick
towel, and continue turning coun-
terclockwise to remove it.
Even if the engine is not operat- ing, do not remove the radiatorcap or the drain plug while the
engine and radiator are hot. Hot
coolant and steam may still blow
out under pressure, causing seri-
ous injury.
Page 291 of 761
Maintenance
28
7
BRAKE/CLUTCH FLUID (IF EQUIPPED)
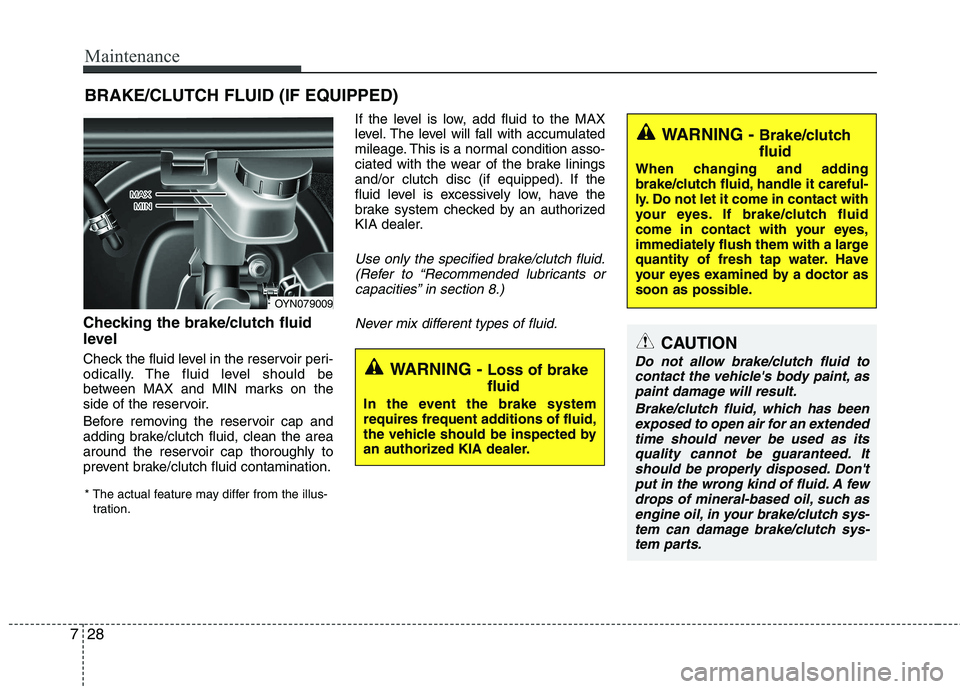
Checking the brake/clutch fluid
level
Check the fluid level in the reservoir peri-
odically. The fluid level should be
between MAX and MIN marks on the
side of the reservoir.
Before removing the reservoir cap and
adding brake/clutch fluid, clean the area
around the reservoir cap thoroughly to
prevent brake/clutch fluid contamination. If the level is low, add fluid to the MAX
level. The level will fall with accumulated
mileage. This is a normal condition asso-
ciated with the wear of the brake linings
and/or clutch disc (if equipped). If the
fluid level is excessively low, have the
brake system checked by an authorized
KIA dealer.
Use only the specified brake/clutch fluid.
(Refer to “Recommended lubricants or
capacities” in section 8.)
Never mix different types of fluid.
WARNING - Loss of brake fluid
In the event the brake system
requires frequent additions of fluid,
the vehicle should be inspected by
an authorized KIA dealer.
WARNING - Brake/clutch fluid
When changing and adding
brake/clutch fluid, handle it careful-
ly. Do not let it come in contact with
your eyes. If brake/clutch fluid
come in contact with your eyes,
immediately flush them with a large
quantity of fresh tap water. Have
your eyes examined by a doctor as
soon as possible.
CAUTION
Do not allow brake/clutch fluid to contact the vehicle's body paint, as
paint damage will result.
Brake/clutch fluid, which has beenexposed to open air for an extendedtime should never be used as its quality cannot be guaranteed. It
should be properly disposed. Don'tput in the wrong kind of fluid. A few drops of mineral-based oil, such asengine oil, in your brake/clutch sys-
tem can damage brake/clutch sys-tem parts.
OYN079009
* The actual feature may differ from the illus- tration.
Page 293 of 761
Maintenance
30
7
✽✽
NOTICE
New automatic transaxle fluid should be
red. The red dye is added so the assem-
bly plant can identify it as automatic
transaxle fluid and distinguish it from
engine oil or antifreeze. The red dye,
which is not an indicator of fluid quali-
ty, is not permanent. As the vehicle is
driven, the automatic transaxle fluid
will begin to look darker. The color may
eventually appear light brown.
Therefore, have an authorized KIA
dealer change the automatic transaxle
fluid according to the Scheduled
Maintenance at the beginning of this
section.
Use only specified automatic transaxle
fluid. (Refer to "Recommended lubricantsor capacities" in section 8.) Changing the automatic transaxle fluid
Have the automatic transaxle fluid
changed by an authorized KIA dealeraccording to the Maintenance Scheduleat the beginning of this section.
Page 304 of 761

741
Maintenance
Reset items
Items should be reset after the battery
has been discharged or the battery hasbeen disconnected.
Auto up/down window (See section 4)
Sunroof (See section 4)
Trip computer (See section 4)
Climate control system (See section 4)
Clock (See section 4)
Audio (See section 4)
WARNING
Before performing maintenance or recharging the battery, turn off all accessories and stop the
engine.
The negative battery cable must be removed first and installed
last when the battery is discon-nected.WARNING - Recharging
battery
When recharging the battery,
observe the following precautions:
The battery must be removed from the vehicle and placed in an area with good ventilation.
Do not allow cigarettes, sparks, or flame near the battery.
Watch the battery during charg- ing, and stop or reduce the charg-
ing rate if the battery cells begin
gassing (boiling) violently or if
the temperature of the electrolyte
of any cell exceeds 49°C (120°F).
Wear eye protection when check- ing the battery during charging.
Disconnect the battery charger in the following order.
1. Turn off the battery charger main switch.
2. Unhook the negative clamp from the negative battery terminal.
3. Unhook the positive clamp from the positive battery terminal.CAUTION - AGM battery (if equipped)
Absorbent Glass Matt (AGM) bat-
teries are maintenance-free and
should only be serviced by anauthorized KIA dealer. For charg-ing your AGM battery, use only fully automatic battery chargers
that are specially developed forAGM batteries.
When replacing the AGM battery, use only the KIA genuine battery
for the ISG system.
If the AGM battery is reconnected or replaced, ISG function will notoperate immediately.
If you want to use the ISG func-tion, the battery sensor needs to
be calibrated for approximately 4hours with the ignition off.
Page 315 of 761

Maintenance
52
7
FUSES
A vehicle’s electrical system is protected
from electrical overload damage by
fuses. This vehicle has 2 (or 3) fuse panels, one
located in the driver’s side panel bolster,
the other in the engine compartment
near the battery.
If any of your vehicle’s lights, acces-
sories, or controls do not work, check the
appropriate circuit fuse. If a fuse has
blown, the element inside the fuse will bemelted.
If the electrical system does not work,
first check the driver’s side fuse panel.
Always replace a blown fuse with one of
the same rating.
If the replacement fuse blows, this indi-
cates an electrical problem. Avoid using
the system involved and immediately
consult an authorized KIA dealer.
Three kinds of fuses are used: blade type
for lower amperage rating, cartridge type
and multi fuse for higher amperage rat-ings.
OBK079042
Normal
Normal
Cartridge type Multi fuse Blown
Blown
Normal Blown
WARNING - Fuse replace-
ment
Never replace a fuse with any- thing but another fuse of the same rating.
A higher capacity fuse could cause damage and possibly a
fire.
Never install a wire or aluminum foil instead of the proper fuse -
even as a temporary repair. It may
cause extensive wiring damage
and a possible fire.
CAUTION
Do not use a screwdriver or any
other metal object to remove fusesbecause it may cause a short circuit
and damage the system.
Blade type
Page 320 of 761

757
Maintenance
Inner fuse panelDescription Fuse rating Protected component
START 10A Start Motor
ACC 10A Audio, Trip Computer, Outside Mirror Actuator
P/OUTLET FRT 15A Front Power Outlet & Cigar Lighter
P/OUTLET RR 25A Rear Power Outlet, Console Power Outlet CLUSTER 10A Cluster, BCM, Trip Computer, PDM, Smart Key Unit T/SIG 10A Multi Function Switch Light
ECU 5 10A ECU, Air Flow Sensor, Fuel Water Sensor TCU 10A Speed In Sensor, Speed Out Sensor, Speed Sensor
B/UP LP 10A Back Up Switch, Inhibit Switch, RPAS
ABS 3 10A Yaw Rate Sensor, ABS(ESP), ESP Switch
A/BAG 10A ACU
A/BAG IND 10A Cluster(Air Bag Indicator)
IGN COIL 15A Ignition Coil, Condensor IG1 10A MDPS, Center Facia Switch Module, TPMS, RPAS, Start Motor(ISG)
IG2 10A HLLD Switch, HLLD Actuator, BCM, FATC, Sunroof
WIPER FRT 25A Front Wiper S/HEATER 15A Seat Warmer
WIPER RR 25A Rear Wiper PDM 2 10A PDM
HTD MIRR 10A Outside Mirror Defroster
FOG LP FRT10AFront Fog Light
FOG LP RR10ARear Fog Light