Page 322 of 761

759
Maintenance
Engine compartment fuse panelDescription Fuse rating Protected component
B+1 50A I/P Junction Box(FOG LP FRT 10A,FOG LP RR 10A, AUDIO 20A, ROOM LP 10A, STOP LP 15A,
PDM 1 25A, DEICER 15A, DR LOCK 20A, FOLD’G MIRR 10A, SUNROOF 20A, Relay-Tail Lamp,
Fuse- TAIL LP LH 10A, TAIL LP RH 10A)
B+2 50A I/P Junction Box(HAZARD 15A, Relay-Power Window, Fuse-P/WDW LH 25A, P/WDW RH 25A,
SAFETY P/WDW 15A)
C/FAN 40A Cooling Fan Relay(High), Cooling Fan Relay (Low) ALT 125A/150A Alternator(Gasoline/Diesel)
ABS 2 40A ABS, ESP
ABS 1 40A ABS, ESP
RR HTD 40A I/P Junction Box(Rear Heater Relay)
BLOWER 40A Blower Motor
MDPS 80A MDPS(Motor Driving Power Steering)IG2 40A Ignition Switch(IG2, Start)
ECU 1 20A ECU
F/PUMP 20A Fuel Pump Relay(Gasoline) IG1 40A Ignition Switch(IG1, Accessory)
H/LP 20A Head Lamp Low Beam
H/LP LO LH 10A Left Head Lamp Low Beam
H/LP LO RH 10A Right Head Lamp Low Beam H/LP HI 20A Head Lamp High Beam
HORN 10A Horn, Burglar Alarm Horn, Battery Sensor
ECU 4 10A ECU(Gasoline)
Page 323 of 761
Maintenance
60
7
Engine compartment fuse panel (Diesel engine only) Description Fuse rating
Protected component
FUEL HTR30AFuel Filter Heater(Diesel)
A/CON 110AAir Conditioning System Relay
A/CON 210AAir Conditioning System
ECU 3 10A Immobilizer, Stop Switch, IMV, MPROP
ECU 2 30A ECU 4 10A, Main Relay, Fuse-ECU 1 20A, ECU 3 10A, SENSOR 10A, INJECTOR 15A
DRL 10A Daytime Running Light
SENSOR 10A Gasoline - Air Conditioning System Relay, Cooling Fan Relay(High, Low), Camshaft Position, Sensor,
Immobilizer, Canister Purge Solenoid Valve, Oxygen Sensor Up/Down
Diesel - Air Conditioning System Relay, Cooling Fan Relay(High, Low), Lambda Sensor
INJECTOR 15A Gasoline - Injector #1~#4, Fuel Pump Relay, Oil Control Valve
Diesel - Electrical EGR Actuator, Immobilizer, VGT Actuator, Crank Position Sensor, Glow Plug Relay,
PTC HTR 1 Relay
Description Fuse rating Protected component
GLOW 80A Glow Plug
PTC HTR 1 50A PTC Heater 1
PTC HTR 2 50A PTC Heater 2
PTC HTR 3 50A PTC Heater 3
Page 494 of 761
473
Features of your vehicle
Heating and air conditioning
1. Start the engine.
2. Set the mode to the desired position.To improve the effectiveness of heat-ing and cooling :
- Heating:- Cooling:
3. Set the temperature control to the desired position.
4. Set the air intake control to the outside (fresh) air position.
5. Set the fan speed control to the desired speed.
6. If air conditioning is desired, turn the air conditioning system (if equipped) on.
OYN049096R
YN RHD 4(~98).QXP 10/20/2009 4:32 PM Page 73
Page 499 of 761
Features of your vehicle
78
4
Operation Tips
To keep dust or unpleasant fumes from
entering the car through the ventilation
system, temporarily set the air intakecontrol to the recirculated air position.
Be sure to return the control to the
fresh air position when the irritation
has passed to keep fresh air in the
vehicle. This will help keep the driver
alert and comfortable.
Air for the heating/cooling system is drawn in through the grilles just ahead
of the windscreen. Care should be
taken that these are not blocked by
leaves, snow, ice or other obstructions.
To prevent interior fog on the wind- screen, set the air intake control to the
fresh air position and fan speed to the
desired position, turn on the air condi-tioning system, and adjust the temper-
ature control to desired temperature.Air conditioning (if equipped)
All KIA Air Conditioning Systems are
filled with environmentally friendly
R-134a refrigerant which does not dam-
age the ozone layer.
1. Start the engine. Push the air condi- tioning button.
2. Set the mode to the position.
3. Set the air intake control to the outside air or recirculated air position.
4. Adjust the fan speed control and tem- perature control to maintain maximum
comfort.✽✽ NOTICE
Page 500 of 761
479
Features of your vehicle
During air conditioning system opera-tion, you may occasionally notice a slight change in engine speed as the
air conditioning compressor cycles.
This is a normal system operation
characteristic.
Use the air conditioning system every month only for a few minutes to ensure
maximum system performance.
When using the air conditioning sys- tem, you may notice clear water drip-
ping (or even puddling) on the ground
under the passenger side of the vehi-
cle. This is a normal system operation
characteristic.
Operating the air conditioning system in the recirculated air position provides
maximum cooling, however, continual
operation in this mode may cause the
air inside the vehicle to become stale.
During cooling operation, you may occasionally notice a misty air flow
because of rapid cooling and humid air
intake. This is a normal system opera-
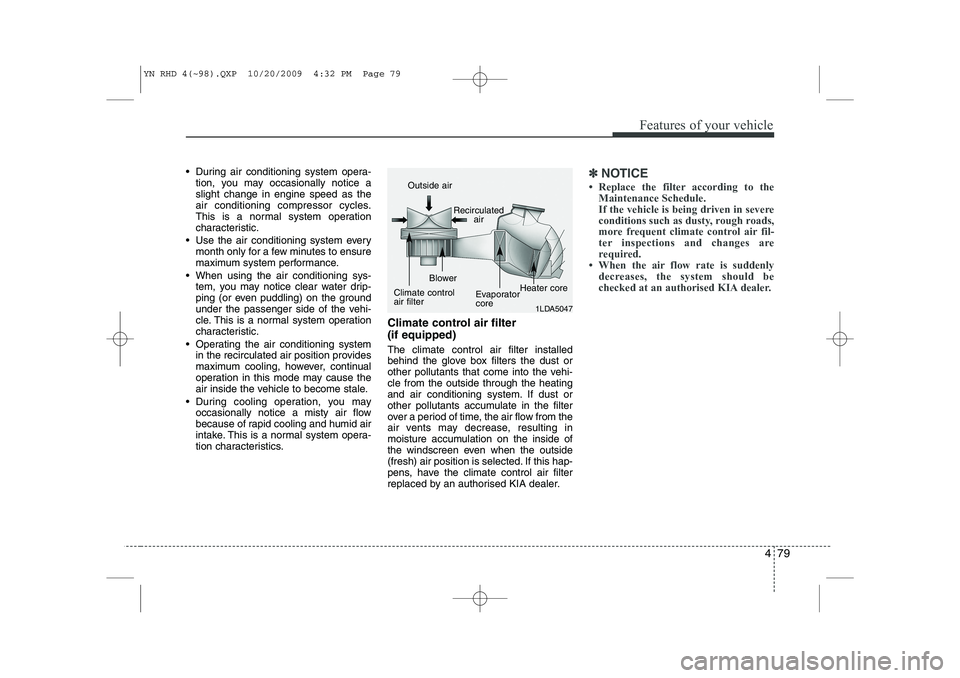
tion characteristics. Climate control air filter (if equipped) The climate control air filter installed
behind the glove box filters the dust or
other pollutants that come into the vehi-cle from the outside through the heating
and air conditioning system. If dust or
other pollutants accumulate in the filter
over a period of time, the air flow from the
air vents may decrease, resulting in
moisture accumulation on the inside of
the windscreen even when the outside
(fresh) air position is selected. If this hap-
pens, have the climate control air filter
replaced by an authorised KIA dealer.✽✽
NOTICE
Page 503 of 761
Features of your vehicle
82
4
Automatic heating and air condi- tioning The automatic climate control system is
controlled by simply setting the desired
temperature.
The Full Automatic Temperature Control
(FATC) system automatically controls the
heating and cooling system as follows;
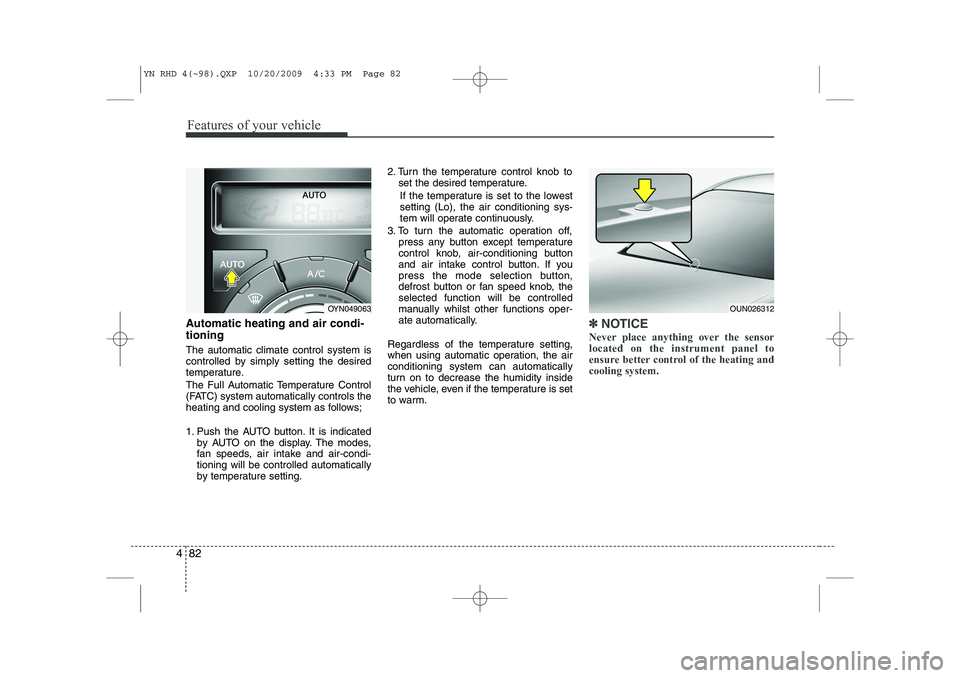
1. Push the AUTO button. It is indicated
by AUTO on the display. The modes,
fan speeds, air intake and air-condi-tioning will be controlled automatically
by temperature setting. 2. Turn the temperature control knob to
set the desired temperature.
If the temperature is set to the lowestsetting (Lo), the air conditioning sys-
tem will operate continuously.
3. To turn the automatic operation off, press any button except temperature
control knob, air-conditioning button
and air intake control button. If you
press the mode selection button,
defrost button or fan speed knob, theselected function will be controlled
manually whilst other functions oper-
ate automatically.
Regardless of the temperature setting,
when using automatic operation, the airconditioning system can automatically
turn on to decrease the humidity inside
the vehicle, even if the temperature is set
to warm.✽✽ NOTICE
Never place anything over the sensor located on the instrument panel to
ensure better control of the heating andcooling system.
OUN026312OYN049063
YN RHD 4(~98).QXP 10/20/2009 4:33 PM Page 82
Page 504 of 761
483
Features of your vehicle
Manual heating and air condition- ing The heating and cooling system can be
controlled manually by pushing buttons
other than the AUTO button. In this case,
the system works sequentially according
to the order of buttons selected.
When pressing any button (or turning
any knob) except AUTO button whilst
automatic operation, the functions not
selected will be controlled automatically.
1. Start the engine.
2. Set the mode to the desired position.
3. Set the temperature control to thedesired position.
4. Set the air intake control to the outside (fresh) air position.
5. Set the fan speed control to the desired speed.
6. If air conditioning is desired, turn the air conditioning system on.
Press the AUTO button in order to con-
vert to full automatic control of the sys-tem.
Mode selection
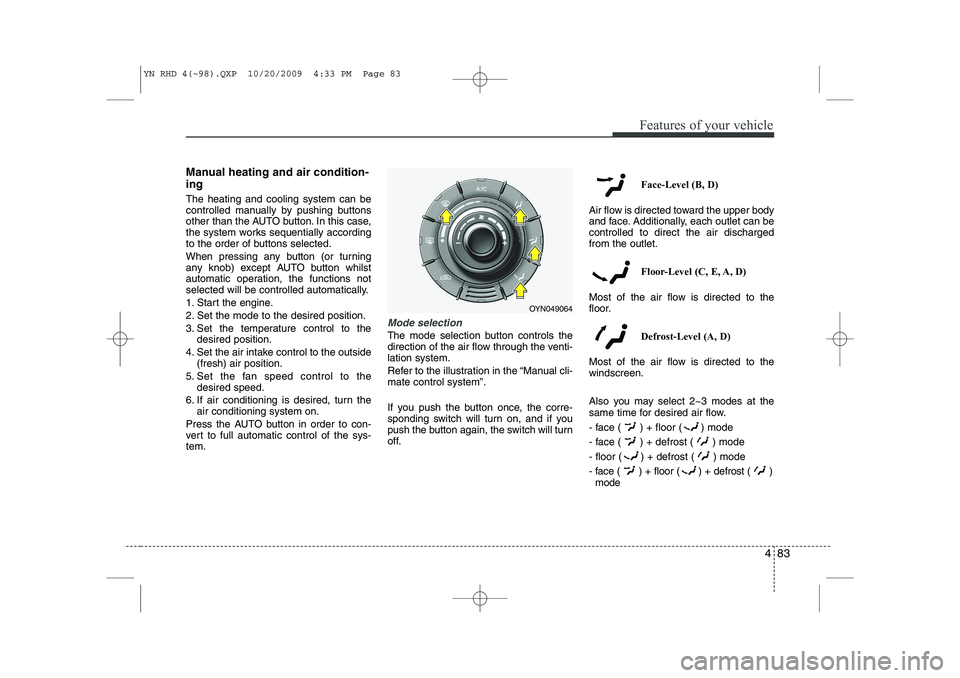
The mode selection button controls the
direction of the air flow through the venti-lation system.
Refer to the illustration in the “Manual cli- mate control system”.
If you push the button once, the corre-
sponding switch will turn on, and if you
push the button again, the switch will turn
off. Face-Level (B, D)
Air flow is directed toward the upper body
and face. Additionally, each outlet can becontrolled to direct the air dischargedfrom the outlet.
Floor-Level (C, E, A, D)
Most of the air flow is directed to the
floor.
Defrost-Level (A, D)
Most of the air flow is directed to thewindscreen.
Also you may select 2~3 modes at the
same time for desired air flow.
- face ( ) + floor ( ) mode
- face ( ) + defrost ( ) mode
- floor ( ) + defrost ( ) mode
- face ( ) + floor ( ) + defrost ( ) mode
OYN049064
YN RHD 4(~98).QXP 10/20/2009 4:33 PM Page 83
Page 510 of 761
489
Features of your vehicle
For maximum defrosting, set the tem-perature control to the extreme
right/hot position and the fan speedcontrol to the highest speed.
If warm air to the floor is desired whilst defrosting or defogging, set the modeto the floor-defrost position.
Before driving, clear all snow and ice from the windscreen, rear window, out-
side rear view mirrors, and all side win-
dows.
Clear all snow and ice from the bonnet and air inlet in the cowl grill to improveheater and defroster efficiency and to
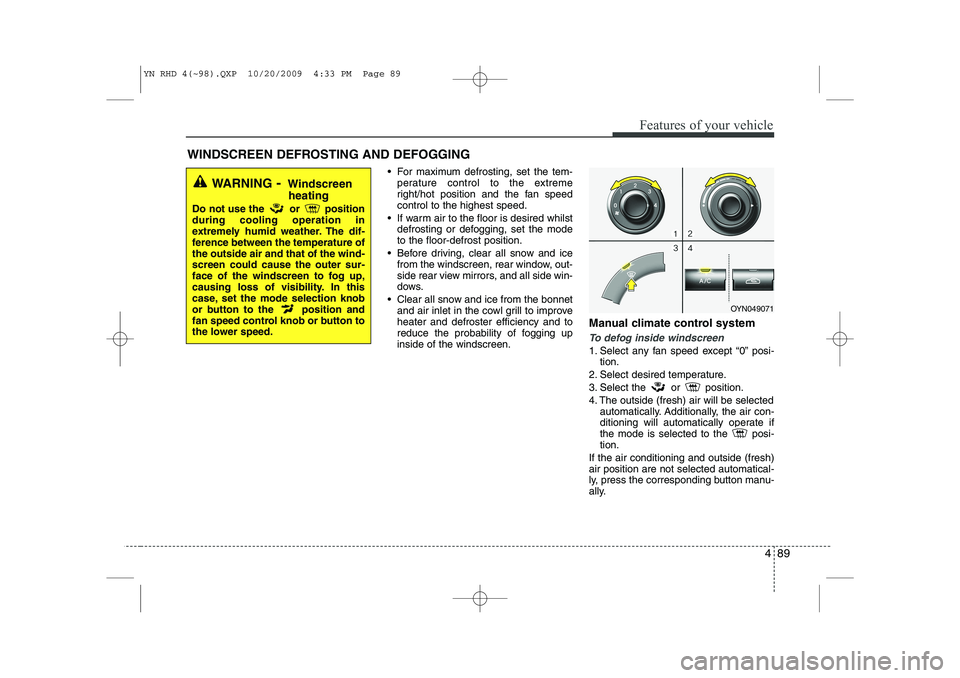
reduce the probability of fogging upinside of the windscreen. Manual climate control system
To defog inside windscreen
1. Select any fan speed except “0” posi-
tion.
2. Select desired temperature.
3. Select the or position.
4. The outside (fresh) air will be selected automatically. Additionally, the air con-
ditioning will automatically operate if
the mode is selected to the posi-tion.
If the air conditioning and outside (fresh)air position are not selected automatical-
ly, press the corresponding button manu-
ally.
WINDSCREEN DEFROSTING AND DEFOGGING
WARNING - Windscreen
heating
Do not use the or position during cooling operation in
extremely humid weather. The dif-
ference between the temperature ofthe outside air and that of the wind-screen could cause the outer sur-
face of the windscreen to fog up,
causing loss of visibility. In this
case, set the mode selection knob
or button to the position and
fan speed control knob or button to
the lower speed.
OYN049071
YN RHD 4(~98).QXP 10/20/2009 4:33 PM Page 89