2011 KIA VENGA light
[x] Cancel search: lightPage 607 of 761
555
Driving your vehicle
Parking on hills
Generally, if you have a trailer attached to
your vehicle, you should not park your
vehicle on a hill. People can be seriously
or fatally injured, and both your vehicle
and the trailer can be damaged if unex-
pectedly roll down hill.
However, if you ever have to park your
trailer on a hill, here's how to do it:
1. Pull the vehicle into the parking space.Turn the steering wheel in the direction
of the curb (right if headed down hill,left if headed up hill).
2. If the vehicle has a manual transaxle, place the car in neutral. If the vehicle
has an automatic transaxle, place the
car in P (Park).
3. Set the parking brake and shut off the vehicle.
4. Place chocks under the trailer wheels on the down hill side of the wheels. 5. Start the vehicle, hold the brakes, shift
to neutral, release the parking brake
and slowly release the brakes until the
trailer chocks absorb the load.
6. Reapply the brakes, reapply the park- ing brake and shift the vehicle to R
(Reverse) for manual transaxle or P
(Park) for automatic transaxle.
7. Shut off the vehicle and release the vehicle brakes but leave the parking
brake set.CAUTION
When towing a trailer on steep
grades (in excess of 6%) pay
close attention to the enginecoolant temperature gauge toensure the engine does not over- heat. If the coolant temperature
red warning light illuminates, pullover and stop as soon as it is safeto do so, and allow the engine to
idle until it cools down. You mayproceed once the engine hascooled sufficiently.
You must decide the driving speed depending on trailer
weight and uphill grade to reduce the possibility of engine andtransaxle overheating.
WARNING - Parking on a
hill
Parking your vehicle on a hill with a
trailer attached could cause seri-
ous injury or death, should the trail-
er break loose.
WARNING - Parking brake
It can be dangerous to get out of
your vehicle if the parking brake is
not firmly set.
If you have left the engine running,
the vehicle can move suddenly. You
or others could be seriously or
fatally injured.
YN RHD 5.QXP 10/20/2009 4:41 PM Page 55
Page 613 of 761
What to do in an emergency
2
6
ROAD WARNING
Hazard warning flasher
The hazard warning flasher serves as a
warning to other drivers to exercise
extreme caution when approaching,
overtaking, or passing your vehicle. It should be used whenever emergency
repairs are being made or when the vehi-cle is stopped near the edge of a road-
way.
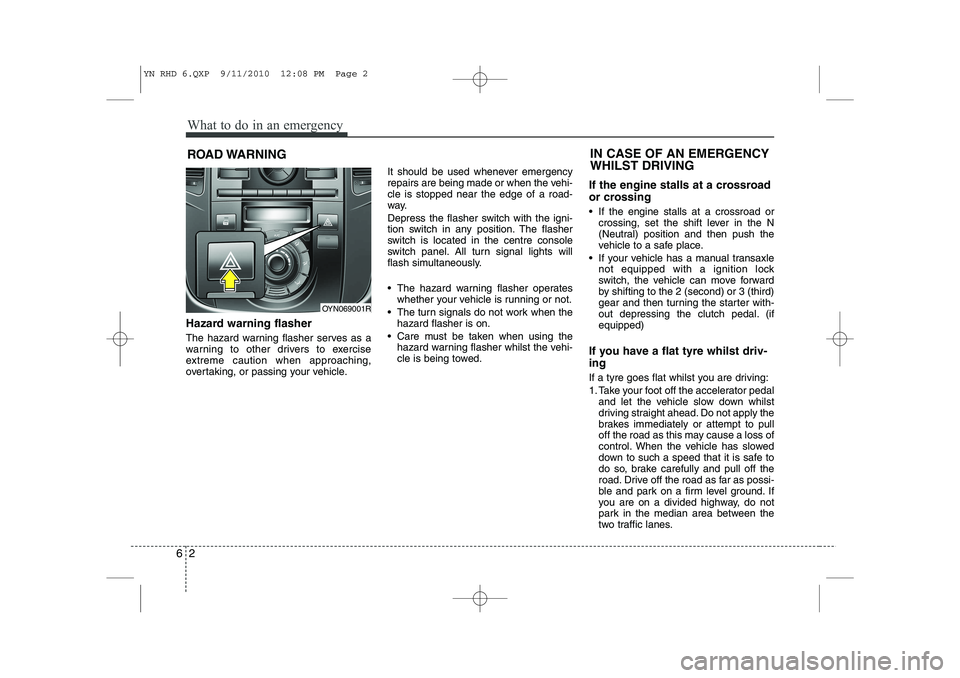
Depress the flasher switch with the igni-
tion switch in any position. The flasher
switch is located in the centre console
switch panel. All turn signal lights will
flash simultaneously.
• The hazard warning flasher operates
whether your vehicle is running or not.
The turn signals do not work when the hazard flasher is on.
Care must be taken when using the hazard warning flasher whilst the vehi-
cle is being towed. If the engine stalls at a crossroad
or crossing
If the engine stalls at a crossroad or
crossing, set the shift lever in the N
(Neutral) position and then push the
vehicle to a safe place.
If your vehicle has a manual transaxle not equipped with a ignition lock
switch, the vehicle can move forward
by shifting to the 2 (second) or 3 (third)
gear and then turning the starter with-
out depressing the clutch pedal. (ifequipped)
If you have a flat tyre whilst driv- ing
If a tyre goes flat whilst you are driving:
1. Take your foot off the accelerator pedal and let the vehicle slow down whilst
driving straight ahead. Do not apply the
brakes immediately or attempt to pull
off the road as this may cause a loss of
control. When the vehicle has slowed
down to such a speed that it is safe to
do so, brake carefully and pull off the
road. Drive off the road as far as possi-
ble and park on a firm level ground. If
you are on a divided highway, do not
park in the median area between the
two traffic lanes.
IN CASE OF AN EMERGENCY WHILST DRIVING
OYN069001R
YN RHD 6.QXP 9/11/2010 12:08 PM Page 2
Page 614 of 761

63
What to do in an emergency
2. When the vehicle is stopped, turn onyour emergency hazard flashers, set
the parking brake and put the transaxle
in P (automatic transaxle) or reverse
(manual transaxle).
3. Have all passengers get out of the vehicle. Be sure they all get out on the
side of the vehicle that is away from
traffic.
4. When changing a flat tyre, follow the instruction provided later in this sec-tion.
If engine stalls whilst driving
1. Reduce your speed gradually, keeping a straight line. Move cautiously off the
road to a safe place.
2. Turn on your emergency flashers.
3. Try to start the engine again. If your vehicle will not start, contact an autho-
rised KIA dealer or seek other quali-
fied assistance. If engine doesn't turn over or
turns over slowly
1. If your vehicle has an automatic
transaxle, be sure the shift lever is in N
(Neutral) or P (Park) and the emer-
gency brake is set.
2. Check the battery connections to be sure they are clean and tight.
3. Turn on the interior light. If the light dims or goes out when you operate the
starter, the battery is discharged.
4. Check the starter connections to be sure they are securely tightened.
5. Do not push or pull the vehicle to start it. See instructions for "Jump starting". If engine turns over normally but
does not start
1. Check the fuel level.
2. With the ignition switch in the LOCK
position, check all connectors at the
ignition coils and spark plugs.
Reconnect any that may be discon-
nected or loose.
3. Check the fuel line in the engine com- partment.
4. If the engine still does not start, call an authorised KIA dealer or seek other
qualified assistance.
IF THE ENGINE WILL NOT START
WARNING
If the engine will not start, do not
push or pull the vehicle to start it.This could result in a collision or
cause other damage. In addition,
push or pull starting may cause the
catalytic converter to be over-
loaded and create a fire hazard.
YN RHD 6.QXP 1/25/2010 11:35 AM Page 3
Page 621 of 761

What to do in an emergency
10
6
7. Place the jack at the front or rear
jacking position closest to the tyre
you are changing. Place the jackat the designated locations under
the frame. The jacking positions
are plates welded to the frame
with two tabs and a raised dot to
index with the jack. 8. Insert the jack handle into the jack
and turn it clockwise, raising the
vehicle until the tyre just clears the
ground. This measurement is
approximately 30 mm (1.2 in).
Before removing the wheel lug
nuts, make sure the vehicle is sta-
ble and that there is no chance for
movement or slippage. 9. Loosen the wheel nuts and
remove them with your fingers.Slide the wheel off the studs and
lay it flat so it cannot roll away. To
put the wheel on the hub, pick up
the spare tyre, line up the holeswith the studs and slide the wheel
onto them. If this is difficult, tip thewheel slightly and get the top holein the wheel lined up with the top
stud. Then jiggle the wheel back
and forth until the wheel can be
slid over the other studs.
WARNING - Jack location
To reduce the possibility of
injury, be sure to use only the
jack provided with the vehicle
and in the correct jack position;
never use any other part of the
vehicle for jack support.
OYN069020OED066027/H
YN RHD 6.QXP 1/25/2010 11:35 AM Page 10
Page 632 of 761

621
What to do in an emergency
✽✽NOTICE
If the TPMS, Low Tyre Pressure and Position indicators do not illuminate
for 3 seconds when the ignitionswitch is turned to the ON position
or engine is running, or if they
remain illuminated after coming on
for approximately 3 seconds, take
your car to your nearest authorised
KIA dealer and have the systemchecked.Low tyre pressure tell- tale
Low tyre pressure posi- tion telltale
When the tyre pressure monitoring
system warning indicators are illumi-
nated, one or more of your tyres is
significantly under-inflated. The lowtyre pressure position telltale lightwill indicate which tyre is significant-
ly under-inflated by illuminating thecorresponding position light.
If either telltale illuminates, immedi-
ately reduce your speed, avoid hard
cornering and anticipate increased
stopping distances. You should stop
and check your tyres as soon as pos-
sible. Inflate the tyres to the proper
pressure as indicated on the vehi-
cle’s placard or tyre inflation pres-
sure label located on the driver’s side
centre pillar outer panel. If you can-
not reach a service station or if the
tyre cannot hold the newly added air,
replace the low pressure tyre with
the spare tyre. Then the TPMS malfunction indicator
may turn on and the Low Tyre
Pressure and Position telltales will
remain on after restarting and about
20 minutes of continuous driving
before you have the low pressuretyre repaired and replaced on the
vehicle.
CAUTION
In winter or cold weather, the
low tyre pressure telltale may beilluminated if the tyre pressurewas adjusted to the recom- mended tyre inflation pressurein warm weather. It does notmean your TPMS is malfunction- ing because the decreased tem-perature leads to a proportionallowering of tyre pressure.
When you drive your vehiclefrom a warm area to a cold area or from a cold area to a warmarea, or the outside temperatureis greatly higher or lower, you should check the tyre inflationpressure and adjust the tyres tothe recommended tyre inflation pressure.
YN RHD 6.QXP 1/25/2010 11:36 AM Page 21
Page 635 of 761
What to do in an emergency
24
6
You may not be able identify a low
tyre by simply looking at it. Alwaysuse a good quality tyre pressuregauge to measure the tyre's inflation
pressure. Please note that a tyre that
is hot (from being driven) will have ahigher pressure measurement than atyre that is cold (from sitting station-
ary for at least 3 hours and driven
less than 1 mile (1.6 km) during that
3 hour period).
Allow the tyre to cool before measur-
ing the inflation pressure. Always be
sure the tyre is cold before inflating
to the recommended pressure.
A cold tyre means the vehicle has
been sitting for 3 hours and driven forless than 1 mile (1.6 km) in that 3
hour period.
CAUTION
Do not use any tyre sealant if
your vehicle is equipped with aTyre Pressure Monitoring System. The liquid sealant candamage the tyre pressure sen-sors.
WARNING - Protecting
TPMS
Tampering with, modifying, or
disabling the Tyre PressureMonitoring System (TPMS)
components may interfere withthe system's ability to warn the
driver of low tyre pressure con-
ditions and/or TPMS malfunc-
tions. Tampering with, modify-
ing, or disabling the TyrePressure Monitoring System
(TPMS) components may void
the warranty for that portion of
the vehicle.WARNING - TPMS
The TPMS cannot alert you to severe and sudden tyre dam-
age caused by external fac-
tors such as nails or roaddebris.
If you feel any vehicle instabil- ity, immediately take your foot
off the accelerator, apply the
brakes gradually and with
light force, and slowly move to
a safe position off the road.
YN RHD 6.QXP 1/25/2010 11:36 AM Page 24
Page 641 of 761
7
Engine compartment / 7-2 Maintenance services / 7-3
Owner maintenance / 7-5Scheduled maintenance service / 7-7Explanation of scheduled maintenance items / 7-20Engine oil / 7-24Engine coolant / 7-25Brake/clutch fluid / 7-28Automatic transaxle fluid / 7-29
Washer fluid / 7-31Parking brake / 7-31
Fuel filter / 7-32
Air cleaner / 7-33
Wiper blades / 7-34Battery / 7-37
Tyres and wheels / 7-40Fuses / 7-50Light bulbs / 7-59
Appearance care / 7-68
Emission control system / 7-74
Maintenance
YN RHD 7.QXP 10/20/2009 4:45 PM Page 1
Page 645 of 761
75
Maintenance
OWNER MAINTENANCE
The following lists are vehicle checks and
inspections that should be performed by
the owner or an authorised KIA dealer atthe frequencies indicated to help ensure
safe, dependable operation of your vehi-
cle.
Any adverse conditions should be
brought to the attention of your dealer as
soon as possible.
These Owner Maintenance Checks are
generally not covered by warranties and
you may be charged for labour, parts and
lubricants used. Owner maintenance schedule
When you stop for fuel:
Check the engine oil level.
Check the coolant level in coolant
reservoir.
Check the windscreen washer fluid level.
Look for low or under-inflated tyres.
Whilst operating your vehicle:
Note any changes in the sound of the exhaust or any smell of exhaust fumes
in the vehicle.
Check for vibrations in the steering wheel. Notice any increased steering
effort or looseness in the steering
wheel, or change in its straight-aheadposition.
Notice if your vehicle constantly turns slightly or “pulls” to one side when trav-
elling on smooth, level road.
When stopping, listen and check for unusual sounds, pulling to one side,
increased brake pedal travel or “hard-
to-push” brake pedal.
If any slipping or changes in the oper- ation of your transaxle occurs, check
the transaxle fluid level.
Check automatic transaxle P (Park) function.
Check the parking brake.
Check for fluid leaks under your vehicle (water dripping from the air condition-
ing system during or after use is nor-mal).
WARNING
Be careful when checking your
engine coolant level when the
engine is hot. Scalding hot coolant
and steam may blow out under
pressure. This could cause burns
or other serious injury.
YN RHD 7.QXP 10/20/2009 4:45 PM Page 5