2011 KIA VENGA wheel
[x] Cancel search: wheelPage 455 of 761
Features of your vehicle
34
4
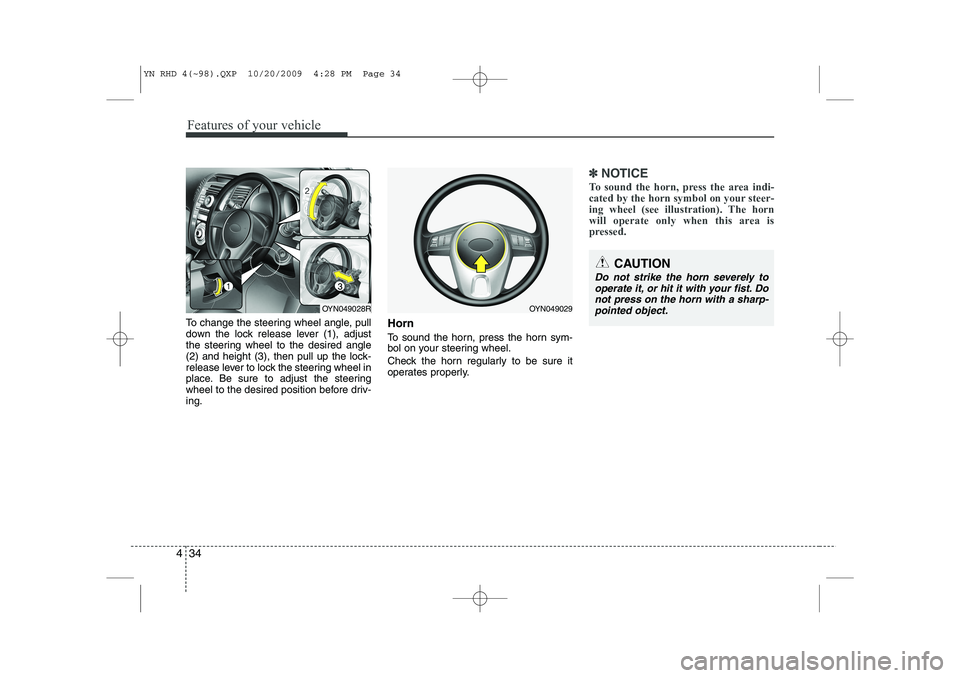
To change the steering wheel angle, pull
down the lock release lever (1), adjust
the steering wheel to the desired angle
(2) and height (3), then pull up the lock-
release lever to lock the steering wheel in
place. Be sure to adjust the steering
wheel to the desired position before driv-ing. Horn
To sound the horn, press the horn sym-
bol on your steering wheel.
Check the horn regularly to be sure it
operates properly.
✽✽
NOTICE
To sound the horn, press the area indi-
cated by the horn symbol on your steer-
ing wheel (see illustration). The horn
will operate only when this area is
pressed.
CAUTION
Do not strike the horn severely to operate it, or hit it with your fist. Do
not press on the horn with a sharp-pointed object.
OYN049029OYN049028R
YN RHD 4(~98).QXP 10/20/2009 4:28 PM Page 34
Page 471 of 761
Features of your vehicle
50
4
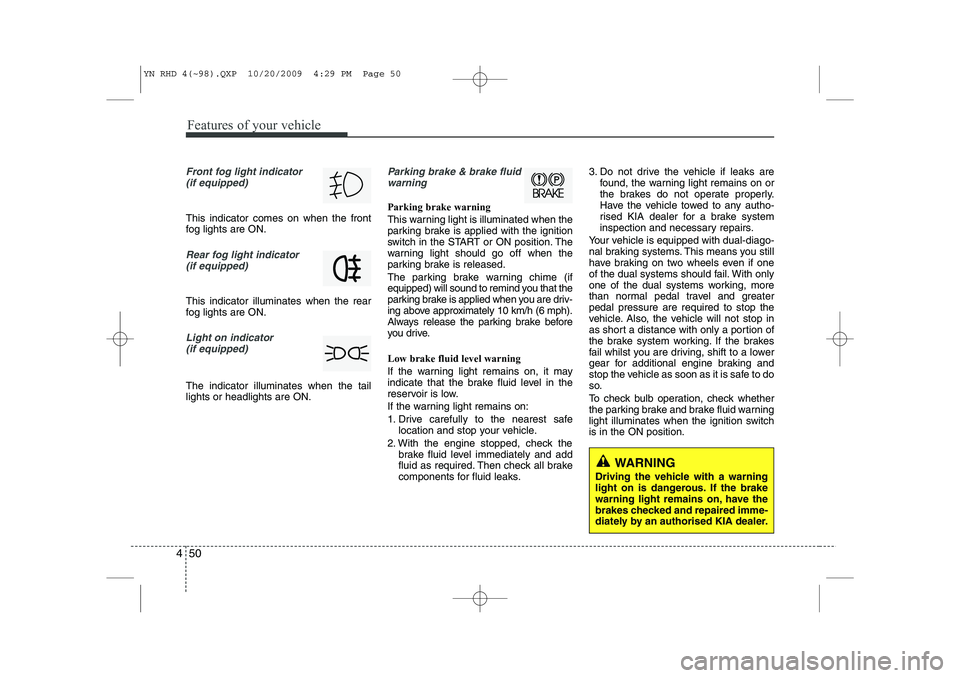
Front fog light indicator
(if equipped)
This indicator comes on when the front
fog lights are ON.
Rear fog light indicator
(if equipped)
This indicator illuminates when the rear
fog lights are ON.
Light on indicator (if equipped)
The indicator illuminates when the tail lights or headlights are ON.
Parking brake & brake fluidwarning
Parking brake warning
This warning light is illuminated when the
parking brake is applied with the ignition
switch in the START or ON position. The
warning light should go off when the
parking brake is released.
The parking brake warning chime (if
equipped) will sound to remind you that the
parking brake is applied when you are driv-
ing above approximately 10 km/h (6 mph).
Always release the parking brake before
you drive. Low brake fluid level warning
If the warning light remains on, it may
indicate that the brake fluid level in the
reservoir is low.
If the warning light remains on:
1. Drive carefully to the nearest safe location and stop your vehicle.
2. With the engine stopped, check the brake fluid level immediately and add
fluid as required. Then check all brake
components for fluid leaks. 3. Do not drive the vehicle if leaks are
found, the warning light remains on or
the brakes do not operate properly.
Have the vehicle towed to any autho-
rised KIA dealer for a brake system
inspection and necessary repairs.
Your vehicle is equipped with dual-diago-
nal braking systems. This means you still
have braking on two wheels even if one
of the dual systems should fail. With only
one of the dual systems working, more
than normal pedal travel and greaterpedal pressure are required to stop the
vehicle. Also, the vehicle will not stop in
as short a distance with only a portion of
the brake system working. If the brakes
fail whilst you are driving, shift to a lower
gear for additional engine braking and
stop the vehicle as soon as it is safe to do
so.
To check bulb operation, check whether
the parking brake and brake fluid warning
light illuminates when the ignition switchis in the ON position.
WARNING
Driving the vehicle with a warning
light on is dangerous. If the brake
warning light remains on, have the
brakes checked and repaired imme-
diately by an authorised KIA dealer.
YN RHD 4(~98).QXP 10/20/2009 4:29 PM Page 50
Page 475 of 761
Features of your vehicle
54
4
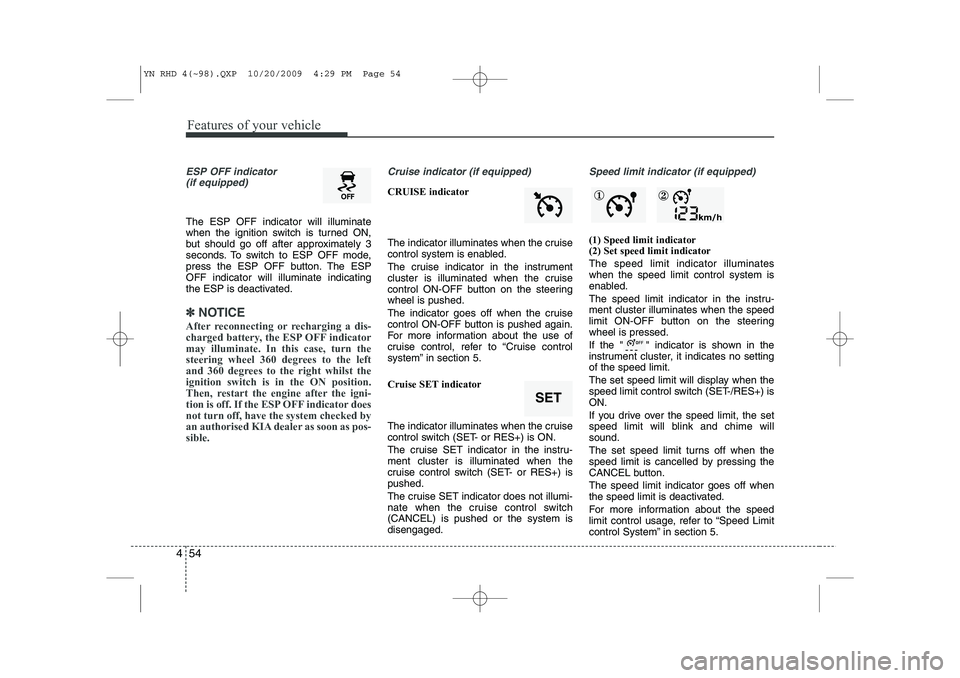
ESP OFF indicator
(if equipped)
The ESP OFF indicator will illuminate
when the ignition switch is turned ON,
but should go off after approximately 3
seconds. To switch to ESP OFF mode,
press the ESP OFF button. The ESPOFF indicator will illuminate indicating
the ESP is deactivated.
✽✽ NOTICE
After reconnecting or recharging a dis-
charged battery, the ESP OFF indicatormay illuminate. In this case, turn the
steering wheel 360 degrees to the left
and 360 degrees to the right whilst theignition switch is in the ON position.
Then, restart the engine after the igni-
tion is off. If the ESP OFF indicator doesnot turn off, have the system checked by
an authorised KIA dealer as soon as pos-sible.
Cruise indicator (if equipped)
CRUISE indicator
The indicator illuminates when the cruise
control system is enabled.
The cruise indicator in the instrument
cluster is illuminated when the cruise
control ON-OFF button on the steeringwheel is pushed.
The indicator goes off when the cruise
control ON-OFF button is pushed again.
For more information about the use of
cruise control, refer to “Cruise control
system” in section 5.
Cruise SET indicator
The indicator illuminates when the cruise
control switch (SET- or RES+) is ON.
The cruise SET indicator in the instru- ment cluster is illuminated when the
cruise control switch (SET- or RES+) ispushed.
The cruise SET indicator does not illumi-
nate when the cruise control switch(CANCEL) is pushed or the system isdisengaged.
Speed limit indicator (if equipped)
(1) Speed limit indicator (2) Set speed limit indicator The speed limit indicator illuminates when the speed limit control system is
enabled.
The speed limit indicator in the instru- ment cluster illuminates when the speed
limit ON-OFF button on the steeringwheel is pressed.
If the " " indicator is shown in the
instrument cluster, it indicates no settingof the speed limit.
The set speed limit will display when the
speed limit control switch (SET-/RES+) isON.
If you drive over the speed limit, the set
speed limit will blink and chime willsound.
The set speed limit turns off when the
speed limit is cancelled by pressing the
CANCEL button. The speed limit indicator goes off when
the speed limit is deactivated.
For more information about the speed
limit control usage, refer to “Speed Limit
control System” in section 5.
SET
① ②
YN RHD 4(~98).QXP 10/20/2009 4:29 PM Page 54
Page 496 of 761
475
Features of your vehicle
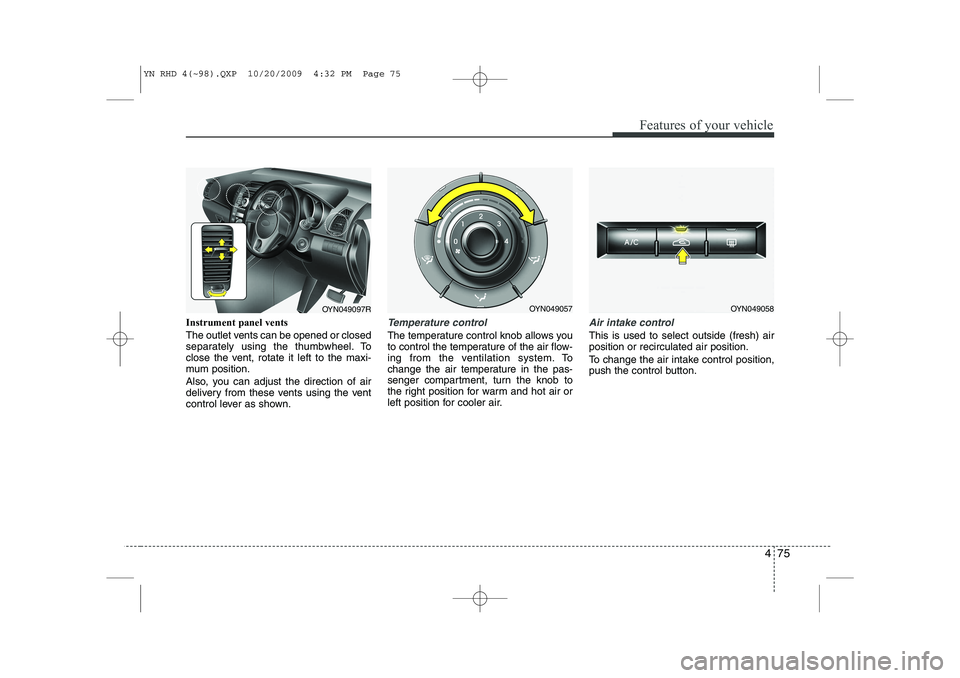
Instrument panel vents
The outlet vents can be opened or closed
separately using the thumbwheel. To
close the vent, rotate it left to the maxi-
mum position.
Also, you can adjust the direction of air
delivery from these vents using the vent
control lever as shown.Temperature control
The temperature control knob allows you
to control the temperature of the air flow-
ing from the ventilation system. To
change the air temperature in the pas-
senger compartment, turn the knob to
the right position for warm and hot air or
left position for cooler air.
Air intake control
This is used to select outside (fresh) air position or recirculated air position.
To change the air intake control position,
push the control button.
OYN049097ROYN049057OYN049058
YN RHD 4(~98).QXP 10/20/2009 4:32 PM Page 75
Page 505 of 761
Features of your vehicle
84
4
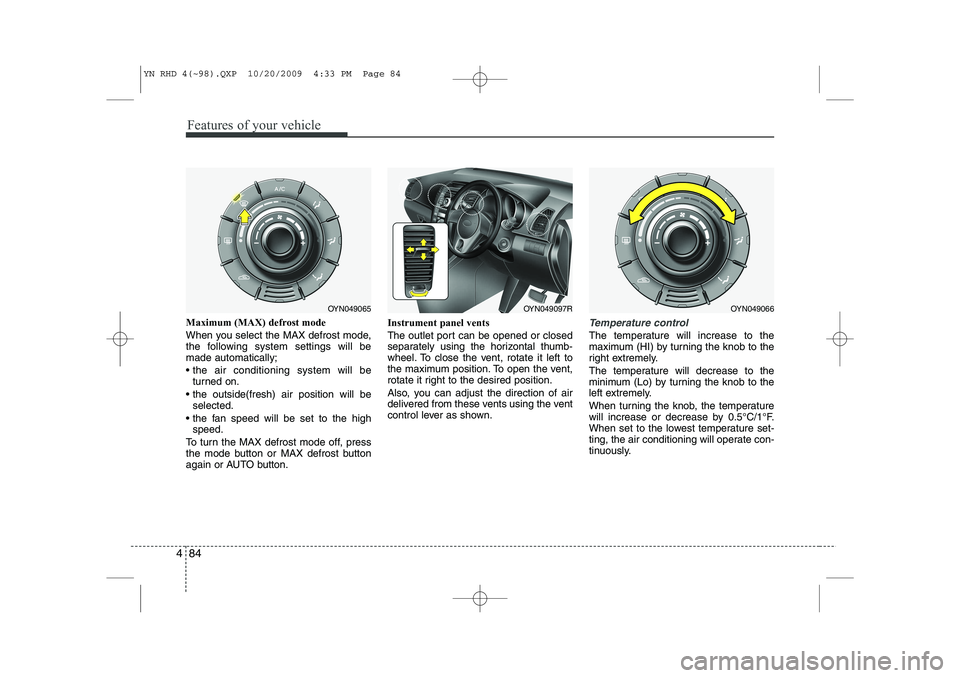
Maximum (MAX) defrost mode
When you select the MAX defrost mode,
the following system settings will bemade automatically;
the air conditioning system will be
turned on.
the outside(fresh) air position will be selected.
the fan speed will be set to the high speed.
To turn the MAX defrost mode off, press
the mode button or MAX defrost button
again or AUTO button. Instrument panel vents
The outlet port can be opened or closed
separately using the horizontal thumb-
wheel. To close the vent, rotate it left to
the maximum position. To open the vent,
rotate it right to the desired position.
Also, you can adjust the direction of air
delivered from these vents using the vent
control lever as shown.Temperature control
The temperature will increase to the
maximum (HI) by turning the knob to the
right extremely.
The temperature will decrease to the
minimum (Lo) by turning the knob to the
left extremely.
When turning the knob, the temperature
will increase or decrease by 0.5°C/1°F.
When set to the lowest temperature set-
ting, the air conditioning will operate con-
tinuously.
OYN049065OYN049097ROYN049066
YN RHD 4(~98).QXP 10/20/2009 4:33 PM Page 84
Page 541 of 761
Features of your vehicle
120
4
Auxiliary In �‰ Via the Auxiliary Input (3.5 mm plug)
you can connect your portable deviceto the Head Unit.
�) Insert the 3.5 mm plug (connected to
your portable device) into the Auxinput.
✎ Audio output from the auxiliary source
is directly audible when the device isplugged in.
✎ The Auxiliary Source is aborted when
another source becomes active.
�9 To re-select the Auxiliary Sourcewhen it is plugged in already:
�) Short press the AUXbutton on the
Head Unit.
OR
�) Short press the Modebutton on the
Steering Wheel Remote Control.
✎ If no Auxiliary Source is detected,
“NO MEDIA” will be displayed for 5
seconds and the Head Unit will return
to the previous selected source.✽✽
NOTICE
The AUX source is not available if an iPod is connected.
The volume setting of Auxiliary source
is independent of other sources. Any volume changes in Auxiliary source
is memorized and used whenever the
Auxiliary source is selected.
YN RHD 4(99~AUDIO).QXP 6/1/2010 4:03 PM Page 120
Page 543 of 761

Features of your vehicle
122
4
Device List
With this function you can browse
through and select bluetooth devices thatare stored in the Head Unit Bluetooth
Device List.
�) Short press the SETUPbutton to
enter the Setup menu.
�) Short press the or button to
access the Bluetooth sub-menu.
�) Press the button to browse the
Device List to select the required
device.
�) Press the OKbutton to start pairing
between the selected device and theHead Unit.
✎ Note: Whenever there is at least one
connected device active, in the dis-
play the Bluetooth icon is visible. Delete Device
This function allows you to delete a
Bluetooth device ID from the Head Unit
Bluetooth Device List.
�)
Short press the SETUPbutton to
enter the Setup menu.
�) Short press the or button to
access the Bluetooth sub-menu.
�) Press the button to select Delete
Device.
�) Press the OKbutton to delete the
selected device from the Head Unit
Bluetooth Device List
Phone Volume
�) Short press the SETUPbutton to
enter the Setup menu.
�) Short press the or button to
access the Bluetooth sub-menu.
�) Select the option “Phone Volume”.
�) Press the or button to decrease
or increase the phone volume setting.
�‰ Default setting: 12
�‰ Setting range: 0 ... 35
�‰ During an ongoing call, user is
allowed to adjust the BT Phone vol-
ume. The adjusted volume is memo-
rized into Phone Volume setting. Answering a Call
�)
Press the Callbutton on the Steering
Wheel Remote Control to accept an incoming call.
Terminate / Reject Call
�) Press the End Callbutton on the
Steering Wheel Remote Control to
terminate or reject a call.
Last Call Re-dial
�) Short press the Callbutton on the
Steering Wheel Remote Control to re-
dial last dialled number (one attempt).
�) Long press the Callbutton on the
Steering Wheel Remote Control to re-
dial last dialled number (twoattempts).
Private Call
This function allows you to have a private
call even if the phone is connected to theHead Unit.
�) Press the Callbutton on your phone
to start a private call.
OR
�) Press the End Callbutton on your
phone to end a private call.
YN RHD 4(99~AUDIO).QXP 6/1/2010 4:03 PM Page 122
Page 544 of 761

4 123
Features of your vehicle
Transferring a Call
This function allows you to transfer a call
during an ongoing call. �‰From the tuner to the phone
�‰ From the phone to the tuner
�) Long press the Callbutton on the
Steering Wheel Remote Control to
transfer the ongoing call back to the
phone or back to the tuner again.
Audio Streaming
Start Audio Streaming
This function allows the Head Unit to
start streaming music from phone.
�9 The Bluetooth device must be con- nected with the Head Unit.
�) Press the AUXbutton and select BT
AUDIO.
✎ The Head Unit starts streaming the
audio from the phone and will start
playing the audio files.
✎ The Head Unit has no control on the
sequence of track playback in phone. Next/Previous Track
This function allows you to select the
next/ previous track of phone‘s music
player by using the next/previous track
buttons on the Head Unit or SteeringWheel Remote Control.
�)
Short press the or button on the
Head Unit or the Steering WheelRemote Control.
Suspend Audio Streaming
This function allows you to suspend
streaming music from the phone to theHead Unit.
�) Short press the Mutebutton on the
Steering Wheel Remote Control.
�) Press the AUXbutton and de-select
BT AUDIO.
YN RHD 4(99~AUDIO).QXP 6/1/2010 4:03 PM Page 123