Page 19 of 761
Safety features of your vehicle
2
3
Driver’s seat
(1) Seat adjustment, forward / backward
(2) Seatback recliner
(3) Seat adjustment, height*
(4) Seat warmer*
(5) Armrest*
(6) Headrest adjustment
Front passenger seat
(7) Seat adjustment, forward /
backward
(8) Seatback recliner
(9) Seat warmer*
(10) Headrest adjustment Rear seat
(11) Seat adjustment, forward / backward
(12) Armrest*
(13) Headrest adjustment
(14) Split folding rear seat* if equipped
SEATS
OYN039001
Page 23 of 761
Safety features of your vehicle
6
3
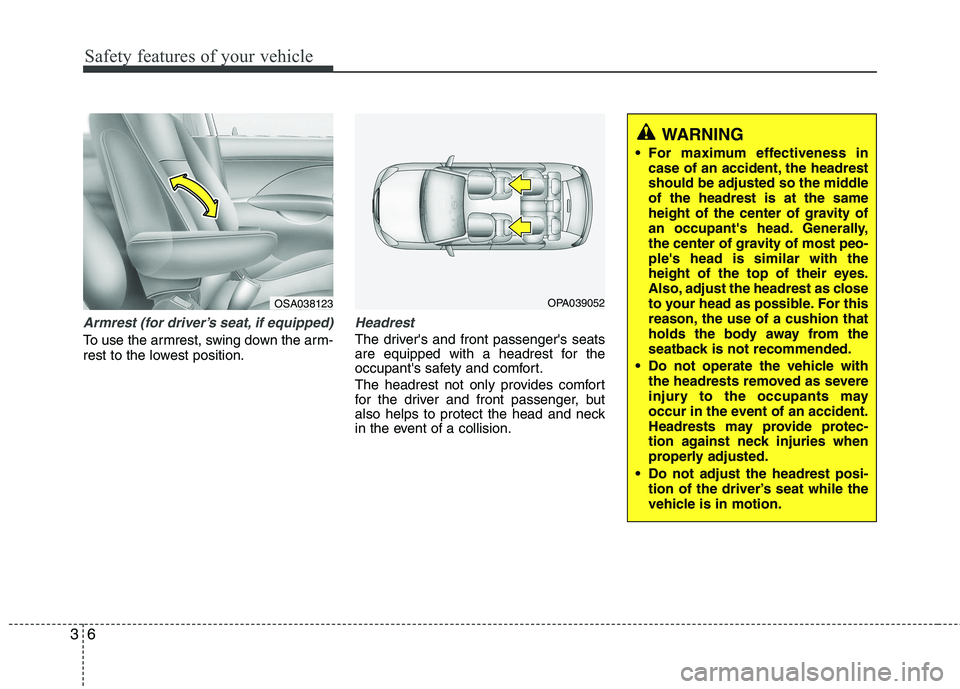
Armrest (for driver’s seat, if equipped)
To use the armrest, swing down the arm-
rest to the lowest position.
Headrest
The driver's and front passenger's seats
are equipped with a headrest for the
occupant's safety and comfort.
The headrest not only provides comfort
for the driver and front passenger, but
also helps to protect the head and neck
in the event of a collision.
WARNING
For maximum effectiveness in case of an accident, the headrest
should be adjusted so the middleof the headrest is at the same
height of the center of gravity of
an occupant's head. Generally,
the center of gravity of most peo-ple's head is similar with the
height of the top of their eyes.
Also, adjust the headrest as close
to your head as possible. For this
reason, the use of a cushion that
holds the body away from the
seatback is not recommended.
Do not operate the vehicle with the headrests removed as severe
injury to the occupants may
occur in the event of an accident.
Headrests may provide protec-
tion against neck injuries when
properly adjusted.
Do not adjust the headrest posi- tion of the driver’s seat while the
vehicle is in motion.
OPA039052OSA038123
Page 24 of 761
37
Safety features of your vehicle
Forward and backward (if equipped)
The headrest will be adjusted forward to
4 positions by pulling it forward. To adjust
the headrest backward, pull it fully for-
ward to the foremost position and release
it. Adjust the headrest so that it properly
supports the head and neck.Adjusting the height up and down
To raise the headrest, pull it up to the
desired position (1). To lower the head-
rest, push and hold the release button (2)
on the headrest support and lower theheadrest to the desired position (3).
Removal
To remove the headrest, raise it as far as
it can go then press the release button (1)
while pulling upward (2).
To reinstall the headrest, put the head- rest poles (3) into the holes while press-
ing the release button (1). Then adjust it
to the appropriate height.
WARNING
Make sure the headrest locks in
position after adjusting it to proper-
ly protect the occupants.
OYN039007OYN039008OYN039039
Page 25 of 761
Safety features of your vehicle
8
3
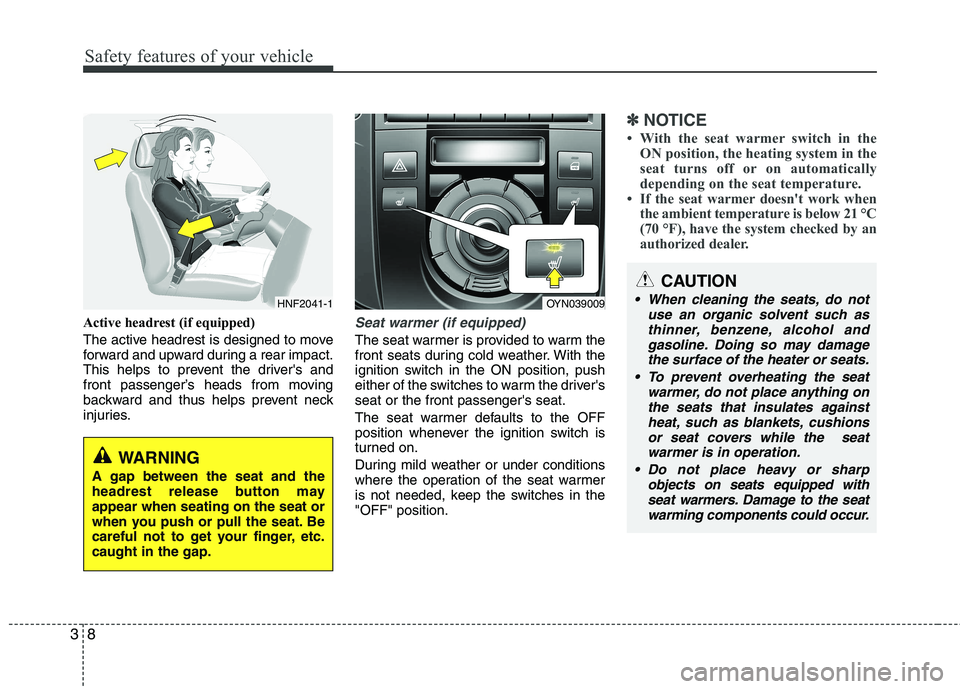
Active headrest (if equipped)
The active headrest is designed to move
forward and upward during a rear impact.
This helps to prevent the driver's and
front passenger’s heads from moving
backward and thus helps prevent neck
injuries.Seat warmer (if equipped)
The seat warmer is provided to warm the
front seats during cold weather. With the
ignition switch in the ON position, push
either of the switches to warm the driver'sseat or the front passenger's seat.
The seat warmer defaults to the OFF
position whenever the ignition switch is
turned on.
During mild weather or under conditions
where the operation of the seat warmer
is not needed, keep the switches in the"OFF" position.
✽✽
NOTICE
With the seat warmer switch in the ON position, the heating system in the
seat turns off or on automatically
depending on the seat temperature.
If the seat warmer doesn't work when
the ambient temperature is below 21 °C
(70 °F), have the system checked by an
authorized dealer.
OYN039009
CAUTION
When cleaning the seats, do not
use an organic solvent such asthinner, benzene, alcohol and gasoline. Doing so may damagethe surface of the heater or seats.
To prevent overheating the seat warmer, do not place anything onthe seats that insulates against heat, such as blankets, cushionsor seat covers while the seat
warmer is in operation.
Do not place heavy or sharp objects on seats equipped withseat warmers. Damage to the seat warming components could occur.HNF2041-1
WARNING
A gap between the seat and the
headrest release button mayappear when seating on the seat or
when you push or pull the seat. Be
careful not to get your finger, etc.caught in the gap.
Page 27 of 761
Safety features of your vehicle
10
3
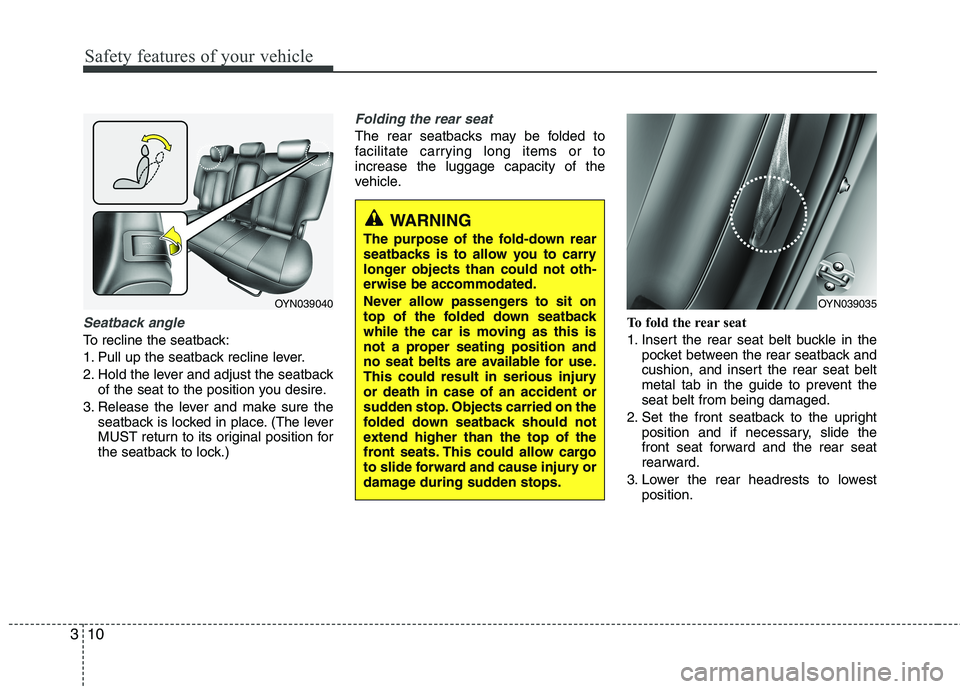
Seatback angle
To recline the seatback:
1. Pull up the seatback recline lever.
2. Hold the lever and adjust the seatback
of the seat to the position you desire.
3. Release the lever and make sure the seatback is locked in place. (The lever
MUST return to its original position for
the seatback to lock.)
Folding the rear seat
The rear seatbacks may be folded to
facilitate carrying long items or toincrease the luggage capacity of the
vehicle.
To fold the rear seat
1. Insert the rear seat belt buckle in thepocket between the rear seatback and
cushion, and insert the rear seat belt
metal tab in the guide to prevent theseat belt from being damaged.
2. Set the front seatback to the upright position and if necessary, slide the
front seat forward and the rear seat
rearward.
3. Lower the rear headrests to lowest position.
WARNING
The purpose of the fold-down rear
seatbacks is to allow you to carry
longer objects than could not oth-erwise be accommodated.
Never allow passengers to sit on
top of the folded down seatback
while the car is moving as this is
not a proper seating position and
no seat belts are available for use.
This could result in serious injuryor death in case of an accident or
sudden stop. Objects carried on the
folded down seatback should not
extend higher than the top of the
front seats. This could allow cargo
to slide forward and cause injury or
damage during sudden stops.
OYN039035OYN039040
Page 29 of 761
Safety features of your vehicle
12
3
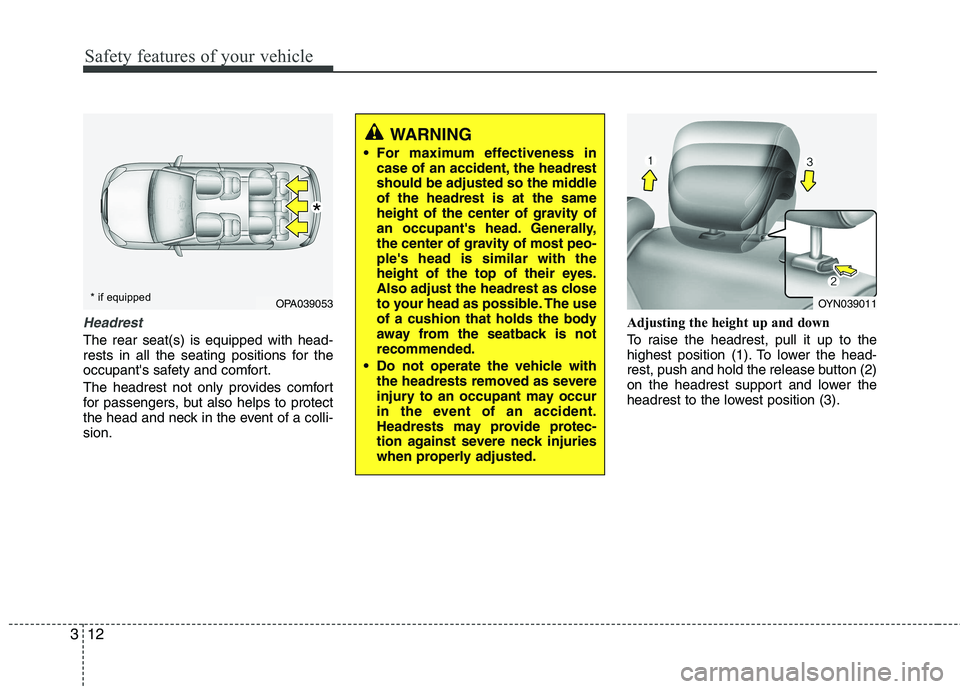
Headrest
The rear seat(s) is equipped with head-
rests in all the seating positions for the
occupant's safety and comfort.
The headrest not only provides comfort
for passengers, but also helps to protect
the head and neck in the event of a colli-sion. Adjusting the height up and down
To raise the headrest, pull it up to the
highest position (1). To lower the head-
rest, push and hold the release button (2)
on the headrest support and lower the
headrest to the lowest position (3).
OPA039053
WARNING
For maximum effectiveness in case of an accident, the headrest
should be adjusted so the middleof the headrest is at the same
height of the center of gravity of
an occupant's head. Generally,
the center of gravity of most peo-ple's head is similar with the
height of the top of their eyes.
Also adjust the headrest as close
to your head as possible. The use
of a cushion that holds the body
away from the seatback is notrecommended.
Do not operate the vehicle with the headrests removed as severe
injury to an occupant may occur
in the event of an accident.
Headrests may provide protec-
tion against severe neck injuries
when properly adjusted.
OYN039011
* if equipped
*
Page 30 of 761
313
Safety features of your vehicle
Removal
To remove the headrest, raise it as far as
it can go then press the release button
(1) while pulling upward (2).
To reinstall the headrest, put the head- rest poles (3) into the holes while press-
ing the release button (1). Then adjust it
to the appropriate height.Armrest (if equipped)
The armrest is located in the center of
the rear seat. Pull the armrest down from
the seatback.
OYN039012
WARNING
Make sure the headrest locks in
position after adjusting it to proper-
ly protects the occupants.
OYN039015
Page 48 of 761
331
Safety features of your vehicle
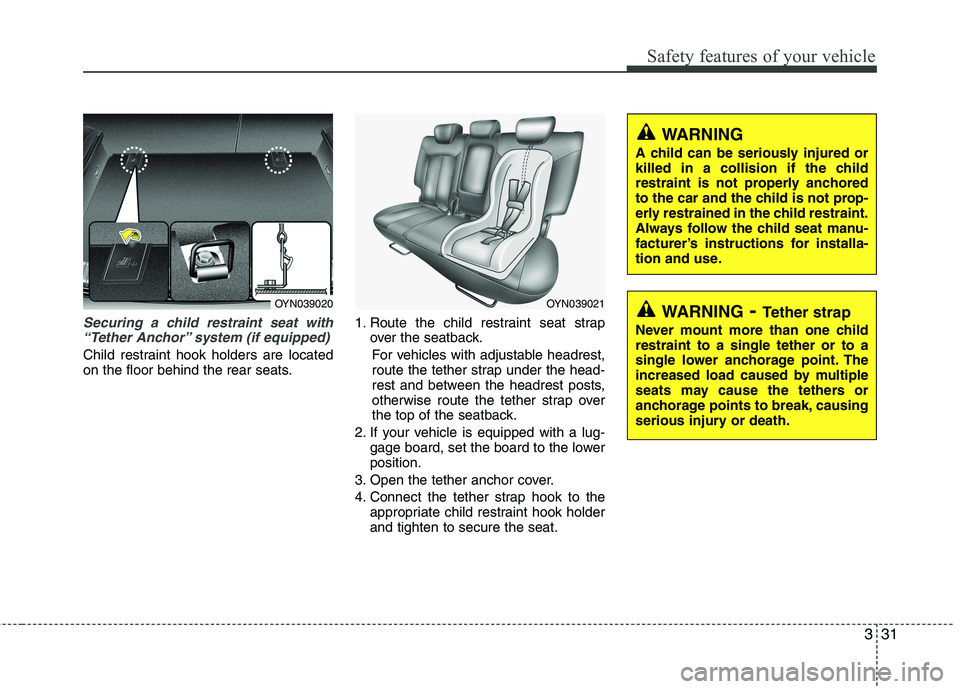
Securing a child restraint seat with“Tether Anchor” system (if equipped)
Child restraint hook holders are located
on the floor behind the rear seats. 1. Route the child restraint seat strap
over the seatback.
For vehicles with adjustable headrest,
route the tether strap under the head-
rest and between the headrest posts,
otherwise route the tether strap over
the top of the seatback.
2. If your vehicle is equipped with a lug- gage board, set the board to the lowerposition.
3. Open the tether anchor cover.
4. Connect the tether strap hook to the appropriate child restraint hook holder and tighten to secure the seat.
WARNING - Tether strap
Never mount more than one child restraint to a single tether or to a
single lower anchorage point. The
increased load caused by multiple
seats may cause the tethers or
anchorage points to break, causing
serious injury or death.
WARNING
A child can be seriously injured or
killed in a collision if the child
restraint is not properly anchored
to the car and the child is not prop-
erly restrained in the child restraint.
Always follow the child seat manu-
facturer’s instructions for installa-
tion and use.
OYN039021OYN039020