Page 205 of 385
Features of your vehicle
124
4
7. Button
Press button to move to
child folder of the current folder and
display the first song in the folder.
Press TUNE/ ENTER knob to move to
the folder displayed. It will play the first
song in the folder.
Press button to move to
parent folder display the first song in
the folder.
Press TUNE/ENTER knob to move to
the folder displayed.
8.Knob & Button
songs after current song, or counter
clockwise to browse songs before cur-
rent song. To play the displayed song,
press the knob.
enters to AUDIO CONTROL mode.
ENTERTUNE
FOLDER
FOLDER
FOLDER
SL_USA_USB
Page 208 of 385
4127
Features of your vehicle
7.Knob & Button
When you rotate the knob clockwise, it
will display the songs (category) ahead
of the song currently played (category in
the same level).
Also, when you rotate the knob counter-
clockwise, it will display the songs (cate-
gory) before the song currently played
(category in the same level).
To listen to the song displayed in the
song category, press the button to skip to
and play the selected song.
Pressing the button changes the BASS,
MIDDLE, TREBLE, FADER and BAL-
ANCE TUNE mode. The mode selected
is shown on the display. After selecting
each mode, rotate the Audio control knob
clockwise or counterclockwise.
8. Button
Displays the information of the file cur-
rently played in the order of
TITLE ➟ARTIST ➟ALBUM ➟NORMAL
DISPLAY ➟TITLE... (Displays no informa-
tion if the file has no song information.)
INFO
ENTERTUNE
SL_USA_iPod
Page 211 of 385
Features of your vehicle
130
4
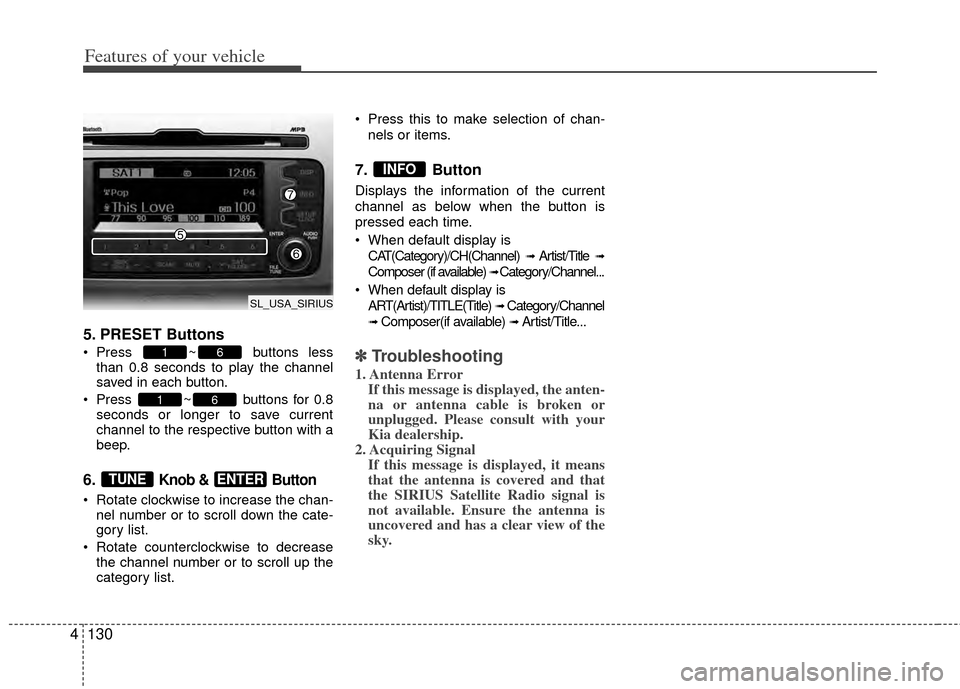
5. PRESET Buttons
Press ~ buttons less
than 0.8 seconds to play the channel
saved in each button.
Press ~ buttons for 0.8 seconds or longer to save current
channel to the respective button with a
beep.
6. Knob & Button
Rotate clockwise to increase the chan-nel number or to scroll down the cate-
gory list.
Rotate counterclockwise to decrease the channel number or to scroll up the
category list. Press this to make selection of chan-
nels or items.
7. Button
Displays the information of the current
channel as below when the button is
pressed each time.
When default display isCAT(Category)/CH(Channel)
➟ Artist/Title ➟
Composer (if available) ➟ Category/Channel...
When default display is ART(Artist)/TITLE(Title)
➟ Category/Channel
➟ Composer(if available) ➟ Artist/Title...
✽ ✽ Troubleshooting
1. Antenna Error
If this message is displayed, the anten-
na or antenna cable is broken or
unplugged. Please consult with your
Kia dealership.
2. Acquiring Signal If this message is displayed, it means
that the antenna is covered and that
the SIRIUS Satellite Radio signal is
not available. Ensure the antenna is
uncovered and has a clear view of the
sky.
INFO
ENTERTUNE
61
61
SL_USA_SIRIUS
Page 298 of 385
What to do in an emergency
86
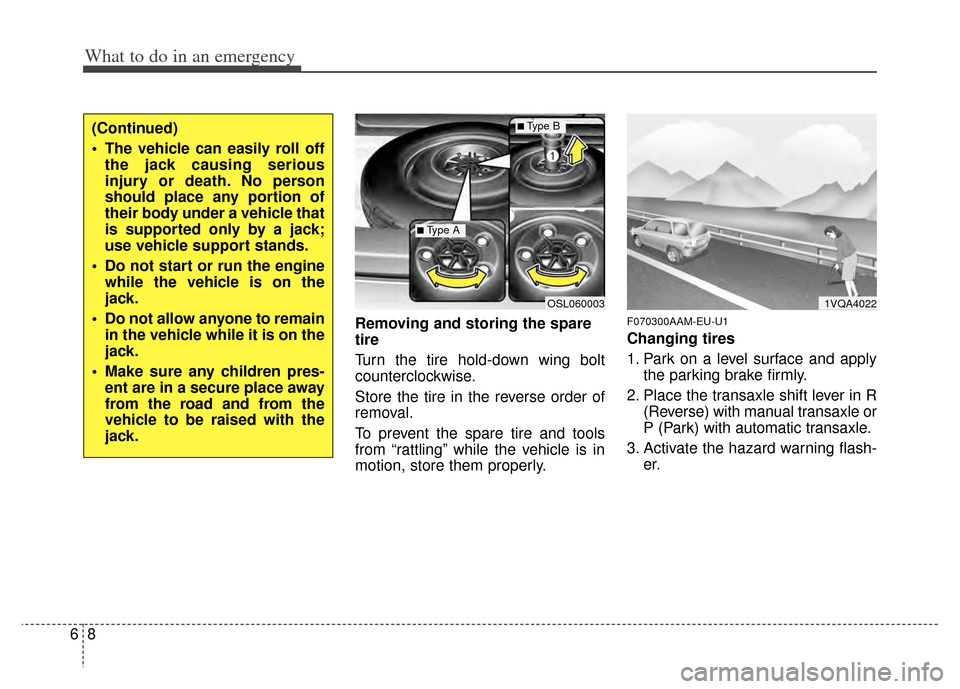
Removing and storing the spare
tire
Turn the tire hold-down wing bolt
counterclockwise.
Store the tire in the reverse order of
removal.
To prevent the spare tire and tools
from “rattling” while the vehicle is in
motion, store them properly.F070300AAM-EU-U1
Changing tires
1. Park on a level surface and applythe parking brake firmly.
2. Place the transaxle shift lever in R (Reverse) with manual transaxle or
P (Park) with automatic transaxle.
3. Activate the hazard warning flash- er.
(Continued)
The vehicle can easily roll offthe jack causing serious
injury or death. No person
should place any portion of
their body under a vehicle that
is supported only by a jack;
use vehicle support stands.
Do not start or run the engine while the vehicle is on the
jack.
Do not allow anyone to remain in the vehicle while it is on the
jack.
Make sure any children pres- ent are in a secure place away
from the road and from the
vehicle to be raised with the
jack.
1VQA4022OSL060003
■Type A
■Type B
Page 299 of 385
69
What to do in an emergency
4. Remove the wheel lug nut wrench,jack, jack handle, and spare tire
from the vehicle.
5. Block both the front and rear of the wheel that is diagonally opposite
from the jack position. 6. Loosen the wheel lug nuts coun-
terclockwise one turn each, but do
not remove any nut until the tire
has been raised off the ground.
WARNING- Changing a tire
To prevent vehicle movementwhile changing a tire, always
set the parking brake fully,
and always block the wheel
diagonally opposite the wheel
being changed.
We recommend that the wheels of the vehicle be
blocked, and that no person
remain in a vehicle that is
being jacked.
1VQA4023OLM069006
Page 300 of 385
What to do in an emergency
10
6
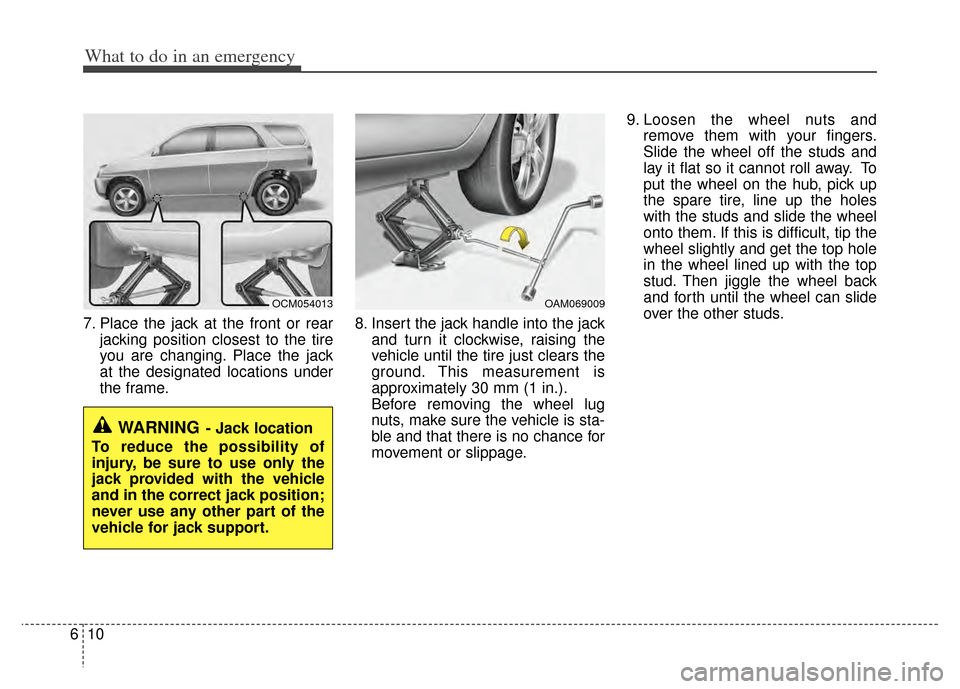
7. Place the jack at the front or rear
jacking position closest to the tire
you are changing. Place the jack
at the designated locations under
the frame. 8. Insert the jack handle into the jack
and turn it clockwise, raising the
vehicle until the tire just clears the
ground. This measurement is
approximately 30 mm (1 in.).
Before removing the wheel lug
nuts, make sure the vehicle is sta-
ble and that there is no chance for
movement or slippage. 9. Loosen the wheel nuts and
remove them with your fingers.
Slide the wheel off the studs and
lay it flat so it cannot roll away. To
put the wheel on the hub, pick up
the spare tire, line up the holes
with the studs and slide the wheel
onto them. If this is difficult, tip the
wheel slightly and get the top hole
in the wheel lined up with the top
stud. Then jiggle the wheel back
and forth until the wheel can slide
over the other studs.
WARNING- Jack location
To reduce the possibility of
injury, be sure to use only the
jack provided with the vehicle
and in the correct jack position;
never use any other part of the
vehicle for jack support.
OCM054013OAM069009
Page 301 of 385
611
What to do in an emergency
10. To install the wheel, hold it on thestuds, put the wheel nuts on the
studs and tighten them finger
tight. Jiggle the tire to be sure it is
completely seated, then tighten
the nuts as much as possible
with your fingers again.
11. Lower the vehicle to the ground by turning the wheel nut wrench
counterclockwise.
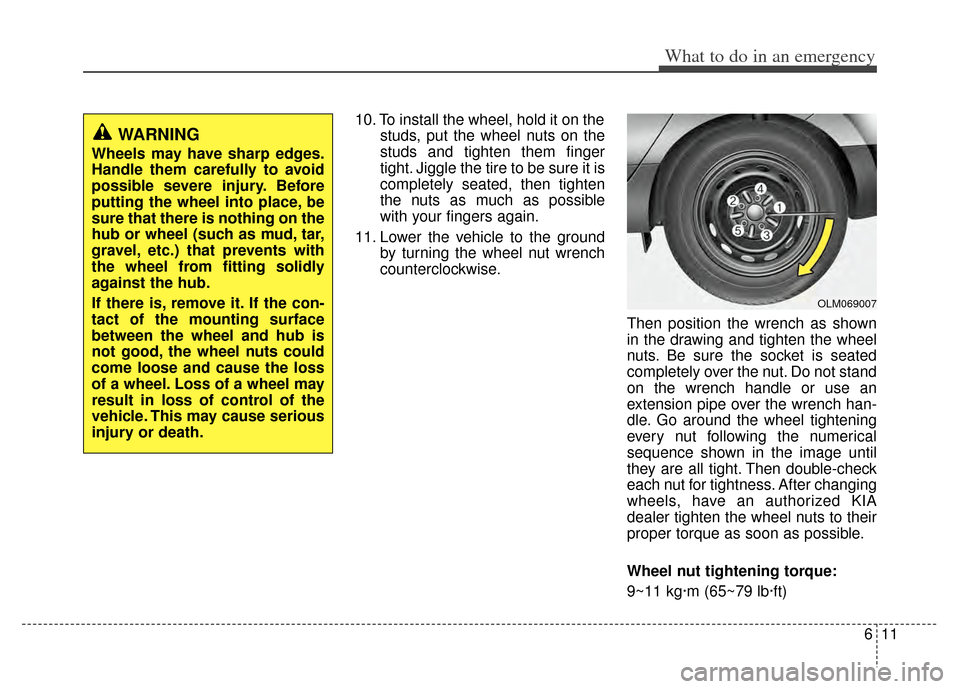
Then position the wrench as shown
in the drawing and tighten the wheel
nuts. Be sure the socket is seated
completely over the nut. Do not stand
on the wrench handle or use an
extension pipe over the wrench han-
dle. Go around the wheel tightening
every nut following the numerical
sequence shown in the image until
they are all tight. Then double-check
each nut for tightness. After changing
wheels, have an authorized KIA
dealer tighten the wheel nuts to their
proper torque as soon as possible.
Wheel nut tightening torque:
9~11 kg·m (65~79 lb·ft)
WARNING
Wheels may have sharp edges.
Handle them carefully to avoid
possible severe injury. Before
putting the wheel into place, be
sure that there is nothing on the
hub or wheel (such as mud, tar,
gravel, etc.) that prevents with
the wheel from fitting solidly
against the hub.
If there is, remove it. If the con-
tact of the mounting surface
between the wheel and hub is
not good, the wheel nuts could
come loose and cause the loss
of a wheel. Loss of a wheel may
result in loss of control of the
vehicle. This may cause serious
injury or death.
OLM069007
Page 307 of 385
617
What to do in an emergency
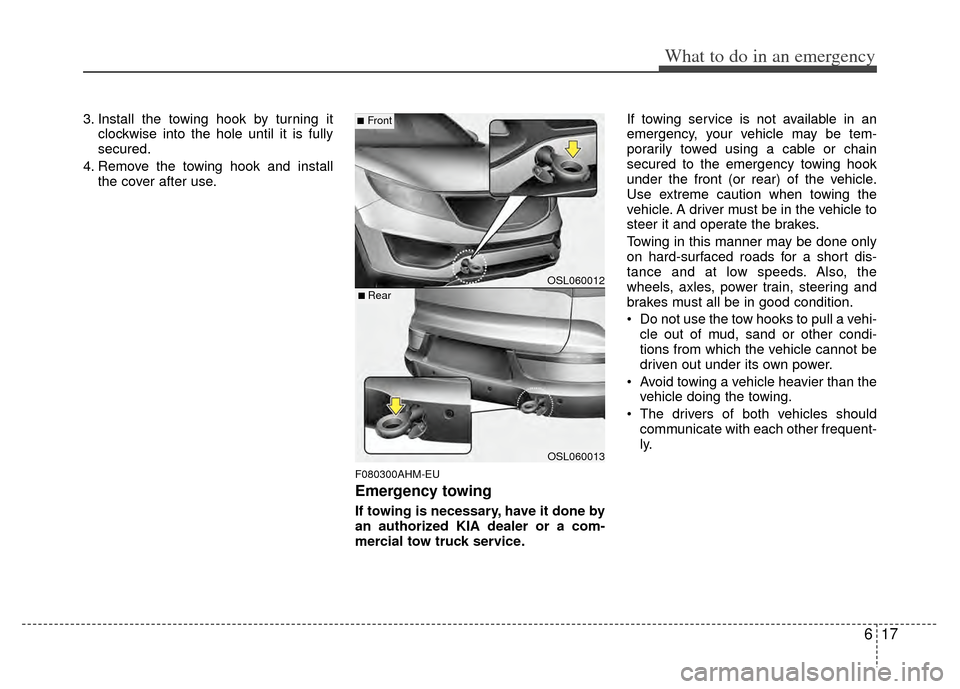
3. Install the towing hook by turning itclockwise into the hole until it is fully
secured.
4. Remove the towing hook and install the cover after use.
F080300AHM-EU
Emergency towing
If towing is necessary, have it done by
an authorized KIA dealer or a com-
mercial tow truck service. If towing service is not available in an
emergency, your vehicle may be tem-
porarily towed using a cable or chain
secured to the emergency towing hook
under the front (or rear) of the vehicle.
Use extreme caution when towing the
vehicle. A driver must be in the vehicle to
steer it and operate the brakes.
Towing in this manner may be done only
on hard-surfaced roads for a short dis-
tance and at low speeds. Also, the
wheels, axles, power train, steering and
brakes must all be in good condition.
Do not use the tow hooks to pull a vehi-
cle out of mud, sand or other condi-
tions from which the vehicle cannot be
driven out under its own power.
Avoid towing a vehicle heavier than the vehicle doing the towing.
The drivers of both vehicles should communicate with each other frequent-
ly.
OSL060012
OSL060013
■Front
■ Rear