Page 94 of 394

423
Features of your vehicle
The automatic reverse feature for the dri-
ver’s window is only active when the
“auto up” feature is used by fully pulling
up the switch. The automatic reverse
feature will not operate if the window is
raised using the halfway position on the
power window switch.
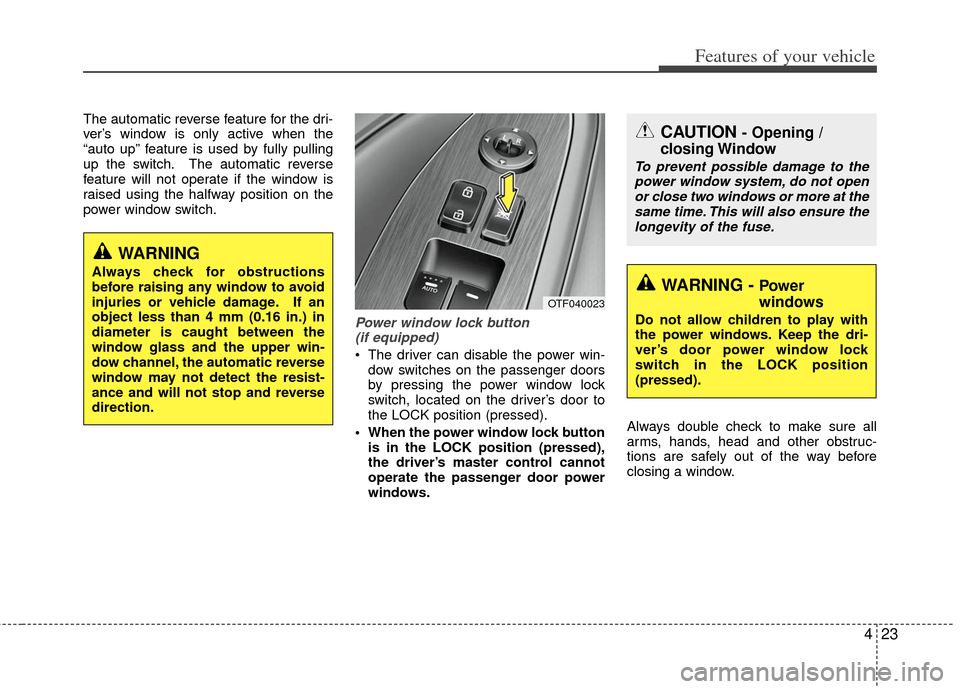
Power window lock button (if equipped)
The driver can disable the power win-
dow switches on the passenger doors
by pressing the power window lock
switch, located on the driver’s door to
the LOCK position (pressed).
When the power window lock button is in the LOCK position (pressed),
the driver’s master control cannot
operate the passenger door power
windows. Always double check to make sure all
arms, hands, head and other obstruc-
tions are safely out of the way before
closing a window.
CAUTION - Opening /
closing Window
To prevent possible damage to the
power window system, do not open or close two windows or more at thesame time. This will also ensure thelongevity of the fuse.
WARNING - Power
windows
Do not allow children to play with
the power windows. Keep the dri-
ver’s door power window lock
switch in the LOCK position
(pressed).
WARNING
Always check for obstructions
before raising any window to avoid
injuries or vehicle damage. If an
object less than 4 mm (0.16 in.) in
diameter is caught between the
window glass and the upper win-
dow channel, the automatic reverse
window may not detect the resist-
ance and will not stop and reverse
direction.
OTF040023
Page 108 of 394

437
Features of your vehicle
Inside rearview mirror
Adjust the rearview mirror so that the
center view through the rear window is
seen. Make this adjustment before you
start driving.
Do not place objects in the rear seat
which would interfere with your vision
through the rear window.
Day/night rearview mirror (if equipped)
Make this adjustment before you start
driving and while the day/night lever is in
the day position.
Pull the day/night lever toward you to
reduce the glare from the headlights of
the vehicles behind you during night driv-
ing.
Remember that you lose some rearviewclarity in the night position. Electric chromic mirror (ECM) with
HomeLink
®system and compass
(if equipped)
Your vehicle may be equipped with a
Gentex Automatic-Dimming Mirror with a
Z-Nav™ Electronic Compass Display
and an Integrated HomeLink
®Wireless
Control System. During nighttime driving,
this feature will automatically detect and
reduce rearview mirror glare while the
compass indicates the direction the vehi-
cle is pointed. The HomeLink
®Universal
Transceiver allows you to activate your
garage door(s), electric gate, home light-
ing, etc.
MIRRORS
WARNING - Mirror
adjustment
Do not adjust the rearview mirror
while the vehicle is moving. This
could result in loss of control.OTF040040
Day Night
Page 110 of 394
439
Features of your vehicle
Z-Nav™ Compass Display
The NVS™ Mirror in your vehicle is also
equipped with a Z-Nav™ Compass that
shows the vehicle Compass heading in
the Display Window using the 8 basic
cardinal headings (N, NE, E, SE, etc.).
Compass function
The Compass can be turned ON and
OFF and will remember the last state
when the ignition is cycled. To turn the
display feature ON/OFF:
1. Press and release the button toturn the display feature OFF.
2. Press and release the button again to turn the display back ON.
Additional options can be set with press
and hold sequences of the button and
are detailed below.
There is a difference between magnetic
north and true north. The compass in the
mirror can compensate for this difference
when it knows the Magnetic Zone in
which it is operating. This is set either by
the dealer or by the user. The operating
Zone Numbers for North America are
shown in the figure on the following sec-
tion.
B520C05NF
Page 159 of 394

Features of your vehicle
88
4
Auto light position (if equipped)
When the light switch is in the AUTO light
position, the taillights and headlights will
turn ON or OFF automatically depending
on the amount of light outside the vehi-
cle.
Never place anything over sensor (1)
located on the instrument panel. This will
ensure better auto-light system control.
Don’t clean the sensor using a window
cleaner. The cleaner may leave a light
film which could interfere with sensor
operation.
If your vehicle has window tint or other
types of metallic coating on the front
windshield, the Auto light system may not
work properly.
High beam operation
To turn on the high beam headlights, push
the lever away from you. Pull it back for
low beams.
The high-beam indicator will light when
the headlight high beams are switched on.
To prevent the battery from being dis-
charged, do not leave the lights on for a
prolonged time while the engine is not
running. To flash the headlights, pull the lever
towards you. It will return to the normal
(low-beam) position when released. The
headlight switch does not need to be on
to use this flashing feature.
OAM049044
WARNING- High beams
Do not use high beam when there
are other vehicles. Using high
beam could obstruct the other dri-
ver's vision.
OAM049043OVG049181
Page 167 of 394

Features of your vehicle
96
4
If you want to defrost and defog the front
windshield, refer to “Windshield
Defrosting and Defogging” in this section.
Rear window defroster
The defroster heats the window to
remove frost, fog and thin ice from the
interior and exterior of the rear window,
while the engine is running.
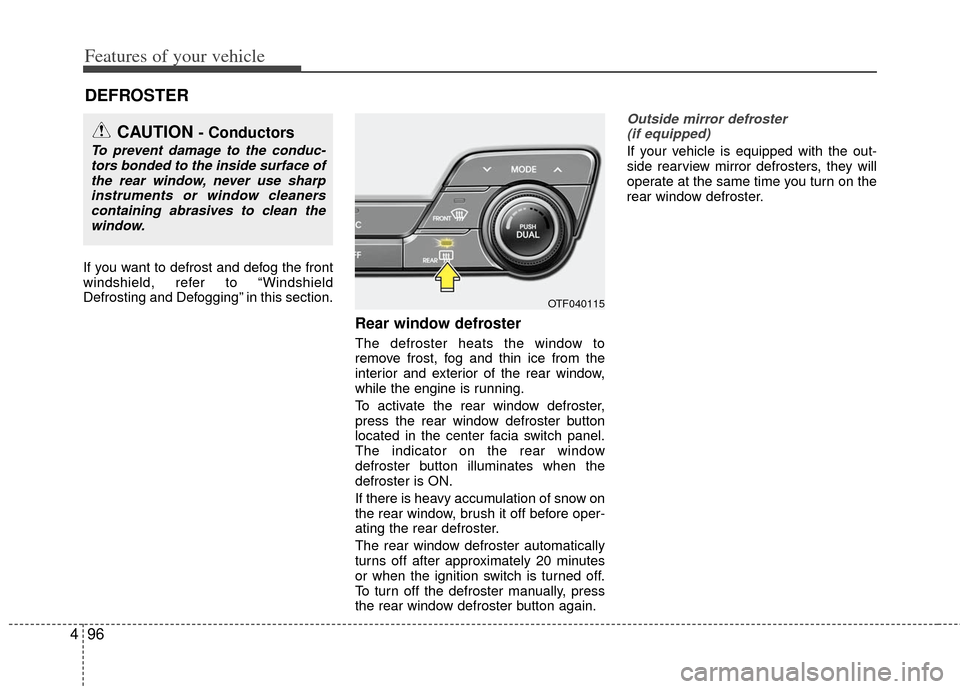
To activate the rear window defroster,
press the rear window defroster button
located in the center facia switch panel.
The indicator on the rear window
defroster button illuminates when the
defroster is ON.
If there is heavy accumulation of snow on
the rear window, brush it off before oper-
ating the rear defroster.
The rear window defroster automatically
turns off after approximately 20 minutes
or when the ignition switch is turned off.
To turn off the defroster manually, press
the rear window defroster button again.
Outside mirror defroster
(if equipped)
If your vehicle is equipped with the out-
side rearview mirror defrosters, they will
operate at the same time you turn on the
rear window defroster.
DEFROSTER
CAUTION - Conductors
To prevent damage to the conduc- tors bonded to the inside surface ofthe rear window, never use sharpinstruments or window cleanerscontaining abrasives to clean the window.
OTF040115
Page 168 of 394
497
Features of your vehicle
AUTOMATIC CLIMATE CONTROL SYSTEM (IF EQUIPPED)
OTFH040129N/OTFH040175N
■
■Type A
■
■Type B1. Fan speed control switch
2. Driver’s temperature control knob
3. Air conditioning button
4. ECON (economy air conditioning button)
5. Front windshield defroster button
6. Mode selection button
7. Passenger's temperature control knob
8. Dual temperature control selection button
9. Rear window defroster button
10. OFF button
11. Recirculated air position button (Type A)
Air intake control button (Type B)
12. AUTO (automatic control) button
13. Climate control display
14. Climate information screen selection button
Page 170 of 394

499
Features of your vehicle
Manual heating and air condition-
ing
The heating and cooling system can be
controlled manually by pushing buttons
other than the AUTO button. In this case,
the system works sequentially according
to the order of buttons selected.
1. Start the engine.
2. Set the mode to the desired position.To improve the effectiveness of heat-ing and cooling :
- Heating:
- Cooling:
3. Set the temperature control to the desired position.
4. Set the air intake control to the outside (fresh) air or recirculated air position.
5. Set the fan speed control to the desired speed.
6. If air conditioning is desired, turn the air conditioning system on.
Press the AUTO button in order to con-
vert to full automatic control of the sys-
tem.
Mode selection
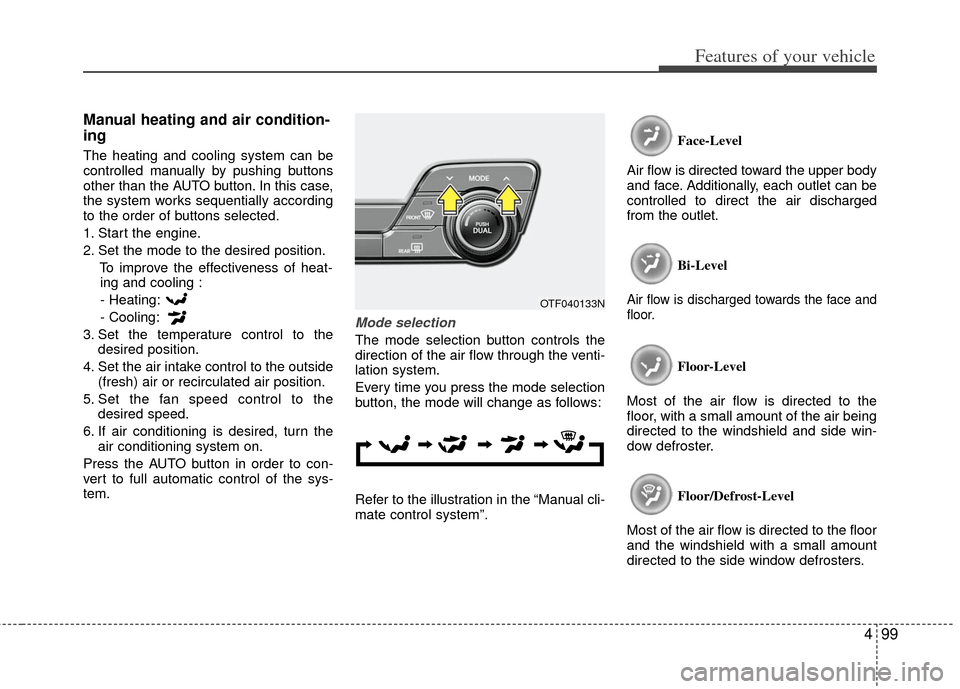
The mode selection button controls the
direction of the air flow through the venti-
lation system.
Every time you press the mode selection
button, the mode will change as follows:
Refer to the illustration in the “Manual cli-
mate control system”. Face-Level
Air flow is directed toward the upper body
and face. Additionally, each outlet can be
controlled to direct the air discharged
from the outlet.
Bi-Level
Air flow is discharged towards the face and
floor.
Floor-Level
Most of the air flow is directed to the
floor, with a small amount of the air being
directed to the windshield and side win-
dow defroster.
Floor/Defrost-Level
Most of the air flow is directed to the floor
and the windshield with a small amount
directed to the side window defrosters.
OTF040133N
Page 171 of 394
Features of your vehicle
100
4
Defrost-level
Most of the air flow is directed to the
windshield with a small amount of air
directed to the side window defrosters. Instrument panel vents
The outlet vents can be opened or closed
separately using the thumbwheel.
Also, you can adjust the direction of air
delivered from these vents using the vent
control lever as shown.Temperature control
The temperature control knob allows you
to control the temperature of the air flow-
ing from the ventilation system. To
change the air temperature in the pas-
senger compartment, turn the knob to
the right for warm air or left for cooler air.
OTF040124OTF040135OTF040134N