Page 171 of 603
STORAGE
Console Storage Compartment
To lock or unlock the storage compartment, insert the
ignition key and turn. To open the storage compartment,
press the latch and lift the cover.
Rear Storage Compartment
The rear cargo area storage compartment cover is held by
a spring-loaded latch. In order to remove the rear storage
compartment cover, use the following procedure:
NOTE: The rear storage compartment latch should not
be used as cargo tie-down.
1. Flip up the pull loop so it is perpendicular (straight
up) to the top surface of the tray.
2. Pull up on the loop and twist it 90 degrees, so it is
parallel to the slotted hole in the tray.
Center Console
3
UNDERSTANDING THE FEATURES OF YOUR VEHICLE 169
Page 179 of 603
Front Panel(s) Removal
NOTE: Left panel must be removed before removing
right panel.
1. Fold down the sun visor, and move it to the side.
2. Turn the rear fasteners (knobs) (located on the over-
head speaker bar assembly) counterclockwise until they
can be removed.
3
UNDERSTANDING THE FEATURES OF YOUR VEHICLE 177
Page 180 of 603
3. Turn the center L-shaped locks (two) from the center
of the roof panel.
4. Turn the rear L-shaped lock (located above the shoul-
der belt anchorage).5. Unlatch the header panel latch located at the top of the
windshield.
178 UNDERSTANDING THE FEATURES OF YOUR VEHICLE
Page 185 of 603
Front Panel(s) Installation
NOTE:Set the panels on the windshield frame so that
there is no overhang. Also, make sure that the panels are
sitting flush with the body.
1. Install the right panel first, then the left panel.
2. Reinstall the panel(s) using the same steps for removal
in reverse order.
Front Panel(s) Installation With Rear Hard Top
Removed
1. Turn the left and right panels over and move the
spacer block (located on the rear of the panel) upward 90
degrees.
3
UNDERSTANDING THE FEATURES OF YOUR VEHICLE 183
Page 187 of 603
6. Locate the wire harness on the left rear inside corner of
the vehicle.7. Release the red locking tab by pulling outward.
Wire Harness Connector
Red Locking Tab
3
UNDERSTANDING THE FEATURES OF YOUR VEHICLE 185
Page 241 of 603
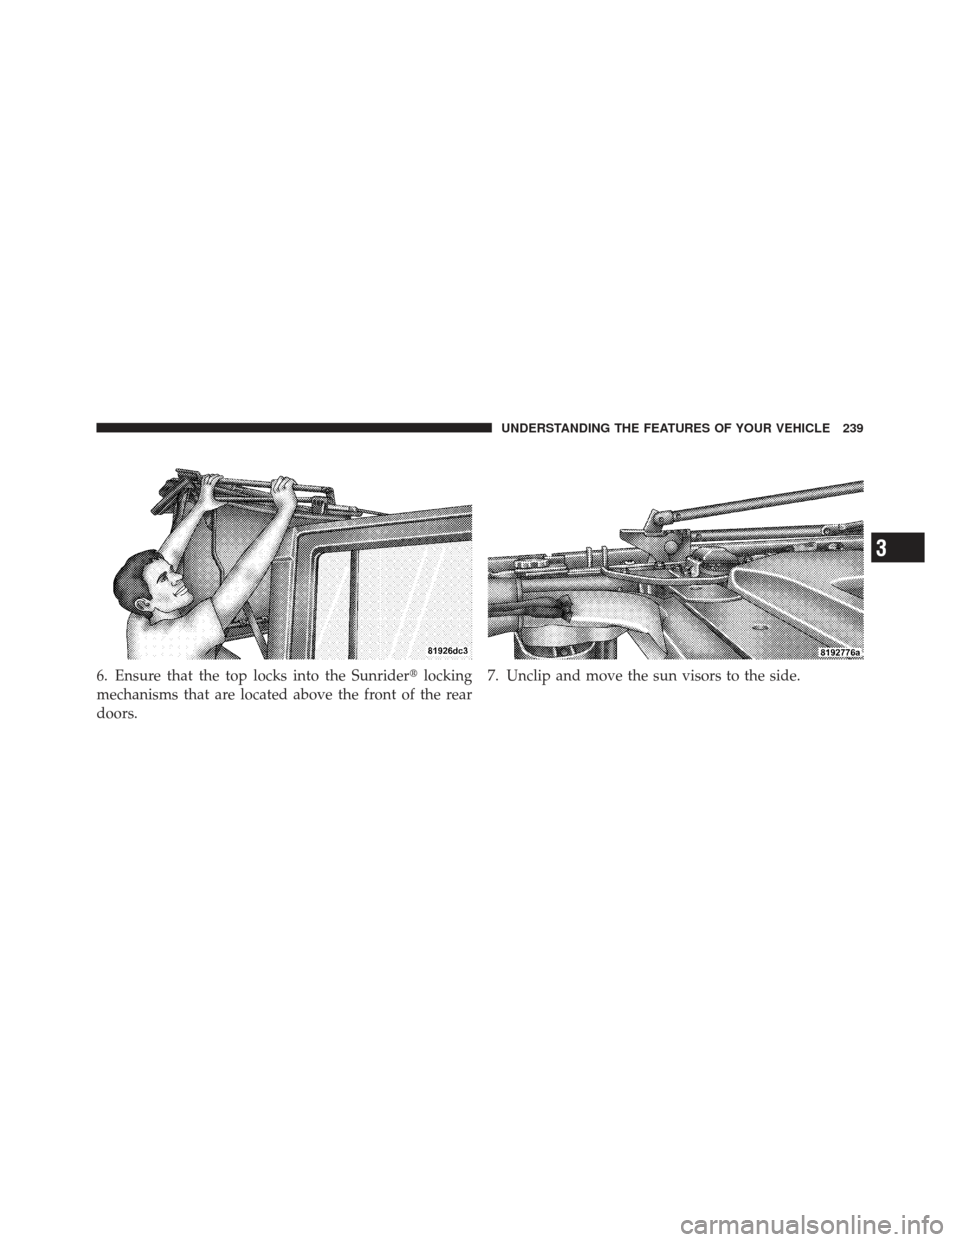
6. Ensure that the top locks into the Sunrider�locking
mechanisms that are located above the front of the rear
doors. 7. Unclip and move the sun visors to the side.
3
UNDERSTANDING THE FEATURES OF YOUR VEHICLE 239
Page 254 of 603
5. Fold the top so that the material forms a�W�as shown.
Enter the vehicle and move the material into two folds.
6. Secure the top by using the two provided straps. Each
strap will wrap around the side bow and Velcro� to itself;
use one strap on each side of the vehicle.
Closing The Sunrider�
Perform the above steps in the opposite order.
NOTE: Failure to fold the fabric rearward will allow the
material to sag and may block the rearview mirror.
252 UNDERSTANDING THE FEATURES OF YOUR VEHICLE
Page 258 of 603

CAUTION!
Do not remove the head impact foam from the side
bars, as damage to the foam may result.
NOTE: Store all of the mounting bolts in their original
threaded holes and tighten for safekeeping.
8. Remove the side bar assembly, and reattach the sport
bar Velcro� covering.
9. To safely store the side bars in your vehicle, use four
cinch straps (available from your authorized dealer).
Attach the straps through the slots located on the floor
behind the folded rear seat at the front of the storage bin
cover.
WARNING!
You or others could be injured if you carry the side
bars loose in your vehicle. Remove the side bars from
the vehicle or securely store them as described or
they may cause personal injury if an accident occurs.
See your authorized dealer for the cinch straps.
10. Remove the windshield wiper arms by first pulling
the wiper away from the windshield and out to the
“lock” position. Unsnap the wiper arm nut caps, and
remove the retaining nuts. Lift the wiper arms off and
store them in the center console or securely behind the
rear seat.
NOTE: It may be necessary to use a battery terminal
puller tool in order to separate the wiper arms from the
shaft after the nuts have been removed.
256 UNDERSTANDING THE FEATURES OF YOUR VEHICLE

 Removal
NOTE: Left panel must be removed before removing
right panel.
1. Fold down the sun visor, and move it to the side.
2. Turn the rear fasteners (knobs) (located on the over-
head")
 from the center
of the roof panel.
4. Turn the rear L-shaped lock (located above the shoul-
der belt anchorage).5. Unlatch the header panel latch located at the")
 Installation
NOTE:Set the panels on the windshield frame so that
there is no overhang. Also, make sure that the panels are
sitting flush with the body.
1. Install the right panel first,")