Page 154 of 603
.
Lane Change Assist
Tap the lever up or down once, without moving beyond
the detent, and the turn signal (right or left")
•A tone will chime if the turn signals are left on for
more than 1 mile (2 km).
Lane Change Assist
Tap the lever up or down once, without moving beyond
the detent, and the turn signal (right or left) will flash
three times then automatically turn off.
Lights-On Reminder
If the headlights or parking lights are on after the ignition
is turned OFF, a chime will sound when the driver’s door
is opened.
High/Low Beam Switch
Push the multifunction lever away from you to switch
the headlights to high beam. Pull the lever toward you to
switch the headlights back to low beam.
Flash-To-Pass
You can signal another vehicle with your headlights by
lightly pulling the multifunction lever toward the steer-
ing wheel. This will turn on the high beam headlights
until the lever is released.
Front Fog Lights
The front fog light switch is located on the multi-
function lever. To activate the front fog lights, turn
on the parking or low beam headlights and pull
out the end of the lever.
NOTE: The fog lights will only operate with the parking
lights or the headlights on low beam. Selecting high
beam headlights will turn off the fog lights.
152 UNDERSTANDING THE FEATURES OF YOUR VEHICLE
Page 159 of 603
NOTE:The wiper delay times depend on vehicle speed.
If the vehicle is moving less than 10 mph (16 km/h),
delay times will be doubled.
Windshield Washers
To use the washer, pull the lever toward you and hold
while spray is desired. If the lever is pulled while in the
delay range, the wiper will start and continue to operate
for two or three wipe cycles after the lever is released,
and then resume the intermittent interval previously
selected.
If the lever is pulled while in the off position, the wipers
will operate for two or three wipe cycles and then turn
off.
WARNING!
Sudden loss of visibility through the windshield
could lead to a collision. You might not see other
vehicles or other obstacles. To avoid sudden icing of
the windshield during freezing weather, warm the
windshield with defroster before and during wind-
shield washer use.
Front Wiper Control
3
UNDERSTANDING THE FEATURES OF YOUR VEHICLE 157
Page 191 of 603
2. Place one hand on the upper rear and one hand on the
front of the door frame.
3. Pull the frame toward you with your rearward hand to
remove the frame from the vehicle.
4. Screw the knobs back into the door frame and fold for
storage. Store in a secure location.
WARNING!
Never store the door frames in your vehicle. In an
event of an accident, a loose door frame many cause
personal injury. If removed, always store the door
frames outside of the vehicle.
3
UNDERSTANDING THE FEATURES OF YOUR VEHICLE 189
Page 205 of 603
NOTE:Clean side and rear windows before removal to
assist in preventing scratching during removal of the soft
top. If zippers are difficult to operate due to road dust,
etc., clean them with a mild soap solution and a small
brush. Cleaning products are available through your
authorized dealer.
1. If your vehicle has half doors, remove each half-door
window by opening the door and lifting the half-door
window out.
NOTE: Stow the half-door windows carefully outside of
the vehicle, never inside, to avoid scratches.
2. Unclip and move the sun visors to the side.
3. Release the header latches and leave the hooks in the
loops on the windshield. 4. Open the swing gate.
3
UNDERSTANDING THE FEATURES OF YOUR VEHICLE 203
Page 207 of 603
7. Stow the windows carefully to avoid scratching.
8. Undo the Velcro�that runs along the top and rear
edge of the side window.
9. Beginning from the rear lower corner, completely
unzip the window. 10. Once unzipped, remove the side window retainers
from the door channel and body side channel. Repeat this
step on the opposite side.
3
UNDERSTANDING THE FEATURES OF YOUR VEHICLE 205
Page 209 of 603
13. The swing gate brackets do not need to be removed
unless the hard top is being installed. To remove the
swing gate brackets, pull the front of the bracket forward
while rolling the entire bracket back in toward the vehicle
to disengage.14. Completely release the latches from the loops on the
windshield frame.
If your vehicle is not equipped with
the Sunrider� package, proceed to Step 15.
3
UNDERSTANDING THE FEATURES OF YOUR VEHICLE 207
Page 210 of 603
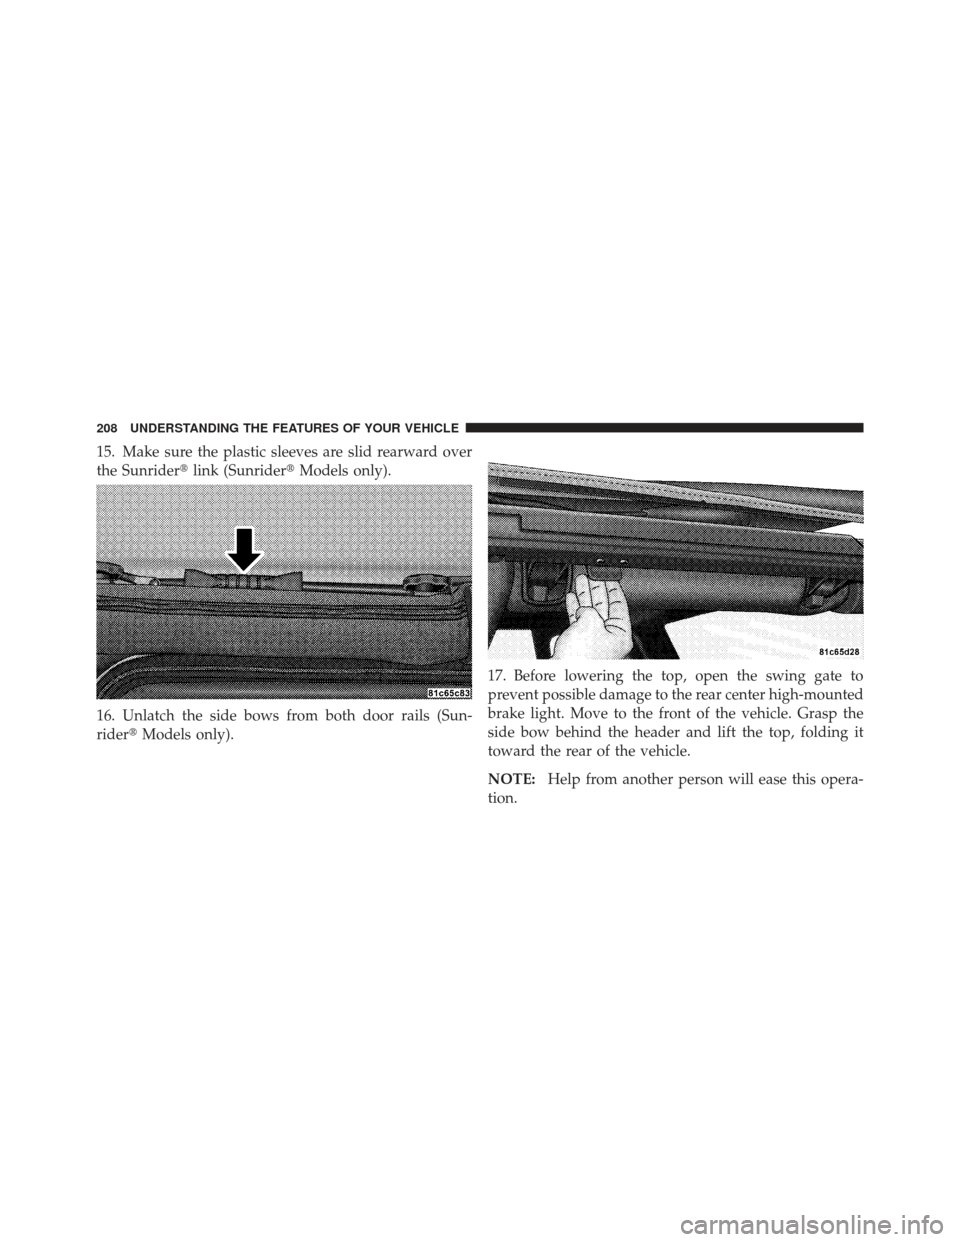
15. Make sure the plastic sleeves are slid rearward over
the Sunrider�link (Sunrider� Models only).
16. Unlatch the side bows from both door rails (Sun-
rider� Models only). 17. Before lowering the top, open the swing gate to
prevent possible damage to the rear center high-mounted
brake light. Move to the front of the vehicle. Grasp the
side bow behind the header and lift the top, folding it
toward the rear of the vehicle.
NOTE:
Help from another person will ease this opera-
tion.
208 UNDERSTANDING THE FEATURES OF YOUR VEHICLE
Page 215 of 603
9. Partially install the sail panel retainers into the body
side channel, leaving the last 3 in (7.6 cm) toward the rear
window loose (on both sides). Pulling down on the rear
roof bow (3–bow) will aid to reach the channel with the
retainers.10. To install the side windows, affix the window tem-
porarily by attaching to the Velcro�
in the rear corner.
Start the zipper but close only about 1 in (2.5 cm).
3
UNDERSTANDING THE FEATURES OF YOUR VEHICLE 213
,
delay times will be doubled.
Windshield Washers
To use the washer, pull the lever toward you an")


 toward the rear
window loose (on both sides). Pulling down on the rear
roof bow (3–bow) will")