Page 481 of 542
Cavity CartridgeFuseMini-
Fuse Description
J8 40 Amp Green — Power Seats – If
Equipped
J9 — — —
J10 — — — J11 30 Amp Pink — Thatchm Lock/Unlock
– If Equipped
J13 60 Amp Yellow — Ignition Off Draw
J14 40 Amp Green — Rear Defroster – If
Equipped
J15 40 Amp Green — Front Blower
J17 40 Amp Green — Starter Solenoid
J18 20 Amp Blue — Powertrain Control
ModuleCavity Cartridge FuseMini-
Fuse Description
J19 60 Amp Yellow — Radiator Fan
J20 30 Amp Pink — Front Wiper
J21 20 Amp Blue — Front Washer/Rear
Washer – If Equipped
J22 25 Amp Natural — Sunroof Module – If
Equipped
M1 — 15 Amp BlueStop Light Switch Feed
— Rear Center Brake
Lamp
M2 — 20 Amp YellowTrailer Lighting – If
Equipped
M3 — 20 Amp YellowFrt/Rr Axle Lockers –
If Equipped
M4 — 10 Amp RedTrailer Tow – If
Equipped
7
MAINTAINING YOUR VEHICLE 479
Page 482 of 542
Cavity CartridgeFuseMini-
Fuse Description
M5 — 25 Amp NaturalPower Inverter – If
Equipped
M6 — 20 Amp YellowRain Sensor – If
Equipped
M7 — 20 Amp YellowCigar Lighter
M8 — 20 Amp YellowFront Heated Seats – If
Equipped
M9 — — —
M10 — 15 Amp BlueIgnition Off Draw -
Vehicle Entertainment
System, Satellite Digital
Receiver, DVD, Hands
Free Module, Radio,
Antenna,Universal Ga-
rage Door Opener – If
Equipped/Vanity LightCavity Cartridge
FuseMini-
Fuse Description
M11 — 10 Amp RedClimate Control Sys-
tem – If Equipped
M12 — 30 Amp GreenRadio/Amplifier – If
Equipped
M13 — 20 Amp YellowInstrument Cluster/
Wireless Control
Module/Multifunction
Control Switch, Siren –
If Equipped
M14 — 20 Amp YellowTrailer Tow (Export
Only) – If Equipped
M15 — 20 Amp YellowInstrument Cluster/
Rear View Mirror/Tire
Pressure Monitor/
Transfer Case Module
– If Equipped/Glow
Plugs – If Equipped
480 MAINTAINING YOUR VEHICLE
Page 483 of 542
Cavity CartridgeFuseMini-
Fuse Description
M16 — 10 Amp RedAirbag Module
M17 — 15 Amp BlueExterior Lighting – Left
Front Park and Side
Marker, Left Tail and
Running, License
Lights
M18 — 15 Amp BlueExterior Lighting –
Right Front Park and
Side Marker, Right Tail
and Running Lights
M19 — 25 Amp NaturalAutomatic Shutdown
#1 and #2Cavity Cartridge
FuseMini-
Fuse Description
M20 — 15 Amp BlueInterior Lighting/
Steering Wheel
Switches – If
Equipped/Switch
Bank/Steering Column
Module – If Equipped
M21 — 20 Amp YellowAutomatic Shutdown
#3
M22 — 10 Amp RedRight Horn (Hi/Low)
M23 — 10 Amp RedLeft Horn (Hi/Low)
M24 — 25 Amp NaturalRear Wiper – If
Equipped
M25 — 20 Amp YellowFuel Pump, Diesel Lift
Pump – If Equipped
7
MAINTAINING YOUR VEHICLE 481
Page 484 of 542
Cavity CartridgeFuseMini-
Fuse Description
M26 — 10 Amp RedPower Mirror Switch/
Driver Window Switch
M27 — 10 Amp RedIgnition Switch/
Wireless Control
Module/Steering Col-
umn Lock – If
Equipped
M28 — 10 Amp RedPowertrain Control
Module
M29 — 10 Amp RedOccupant Classification
Module
M30 — 15 Amp BlueRear Wiper Module –
If Equipped/Power
Folding Mirror – If
Equipped/Diagnostic
LinkCavity Cartridge
FuseMini-
Fuse Description
M31 — 20 Amp YellowBack-Up Lights
M32 — 10 Amp RedAirbag Module
M33 — 10 Amp RedPowertrain Control
Module
M34 — 10 Amp RedPark Assist Module – If
Equipped/Climate
Control System Mod-
ule – If Equipped/
Compass Module – If
Equipped/Cabin
Heater – If Equipped/
Diesel Rad Fan – If
Equipped
M35 — 10 Amp RedHeated Mirrors – If
Equipped
482 MAINTAINING YOUR VEHICLE
Page 485 of 542
Cavity CartridgeFuseMini-
Fuse Description
M36 — — —
M37 — 10 Amp RedAntilock Brakes/
Stability Control Sys-
tem Module/Stop
Light Switch/Fuel
Pump Relay
M38 — 25 Amp NaturalDoor and Liftgate
Lock/Unlock MotorsCAUTION!
•When installing the Integrated Power Module
cover, it is important to ensure the cover is prop-
erly positioned and fully latched. Failure to do so
may allow water to get into the Integrated Power
Module, and possibly result in an electrical system
failure.
•When replacing a blown fuse, it is important to
use only a fuse having the correct amperage rating.
The use of a fuse with a rating other than indicated
may result in a dangerous electrical system over-
load. If a properly rated fuse continues to blow, it
indicates a problem in the circuit that must be
corrected.
7
MAINTAINING YOUR VEHICLE 483
Page 486 of 542

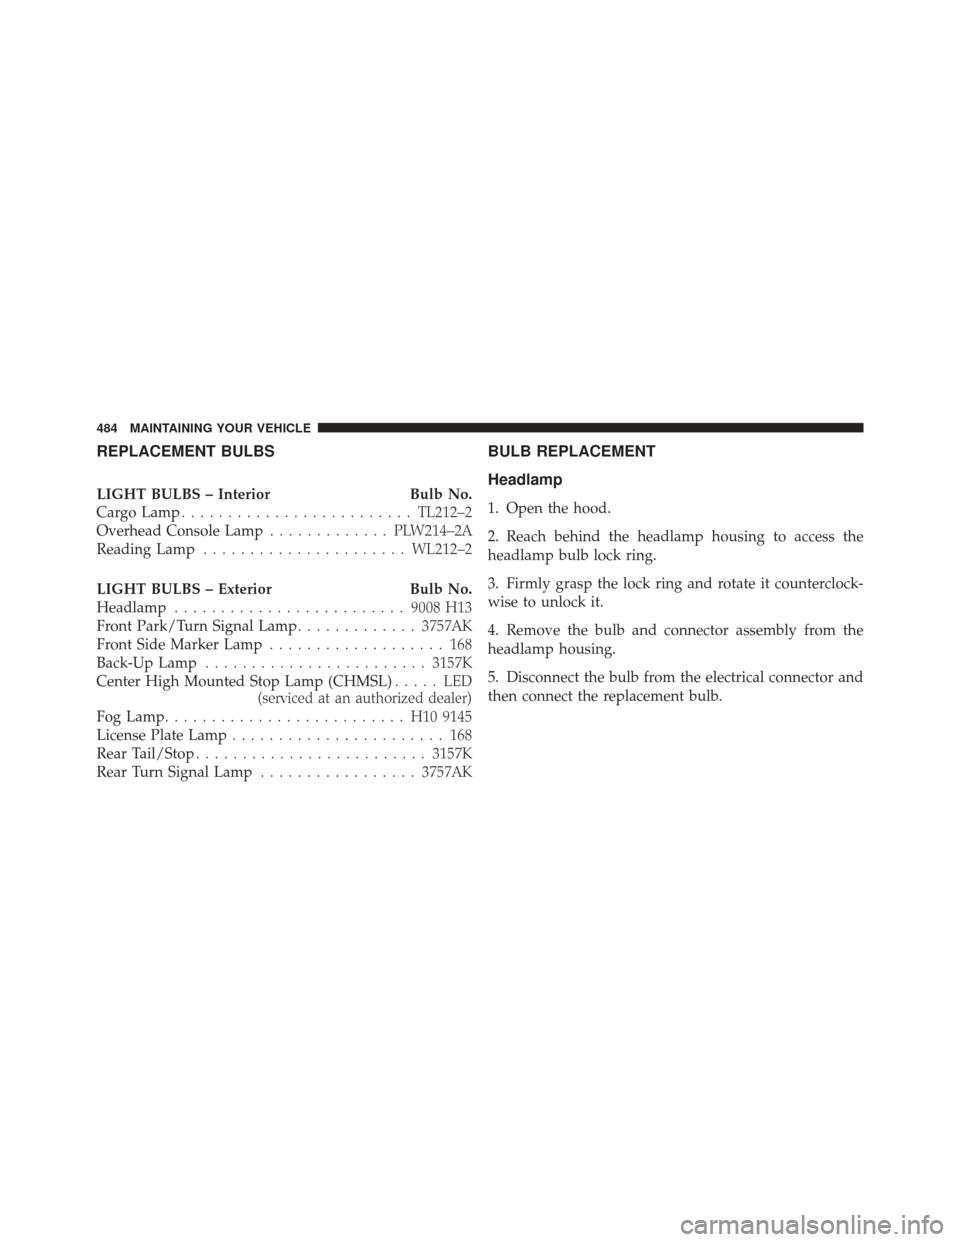
REPLACEMENT BULBS
LIGHT BULBS – InteriorBulb No.
Cargo Lamp ......................... TL212–2
Overhead Console Lamp ............. PLW214–2A
Reading Lamp ...................... WL212–2
LIGHT BULBS – Exterior Bulb No.
Headlamp ......................... 9008 H13
Front Park/Turn Signal Lamp .............3757AK
Front Side Marker Lamp ................... 168
Back-Up Lamp ........................ 3157K
Center High Mounted Stop Lamp (CHMSL) ..... LED
(serviced at an authorized dealer)
Fog Lamp .......................... H10 9145
License Plate Lamp ....................... 168
Rear Tail/Stop ......................... 3157K
Rear Turn Signal Lamp .................3757AK
BULB REPLACEMENT
Headlamp
1. Open the hood.
2. Reach behind the headlamp housing to access the
headlamp bulb lock ring.
3. Firmly grasp the lock ring and rotate it counterclock-
wise to unlock it.
4. Remove the bulb and connector assembly from the
headlamp housing.
5. Disconnect the bulb from the electrical connector and
then connect the replacement bulb.
484 MAINTAINING YOUR VEHICLE
Page 496 of 542
Once A Month
•Check tire pressure and look for unusual wear or
damage.
•Inspect the battery and clean and tighten the terminals
as required.
•Check the fluid levels of the coolant reservoir and the
brake master cylinder, add as needed.
•Check all lights and other electrical items for correct
operation.
At Each Oil Change
•Change the engine oil filter.
•Inspect the brake hoses and lines.
CAUTION!
•Failure to perform the required maintenance items
may result in damage to the vehicle.
•Proper operation of four-wheel drive vehicles de-
pends on tires of equal size, type and circumfer-
ence on each wheel. Any difference in tire size can
cause damage to the transfer case. Tire rotation
schedule should be followed to balance tire wear.
Required Maintenance Intervals
Refer to the Maintenance Schedules on the following
pages for the required maintenance intervals.
8
M A I
N T
E
N A
N CE
S
C
H E
D
U L
E
S494 MAINTENANCE SCHEDULES
Page 514 of 542

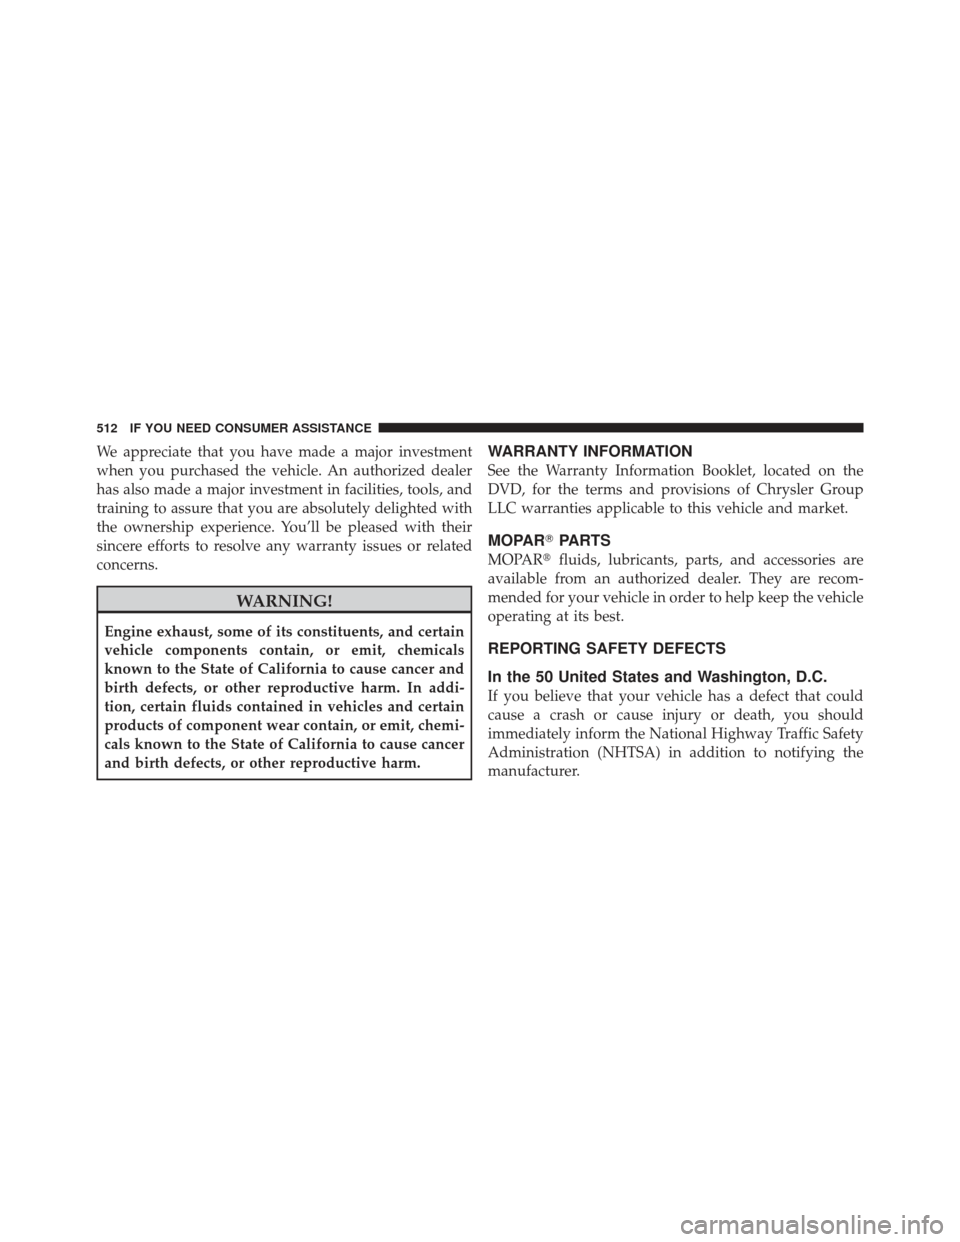
We appreciate that you have made a major investment
when you purchased the vehicle. An authorized dealer
has also made a major investment in facilities, tools, and
training to assure that you are absolutely delighted with
the ownership experience. You’ll be pleased with their
sincere efforts to resolve any warranty issues or related
concerns.
WARNING!
Engine exhaust, some of its constituents, and certain
vehicle components contain, or emit, chemicals
known to the State of California to cause cancer and
birth defects, or other reproductive harm. In addi-
tion, certain fluids contained in vehicles and certain
products of component wear contain, or emit, chemi-
cals known to the State of California to cause cancer
and birth defects, or other reproductive harm.
WARRANTY INFORMATION
See the Warranty Information Booklet, located on the
DVD, for the terms and provisions of Chrysler Group
LLC warranties applicable to this vehicle and market.
MOPAR�PARTS
MOPAR� fluids, lubricants, parts, and accessories are
available from an authorized dealer. They are recom-
mended for your vehicle in order to help keep the vehicle
operating at its best.
REPORTING SAFETY DEFECTS
In the 50 United States and Washington, D.C.
If you believe that your vehicle has a defect that could
cause a crash or cause injury or death, you should
immediately inform the National Highway Traffic Safety
Administration (NHTSA) in addition to notifying the
manufacturer.
512 IF YOU NEED CONSUMER ASSISTANCE