Page 57 of 100

POWER OUTLETS
• The front power outlet is located insidethe center storage bin of the instrument
panel. Push inward on the storage lid to
open the compartment and gain access
to this power outlet.
• A second front power outlet is located inside the center console.
• The rear power outlet is located in the right rear cargo area.
• The power outlets are labeled with either a “key” or a “battery” symbol to indicate how the outlet is powered. Power outlets labeled with a “key” are powered when the
ignition switch is in the ON/RUN or ACC position, while the outlets labeled with a
“battery” are connected directly to the battery and powered at all times.
NOTE:
• Do not exceed the maximum power of 160 Watts (13 Amps) at 12 Volts. If the 160 Watt (13 Amp) power rating is exceeded, the fuse protecting the system will need to be
replaced.
• All accessories connected to the “battery” powered outlets should be removed or turned off when the vehicle is not in use to protect the battery against discharge.
ELECTRONICS
55
Page 58 of 100
 transfer case, which
provides convenient full-ti")
QUADRA-TRAC I®
FOUR-WHEEL DRIVE
Quadra-Trac I®Operating
Instructions/Precautions - 3.6L
Only
• The Quadra-Trac I®is a single-speed
(HI range only) transfer case, which
provides convenient full-time
four-wheel drive. No driver interaction
is required. The Brake Traction Control
(BTC) System, which combines
standard ABS and Traction Control,
provides resistance to any wheel that
is slipping to allow additional torque
transfer to wheels with traction.
QUADRA-TRAC II®/
QUADRA-DRIVE II
®
FOUR-WHEEL DRIVE
Quadra-Trac II®/Quadra-Drive
II®Operating Instructions/
Precautions
• The Quadra-Trac II®/Quadra-Drive
II®transfer case is fully automatic in
the normal driving 4WD HI mode. The Quadra-Trac II
®/Quadra-Drive
II®transfer case provides three mode
positions:
• 4WD HI
• NEUTRAL
• 4WD LOW
• This transfer case is fully automatic in the 4WD HI mode.
• When additional traction is required, the 4WD LOW position can be used
to lock the front and rear driveshafts
together and force the front and rear
wheels to rotate at the same speed.
The 4WD LOW position is intended
for loose, slippery surfaces only.
Driving in the 4WD LOW position on
dry, hard-surfaced roads may cause
increased tire wear and damage to
driveline components.
• When operating your vehicle in 4WD LOW, the engine speed is
approximately three times that of the
4WD HI position at a given road
speed. Take care not to overspeed the
engine and do not exceed 25 mph
(40 km/h).
NOTE:
• If shift conditions/interlocks are not met, or a transfer case motor temperature
protection condition exists, a “For 4x4
Low Slow Below 5 MPH or 8 KPH Put
Trans in N Press 4 Low” message will
flash from the Electronic Vehicle
Information Center (EVIC).
Shifting Procedures
4WD HI To 4WD LOW
• With the vehicle at speeds of 0 to 3 mph (0 to 5 km/h), the ignition
switch in the ON/RUN position or the
engine running, shift the transmission
into NEUTRAL, and press the “4WD
LOW” button once on the transfer
case switch. The “4WD LOW”
indicator light in the instrument cluster
will begin to flash and remain on solid
when the shift is complete.
OFF-ROAD CAPABILITIES
56
Page 59 of 100
, the ignition
switch in the ON/RUN position or the
engine running, shift the transmission
into NEUTRAL, and press the “4WD")
4WD LOW To 4WD HI• With the vehicle at speeds of 0 to 3 mph (0 to 5 km/h), the ignition
switch in the ON/RUN position or the
engine running, shift the transmission
into NEUTRAL, and press the “4WD
LOW” button once on the transfer
case switch. The “4WD LOW”
indicator light in the instrument cluster
will flash and turn off when the shift is
complete.
NOTE:
• If the shift conditions/interlocks are not met, or a transfer case motor
temperature protection exists, a “For 4x4
Low Slow Below 5 MPH or 8 KPH Put
Trans in N Press 4 Low” message will
flash on the Electronic Vehicle
Information Center (EVIC).
• Shifting into or out of 4WD LOW is possible with the vehicle completely
stopped; however, difficulty may occur
due to the mating clutch teeth not being
properly aligned. Several attempts may
be required for clutch teeth alignment
and shift completion to occur. The
preferred method is with the vehicle
rolling 0 to 3 mph (0 to 5 km/h). If the
vehicle is moving faster than 3 mph
(5 km/h), the transfer case will not allow
the shift.
NEUTRAL Shift Procedure
• Turn the ignition switch to theON/RUN position, engine off.
• Vehicle stopped, with foot on brake.
• Place the transmission into NEUTRAL. • Press and hold the NEUTRAL button
located near the 4WD mode control
knob with a pen or similar object for
four seconds. The indicator light will
begin to flash indicating the shift is in
progress. The light will stop blinking
(stay on solid) when the NEUTRAL shift
is complete. A “4WD SYSTEM IN
NEUTRAL” message will display on
the Electronic Vehicle Information
Center (EVIC).
• Repeat these Steps to shift out of NEUTRAL.
SELEC-TERRAIN™
• Selec-Terrain™ combines thecapabilities of the vehicle control
systems, along with driver input, to
provide the best performance for all
terrains.
Rotate the mode control knob to select the
following Selec-Terrain™ positions: • Sport – Dry weather, on-road
calibration. Only available in 4WD
High range. Performance-based
tuning that provides a rear wheel
drive feel but with improved handling
and acceleration over a two-wheel
drive vehicle. The Electronic Stability
Control will set to allow more driver
control of the vehicle while
maintaining safe handling controls.
The vehicle will lower (if equipped
with Air Suspension) by 0.59 inches
(15 mm) in the SPORT mode.
• Snow – The Electronic Stability
Control is set for additional stability in
inclement weather. Use on and off
road on loose traction surfaces such
as snow.
• Auto – Fully automatic full-time
four-wheel drive operation can be
used on and off road. Balances
traction with steering feel to provide
improved handling and acceleration
over two-wheel drive vehicles.
OFF-ROAD CAPABILITIES
57
Page 60 of 100

•Sand/Mud – Off-road calibration
for use on low traction surfaces such
as mud, sand, or wet grass. Driveline
is maximized for traction. Some
binding may be felt on less forgiving
surfaces. The electronic brake controls
are set to limit traction control
management of throttle and wheel
spin.
• Rock – Off-road calibration only
available in 4WD Low range. The
vehicle is raised (if equipped with Air
Suspension) for improved ground
clearance. Traction based tuning with
improved steer-ability for use on high
traction off-road surfaces. Activates
the Hill Descent Control for steep
downhill control. Use for low speed
obstacles such as large rocks, deep
ruts, etc.
Quadra-Lift™
• The Quadra-Lift™ air suspension system provides full time load leveling
capability along with the benefit of
being able to adjust vehicle height by
the push of a button. Quadra-Lift™ is
available with both Quadra-Trac II
®
and Quadra-Drive II™.
• The system requires that the engine be running for all changes. When
lowering the vehicle all of the doors,
including the liftgate, must be closed. • The Quadra-Lift™ air suspension
system uses a lifting and lowering
pattern which keeps the headlights
from shining into oncoming traffic.
When raising the vehicle, the rear of
the vehicle will move up first and then
the front. When lowering the vehicle,
the front will move down first and then
the rear.
• After the engine is turned off, you may notice that the air suspension system
operates briefly. This is normal. The
system is correcting the position of the
vehicle.
• To assist with changing a spare tire, the Quadra-Lift™ air suspension
system has a feature which allows the
automatic leveling to be disabled.
Press and hold both the “Up” and
“Down” buttons simultaneously
between 5 and 10 seconds; a
message will appear in the EVIC
stating leveling has been disabled
immediately after both buttons have
been released. Driving the vehicle
over 5 mph (8 km/h) will return the
air suspension to normal operation.
• An audible chime will be heard whenever a system error has been
detected.
Operation • Pressing the “Up” or “Down” button once will move the suspension one
position higher or lower from the
current position, assuming all
conditions are met (i.e., engine
running and all doors and liftgate
closed).
• The 4 indicator lamps will illuminate to show the current position of the
vehicle. Flashing indicator lamps will
show a position which the system is
working to achieve. If multiple
indicator lamps are flashing on the
“Up” button, the highest flashing
indicator lamp is the position the
system is working to achieve.
OFF-ROAD CAPABILITIES
58
Page 61 of 100
 – This is the
standard position of the
suspension and is meant
for normal driving. Only
the bottom Indicator lamp
on the “Up” button will be illuminated
when the vehi")
• Normal Ride Height(NRH) – This is the
standard position of the
suspension and is meant
for normal driving. Only
the bottom Indicator lamp
on the “Up” button will be illuminated
when the vehicle is in this position.
• Off-Road 1 (OR1) (Raisesthe vehicle approximately
1.3 in (33 mm) – This
position is intended for
off-road driving only
where vehicle speeds may
go above 25 mph (40 km/h). Press
the “Up” button once from NRH while
vehicle speed is below 48 mph
(77 km/h). The bottom two Indicator
lamps on the “Up” button will be
illuminated when the vehicle is in
OR1.
• Off-Road 2 (OR2) (Raisesthe vehicle approximately
2.6 in (65 mm) – This
position is intended for
off-road driving where
maximum ground
clearance is required. Press the “Up”
button twice from NRH, or once from
OR1 position while vehicle speed is
below 20 mph (32 km/h). All three
Indicator lamps on the “Up” button
will be illuminated when the vehicle is
in OR2.
• Park Mode (Lowers thevehicle approximately
1.5 in (38 mm) – This
position lowers the vehicle
for easier passenger entry
and exit. Press the
“Down” button once from NRH while
the vehicle speed is below 25 mph
(40 km/h). Once the vehicle speed
goes below 15 mph (24 km/h) the
vehicle height will begin to lower. The
Indicator lamp on the “Down” button
will be illuminated when the vehicle is
in Park Mode.WARNING!
• You or others could be injured if you leave the vehicle unattended
with the transfer case in the N
(Neutral) position without first fully
engaging the parking brake. The
transfer case N (Neutral) position
disengages both the front and rear
driveshafts from the powertrain and
will allow the vehicle to move
regardless of the transmission
position. The parking brake should
always be applied when the driver
is not in the vehicle.
• The air suspension system uses a high pressure volume of air to
operate the system. To avoid
personal injury or damage to the
system, see your authorized dealer
for service.
Hill Start Assist/Hill
Descent Control
• The Hill Start Assist system assists the
driver when starting a vehicle from a
stop on a hill.
• The Hill Descent Control system maintains vehicle speed while
descending hills during off-road
driving situations and is available in
4WD HIGH range and 4WD LOW
range.
• Refer to your Owner's Manual on the DVD for further details.
UP
UP
UP
DOWN
PARK
OFF-ROAD CAPABILITIES
59
Page 62 of 100
Engine/Model ModelGCWR (Gross
Combined Wt. Rating) Frontal Area
Max. GTW (Gross
Trailer Wt.) Max. Trailer
Tongue Wt. (See
Note)
3.6L 4x2 10,400 l")
TRAILER TOWING WEIGHTS (MAXIMUM TRAILER WEIGHT RATINGS)Engine/Model ModelGCWR (Gross
Combined Wt. Rating) Frontal Area
Max. GTW (Gross
Trailer Wt.) Max. Trailer
Tongue Wt. (See
Note)
3.6L 4x2 10,400 lbs. (4 717 kg) 40 sq ft (3.72 sq m) 5,000 lbs (2 268 kg) 500 lbs (227 kg)
3.6L 4x4 10,400 lbs. (4 717 kg) 40 sq ft (3.72 sq m) 5,000 lbs (2 268 kg) 500 lbs (227 kg)
5.7L 4x2 13,100 lbs (5 942 kg) 60 sq ft (5.57 sq m) 7,400 lbs (3 357 kg) 740 lbs (336 kg)
5.7L 4x4 13,100 lbs (5 942 kg) 60 sq ft (5.57 sq m) 7,200 lbs (3 266 kg) 720 lbs (327 kg) Refer to local laws for maximum trailer towing speeds.
NOTE: The trailer tongue weight must be considered as part of the combined weight of occupants and cargo,
and should never exceed the weight referenced on the Tire and Loading Information placard.
• If the gross trailer weight is 3,500 lbs (1587 kg) or more, it is mandatory to use a weight-distributing hitch to ensure stable handling of your vehicle.
NOTE: Vehicles not factory equipped with trailer tow package are limited to 3,500 lbs (350 lbs tongue weight).
UTILITY
60
Page 63 of 100

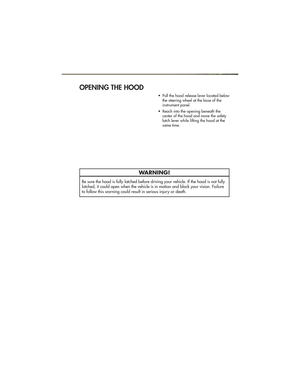
TOW/HAUL MODE
• When driving in hilly areas, towing atrailer, carrying a heavy load, etc.,
and frequent transmission shifting
occurs, press the TOW/HAUL switch
to select TOW/HAUL mode. This will
improve performance and reduce the
potential for transmission overheating
or failure due to excessive shifting.
When operating in TOW/HAUL
mode, transmission upshifts are
delayed, and the transmission will
automatically downshift (for engine
braking) during steady braking
maneuvers.
• The “TOW/HAUL Indicator Light” will illuminate in the instrument cluster to
indicate that TOW/HAUL mode has
been activated. Pressing the switch a
second time restores normal
operation. If the TOW/HAUL mode is
desired, the switch must be pressed
each time the engine is started.
RECREATIONAL
TOWING (BEHIND
MOTORHOME, ETC.)
Two-Wheel Drive Models
•Recreational towing is not
allowed.
Quadra-Trac I®(Single-Speed
Transfer Case) Four-Wheel
Drive Models
• Recreational towing is not
allowed. This model does not have
a NEUTRAL position in the transfer
case.
Quadra–Trac II®/Quadra–
Drive®II /Selec- Terrain™
Four-Wheel Drive Models
NOTE: The transfer case must be in the
NEUTRAL position, and the transmission
must be in the PARK position for
recreational towing.
Shifting Into NEUTRAL• Use the following procedure to prepare your vehicle for recreational
towing.
• Bring the vehicle to a complete stop and shift the transmission to PARK.
Turn the engine off.
• For vehicles with Keyless Enter-N-Go, remove the Keyless Enter-N-Go button
and use the Key Fob to complete this
procedure.
• Turn the ignition switch to the ON/RUN position, but do not start the
engine.
• Press and hold the brake pedal and shift the transmission into NEUTRAL.
TOW/HAUL Switch
UTILITY
61
Page 64 of 100
 button for
four seconds, until the light next to the
N symbol starts to blink, indicating
shift in pro")
• Using a ballpoint pen or similarobject, press and hold the recessed
transfer case N (Neutral) button for
four seconds, until the light next to the
N symbol starts to blink, indicating
shift in progress. The light will stop
blinking (stay on solid) when the shift
to N (Neutral) is complete. A “FOUR
WHEEL DRIVE SYSTEM IN NEUTRAL”
message will display on the EVIC
(Electronic Vehicle Information Center).
• Start the engine and shift the transmission into REVERSE.
• Release the brake pedal for five seconds and ensure that there is no
vehicle movement.
• Turn the engine off and firmly apply the parking brake.
• Shift the transmission into PARK and remove the Key Fob.
• Attach the vehicle to the tow vehicle using a suitable tow bar and release
the parking brake.
NOTE: Vehicles equipped with
Quadra-Lift™ must be lowered to the
“Park” (lowest) level, and have automatic
leveling disabled, before tying them down
(from the body) on a trailer or a flatbed
truck. Refer to “Quadra-Lift™” in
“Off-Road Capabilities” for more
information. If the vehicle cannot be
lowered to the “Park” level (for example,
engine will not run), tie-downs must be
fastened to the axles (not the body). Failure
to follow these instructions may cause fault
codes to be set and/or loss of proper
tie-down tension.CAUTION!
• Towing with the rear wheels on the ground will cause severe
transmission damage. Damage
from improper towing is not
covered under the New Vehicle
Limited Warranty.
• Front or rear wheel lifts should not be used. Internal damage to the
transmission or transfer case will
occur if a front or rear wheel lift is
used when recreational towing.
• It is necessary to follow these steps to be certain that the transfer case
is fully in NEUTRAL before
recreational towing to prevent
damage to internal parts.
WARNING!
You or others could be injured if you
leave the vehicle unattended with the
transfer case in the NEUTRAL position
without first fully engaging the
parking brake. The transfer case
NEUTRAL position disengages both
the front and rear driveshafts from the
powertrain and will allow the vehicle
to move even if the transmission is in
PARK. The parking brake should
always be applied when the driver is
not in the vehicle.
UTILITY
62