2011 HYUNDAI TUCSON ECO mode
[x] Cancel search: ECO modePage 38 of 382
Safety features of your vehicle
20
3
When the seat belt is fully extended from
the retractor to allow the installation of a
child restraint system, the seat belt oper-
ation changes to allow the belt to retract,
but not to extend (Automatic Locking
Retractor Type). Refer to “Using a child
restraint system” in this section.
✽✽
NOTICE
Although the combination retractor
provides the same level of protection for
seated passengers in either emergency
or automatic locking modes, it is recom-
mended that seated passengers use the
emergency locking feature for improved
convenience. The automatic locking
function is intended to facilitate child
restraint installation. To convert from
the automatic locking feature to the
emergency locking operation mode,
allow the unbuckled seat belt to fully
retract.
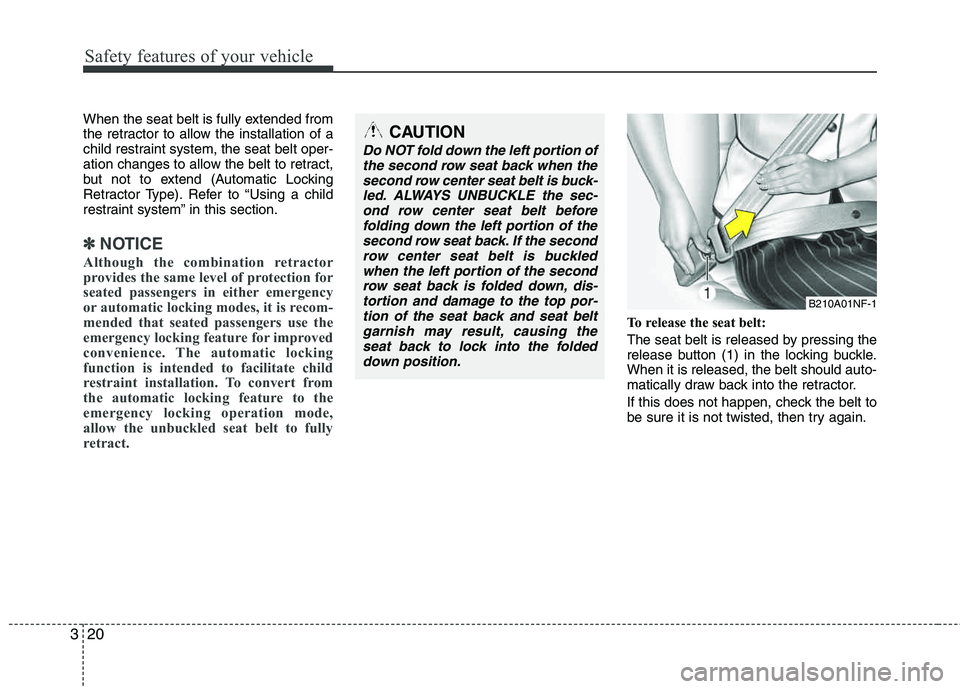
To release the seat belt:
The seat belt is released by pressing the
release button (1) in the locking buckle.When it is released, the belt should auto-
matically draw back into the retractor.
If this does not happen, check the belt to
be sure it is not twisted, then try again.
CAUTION
Do NOT fold down the left portion of the second row seat back when the second row center seat belt is buck-
led. ALWAYS UNBUCKLE the sec-ond row center seat belt before folding down the left portion of thesecond row seat back. If the second
row center seat belt is buckledwhen the left portion of the second row seat back is folded down, dis-
tortion and damage to the top por-tion of the seat back and seat beltgarnish may result, causing theseat back to lock into the folded
down position.
B210A01NF-1
Page 50 of 382
Safety features of your vehicle
32
3
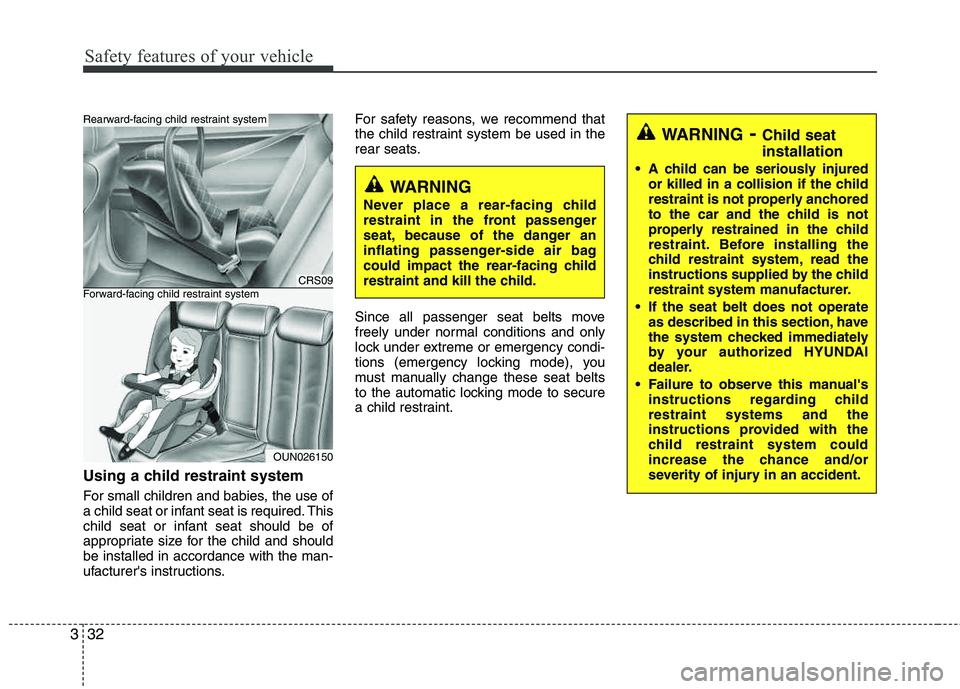
Using a child restraint system
For small children and babies, the use of
a child seat or infant seat is required. This
child seat or infant seat should be of
appropriate size for the child and should be installed in accordance with the man-
ufacturer's instructions. For safety reasons, we recommend that
the child restraint system be used in the
rear seats.
Since all passenger seat belts move
freely under normal conditions and only
lock under extreme or emergency condi-
tions (emergency locking mode), you
must manually change these seat belts
to the automatic locking mode to secure
a child restraint.
CRS09
OUN026150
Forward-facing child restraint system
Rearward-facing child restraint system
WARNING-
Child seat installation
A child can be seriously injured
or killed in a collision if the child
restraint is not properly anchored
to the car and the child is not
properly restrained in the child
restraint. Before installing the
child restraint system, read the
instructions supplied by the child
restraint system manufacturer.
If the seat belt does not operate as described in this section, have
the system checked immediately
by your authorized HYUNDAI
dealer.
Failure to observe this manual's instructions regarding childrestraint systems and the
instructions provided with the
child restraint system could
increase the chance and/or
severity of injury in an accident.
WARNING
Never place a rear-facing child
restraint in the front passenger
seat, because of the danger an
inflating passenger-side air bag
could impact the rear-facing child
restraint and kill the child.
Page 85 of 382
Features of your vehicle
4
4
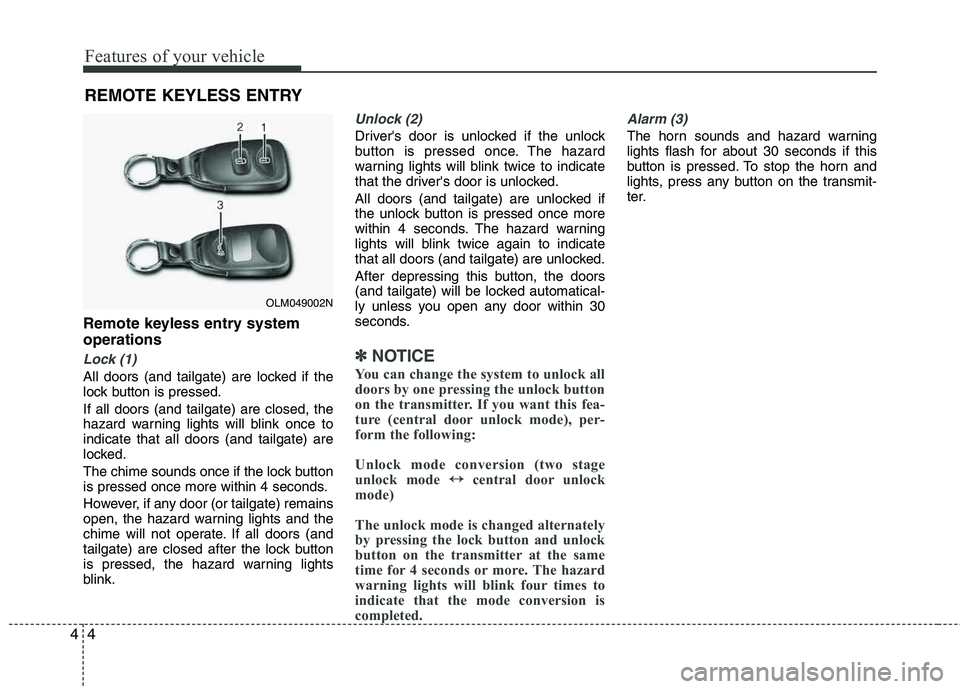
Remote keyless entry system operations
Lock (1)
All doors (and tailgate) are locked if the
lock button is pressed. If all doors (and tailgate) are closed, the
hazard warning lights will blink once to indicate that all doors (and tailgate) are
locked.
The chime sounds once if the lock button
is pressed once more within 4 seconds.
However, if any door (or tailgate) remains
open, the hazard warning lights and the
chime will not operate. If all doors (and
tailgate) are closed after the lock button
is pressed, the hazard warning lights
blink.
Unlock (2)
Driver's door is unlocked if the unlock
button is pressed once. The hazard
warning lights will blink twice to indicate
that the driver's door is unlocked.
All doors (and tailgate) are unlocked if
the unlock button is pressed once more
within 4 seconds. The hazard warning
lights will blink twice again to indicate
that all doors (and tailgate) are unlocked.
After depressing this button, the doors
(and tailgate) will be locked automatical-
ly unless you open any door within 30
seconds.
✽✽
NOTICE
You can change the system to unlock all
doors by one pressing the unlock button
on the transmitter. If you want this fea-
ture (central door unlock mode), per-
form the following:
Unlock mode conversion (two stage
unlock mode ↔
↔
central door unlock
mode)
The unlock mode is changed alternately
by pressing the lock button and unlock
button on the transmitter at the same
time for 4 seconds or more. The hazard
warning lights will blink four times to
indicate that the mode conversion is
completed.
Alarm (3)
The horn sounds and hazard warning
lights flash for about 30 seconds if this
button is pressed. To stop the horn and
lights, press any button on the transmit-
ter.
REMOTE KEYLESS ENTRY
OLM049002N
Page 90 of 382
49
Features of your vehicle
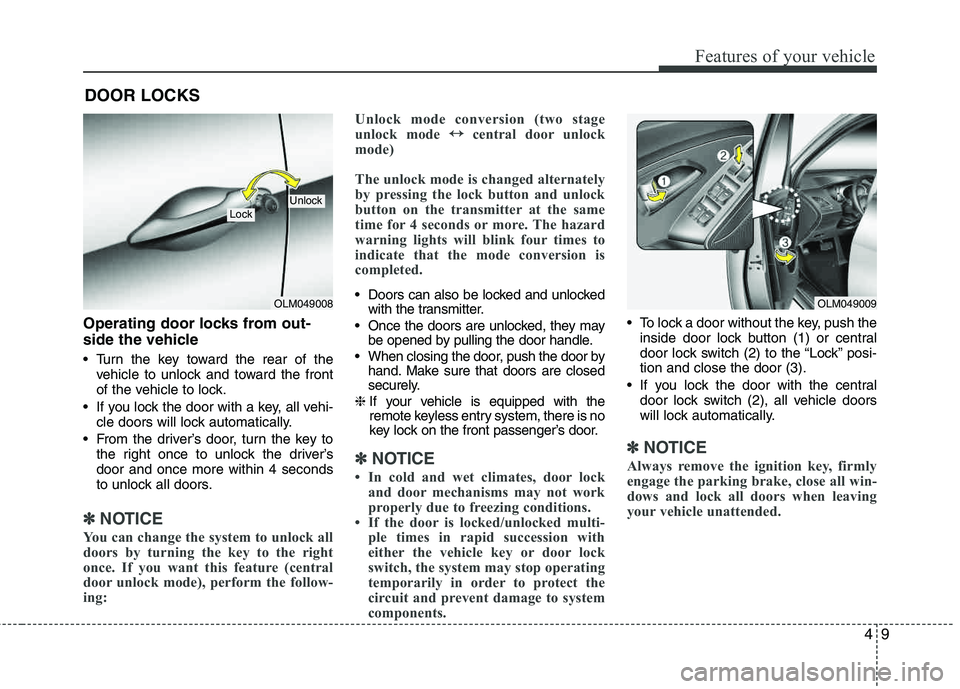
Operating door locks from out-
side the vehicle
Turn the key toward the rear of thevehicle to unlock and toward the front
of the vehicle to lock.
If you lock the door with a key, all vehi- cle doors will lock automatically.
From the driver’s door, turn the key to the right once to unlock the driver’sdoor and once more within 4 seconds
to unlock all doors.
✽✽ NOTICE
You can change the system to unlock all
doors by turning the key to the right
once. If you want this feature (central
door unlock mode), perform the follow-
ing: Unlock mode conversion (two stage
unlock mode
↔
↔
central door unlock
mode)
The unlock mode is changed alternately
by pressing the lock button and unlock
button on the transmitter at the same
time for 4 seconds or more. The hazard
warning lights will blink four times to
indicate that the mode conversion is
completed.
Doors can also be locked and unlocked with the transmitter.
Once the doors are unlocked, they may be opened by pulling the door handle.
When closing the door, push the door by hand. Make sure that doors are closed
securely.
❈ If your vehicle is equipped with the
remote keyless entry system, there is no
key lock on the front passenger’s door.
✽✽
NOTICE
In cold and wet climates, door lock and door mechanisms may not work
properly due to freezing conditions.
If the door is locked/unlocked multi- ple times in rapid succession with
either the vehicle key or door lock
switch, the system may stop operating
temporarily in order to protect the
circuit and prevent damage to system
components.
To lock a door without the key, push the
inside door lock button (1) or central
door lock switch (2 ) to the “Lock” posi-
tion and close the door (3).
If you lock the door with the central door lock switch (2), all vehicle doors
will lock automatically.
✽✽ NOTICE
Always remove the ignition key, firmly
engage the parking brake, close all win-
dows and lock all doors when leaving
your vehicle unattended.
DOOR LOCKS
OLM049008
LockUnlock
OLM049009
Page 117 of 382
Features of your vehicle
36
4
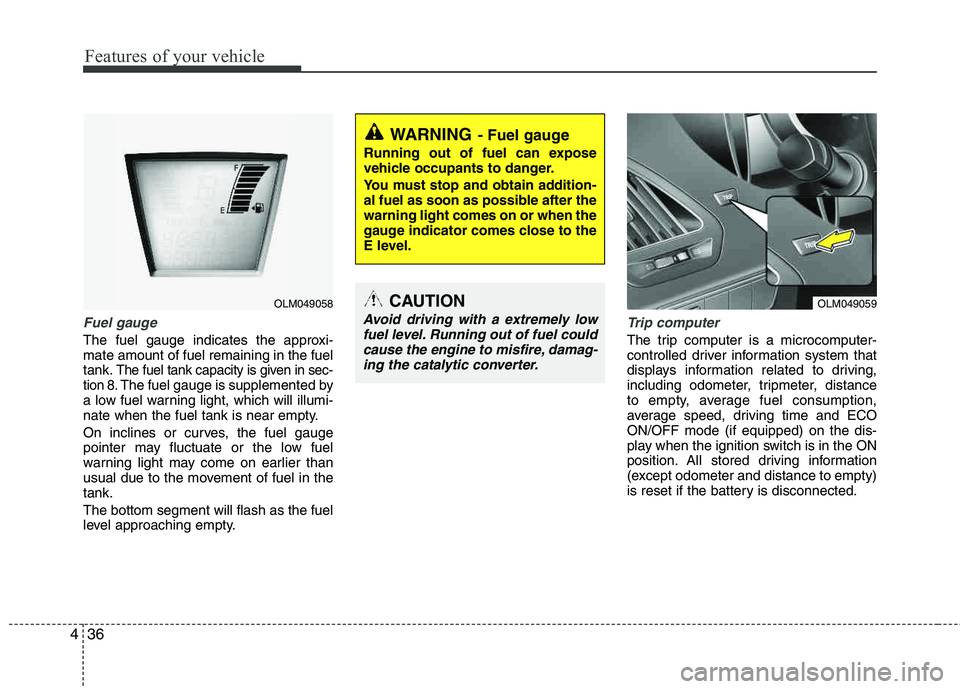
Fuel gauge
The fuel gauge indicates the approxi- mate amount of fuel remaining in the fueltank.
The fuel tank capacity is given in sec-
tion 8.The fuel gauge is supplemented by
a low fuel warning light, which will illumi-
nate when the fuel tank is near empty.
On inclines or curves, the fuel gauge
pointer may fluctuate or the low fuel
warning light may come on earlier than
usual due to the movement of fuel in the tank. The bottom segment will flash as the fuel
level approaching empty.
Trip computer
The trip computer is a microcomputer-
controlled driver information system that
displays information related to driving,
including odometer, tripmeter, distance
to empty, average fuel consumption,
average speed, driving time and ECOON/OFF mode (if equipped) on the dis-
play when the ignition switch is in the ON
position. All stored driving information
(except odometer and distance to empty)
is reset if the battery is disconnected.
WARNING- Fuel gauge
Running out of fuel can expose
vehicle occupants to danger.
You must stop and obtain addition-
al fuel as soon as possible after the warning light comes on or when the
gauge indicator comes close to the
E level.
CAUTION
Avoid driving with a extremely low
fuel level. Running out of fuel couldcause the engine to misfire, damag- ing the catalytic converter.
OLM049058OLM049059
Page 118 of 382
437
Features of your vehicle
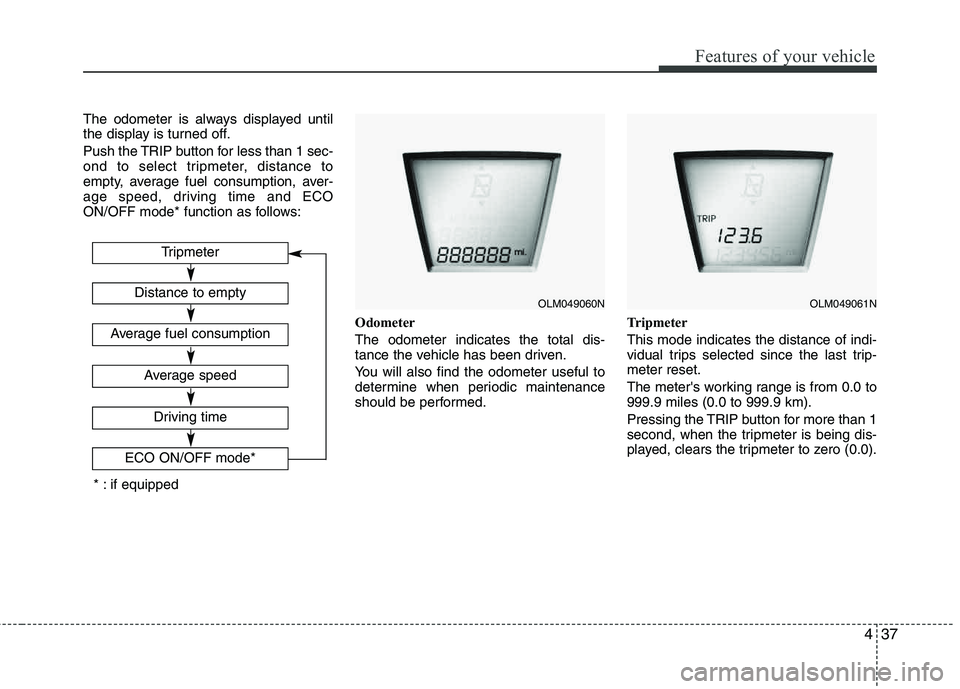
The odometer is always displayed until
the display is turned off.
Push the TRIP button for less than 1 sec-
ond to select tripmeter, distance to
empty, average fuel consumption, aver-
age speed, driving time and ECO
ON/OFF mode* function as follows:Odometer The odometer indicates the total dis-
tance the vehicle has been driven.
You will also find the odometer useful to
determine when periodic maintenance
should be performed.Tripmeter This mode indicates the distance of indi-
vidual trips selected since the last trip-meter reset.
The meter's working range is from 0.0 to 999.9 miles (0.0 to 999.9 km).
Pressing the TRIP button for more than 1
second, when the tripmeter is being dis-
played, clears the tripmeter to zero (0.0).
OLM049060NOLM049061N
Tripmeter
Driving time
ECO ON/OFF mode*
Distance to empty
Average fuel consumption
Average speed
* : if equipped
Page 119 of 382
Features of your vehicle
38
4
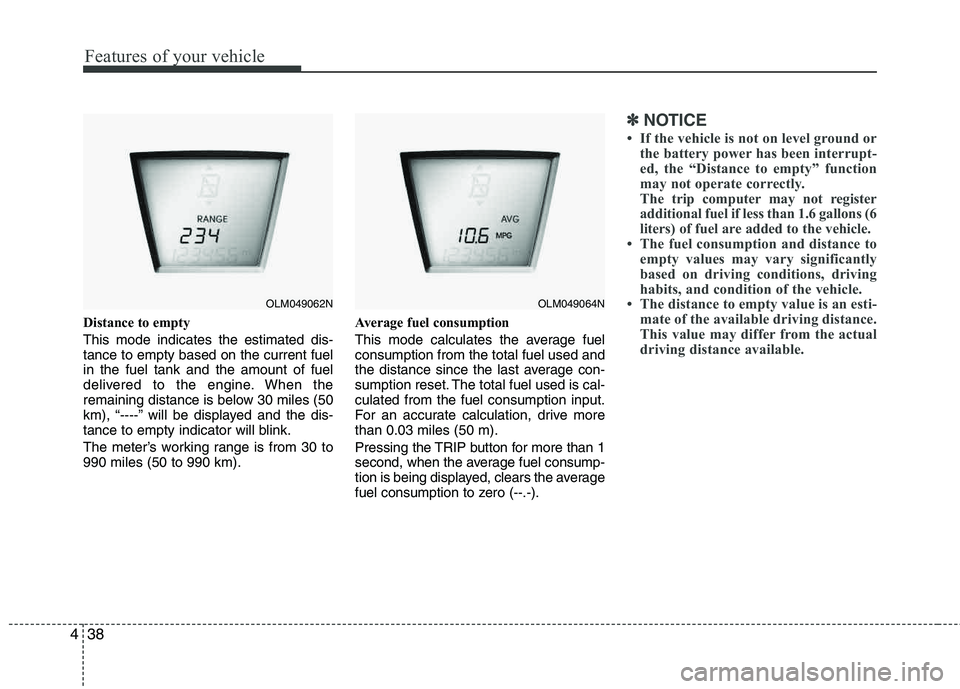
Distance to empty This mode indicates the estimated dis- tance to empty based on the current fuelin the fuel tank and the amount of fuel
delivered to the engine. When the
remaining distance is below 30 miles (50
km), “----” will be displayed and the dis-
tance to empty indicator will blink.
The meter’s working range is from 30 to 990 miles (50 to 990 km). Average fuel consumption
This mode calculates the average fuel consumption from the total fuel used and
the distance since the last average con-
sumption reset. The total fuel used is cal-culated from the fuel consumption input.
For an accurate calculation, drive more than 0.03 miles (50 m).
Pressing the TRIP button for more than 1
second, when the average fuel consump-
tion is being displayed, clears the average
fuel consumption to zero (--.-).
✽✽
NOTICE
If the vehicle is not on level ground or the battery power has been interrupt-
ed, the “Distance to empty” function
may not operate correctly.
The trip computer may not register
additional fuel if less than 1.6 gallons (6
liters) of fuel are added to the vehicle.
The fuel consumption and distance to empty values may vary significantly
based on driving conditions, driving
habits, and condition of the vehicle.
The distance to empty value is an esti-
mate of the available driving distance.
This value may differ from the actual
driving distance available.
OLM049062NOLM049064N
Page 120 of 382
439
Features of your vehicle
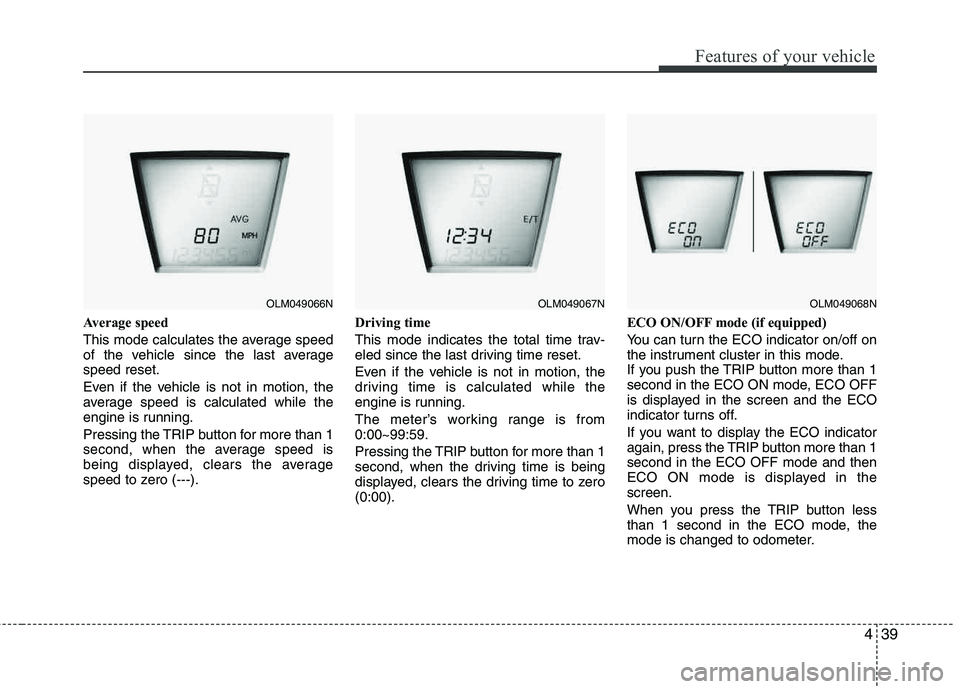
Average speed
This mode calculates the average speed
of the vehicle since the last averagespeed reset.
Even if the vehicle is not in motion, the
average speed is calculated while the
engine is running.
Pressing the TRIP button for more than 1
second, when the average speed is
being displayed, clears the average
speed to zero (---).Driving time
This mode indicates the total time trav-
eled since the last driving time reset.
Even if the vehicle is not in motion, the
driving time is calculated while the
engine is running.
The meter’s working range is from 0:00~99:59.
Pressing the TRIP button for more than 1
second, when the driving time is being
displayed, clears the driving time to zero (0:00).ECO ON/OFF mode (if equipped)
You can turn the ECO indicator on/off on
the instrument cluster in this mode.
If you push the TRIP button more than 1
second in the ECO ON mode, ECO OFF
is displayed in the screen and the ECO
indicator turns off.
If you want to display the ECO indicator
again, press the TRIP button more than 1 second in the ECO OFF mode and then
ECO ON mode is displayed in the screen.
When you press the TRIP button less
than 1 second in the ECO mode, the
mode is changed to odometer.
OLM049066NOLM049067NOLM049068N