Page 308 of 382
Maintenance
22
7
Changing the engine oil and filter
Have engine oil and filter changed by an
authorized HYUNDAI dealer according tothe Maintenance Schedule at the begin- ning of this section. The high-pressure cooling system has a
reservoir filled with year-round antifreeze
coolant. The reservoir is filled at the fac-
tory.
Check the antifreeze protection and
coolant level at least once a year, at the beginning of the winter season, and
before traveling to a colder climate.
Checking the coolant level
ENGINE COOLANT
WARNING- Removing
radiator cap
Never attempt to remove the radi- ator cap while the engine is oper-
ating or hot. Doing so might lead to cooling system and engine
damage. Also, hot coolant orsteam could cause serious per-
sonal injury.
(Continued)
CALIFORNIA PROPOSI-
TION 65 WARNING
Engine oil contains chemicals
known to the State of California to
cause cancer, birth defects, and
reproductive harm.
Used engine oil may cause irrita- tion or cancer of the skin if left in
contact with the skin for prolonged
periods of time. Used engine oil
contains chemicals that have
caused cancer in laboratory ani-
mals. Always protect your skin by
washing your hands thoroughly with soap and warm water as soon
as possible after handling used oil.
Page 309 of 382
723
Maintenance
Check the condition and connections of all cooling system hoses and heater
hoses. Replace any swollen or deterio-
rated hoses.
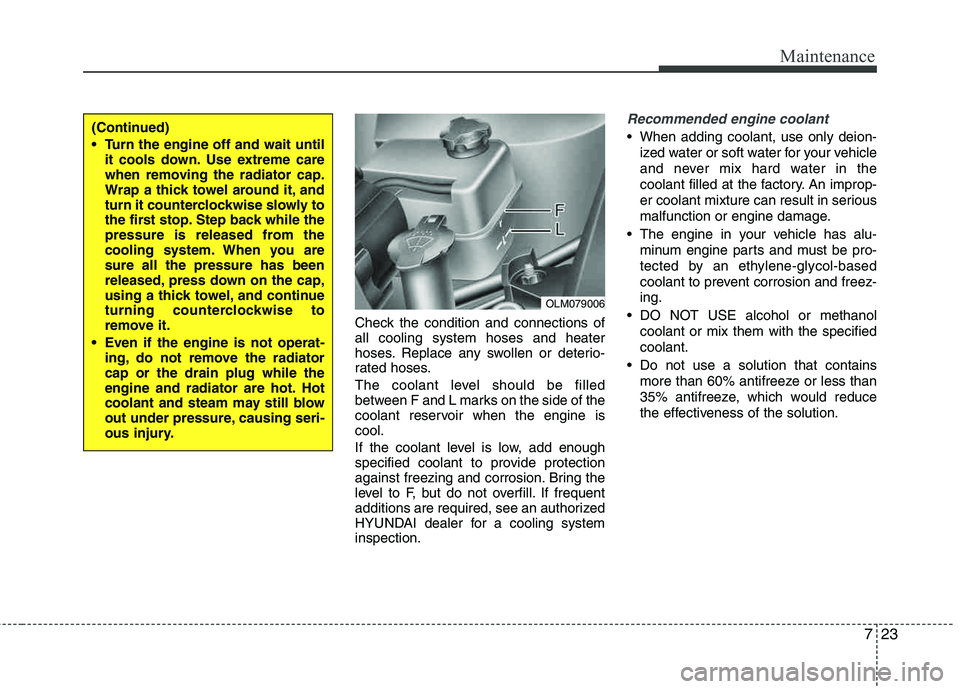
The coolant level should be filled
between F and L marks on the side of the
coolant reservoir when the engine iscool.
If the coolant level is low, add enough
specified coolant to provide protection
against freezing and corrosion. Bring the
level to F, but do not overfill. If frequent
additions are required, see an authorized
HYUNDAI dealer for a cooling systeminspection.
Recommended engine coolant
When adding coolant, use only deion-ized water or soft water for your vehicle
and never mix hard water in the
coolant filled at the factory. An improp-
er coolant mixture can result in serious
malfunction or engine damage.
The engine in your vehicle has alu- minum engine parts and must be pro-
tected by an ethylene-glycol-based
coolant to prevent corrosion and freez-ing.
DO NOT USE alcohol or methanol coolant or mix them with the specifiedcoolant.
Do not use a solution that contains more than 60% antifreeze or less than
35% antifreeze, which would reduce
the effectiveness of the solution.
OLM079006
(Continued)
Turn the engine off and wait untilit cools down. Use extreme care
when removing the radiator cap.
Wrap a thick towel around it, and
turn it counterclockwise slowly to
the first stop. Step back while the
pressure is released from the
cooling system. When you are sure all the pressure has been
released, press down on the cap,
using a thick towel, and continue
turning counterclockwise to
remove it.
Even if the engine is not operat- ing, do not remove the radiator cap or the drain plug while the
engine and radiator are hot. Hot
coolant and steam may still blow
out under pressure, causing seri-
ous injury.
Page 311 of 382
725
Maintenance
BRAKE/CLUTCH (IF EQUIPPED) FLUID
Checking the brake/clutch* fluid
level
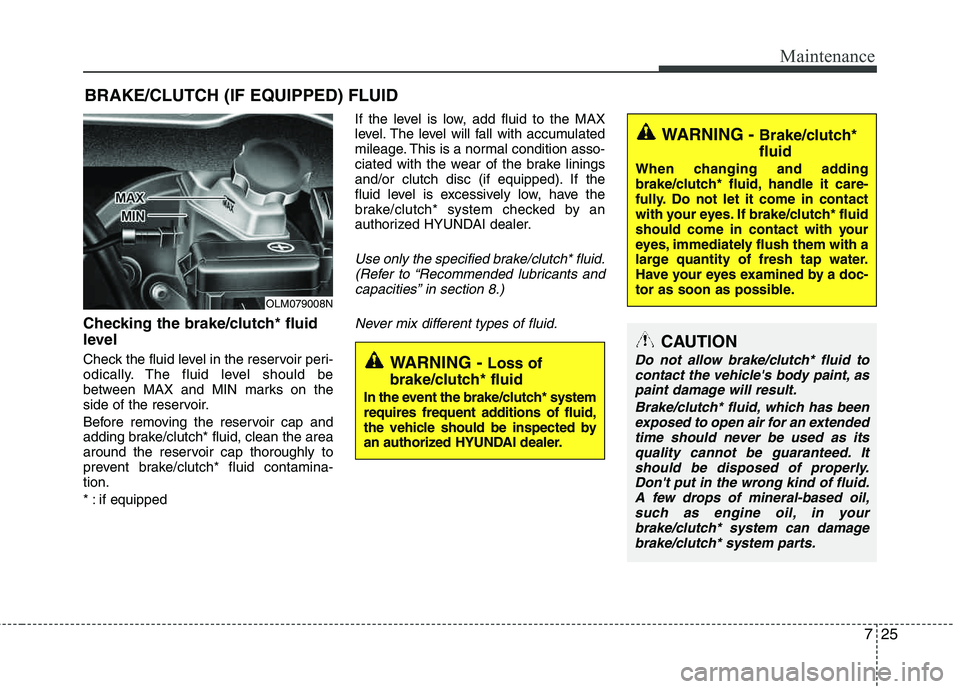
Check the fluid level in the reservoir peri-
odically. The fluid level should be
between MAX and MIN marks on the
side of the reservoir.
Before removing the reservoir cap and
adding brake/clutch* fluid, clean the area
around the reservoir cap thoroughly to
prevent brake/clutch* fluid contamina-tion. *
:if equippedIf the level is low, add fluid to the MAX
level. The level will fall with accumulated
mileage. This is a normal condition asso-
ciated with the wear of the brake linings
and/or clutch disc (if equipped). If the
fluid level is excessively low, have the
brake/clutch* system checked by an
authorized HYUNDAI dealer.
Use only the specified brake/clutch* fluid.
(Refer to “Recommended lubricants andcapacities” in section 8.)
Never mix different types of fluid.
WARNING - Brake/clutch* fluid
When changing and adding
brake/clutch* fluid, handle it care-
fully. Do not let it come in contact
with your eyes. If brake/clutch* fluid
should come in contact with your
eyes, immediately flush them with a
large quantity of fresh tap water.
Have your eyes examined by a doc-
tor as soon as possible.
WARNING - Loss of
brake/clutch* fluid
In the event the brake/clutch* system
requires frequent additions of fluid,
the vehicle should be inspected by
an authorized HYUNDAI dealer.
OLM079008N
CAUTION
Do not allow brake/clutch* fluid to contact the vehicle's body paint, aspaint damage will result.
Brake/clutch* fluid, which has beenexposed to open air for an extended time should never be used as itsquality cannot be guaranteed. Itshould be disposed of properly.
Don't put in the wrong kind of fluid.A few drops of mineral-based oil, such as engine oil, in yourbrake/clutch* system can damage
brake/clutch* system parts.
Page 322 of 382
Maintenance
36
7
Reset items
Items should be reset after the battery
has been discharged or the battery has been disconnected.
Auto up/down window (See section 4)
Sunroof (See section 4)
Trip computer (See section 4)
Climate control system
(See section 4)
Clock (See section 4)
Audio (See section 4)(Continued)
Wear eye protection when check- ing the battery during charging.
Disconnect the battery charger in the following order.
1. Turn off the battery charger main switch.
2. Unhook the negative clamp from the negative battery terminal.
3. Unhook the positive clamp from the positive battery terminal.
WARNING
Before performing maintenance or recharging the battery, turn off all accessories and stop the
engine.
The negative battery cable must be removed first and installed
last when the battery is discon-nected.
Page 336 of 382
Maintenance
50
7
FUSES
A vehicle’s electrical system is protected
from electrical overload damage by
fuses.
This vehicle has 3 fuse panels, one locat-
ed in the driver’s side panel bolster, the
other in the engine compartment.
If any of your vehicle’s lights, acces-
sories, or controls do not work, check the
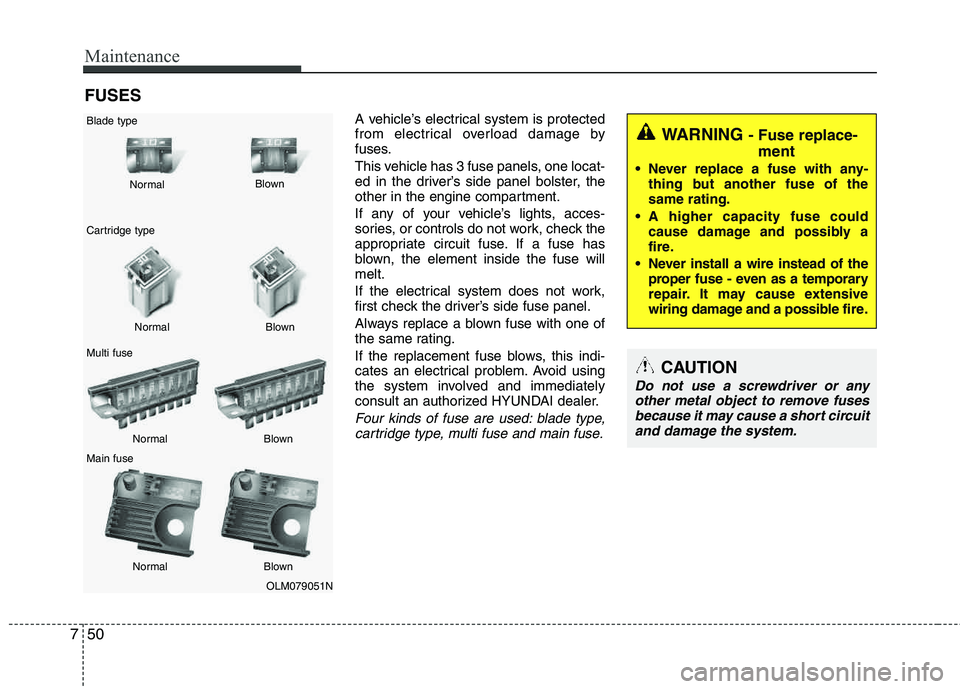
appropriate circuit fuse. If a fuse has
blown, the element inside the fuse willmelt.
If the electrical system does not work,
first check the driver’s side fuse panel.
Always replace a blown fuse with one of
the same rating.
If the replacement fuse blows, this indi-
cates an electrical problem. Avoid using
the system involved and immediately
consult an authorized HYUNDAI dealer.
Four kinds of fuse are used: blade type,cartridge type, multi fuse and main fuse.
WARNING - Fuse replace-
ment
Never replace a fuse with any- thing but another fuse of the same rating.
A higher capacity fuse could cause damage and possibly a
fire.
Never install a wire instead of the proper fuse - even as a temporary
repair. It may cause extensive
wiring damage and a possible fire.
CAUTION
Do not use a screwdriver or any
other metal object to remove fuses
because it may cause a short circuitand damage the system.
OLM079051N
Normal
Normal
Blade type
Cartridge type Multi fuse Main fuse Blown
Blown
Normal Blown
Normal Blown
Page 337 of 382
751
Maintenance
Instrument panel fuse replace- ment
1. Turn the ignition switch and all otherswitches off.
2. Open the fuse panel cover. 3. Pull the suspected fuse straight out.
Use the removal tool provided in the fuse panel.
4. Check the removed fuse; replace it if it is blown.
Spare fuses are provided in the instru-
ment panel fuse panel (or in the enginecompartment fuse panel).
5. Push in a new fuse of the same rating, and make sure it fits tightly in the clips.
If it fits loosely, consult an authorized
HYUNDAI dealer.
If you do not have a spare, use a fuse of the same rating from a circuit you maynot need for operating the vehicle, such as the cigarette lighter fuse.
If the headlights or other electrical com-
ponents do not work and the fuses are
OK, check the fuse panel in the engine
compartment. If a fuse is blown, it mustbe replaced.
OLM079020OLM079021N
Page 338 of 382
Maintenance
52
7
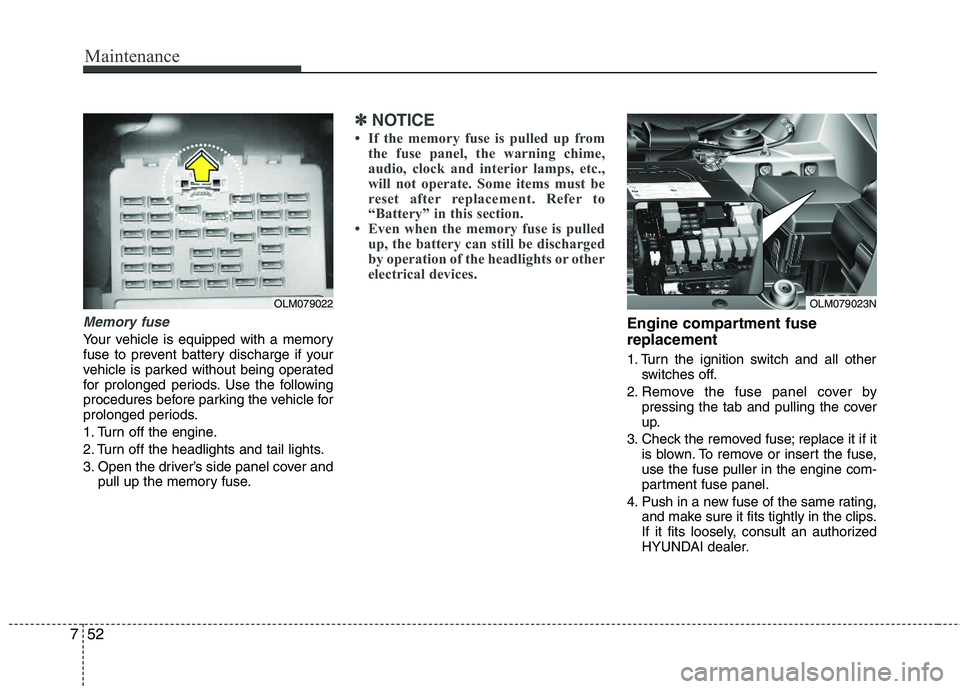
Memory fuse
Your vehicle is equipped with a memory
fuse to prevent battery discharge if your
vehicle is parked without being operated
for prolonged periods. Use the following
procedures before parking the vehicle for
prolonged periods.
1. Turn off the engine.
2. Turn off the headlights and tail lights.
3. Open the driver’s side panel cover and
pull up the memory fuse.
✽✽ NOTICE
If the memory fuse is pulled up from the fuse panel, the warning chime,
audio, clock and interior lamps, etc.,
will not operate. Some items must be
reset after replacement. Refer to
“Battery” in this section.
Even when the memory fuse is pulled
up, the battery can still be discharged
by operation of the headlights or other
electrical devices.
Engine compartment fuse replacement
1. Turn the ignition switch and all other switches off.
2. Remove the fuse panel cover by pressing the tab and pulling the cover
up.
3. Check the removed fuse; replace it if it is blown. To remove or insert the fuse,use the fuse puller in the engine com-
partment fuse panel.
4. Push in a new fuse of the same rating, and make sure it fits tightly in the clips.
If it fits loosely, consult an authorized
HYUNDAI dealer.
OLM079023NOLM079022
Page 339 of 382
753
Maintenance
Main fuse and Multi fuse
If the main fuse and Multi fuse is blown,
it must be removed as follows:
1. Disconnect the negative battery cable.
2. Remove the nuts shown in the pictureabove.
3. Replace the fuse with a new one of the same rating.
4. Reinstall in the reverse order of removal.
✽✽ NOTICE
If the main fuse is blown, consult an
authorized HYUNDAI dealer.CAUTION
After checking the fuse panel in the engine compartment, securelyinstall the fuse panel cover. If not,
electrical failures may occur fromwater contact.
OLM079052N