2011 Hyundai Sonata audio
[x] Cancel search: audioPage 183 of 358
4111
Features of your vehicle
Care of discs
If the temperature inside the car is toohigh, open the car windows for ventila-
tion before using your car audio.
It is illegal to copy and use MP3/WMA files without permission. Use CDs that
are created only by lawful means.
Do not apply volatile agents such as benzene and thinner, normal cleaners
and magnetic sprays made for ana-
logue disc onto CDs.
To prevent the disc surface from get- ting damaged. Hold and carry CDs bythe edges or the edges of the centre
hole only.
Clean the disc surface with a piece of soft cloth before playback (wipe it fromthe centre to the outside edge).
Do not damage the disc surface or attach pieces of sticky tape or paperonto it.
Make sure nothing other than CDs are inserted into the CD player (Do not
insert more than one CD at a time). Keep CDs in their cases after use to
protect them from scratches or dirt.
Depending on the type of CD-R/CD- RW CDs, certain CDs may not operate
normally depending upon manufactur-ing companies or processes and
recording methods. In such circum-
stances, if you still continue to use
those CDs, they may cause the mal-
function of your car audio system.
✽✽ NOTICE - Playing an
Incompatible Copy
Protected Audio CD
Some copy protected CDs, which do not
comply with the international audio CD
standards (Red Book), may not play on
your car audio. Please note that if you
try to play copy protected CDs and the
CD player does not perform correctly
the CDs maybe defective, not the CD
player.
Page 184 of 358
Features of your vehicle
112
4
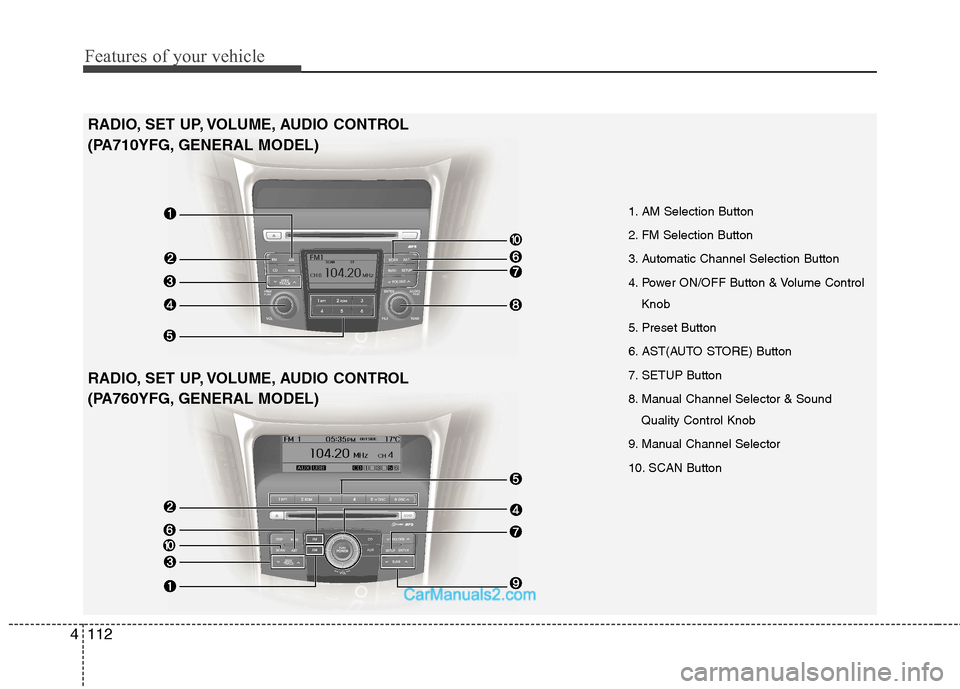
1. AM Selection Button
2. FM Selection Button
3. Automatic Channel Selection Button
4. Power ON/OFF Button & Volume Control
Knob
5. Preset Button
6. AST(AUTO STORE) Button
7. SETUP Button
8. Manual Channel Selector & Sound Quality Control Knob
9. Manual Channel Selector
10. SCAN Button
RADIO, SET UP, VOLUME, AUDIO CONTROL
(PA710YFG, GENERAL MODEL)
RADIO, SET UP, VOLUME, AUDIO CONTROL
(PA760YFG, GENERAL MODEL)
Page 185 of 358
![Hyundai Sonata 2011 Owners Manual - RHD (UK, Australia) 4113
Features of your vehicle
1. AM Selection Button
Pressing the [AM] button selects the AM
band. AM Mode is displayed on the LCD.
2. FM Selection Button
Turns to FM mode and toggles FM1and
FM2 Hyundai Sonata 2011 Owners Manual - RHD (UK, Australia) 4113
Features of your vehicle
1. AM Selection Button
Pressing the [AM] button selects the AM
band. AM Mode is displayed on the LCD.
2. FM Selection Button
Turns to FM mode and toggles FM1and
FM2](/manual-img/35/16818/w960_16818-184.png)
4113
Features of your vehicle
1. AM Selection Button
Pressing the [AM] button selects the AM
band. AM Mode is displayed on the LCD.
2. FM Selection Button
Turns to FM mode and toggles FM1and
FM2 when the button is pressed each
time.
3. Automatic Channel SelectionButton
When the [SEEK ] button is pressed, it increases the band fre- quency to automatically select chan-
nel. Stops at the previous frequency if
no channel is found.
When the [TRACK ] button is press- ed, it reduces the band frequency to
automatically select channel. Stops at
the previous frequency if no channel is
found. 4. Power ON/OFF Button &
Volume Control Button
Turns on/off the set when the IGNITION
SWITCH is on ACC or ON. If the button
is turned to the right, it increases the vol-
ume and left,decreases the volume.
Adjusts the volume of the car audio system. Rotate clockwise to increase
the volume or counterclockwise to
decrease.
5. Preset Button
Push [1]~[6] buttons less than 0.8 sec-
ond to play the channel saved in each
button. Push Preset button for 0.8 sec-
ond or longer to save current channel to
the respective button with a beep.
6. AST(AUTO STORE Button)
When the button is pressed, it automati-
cally selects and saves channels with
high reception rate to PRESET buttons
[1]~[6] and plays the channel saved in
PRESET1. If no channel is saved after
AST, it will play the previous channel. 7. SETUP Button ■
PA710YFG
Press this button to turn to the SCROLL
option and the other adjustment mode.
If no action is taken for 5 seconds after
pressing the button, it will return to the
play mode. (After entering SETUP mode,
move between items using the left, rightand PUSH functions of the [TUNE]
knob.) The setup changes in the order of
TEXT SCROLL ➟ AV C
■ PA760YFG
The setup Change in the order of TONE➟ POSITION ➟ AVC ➟ CLOCK ➟
SCROLL ➟ RETURN
This function is used to display charac-
ters longer than the LCD text display and
can be turned ON/OFF through the [
FOLDER ] button.
This function automatically adjusts the
volume level according to the speed of
the vehicle and can be turned ON/OFF
through the [ FOLDER ] button.
Page 186 of 358
![Hyundai Sonata 2011 Owners Manual - RHD (UK, Australia) Features of your vehicle
114
4
Pressing the [ENTER] button to adjust
the sound the following order : BASS,
MIDDLE, TREBLE. Adjust the BASS and
press the [ FOLDER ] button to set. Use the same metho Hyundai Sonata 2011 Owners Manual - RHD (UK, Australia) Features of your vehicle
114
4
Pressing the [ENTER] button to adjust
the sound the following order : BASS,
MIDDLE, TREBLE. Adjust the BASS and
press the [ FOLDER ] button to set. Use the same metho](/manual-img/35/16818/w960_16818-185.png)
Features of your vehicle
114
4
Pressing the [ENTER] button to adjust
the sound the following order : BASS,
MIDDLE, TREBLE. Adjust the BASS and
press the [ FOLDER ] button to set. Use the same method to adjust MIDDLE,
TREBLE and press the [ENTER] button
to complete and exit from TONE adjust-
ment mode.
Pressing the [ENTER] button to adjust
the POSITION the following order :
FADER, BALANCE. Adjust the FADER
and press the [ FOLDER ] button toset. Use the same method to adjust the BAL-
ANCE and press the [ENTER] button to
complete and exit from POSITION
adjustment mode.
Pressing the [ FOLDER ] button to
adjust the clock in the following order :
CLOCK SET, TIME FORMAT,
RETURN. Adjust the CLOCK SET and
press the [ENTER] button to set.
Use the same method to adjust TIME
FORMAT. Adjust the RETURN and press
the [ENTER] button to complete and exit
from clock adjustment mode.
8. Manual Channel Selector &
Sound Quality Control Knob
Turn this control whilst listening to a radio
channel to manually adjust frequency.
Turn clockwise to increase frequency
and counterclockwise to reduce frequen-
cy.
Pressing the button changes the BASS,
MIDDLE, TREBLE, FADER and BAL-
ANCE TUNE mode. The mode selected
is shown on the display. After selecting
each mode, rotate the Audio control knob
clockwise or counterclockwise. BASS Control
To increase the BASS, rotate the knob
clockwise, whilst to decrease the BASS,
rotate the knob counterclockwise. MIDDLE Control
To increase the MIDDLE, rotate the knob
clockwise, whilst to decrease the MID-
DLE, rotate the knob counterclockwise. TREBLE Control
To increase the TREBLE, rotate the knob
clockwise, whilst to decrease the TRE-
BLE, rotate the knob counterclockwise.
FADER Control
Turn the control knob clockwise to
emphasize rear speaker sound(front
speaker sound will be attenuated).
When the control knob is turned counter-
clockwise, front speaker sound will be
emphasized(rear speaker sound will be
attenuated). BALANCE Control
Rotate the knob clockwise to emphasize
right speaker sound(left speaker sound
will be attenuated).
When the control knob is turned counter
clockwise, left speaker sound will be
emphasized(right speaker sound will be
attenuated).
Page 191 of 358
4119
Features of your vehicle
CAUTION IN USING USB DEVICE
To use an external USB device,make sure the device is not con-nected when starting up the vehi-
cle and connect the device afterstarting up.
If you start the engine when the USB device is connected, it may
damage the USB device. (USBflashdrives are very sensitive toelectric shock.)
If the engine is started up or turned off whilst the external USB
device is connected, the external USB device may not work.
It may not play inauthentic MP3 or WMA files.
1) It can only play MP3 files with the compression rate between8Kbps~320Kbps.
2) It can only play WMA music files with the compression ratebetween 8Kbps~320Kbps.
Take precautions for static elec- tricity when connecting or dis-connecting the external USBdevice.
(Continued)
(Continued) An encoded MP3 PLAYER is not recognizable.
Depending on the condition of the external USB device, the con-
nected external USB device can be unrecognizable.
When the formatted byte/sector setting of External USB devices isnot either 512BYTE or 2048BYTE,
then the device will not be recog- nized.
Use only a USB device formatted to FAT 12/16/32.
USB devices without USB I/F authentication may not be recog-nizable.
Make sure the USB connection terminal does not come in con-tact the human body or other
objects.
If you repeatedly connect and dis- connect the USB device in a shortperiod of time, it may breakthedevice.
You may hear a strange noise when connecting or disconnect-ing a USB device.
(Continued)(Continued) If you disconnect the external USB device during playback inUSB mode, the external USB
device can be damaged or maymalfunction. Therefore, connect the external USB device when theaudio is turned off or in another
mode (e.g, Radio, CD).
Depending on the type and capacity of the external USBdevice or the type of the filesstored in the device, there is there
is a difference in the time takenfor recognition of the device. Thisis normal and waiting may be necessary. an indicator of trouble
and you only have to wait.
Do not use the USB device for purpose other than playing musicfiles.
Use of USB accessories such as rechargers or heaters using USBI/F may lower performance or cause trouble.
(Continued)
Page 192 of 358
Features of your vehicle
120
4
(Continued)
If you use devices such as a USB hub purchased separately, thevehicle’s audio system may notrecognize the USB device. In that
case, connect the USB devicedirectly to the multimedia termi-nal of the vehicle.
If USB device is divided by logical drives, only the music files on thehighest-priority drive are recog-nized by car audio.
Devices such as MP3 Player/ Mobile phone/Digital camera are
not recognizable by standardUSB I/F can be unrecognizable.
Some non-standard USB devices (METAL COVER TYPE USB) canbe unrecognizable.
Some USB flash memory readers (such as CF, SD, microSD, etc.) orexternal-HDD type devices can beunrecognizable.
Music files protected by DRM (DIGITAL RIGHTS MANAGE-
MENT) are not recognizable.
(Continued)(Continued) The data in the USB memory may be lost whilst using this audio.Always back up important data ona personal storage device.
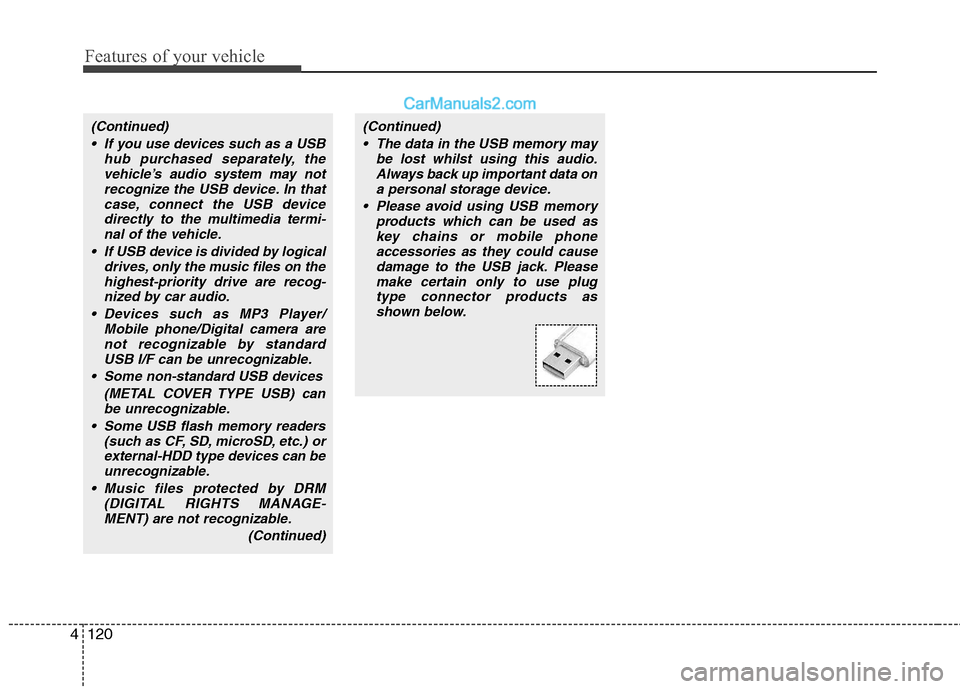
Please avoid using USB memory products which can be used askey chains or mobile phoneaccessories as they could cause
damage to the USB jack. Pleasemake certain only to use plugtype connector products as shown below.
Page 198 of 358
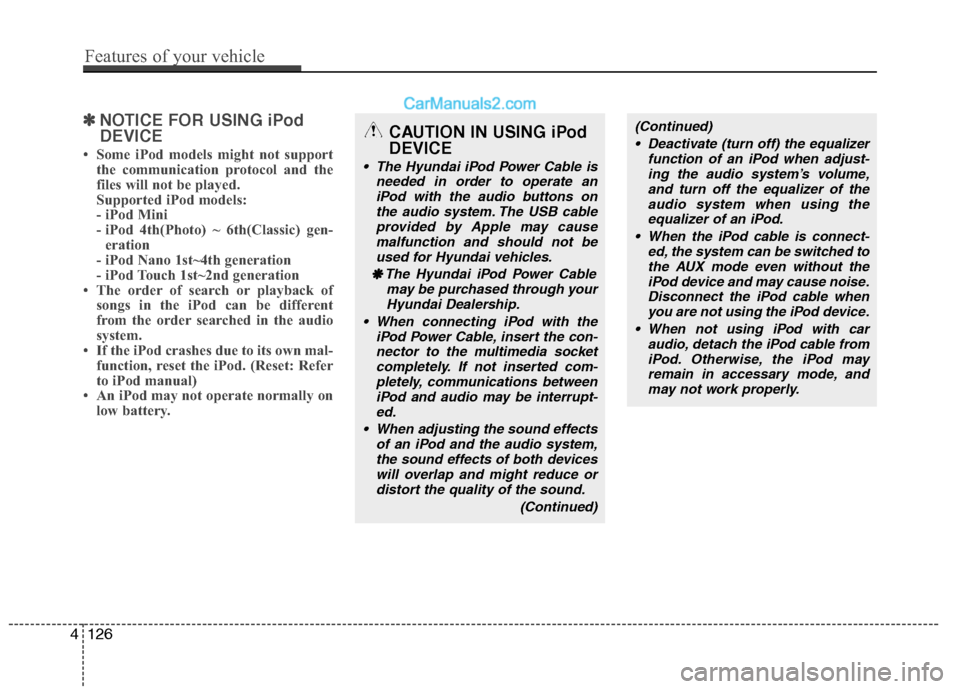
✽✽NOTICE FOR USING iPod DEVICE
Some iPod models might not support the communication protocol and the
files will not be played.
Supported iPod models:
- iPod Mini
- iPod 4th(Photo) ~ 6th(Classic) gen-eration
- iPod Nano 1st~4th generation
- iPod Touch 1st~2nd generation
The order of search or playback of songs in the iPod can be different
from the order searched in the audio
system.
If the iPod crashes due to its own mal- function, reset the iPod. (Reset: Refer
to iPod manual)
An iPod may not operate normally on
low battery.(Continued)
Deactivate (turn off) the equalizer function of an iPod when adjust-ing the audio system’s volume,and turn off the equalizer of the
audio system when using theequalizer of an iPod.
When the iPod cable is connect- ed, the system can be switched to
the AUX mode even without theiPod device and may cause noise.Disconnect the iPod cable whenyou are not using the iPod device.
When not using iPod with car audio, detach the iPod cable fromiPod. Otherwise, the iPod may remain in accessary mode, andmay not work properly.CAUTION IN USING iPod DEVICE
The Hyundai iPod Power Cable is needed in order to operate an
iPod with the audio buttons onthe audio system. The USB cableprovided by Apple may cause malfunction and should not be
used for Hyundai vehicles.
❋
❋ The Hyundai iPod Power Cable
may be purchased through yourHyundai Dealership.
When connecting iPod with the iPod Power Cable, insert the con-nector to the multimedia socketcompletely. If not inserted com- pletely, communications between
iPod and audio may be interrupt-ed.
When adjusting the sound effects of an iPod and the audio system,the sound effects of both devices
will overlap and might reduce or distort the quality of the sound.
(Continued)
4126
Features of your vehicle
Page 304 of 358
733
Maintenance
Reset items
Items should be reset after the battery
has been discharged or the battery hasbeen disconnected.
Auto up/down window (See section 4)
Sunroof (See section 4)
Driver position memory system (See section 4)
Trip computer (See section 4)
Climate control system (See section 4)
Clock (See section 4)
Audio (See section 4)
WARNING
Before performing maintenance or recharging the battery, turn off all accessories and stop the
engine.
The negative battery cable must be removed first and installed
last when the battery is discon-nected.
Operation related to the battery should be done in an authorised
HYUNDAI dealer.
CAUTION
Keep the battery away from water
or any liquid.
For your safety, use the authentic- ity by approved authorisedHYUNDAI dealer, when youreplace the battery.
WARNING - Recharging
battery
When recharging the battery,
observe the following precautions:
The battery must be removed from the vehicle and placed in an area with good ventilation.
Do not allow cigarettes, sparks, or flame near the battery.
Watch the battery during charg- ing, and stop or reduce the charg-
ing rate if the battery cells begin
gassing (boiling) violently or if
the temperature of the electrolyte
of any cell exceeds 49°C (120°F).
Wear eye protection when check- ing the battery during charging.
Disconnect the battery charger in the following order.
1. Turn off the battery charger main switch.
2. Unhook the negative clamp from the negative battery terminal.
3. Unhook the positive clamp from the positive battery terminal.