Page 229 of 404
4135
Features of your vehicle
NOTE:
• If the phone is paired with two or
more vehicles of the same model,
some phones may not handle
Bluetooth
®devices of that name
correctly. In this case, you may need
to change the name displayed on
your phone.
For example, if the vehicles' name is
HMC CAR, you may need to change
the name displayed on you phone
from HMC_CAR to JOHNS_CAR or
HMC CAR_1 to avoid ambiguity.
Refer to your phone User’s Guide, or
contact your cellular carrier or phone
manufacturer for instructions.
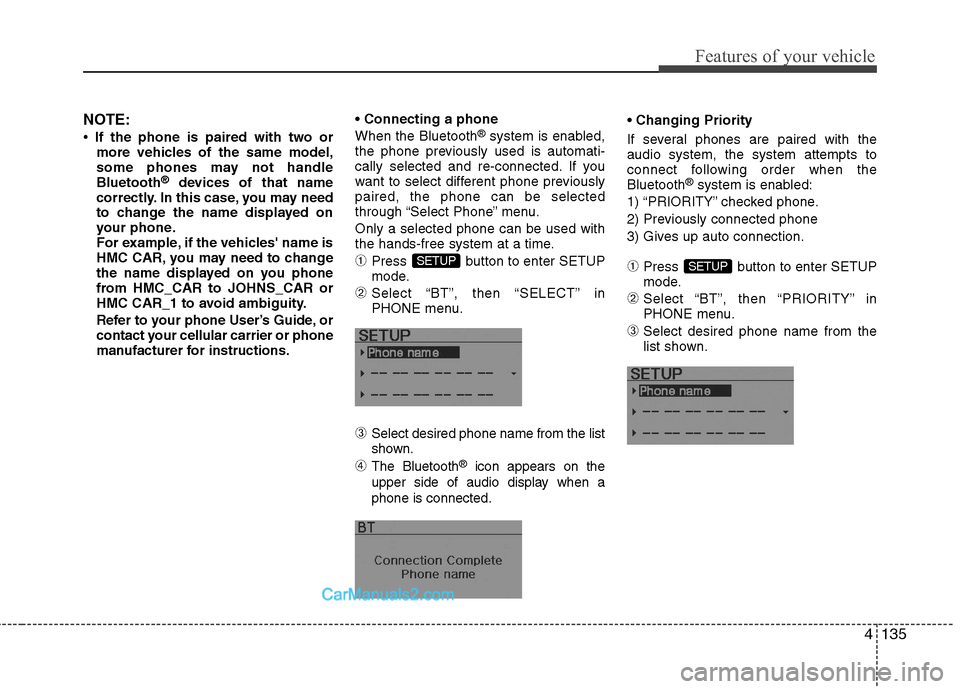
When the Bluetooth
®system is enabled,
the phone previously used is automati-
cally selected and re-connected. If you
want to select different phone previously
paired, the phone can be selected
through “Select Phone” menu.
Only a selected phone can be used with
the hands-free system at a time.
➀Press button to enter SETUP
mode.
➁Select “BT”, then “SELECT” in
PHONE menu.
➂Select desired phone name from the list
shown.
➃The Bluetooth®icon appears on the
upper side of audio display when a
phone is connected.
If several phones are paired with the
audio system, the system attempts to
connect following order when the
Bluetooth
®system is enabled:
1) “PRIORITY” checked phone.
2) Previously connected phone
3) Gives up auto connection.
➀Press button to enter SETUP
mode.
➁Select “BT”, then “PRIORITY” in
PHONE menu.
➂Select desired phone name from the
list shown.
SETUPSETUP
Page 230 of 404
Features of your vehicle
136 4
The paired phone can be deleted.
- When the phone is deleted, all the infor-
mation associated with that phone is
also deleted (including phonebook).
- If you want to use the deleted phone with
the audio system again, pairing proce-
dure must be completed once more.
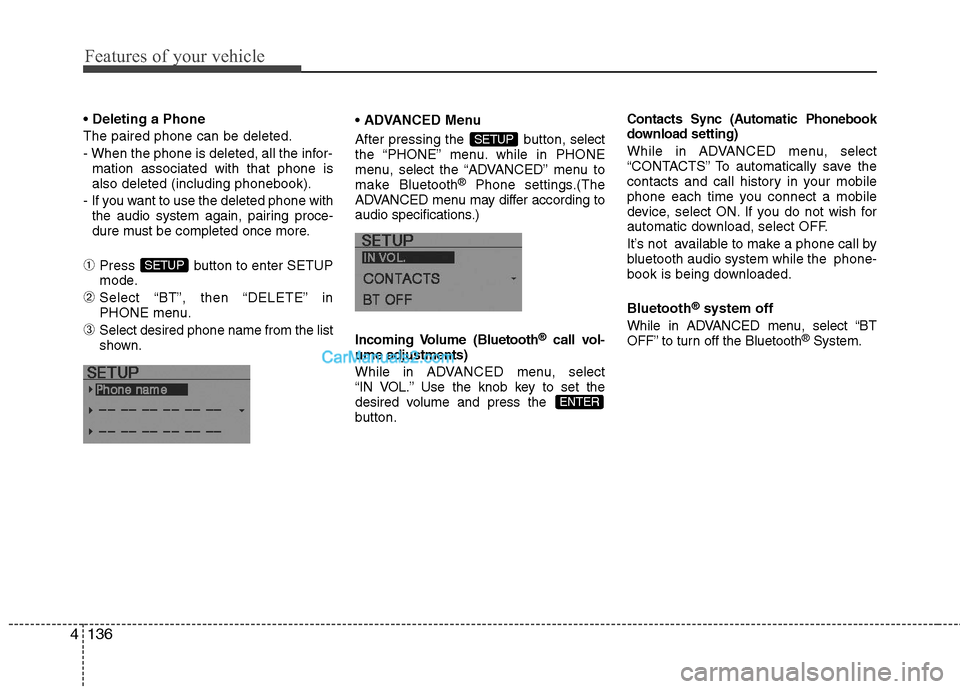
➀Press button to enter SETUP
mode.
➁Select “BT”, then “DELETE” in
PHONE menu.
➂Select desired phone name from the list
shown. Menu
After pressing the button, select
the “PHONE” menu. while in PHONE
menu, selectthe “ADVANCED” menu to
make Bluetooth
®Phone settings.(The
ADVANCED menu may differ according to
audio specifications.)
Incoming Volume (Bluetooth
®call vol-
ume adjustments)
While in ADVANCED menu, select
“IN VOL.” Use the knob key to set the
desired volume and press the
button.
Contacts Sync (Automatic Phonebook
download setting)
While in ADVANCED menu, select
“CONTACTS” To automatically save the
contacts and call history in your mobile
phone each time you connect a mobile
device, select ON. If you do not wish for
automatic download, select OFF.
It’s not available to make a phone call by
bluetooth audio system while the phone-
book is being downloaded.
Bluetooth
®system off
While in ADVANCED menu, select “BT
OFF” to turn off the Bluetooth
®System.
ENTER
SETUP
SETUP
Page 232 of 404
Features of your vehicle
138 4
■Making a Phone Call
➀Press button.
➁Say the following command.
- Call : Connects the call to John.
- Call on : Connects
the call to John’s mobile phone number.
- Call at : Connects
the call to john’s home number.
- Call in : Connects
the call to John’s office number.
Note:
Calls can be immediately connected
to contacts who name or voice tag are
saved in the phonebook(or contacts).
A phone call can be made by speaking
names registered in the audio system.
➀Press button.
➁Say “Call”.
➂Say “By name” when prompted.
➃Say desired name (in Phonebook or
voice tag).
➄Say desired location (phone number
type). Only stored locations can be
selected.
➅ Say “Yes” to confirm and make a call.
✽ ✽
Tip
A shortcut to each of the following func-
tions is available:
1. Say “Call Name”
A phone call can be made by dialing the
spoken numbers. The system can recog-
nize single digits from zero to nine.
➀Press button.
➁Say “Call”.
➂Say “By number” when prompted.
➃Say desired phone numbers.
➄Say “Dial” to complete the number and
make a call.
✽ ✽
Tip
A shortcut to each of the following func-
tions is available:
➀Say “Dial Number”
➁Say “Dial ”
Page 233 of 404
4139
Features of your vehicle
■Phone Book (In-Vehicle)
Phone numbers and voice tags can be
registered. Entries registered in the
phone can also be transferred.
➀Press button.
➁Say "Phonebook".
- The system replies with all available
commands.
- To skip the information message,
press again and then a beep is
heard.
➂Say “Add Entry”.
➃Say “By Voice” to proceed.
➄Say the name of the entry when
prompted.
➅Say “Yes” to confirm.
➆Say the phone number of that entry
when prompted.
➇Say “Store” if phone number input is
finished.
➈ Say a phone number type. “Home”,
“Work”, “Mobile”, “Other” or “Default” is
available.
➉ Say “Yes” to complete adding entry.
Say “Yes” to store additional location
for this contact, or say “Cancel” to fin-
ish the process.
✽ ✽
NOTICE
- The system can recognize single digits
from zero to nine. Numbers that are
ten or greater cannot be recognized.
- You can enter each digit individually
or group digits together in preferred
string lengths.
- To speed up input, it is a good idea to
group all digits into a continuous string.
- Recommend to enter the numbers
constituted an grouping within all
digit numbers to dial 995 / 734 / 0000
- The display corresponding to each
operation appears on the screen as fol-
lows:
Input operation example:
1. Say: “Nine, nine, five”
➟ Display: “995”
2. And say: “Seven, three, four”
➟ Display: “995734”
➀Press button.
➁Say "Phonebook".
➂Say "Add Entry" after prompt.
➃Say "By Phone" to proceed.
➄Say “Yes” to confirm.
➅ Your phone will start to transfer
phone/contact list to the audio system.
This process may take over 10 min-
utes depending on the phone model
and number of entries
➆Wait till the audio displays “Transfer
Complete” message.
Changing Name
The registered names can be modified.
➀Press button.
➁Say “Phonebook”.
➂Say “Change Name” after prompt.
➃Say the name of the entry (voice tag).
➄Say “Yes” to confirm.
➅ Say new desired name.
11
Page 234 of 404
Features of your vehicle
140 4
Deleting Name
The registered names can be deleted.
➀Press button.
➁Say “Phonebook”.
➂Say “Delete Name” after prompt.
➃Say the name of the entry (voice tag).
➄Say “Yes” to confirm.
■Bluetooth®Audio Speaker Adaptation
Speaker adaptation will improve perform-
ance of voice recognition system to a
particular user voice.
This will degrade the performance for
other users.
➀Press button for 10sec.
➁Say “Record profile”.
➂Say “Yes”.
➃Say the word displayed on Radio.
➀Press button for 10sec.
➁Say “Delete profile”.
➂Say “Yes”.
Page 342 of 404
Maintenance
36 7
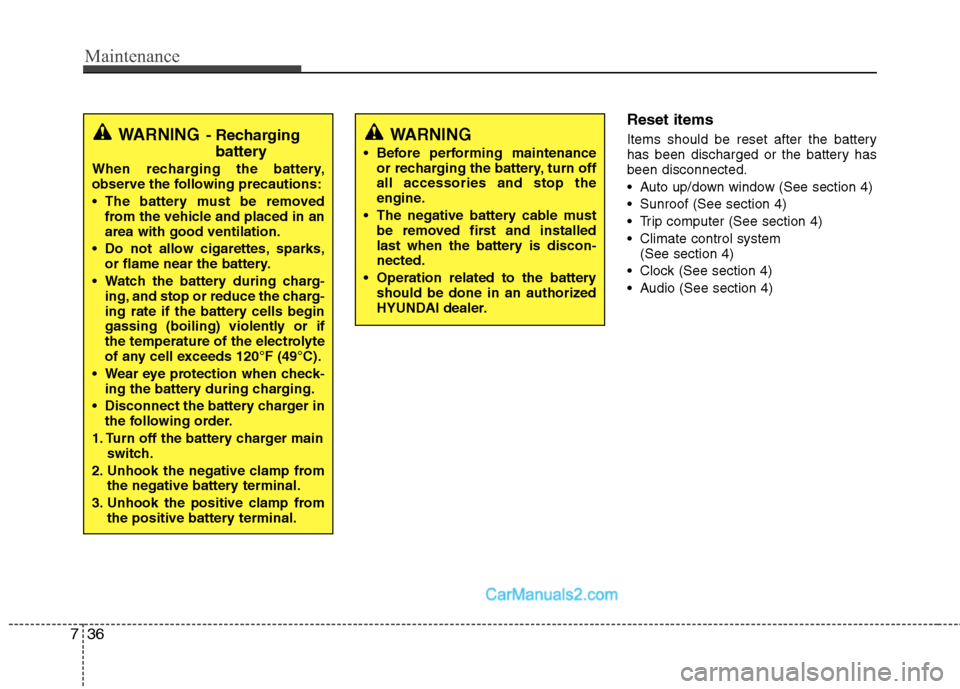
Reset items
Items should be reset after the battery
has been discharged or the battery has
been disconnected.
Auto up/down window (See section 4)
Sunroof (See section 4)
Trip computer (See section 4)
Climate control system
(See section 4)
Clock (See section 4)
Audio (See section 4)WARNING
Before performing maintenance
or recharging the battery, turn off
all accessories and stop the
engine.
The negative battery cable must
be removed first and installed
last when the battery is discon-
nected.
Operation related to the battery
should be done in an authorized
HYUNDAI dealer.
WARNING- Recharging
battery
When recharging the battery,
observe the following precautions:
The battery must be removed
from the vehicle and placed in an
area with good ventilation.
Do not allow cigarettes, sparks,
or flame near the battery.
Watch the battery during charg-
ing, and stop or reduce the charg-
ing rate if the battery cells begin
gassing (boiling) violently or if
the temperature of the electrolyte
of any cell exceeds 120°F (49°C).
Wear eye protection when check-
ing the battery during charging.
Disconnect the battery charger in
the following order.
1. Turn off the battery charger main
switch.
2. Unhook the negative clamp from
the negative battery terminal.
3. Unhook the positive clamp from
the positive battery terminal.
Page 358 of 404
Maintenance
52 7
✽
✽
NOTICE
• If the memory fuse is pulled up from
the fuse panel, the warning chime,
audio, clock and interior lamps, etc.,
will not operate. Some items must be
reset after replacement. Refer to
“Battery” in this section.
• Even though the memory fuse is
pulled up, the battery can still be dis-
charged by operation of the head-
lights or other electrical devices.
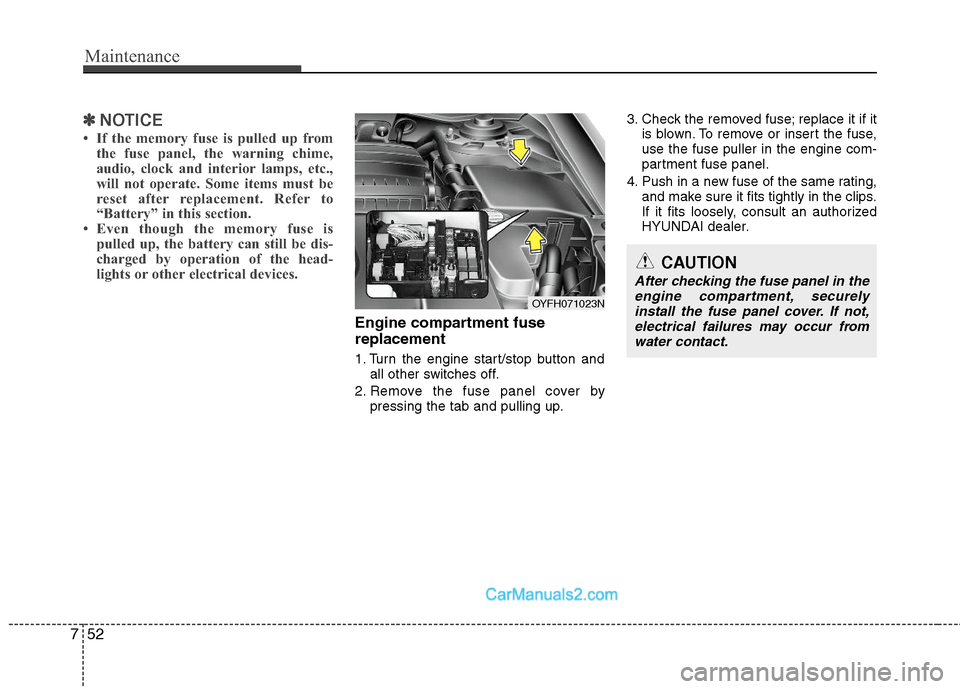
Engine compartment fuse
replacement
1. Turn the engine start/stop button and
all other switches off.
2. Remove the fuse panel cover by
pressing the tab and pulling up.3. Check the removed fuse; replace it if it
is blown. To remove or insert the fuse,
use the fuse puller in the engine com-
partment fuse panel.
4. Push in a new fuse of the same rating,
and make sure it fits tightly in the clips.
If it fits loosely, consult an authorized
HYUNDAI dealer.
OYFH071023N
CAUTION
After checking the fuse panel in the
engine compartment, securely
install the fuse panel cover. If not,
electrical failures may occur from
water contact.
Page 361 of 404
755
Maintenance
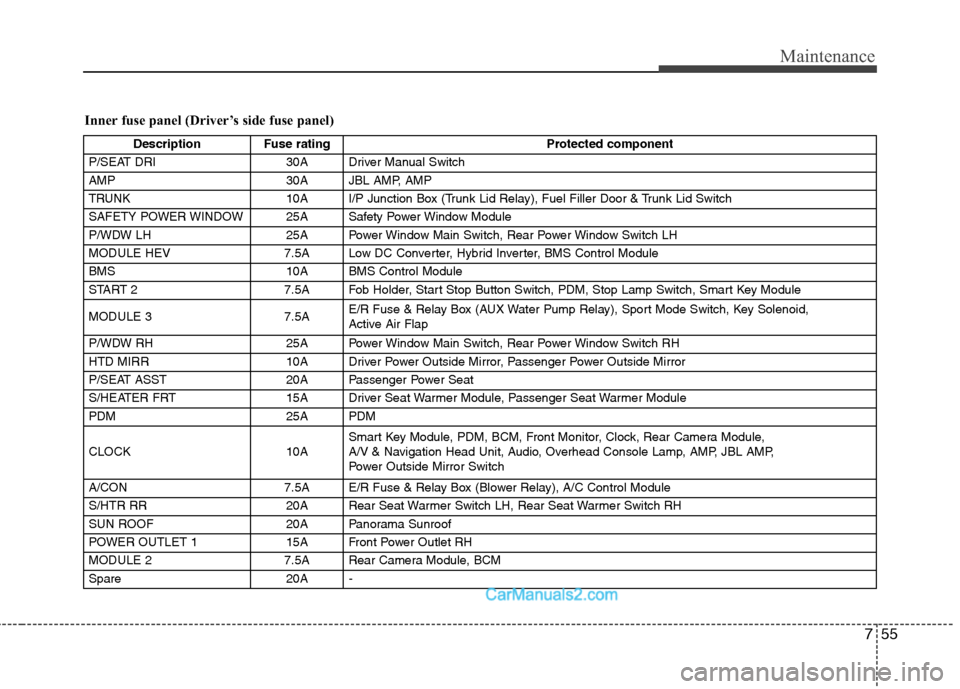
Inner fuse panel (Driver’s side fuse panel)
Description Fuse rating Protected component
P/SEAT DRI 30A Driver Manual Switch
AMP 30A JBL AMP, AMP
TRUNK 10A I/P Junction Box (Trunk Lid Relay), Fuel Filler Door & Trunk Lid Switch
SAFETY POWER WINDOW 25A Safety Power Window Module
P/WDW LH 25A Power Window Main Switch, Rear Power Window Switch LH
MODULE HEV 7.5A Low DC Converter, Hybrid Inverter, BMS Control Module
BMS 10A BMS Control Module
START 2 7.5A Fob Holder, Start Stop Button Switch, PDM, Stop Lamp Switch, Smart Key Module
MODULE 3 7.5AE/R Fuse & Relay Box (AUX Water Pump Relay), Sport Mode Switch, Key Solenoid,
Active Air Flap
P/WDW RH 25A Power Window Main Switch, Rear Power Window Switch RH
HTD MIRR 10A Driver Power Outside Mirror, Passenger Power Outside Mirror
P/SEAT ASST 20A Passenger Power Seat
S/HEATER FRT 15A Driver Seat Warmer Module, Passenger Seat Warmer Module
PDM 25A PDM
CLOCK 10ASmart Key Module, PDM, BCM, Front Monitor, Clock, Rear Camera Module,
A/V & Navigation Head Unit, Audio, Overhead Console Lamp, AMP, JBL AMP,
Power Outside Mirror Switch
A/CON 7.5A E/R Fuse & Relay Box (Blower Relay), A/C Control Module
S/HTR RR 20A Rear Seat Warmer Switch LH, Rear Seat Warmer Switch RH
SUN ROOF 20A Panorama Sunroof
POWER OUTLET 1 15A Front Power Outlet RH
MODULE 2 7.5A Rear Camera Module, BCM
Spare 20A -