2011 Hyundai Sonata Hybrid ESP
[x] Cancel search: ESPPage 162 of 404
Features of your vehicle
68 4
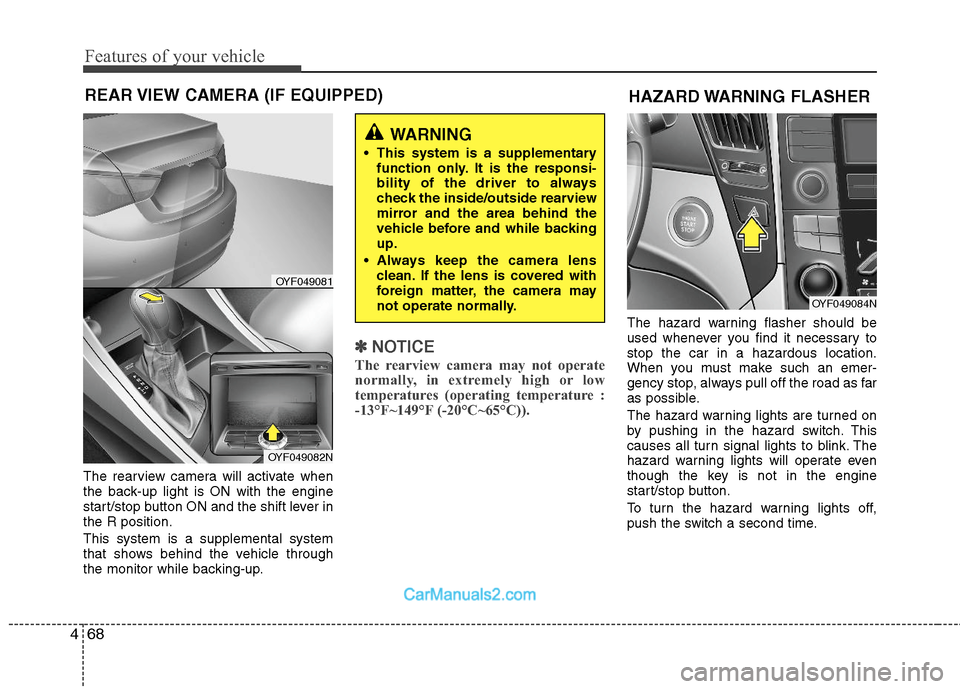
The rearview camera will activate when
the back-up light is ON with the engine
start/stop button ON and the shift lever in
the R position.
This system is a supplemental system
that shows behind the vehicle through
the monitor while backing-up.
✽ ✽
NOTICE
The rearview camera may not operate
normally, in extremely high or low
temperatures (operating temperature :
-13°F~149°F (-20°C~65°C)).
The hazard warning flasher should be
used whenever you find it necessary to
stop the car in a hazardous location.
When you must make such an emer-
gency stop, always pull off the road as far
as possible.
The hazard warning lights are turned on
by pushing in the hazard switch. This
causes all turn signal lights to blink. The
hazard warning lights will operate even
though the key is not in the engine
start/stop button.
To turn the hazard warning lights off,
push the switch a second time.
REAR VIEW CAMERA (IF EQUIPPED)
WARNING
This system is a supplementary
function only. It is the responsi-
bility of the driver to always
check the inside/outside rearview
mirror and the area behind the
vehicle before and while backing
up.
Always keep the camera lens
clean. If the lens is covered with
foreign matter, the camera may
not operate normally.
OYF049081
OYF049082N
HAZARD WARNING FLASHER
OYF049084N
Page 163 of 404
469
Features of your vehicle
Battery saver function
The purpose of this feature is to pre-
vent the battery from being dis-
charged. The system automatically
turns off the parking lights when the
driver turns off the hybrid system and
opens the driver-side door.
With this feature, the parking lights will
be turned off automatically if the driver
parks on the side of road at night.
If necessary, to keep the lights on
when the smart key is turned, perform
the following:
1) Open the driver-side door.
2) Turn the parking lights OFF and ON
again using the light switch on the
steering column.
Headlamp delay (if equipped)
If you turn the engine start/stop button to
the ACC or OFF position with the head-
lights ON, the headlights (and/or tail
lights) remain on for about 20 minutes.
However, if the driver’s door is opened
and closed, the headlights are turned off
after 30 seconds.
The headlights can be turned off by
pressing the lock button on the smart key
twice or turning the light switch to the
OFF or Auto position.
However, if you turn the light switch to the
Auto position when it is dark outside, the
headlights will not be turned off.
Headlamp welcome function
When the headlight switch is in the ON or
AUTO position and all doors (and trunk)
are closed and locked, if you press the
door unlock button on the smart key, the
headlights will come on for about 15 sec-
onds. At this time, if you press the door
lock button on the smart key, the head-
lights will turn off immediately.
Daytime running light
(if equipped)
Daytime Running Lights (DRL) can make
it easier for others to see the front of your
vehicle during the day. DRL can be help-
ful in many different driving conditions,
and it is especially helpful after dawn and
before sunset.
The DRL system will turn OFF when:
1. The headlight is ON.
2. Engine stops.
3. If the multifuntion switch is on “DRL
OFF” position.
4. Parking brake ON.
LIGHTING
CAUTION
If the driver gets out of the vehicle
through doors other than the (dri-
ver's door), the battery saver func-
tion does not operate and the head
lamp delay does not turn off auto-
matically. Therefore, the battery may
become discharged. In this case,
make sure to turn off the lamps
before getting out of the vehicle.
Page 211 of 404
![Hyundai Sonata Hybrid 2011 Owners Manual 4117
Features of your vehicle
1. AM Selection Button
Pressing the [AM] button selects the AM
band. AM Mode is displayed on the LCD.
2. FM Selection Button
Turns to FM mode and toggles FM1and
FM2 when Hyundai Sonata Hybrid 2011 Owners Manual 4117
Features of your vehicle
1. AM Selection Button
Pressing the [AM] button selects the AM
band. AM Mode is displayed on the LCD.
2. FM Selection Button
Turns to FM mode and toggles FM1and
FM2 when](/manual-img/35/19652/w960_19652-210.png)
4117
Features of your vehicle
1. AM Selection Button
Pressing the [AM] button selects the AM
band. AM Mode is displayed on the LCD.
2. FM Selection Button
Turns to FM mode and toggles FM1and
FM2 when the button is pressed each
time.
3.Power ON/OFF Button & VolumeControl Knob
Turns on/off the set when the IGNITION
SWITCH is on ACC or ON. If the button
is turned to the right, it increases the vol-
ume and left,decreases the volume.
system. Rotate clockwise to increase
the volume or counterclockwise to
decrease.
4. Preset Button
Push [1]~[6] buttons less than 0.8 sec-
ond to play the channel saved in each
button.Push Preset button for 0.8 second
or longer to save current channel to the
respective button with a beep.
5. SCAN Button
ically scans the radio stations upwards.
station, starting from the initial station,
for ten seconds.
the scan feature and to listen to the cur-
rently selected channel.
6. MUTE Button
Press the button to mute the sound.
7. SETUP Button
Press this button to turn to the XM option
and the other adjustment mode.
If no action is taken for 5 seconds after
pressing the button, it will return to the
play mode.(After entering SEPUP mode,
move between items using the left, right
and PUSH functions of the [TUNE]
knob.)
The setup changes in the order of TEXT
SCROLL
➟AV C➟BT➟XM
This funtion is used to display characters
longer than the LCD text display and can
be turned ON/OFF through the sound
quality control knob.
This funtion automatically adjusts the
volume level according to the speed of
the vehicle and can be turned ON/OFF
through the sound quality control knob.
Page 214 of 404

Features of your vehicle
120 4
1. CD Loading Slot
Insert CD with printed side upward and
gently push in. When the ignition switch is
on ACC or ON and power is off, power is
automatically turned on if the CD is
loaded. This CDP supports only 12cm CD.
If VCD, Data CD are loaded, “Reading
Error” message will appear and CD will be
ejected.
2. CD Eject Button
Push button for less than 0.8 seconds to
eject the CD during CD playback. This but-
ton is enabled when ignition switch is off.
ALL EJECT(CD Changer : PA760YF)
Press this button for more than 0.8 sec-
onds to eject all discs inside the deck in
respective order.
3. CD Selection Button
If the CD is loaded, turns to CD mode. If no
CD, it displays “NO Disc” (for CD Player :
PA710YF displays “NO Media”) for 3 sec-
onds and returns to th previous mode.
4. Automatic Track Selection
Button
Push [TRACK ] button for less than
0.8 second to play from the beginning
of current song.
Push [TRACK ] button for less than
0.8 second and press again within
1 seconds to play the previous song.
Push [TRACK ] button for 0.8 or
longer to initiate reverse direction high
speed sound search of current song.
Push [SEEK ] button for less than
0.8 second to play the next song.
Push [SEEK ] button for 0.8 or
longer to initiate high speed sound
search of current song.
5. RANDOM Play Button
Press this button for less than 0.8 second
to activate ‘RDM’ mode and more than
0.8 seconds to activate ‘ALL RDM’ mode.
RDM : Only files/tracks in a folder/disc
are played back in a random sequence.
ALL RDM(MP3/WMA Only) : All files in
a disc are played back in the random
sequence.
6. REPEAT Button
Press this button for less than 0.8 second
to activate ‘RPT’ mode and more than 0.8
seconds to activate ‘ RPT’ mode.
RPT : Only a track(file) is repeatedly
played back.
RPT(MP3/WMA Only) : Only files
in a folder are repeatedly played back.
7. CD Indicator Icon
When car ignition switch is ACC or ON
and if the CD is loaded, this indicator Icon
is on. If the CD is ejected the Icon is off.
Page 224 of 404
Features of your vehicle
130 4
Using XM satellite Radio
Your vehicle is equipped with 3 months
complimentary period of XM Satellite
Radio. XM provides access to over 130
channels of music, information, and
entertainment programming.
1. XM Selection Button
Turns to XM Satellite Radio Mode. XM
mode toggles in order to XM1➟XM2➟XM3➟XM1... when the button is pressed
each time.
2. INFO Button
Displays the information of the current
channel in the order of Artist/Song title➟Category/Channel name➟Current Play
Channel➟Artist/Song title➟Category/
Channel name... when the button is
pressed each time. The complete text
information is not displayed, rotate the
tune button to see the next page.
3. Automatic Channel Selection
Button
Push [TRACK ] button for less than
0.8 second to select previous channel.
Push [TRACK ] button for 0.8 sec-
ond or longer to continuously move to
previous channel.
Push [SEEK ] button for less than
0.8 second to select next channel.
Push [SEEK ] button for 0.8 second or
longer to continuously move to next channel.
Radio ID : Seek or Tune to XM channel
0 to display the Radio ID.
4. SCAN Button
Press to hear a brief sampling of all
channel. To cancel the scan mode, press
the button once again.
5. CATEGORY Search Button
Push [FOLDER ] button to search
previous category.
Push [CAT ] button to search next
category. To listen to the displayed cat-
egory, press the TUNE/SETUP button.
To scan channel in displayed category,
press the scan button. To search chan-
nel in displayed category, press seek
buttons or turn the tune button clock-
wise/counterclockwise.(CATEGORY
icon is will be turned on in Category
mode)
6. Manual Channel Selection Button
While listening to XM broadcast, rotate
this control to the right or left to search
other channels while listening to current
channel. (Turn to the right to searchhigh-
er channels and left, lower channels)
7. Preset Button
Push [1]~[6] buttons less than 0.8 sec-
ond to play the channel saved in each
button. Push Preset button for 0.8 sec-
ond or longer to save current channel to
the respective button with a beep.
Page 231 of 404
4137
Features of your vehicle
✽ ✽
Tip
■Voice Operation
To get the best performance out of the
Voice Recognition System, observe the
followings:
- Keep the interior of the vehicle as
quiet as possible. Close the window
to eliminate surrounding noise
(traffic noise, vibration sounds,
etc), which may disturb recogniz-
ing the voice command correctly.
- Speak a command after a beep
sound within 5 seconds. Otherwise
the command will not be received
properly.
- Speak in a natural voice without
pausing between words.
- While receiving voice commands,
press the button on the steer-
ing wheel remote controller to ter-
minate guidance. Voice command
will convert back to waiting mode
to allow the user to say a new voice
command.
■Voice Recognition Activation
in the Bluetooth®System can be acti-
vated in the following conditions:
- Button Activation
The voice recognition system will be
active when the button is pressed
and after the sound of a Beep.
- Active Listening
The voice recognition system will be
active for a period of time when the
Voice Recognition system has asked
for a customer response.
from zero to nine while number greater
than ten will not be recognized.
tion mode in following cases : When
pressing the button and saying
“cancel” following the beep. When not
making a call and pressing the
button. When voice recognition has
failed 3 consecutive times.
will announce what commands are
available.
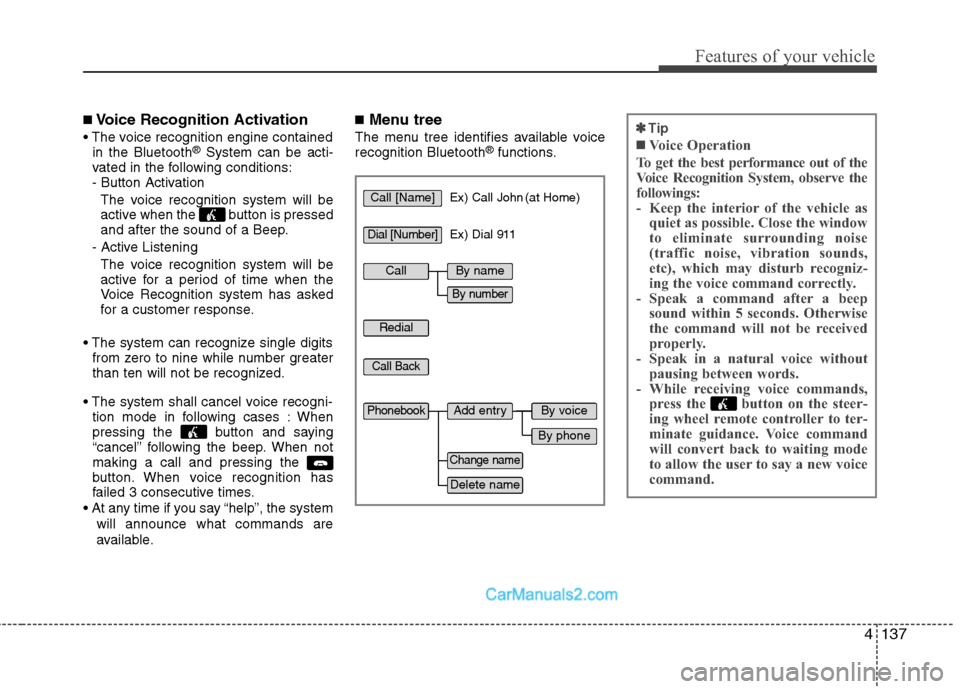
■Menu tree
The menu tree identifies available voice
recognition Bluetooth®functions.
Call [Name]Ex) Call John (at Home)
Ex) Dial 911
Dial [Number]
Redial
Call Back
Add entryPhonebook
Change name
Delete name
By phone
By voice
CallBy name
By number
Page 233 of 404
4139
Features of your vehicle
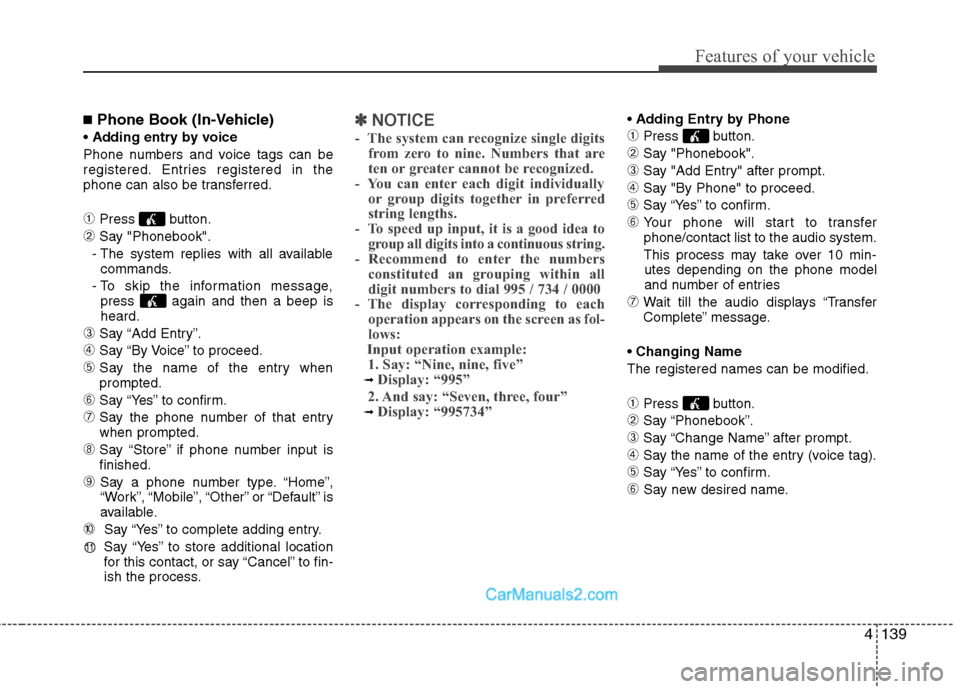
■Phone Book (In-Vehicle)
Phone numbers and voice tags can be
registered. Entries registered in the
phone can also be transferred.
➀Press button.
➁Say "Phonebook".
- The system replies with all available
commands.
- To skip the information message,
press again and then a beep is
heard.
➂Say “Add Entry”.
➃Say “By Voice” to proceed.
➄Say the name of the entry when
prompted.
➅Say “Yes” to confirm.
➆Say the phone number of that entry
when prompted.
➇Say “Store” if phone number input is
finished.
➈ Say a phone number type. “Home”,
“Work”, “Mobile”, “Other” or “Default” is
available.
➉ Say “Yes” to complete adding entry.
Say “Yes” to store additional location
for this contact, or say “Cancel” to fin-
ish the process.
✽ ✽
NOTICE
- The system can recognize single digits
from zero to nine. Numbers that are
ten or greater cannot be recognized.
- You can enter each digit individually
or group digits together in preferred
string lengths.
- To speed up input, it is a good idea to
group all digits into a continuous string.
- Recommend to enter the numbers
constituted an grouping within all
digit numbers to dial 995 / 734 / 0000
- The display corresponding to each
operation appears on the screen as fol-
lows:
Input operation example:
1. Say: “Nine, nine, five”
➟ Display: “995”
2. And say: “Seven, three, four”
➟ Display: “995734”
➀Press button.
➁Say "Phonebook".
➂Say "Add Entry" after prompt.
➃Say "By Phone" to proceed.
➄Say “Yes” to confirm.
➅ Your phone will start to transfer
phone/contact list to the audio system.
This process may take over 10 min-
utes depending on the phone model
and number of entries
➆Wait till the audio displays “Transfer
Complete” message.
Changing Name
The registered names can be modified.
➀Press button.
➁Say “Phonebook”.
➂Say “Change Name” after prompt.
➃Say the name of the entry (voice tag).
➄Say “Yes” to confirm.
➅ Say new desired name.
11
Page 235 of 404
![Hyundai Sonata Hybrid 2011 Owners Manual 4141
Features of your vehicle
■ Key matrix
No.
Class
Paired H/P
EmptyDisconnected
1SHORT
LONG
SHORT
SHORT
LONG
[10sec]
LONG
[10sec]Normal mode
BT SETUP menuIncoming CallOutgoing Call
Active Call2nd Hyundai Sonata Hybrid 2011 Owners Manual 4141
Features of your vehicle
■ Key matrix
No.
Class
Paired H/P
EmptyDisconnected
1SHORT
LONG
SHORT
SHORT
LONG
[10sec]
LONG
[10sec]Normal mode
BT SETUP menuIncoming CallOutgoing Call
Active Call2nd](/manual-img/35/19652/w960_19652-234.png)
4141
Features of your vehicle
■ Key matrix
No.
Class
Paired H/P
EmptyDisconnected
1SHORT
LONG
SHORT
SHORT
LONG
[10sec]
LONG
[10sec]Normal mode
BT SETUP menuIncoming CallOutgoing Call
Active Call2nd Call
Not Paired Not Connecting--Accept Call
Connected
-
2nd call
1st Call:waiting
2nd Call:active2nd Call
2nd Call:waiting
1st Call:active
KEY
-
-
-
---Transfer call:secret call
End Call VR
MODE CancelVR
MODE CancelVR
MODE CancelVR
MODE CancelReject Call End Call End Call
-
Active
Change
language
-
ActiveSpeaker
Adaptation
(Only English)
Change
languageActive
Change
languageActive
-Speaker
Adaptation
(Only English)
Change
language
--
--
--
--
-
--
2
3