2011 Hyundai Santa Fe phone
[x] Cancel search: phonePage 207 of 408
Features of your vehicle
128
4
Deleting phone
The registered phones can be deleted.
1. Press the button.
2. Say "Set Up".
3. Say "Delete Phone".
4. Say the name of the contact, the num- ber of the contact or "Delete all
phone".
5. Say "Yes".
When the phone is deleted by using
the knob:
Turn the “AUDIO CTRL” knob until
“DELETE” is displayed and push the
knob.
Turn the “AUDIO CTRL” knob until the
desired phone name is displayed and
push the knob.
Changing Priority
The connection priority for registered
phones can be changed.
1. Press the button.
2. Say "Set Up".
3. Say "Change Priority".
4. Say the name of the contact or the number of the contact.
5. Say "Yes". When the phone is changed by using
the knob:
Turn the “AUDIO CTRL” knob until “PRI-
ORITY” is displayed and push the knob.
Turn the “AUDIO CTRL” knob until the
desired phone name is displayed and
push the knob.
Turning Bluetooth on / off
Bluetooth function can be switched ON/
OFF. initial status : Bluetooth ON
1. Press the button.
2. Say "Set Up".
3. Say "Bluetooth off".
4. Say "Yes".
Turning Bluetooth on
1. Press the send or button.
2. Say "yes".
3. The Bluetooth will be turned on.
When Bluetooth is off by using the
knob:
Turn the “AUDIO CTRL” knob until
“BLUETOOTH OFF” is displayed and
push the knob. After announcement say
“yes” to confirm.■ Phone Book
Adding Entry
Phone numbers and voice tags can be
registered. Entries registered in the
phone can also be transferred.
Adding Entry by Voice
1. Press the button.
2. Say "phonebook".
3. Say "add entry".
4. Say "by voice".
5. Say the name of the contact.
6. Say "yes".
7. Say the phone number.
8. Say "store".
9. Say "Home", "Office", "Mobile", "Other" or "default".
10. Say "Yes" to store an additional loca- tion for this contact.
Adding Entry by phone
1. Press the button.
2. Say "phonebook".
3. Say "add entry".
4. Say "by phone".
5. Say "yes".
6. Transfer procedures may vary depend- ing on the cellular phone.
✽ ✽NOTICE
Page 208 of 408
4129
Features of your vehicle
The system can recognize single digits
from zero to nine. Numbers that are ten
or greater are not recognized.
To speed up input, it is a good idea to
group all digits into a continuous string.
However, you can enter each digit indi-
vidually or group digits together in pre-
ferred string lengths.
The display corresponding to each oper-
ation appears on the screen as follows:
Input operation
1. say: "Nine, nine, five"Display: "995"
2. say: "Seven, three, four" Display: "995734"
Changing Name
The registered names can be changed.
1. Press the button.
2. Say "phonebook".
3. Say "Change name".
4. Say the name of the phonebook [voice tag].
5. Say "yes".
6. Say the name of the phonebook to be changed.
Deleting name The registered names can be deleted.
1. Press the button.
2. Say "phonebook".
3. Say "Delete name".
4. Say the name of the contact.
5. Say "yes".
■ Making a phone call
Calling by Name
The system dials the numbers corre-
sponding to the spoken names regis-
tered in the system.
1. Press the button.
2. Say "Call".
3. Say "name".
4. Say "
6. Say "
7. Say "yes".
✽ ✽ Tip
A shortcut to each of the following func-
tions is available.
1. Say "Call name".
2. Say "Call
3. Say "Call
Dialing by Number The system will make a phone call by
dialing the spoken numbers.
The system can recognize single digits
from zero to nine.
1. Press the button.
2. Say "Call".
3. Say "Number".
4. Say "
5. Say "
6. Say "Dial".
✽ ✽ Tip
A shortcut to each of the following func-
tions is available.
1. Say "Dial number".
2. Say "Dial
Page 209 of 408
Features of your vehicle
130
4
■ Receiving a phone call
When receiving a phone call, a ring tone
is audible and the system changes into
telephone mode.
When receiving a phone call, the phone
number and the message "Incoming" will
be displayed.
Do either one of the following:
Press the send switch to take the call.
Press the end switch to refuse the call.
To adjust the ring volume, push "+" or "-" on the steering volume controls.
Volume adjustment cannot be made
using the audio system.
To transfer a call to the phone: The received call can be transferred
from the hands-free system to the cel-
lular phone that is connected to
Bluetooth.
For details, please refer to you user's
manual for the cellular phone or go to
the Key matrix in this manual (next
page).
■Using the head unit as Bluetooth
music
The head unit supports A2DP (Audio
Advanced Distribution Profile) and
AVRCP(Audio Video Remote Control
Profile).
Both profiles are available for listening to
the MP3 music via Bluetooth cellular
phone supporting above Bluetooth pro-
files.
To play MP3 music from the Bluetooth
cellular phone, press the [AUX] button
until the mp3 mode is displayed.
Then try playing music by phone.
When playing music from the Bluetooth
cellular phone, the head unit displays
MP3 MODE.
✽ ✽ NOTICE
•The Bluetooth cellular phones shall fea-
ture A2DP and AVRCP functions.
• Some A2DP and AVRCP Bluetooth cel-
lular phones may not play music
through the head unit on first try.
Please try the below;
i.e : Menu
➟File manager➟Music➟Option➟Play via Bluetooth
• Do Please refer to your Bluetooth cel- lular phone User Guide for more
details. To stop music, try stop music
by phone then push the FM or CD but-
ton.
■ Talking on the phone
When talking on the phone, the display
will differ depending on whether or not
the vehicle is in motion.
Number and "active call" is displayed.
When the call is finished, press the end
switch.
✽ ✽ NOTICE
In the following situations, your voice
may not reach the other party:
1. Talk alternately with the other party
on the phone. If you talk at the same
time, the voice may not reach each
other parties. (This is not a malfunc-
tion.) (It is not a malfunction.)
2. Keep the volume of receiving voice to a low level. Otherwise, high volumes
may result in an echo. When you talk
on the phone, speak clearly towards
the microphone.
3. When driving on a rough road.
4. When driving at high speeds.
5. When the window is open.
6. When the air conditioning vents are facing the microphone.
7. When the sound of the air condition- ing fan is loud.
Page 211 of 408
Features of your vehicle
132
4
D320000AEN
Important Safety Information
It is always important to operate your
vehicle in a safe manner and to avoid dis-
traction while driving. This manual pro-
vides information that will help you safely
operate your Rear Seat Entertainment
System (RSE). Please read it completely
before using the system.
This device complies with part 15 of
the FCC rules.
Operation is subject to the following two
conditions:
1. This device may not cause harmful
interference, and
2. This device must accept any interfer- ence received, including interference
that may cause undesired operation.
Welcome
The Rear Seat Entertainment System is
a compact, built-in, easy-to-use enter-
tainment system designed to provide
family fun while you are on the road.
Enjoy great quality sound from the vehi-
cle speakers, or have a private, quiet lis-
tening with the wireless headphones.
The overhead display unit is mounted to
the ceiling in the rear passenger area of
the vehicle, allowing rear-seat passen-
gers to play DVD movies, video CDs or
music CDs. Users may also plug in a
game platform or VHS player into an aux-
iliary input to show the programs through
the RSE display. The RSE can also
access to the vehicle's front radio pro-
grams.
System Overview
Connections / Setup
Your Rear Seat Entertainment system
will play DVD movies, video CDs, music
CDs or music MP3 discs, and is
designed to make your time on the road
more enjoyable. Please follow these
instructions carefully to get the most out
of your RSE.
REAR SEAT ENTERTAINMENT SYSTEM (RSE) (IF EQUIPPED)
CAUTION
• Avoid having food or drinks near, in or on the RSE, the wirelessheadphones or the remote con-troller.
Direct sunlight may interfere with the headphone's operation andperformance.
Normal RSE operation cannot be guaranteed with unofficiallyduplicated discs.
(Continued)
WARNING
Changes or modifications not
expressly approved by the party
responsible for compliance could
void the user's authority to operate
the equipment.
Page 213 of 408
Features of your vehicle
134
4
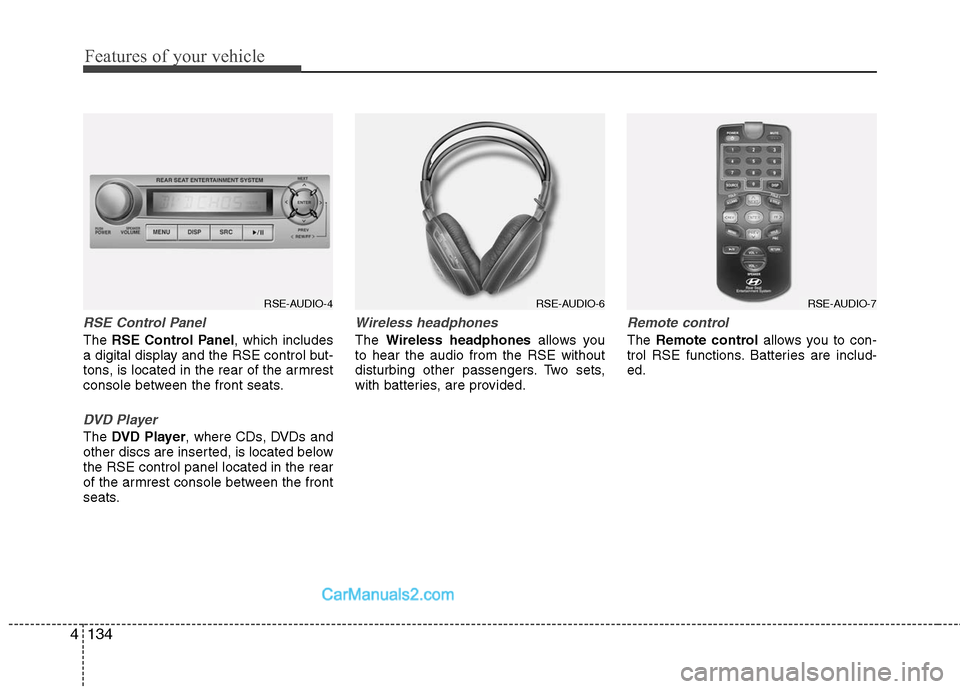
RSE Control Panel
The RSE Control Panel , which includes
a digital display and the RSE control but-
tons, is located in the rear of the armrest
console between the front seats.
DVD Player
The DVD Player , where CDs, DVDs and
other discs are inserted, is located below
the RSE control panel located in the rear
of the armrest console between the front
seats.
Wireless headphones
The Wireless headphones allows you
to hear the audio from the RSE without
disturbing other passengers. Two sets,
with batteries, are provided.
Remote control
The Remote control allows you to con-
trol RSE functions. Batteries are includ-
ed.
RSE-AUDIO-4
RSE-AUDIO-6
RSE-AUDIO-7
Page 215 of 408
Features of your vehicle
136
4
Audio via Vehicle Speakers
To hear the audio from the RSE through
the vehicle's speakers, the RSE button
(located in the front radio control) must
be selected. Regardless of whether RSE
audio is selected for the vehicle speakers
or not, when the RSE audio is playing it
can be heard in the headphones.
Volume Control
You can adjust the volume of the audio
heard in the vehicle speakers from the
RSE control panel or the remote control.
From the RSE control panel, rotate the
POWER/VOLUME knob. From the
remote control, press " VOL +" to
increase the volume and " VOL -" to
decrease the volume.
Adjusting the volume in this way will not
affect the wireless headphone volume. To
adjust the headphones, turn the VOL
control wheel on the headphones.
Headphones
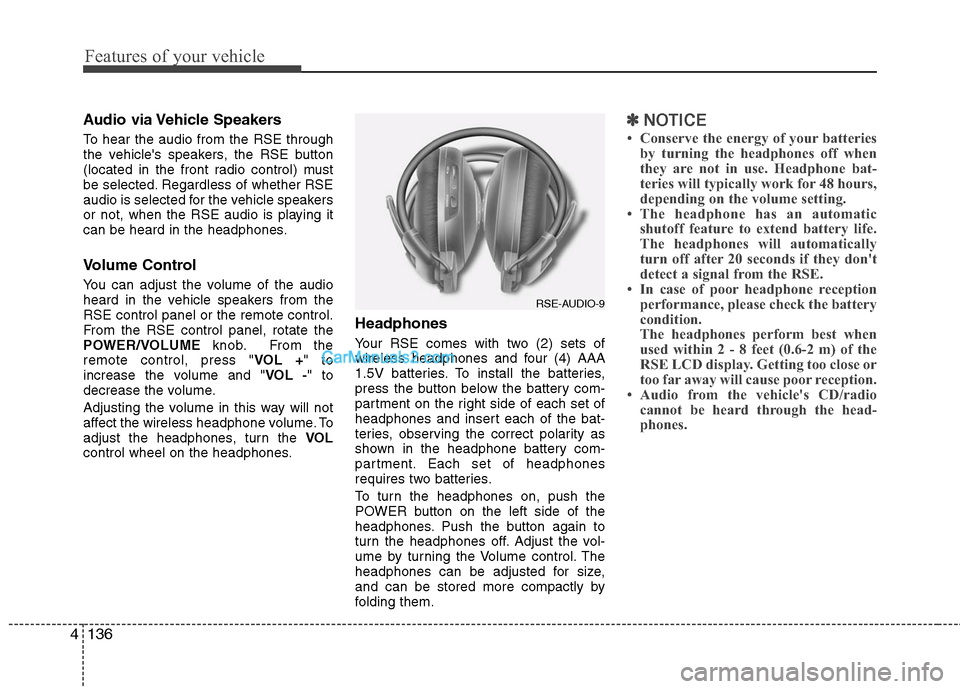
Your RSE comes with two (2) sets of
wireless headphones and four (4) AAA
1.5V batteries. To install the batteries,
press the button below the battery com-
partment on the right side of each set of
headphones and insert each of the bat-
teries, observing the correct polarity as
shown in the headphone battery com-
partment. Each set of headphones
requires two batteries.
To turn the headphones on, push the
POWER button on the left side of the
headphones. Push the button again to
turn the headphones off. Adjust the vol-
ume by turning the Volume control. The
headphones can be adjusted for size,
and can be stored more compactly by
folding them.
✽ ✽ NOTICE
• Conserve the energy of your batteries
by turning the headphones off when
they are not in use. Headphone bat-
teries will typically work for 48 hours,
depending on the volume setting.
• The headphone has an automatic shutoff feature to extend battery life.
The headphones will automatically
turn off after 20 seconds if they don't
detect a signal from the RSE.
• In case of poor headphone reception performance, please check the battery
condition.
The headphones perform best when
used within 2 - 8 feet (0.6-2 m) of the
RSE LCD display. Getting too close or
too far away will cause poor reception.
• Audio from the vehicle's CD/radio cannot be heard through the head-
phones.
RSE-AUDIO-9
Page 219 of 408
Features of your vehicle
140
4
1. ON/OFF and Speaker Volume
Press the POWER/VOLUME knob to
turn the RSE on or off.
Rotate the knob to adjust the speaker
volume. Note that changing the volume
by using the POWER/VOLUME knob
affects only the vehicle speakers. The
wireless headset volume is not affected.
See the "Headphones" section of this
manual for more information.
2. RSE Display
This RSE control panel display indicates
the current selected source, mode of
operation in the current disc, and other
information. It will display FRONT to indi-
cate that the selected source is the front
vehicle radio and REAR to indicate that
the RSE player is the current source.
The display will indicate DISC IN when a
disc is in loaded the RSE player.
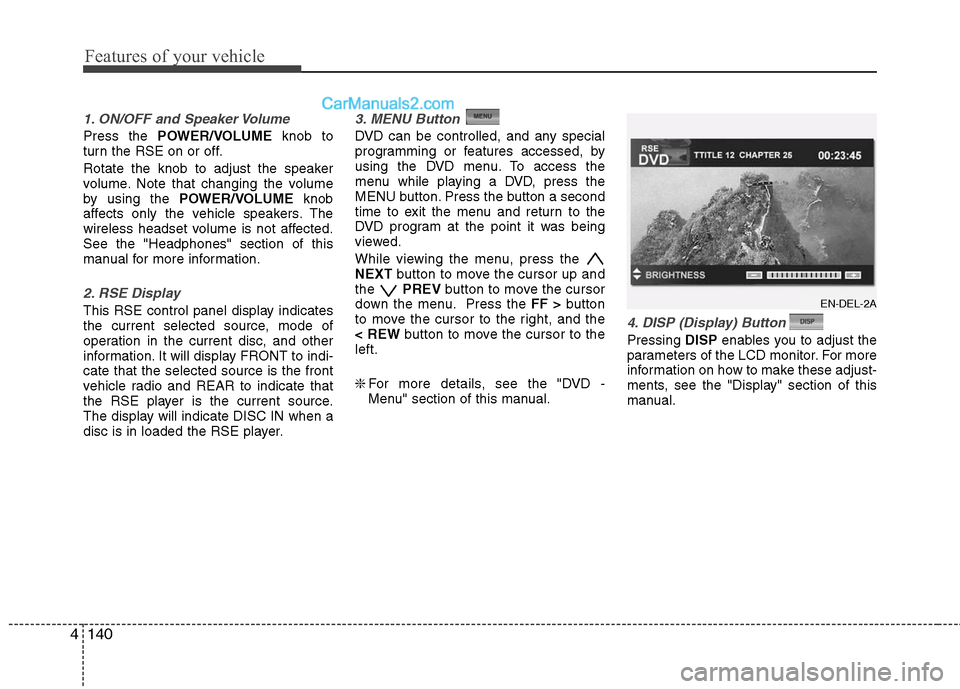
3. MENU Button
DVD can be controlled, and any special
programming or features accessed, by
using the DVD menu. To access the
menu while playing a DVD, press the
MENU button. Press the button a second
time to exit the menu and return to the
DVD program at the point it was being
viewed.
While viewing the menu, press the
NEXT button to move the cursor up and
the PREVbutton to move the cursor
down the menu. Press the FF >button
to move the cursor to the right, and the
< REW button to move the cursor to the
left.
❇ For more details, see the "DVD -
Menu" section of this manual.
4. DISP (Display) Button
Pressing DISPenables you to adjust the
parameters of the LCD monitor. For more
information on how to make these adjust-
ments, see the "Display" section of this
manual.
EN-DEL-2A
Page 225 of 408
Features of your vehicle
146
4
Volume Control
You can adjust the volume of the audio
heard in the vehicle speakers from the
RSE control panel or the remote control.
From the RSE control panel, rotate the
POWER/VOLUME knob. From the
remote control, press " VOL +" to
increase and " VOL -" to decrease the
volume.
Adjusting the volume in this way will not
adjust the wireless headphone volume.
To adjust the headphones, roll the VOL
control wheel.
Play/Pause
When a CD is inserted, the RSE will
automatically begin playing the first track.
Press the PLAY/PAUSE button to
pause the CD. Press the button again to
resume play. While paused, the elapsed
time in the status display at the top of the
monitor will blink. The RSE control will
display "PAUSE."
When the player reaches the end of the
disc, the player will automatically return
to the first track and continue playing.
Fast Forward / Reverse
Press and hold the FF >or < REW but-
ton and the player will fast forward or
reverse at 10 times the normal speed.
Release the button to return to normal
speed play.
The audio is muted while the player fast
forwards or fast reverses.
Previous/Next Track
While a CD is playing, press the
PREV button to jump to the beginning of
the current track. If less than 10 seconds
has elapsed on the current track, press-
ing PREVwill go to the previous
track. Press the button repeatedly to con-
tinue moving through previous tracks.
Press the NEXTbutton to jump to the
beginning of the next track. Press the
button repeatedly to continue moving
through the following tracks.
Instead of using the PREV /
NEXT buttons, you can also enter the
track number using the numbers on the
remote control. While a CD is playing,
press the number button(s) that corre-
spond to the desired track and press
ENTER .
The current track number is shown in the
Status Display at the top of the monitor.
Stop
The CD will automatically stop when any
other source (e.g. the vehicle radio or an
external game) is selected. When you
switch back to the CD, it will begin play-
ing at the point where it stopped.
While a CD is playing, you can stop the
CD by pressing the POWER ON/OFF
button on the remote control or the
POWER/VOLUME knob on the RSE
control panel. When the RSE is turned on
again, it will automatically begin playing
the CD at the point where it was stopped.
Turning the vehicle off, or selecting a dif-
ferent RSE Source, will also stop playing
the CD.
Eject
Press the EJECTbutton to eject the
CD. Discs can be ejected even when the
unit is not turned on.