2011 Hyundai Santa Fe headlights
[x] Cancel search: headlightsPage 109 of 312
Features of your vehicle
34
4
D140100AUN
Inside rearview mirror
Adjust the rearview mirror to centre on
the view through the rear window. Make
this adjustment before you start driving.
D140101AUN
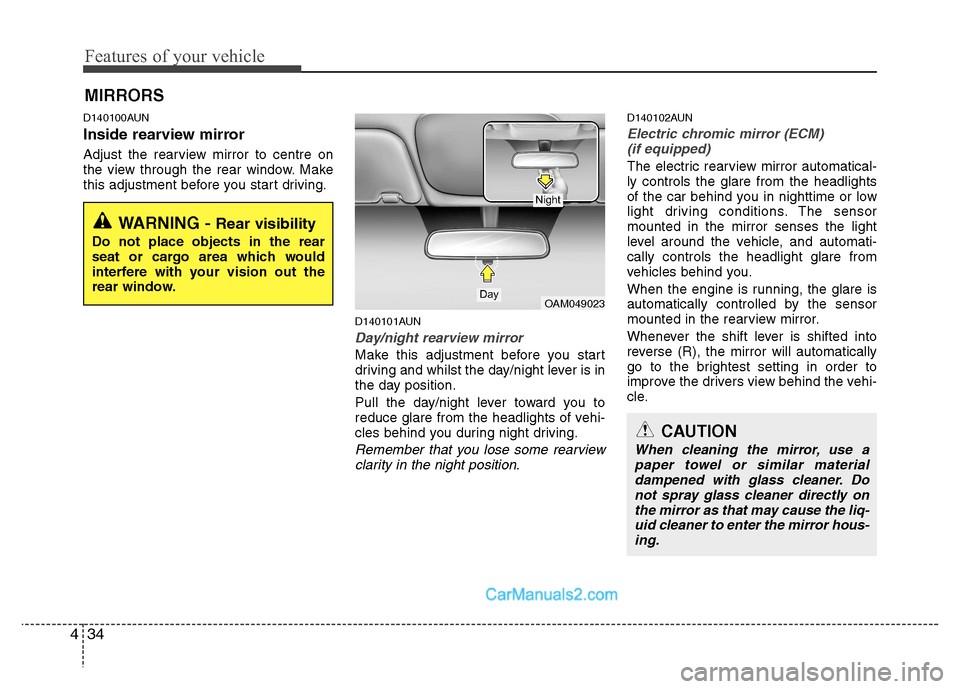
Day/night rearview mirror
Make this adjustment before you start
driving and whilst the day/night lever is in
the day position.
Pull the day/night lever toward you to
reduce glare from the headlights of vehi-
cles behind you during night driving.
Remember that you lose some rearviewclarity in the night position.
D140102AUN
Electric chromic mirror (ECM)(if equipped)
The electric rearview mirror automatical- ly controls the glare from the headlights
of the car behind you in nighttime or low
light driving conditions. The sensormounted in the mirror senses the light
level around the vehicle, and automati-cally controls the headlight glare from
vehicles behind you.
When the engine is running, the glare is
automatically controlled by the sensor
mounted in the rearview mirror.
Whenever the shift lever is shifted into
reverse (R), the mirror will automatically
go to the brightest setting in order to
improve the drivers view behind the vehi-
cle.
MIRRORS
WARNING -
Rear visibility
Do not place objects in the rear
seat or cargo area which would
interfere with your vision out the
rear window.
OAM049023
CAUTION
When cleaning the mirror, use a paper towel or similar materialdampened with glass cleaner. Do not spray glass cleaner directly on
the mirror as that may cause the liq- uid cleaner to enter the mirror hous-ing.
Day
Night
Page 124 of 312
449
Features of your vehicle
Seat belt warning andchime (if equipped)
Seat belt warning light
As a reminder to the driver, the seat belt
warning light will blink or illuminate for
approximately 6 seconds each time you
turn the ignition switch ON regardless of
belt fastening.
For details, refer to the seat belt on chap- ter 3. D150305AFD
Turn signal indicator lights
The blinking green arrows on the instru-
ment panel show the direction indicated
by the turn signals. If the arrow comes on
but does not blink, blinks more rapidly
than normal, or does not illuminate at all,
a malfunction in the turn signal system is
indicated. Your repairer should be con-
sulted for repairs.
This indicator also blinks when the haz-
ard warning switch is turned on. D150306AUN
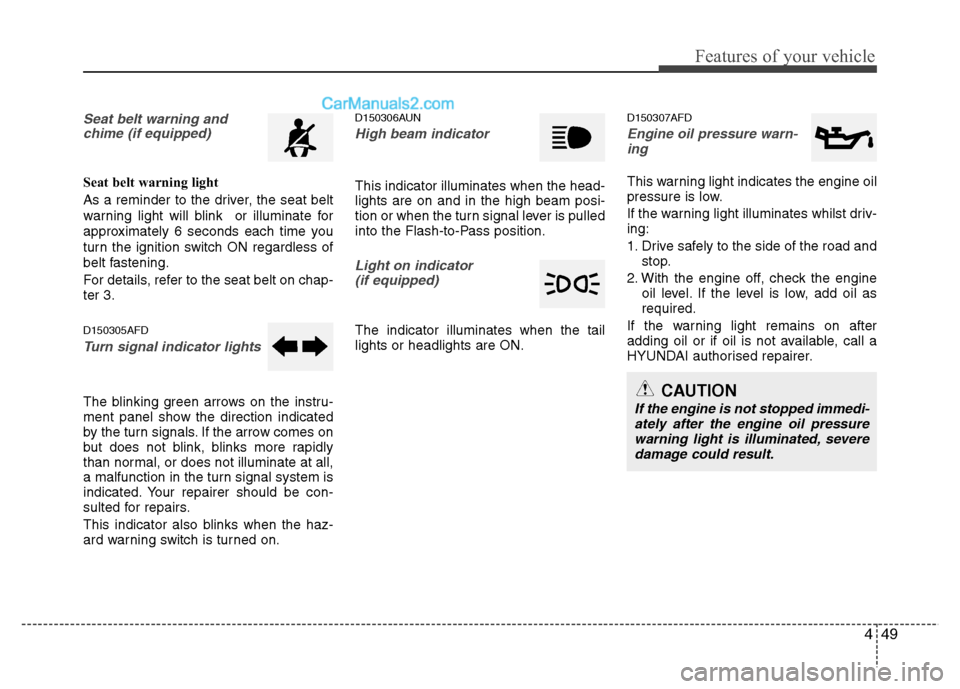
High beam indicator
This indicator illuminates when the head- lights are on and in the high beam posi-
tion or when the turn signal lever is pulled
into the Flash-to-Pass position.
Light on indicator
(if equipped)
The indicator illuminates when the tail lights or headlights are ON. D150307AFD
Engine oil pressure warn-
ing
This warning light indicates the engine oil
pressure is low.
If the warning light illuminates whilst driv- ing:
1. Drive safely to the side of the road and stop.
2. With the engine off, check the engine oil level. If the level is low, add oil as required.
If the warning light remains on after
adding oil or if oil is not available, call a
HYUNDAI authorised repairer.
CAUTION
If the engine is not stopped immedi- ately after the engine oil pressurewarning light is illuminated, severe
damage could result.
Page 140 of 312
465
Features of your vehicle
D190402AUN
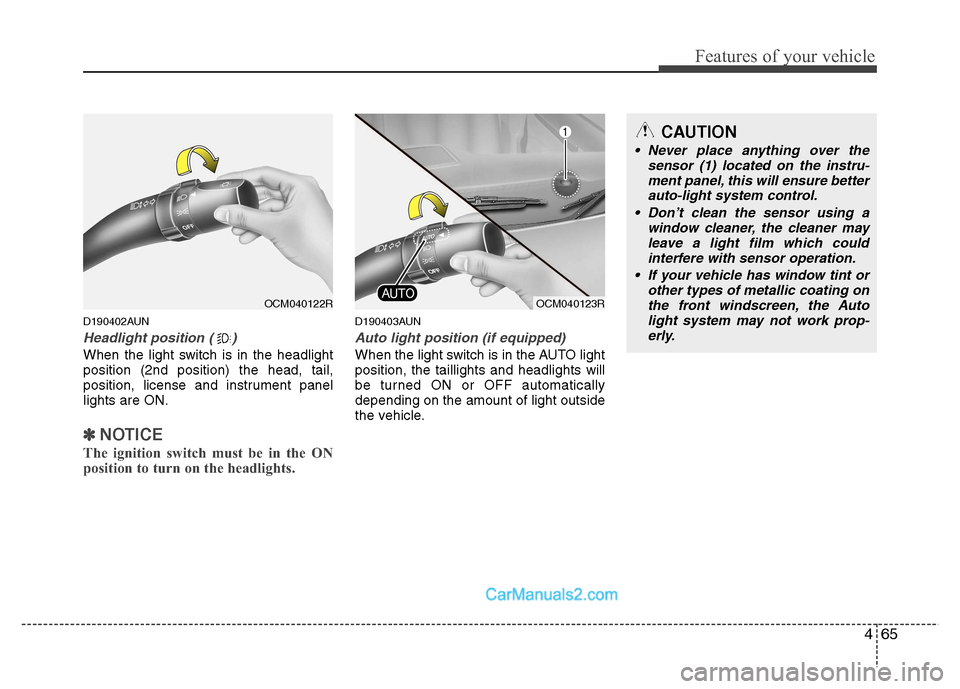
Headlight position ( )
When the light switch is in the headlight position (2nd position) the head, tail,
position, license and instrument panellights are ON.
✽✽NOTICE
The ignition switch must be in the ON
position to turn on the headlights.
D190403AUN
Auto light position (if equipped)
When the light switch is in the AUTO light position, the taillights and headlights will
be turned ON or OFF automaticallydepending on the amount of light outside
the vehicle.
CAUTION
Never place anything over the sensor (1) located on the instru-
ment panel, this will ensure better auto-light system control.
Don’t clean the sensor using a window cleaner, the cleaner may
leave a light film which could interfere with sensor operation.
If your vehicle has window tint or other types of metallic coating onthe front windscreen, the Auto
light system may not work prop-erly.
OCM040122ROCM040123R
Page 141 of 312
Features of your vehicle
66
4
D190500AUN High - beam operation
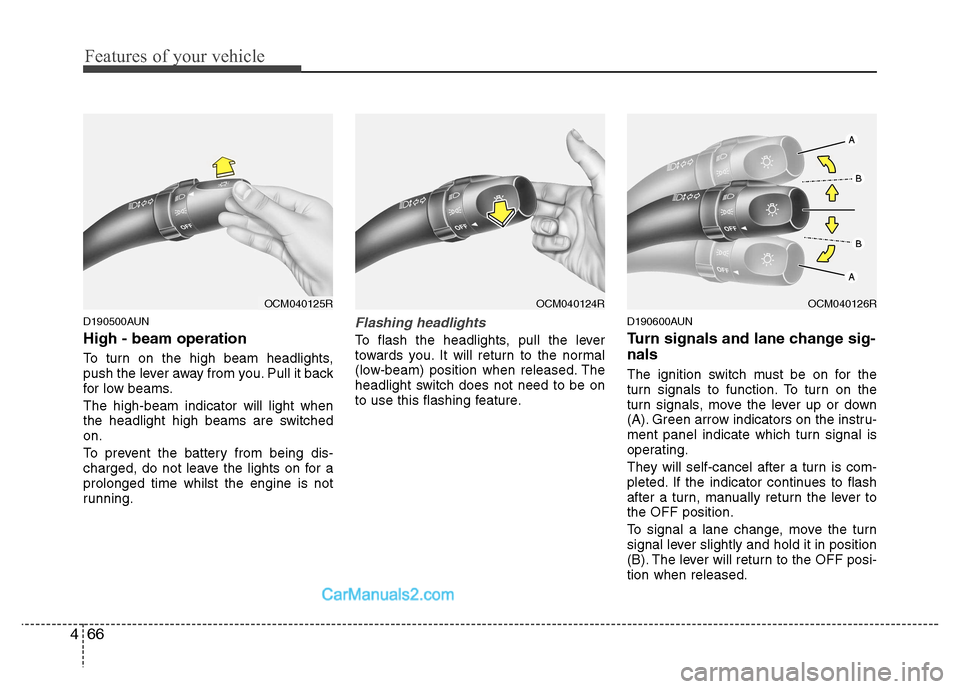
To turn on the high beam headlights,
push the lever away from you. Pull it back
for low beams. The high-beam indicator will light when
the headlight high beams are switchedon.
To prevent the battery from being dis-
charged, do not leave the lights on for aprolonged time whilst the engine is not
running.Flashing headlights
To flash the headlights, pull the lever
towards you. It will return to the normal
(low-beam) position when released. The
headlight switch does not need to be on
to use this flashing feature. D190600AUN
Turn signals and lane change sig- nals
The ignition switch must be on for the
turn signals to function. To turn on the
turn signals, move the lever up or down
(A). Green arrow indicators on the instru-
ment panel indicate which turn signal is
operating.
They will self-cancel after a turn is com-
pleted. If the indicator continues to flash
after a turn, manually return the lever tothe OFF position.
To signal a lane change, move the turn
signal lever slightly and hold it in position
(B). The lever will return to the OFF posi-tion when released.
OCM040125ROCM040124ROCM040126R
Page 144 of 312
469
Features of your vehicle
Listed below are the examples of proper
switch settings. For loading conditions
other than those listed below, adjust the
switch position so that the beam level
may be the nearest as the conditionobtained according to the list.Headlight washer (if equipped)
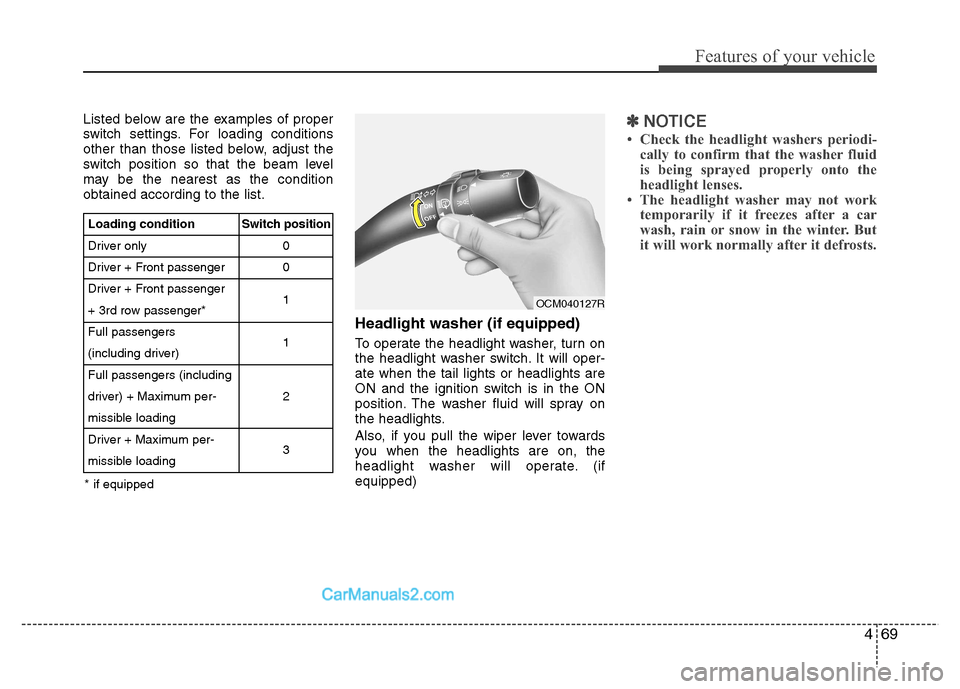
To operate the headlight washer, turn on
the headlight washer switch. It will oper-ate when the tail lights or headlights are
ON and the ignition switch is in the ON
position. The washer fluid will spray on
the headlights.
Also, if you pull the wiper lever towards
you when the headlights are on, the
headlight washer will operate. (ifequipped)✽✽NOTICE
Check the headlight washers periodi- cally to confirm that the washer fluid
is being sprayed properly onto the
headlight lenses.
The headlight washer may not work temporarily if it freezes after a car
wash, rain or snow in the winter. But
it will work normally after it defrosts.
Loading condition
Driver only
Driver + Front passenger
Driver + Front passenger
+ 3rd row passenger*Full passengers
(including driver)Full passengers (including
driver) + Maximum per-
missible loading
Driver + Maximum per-
missible loading Switch position
00 1 1 2 3
* if equipped
OCM040127R
Page 151 of 312
Features of your vehicle
76
4
D210500AUN
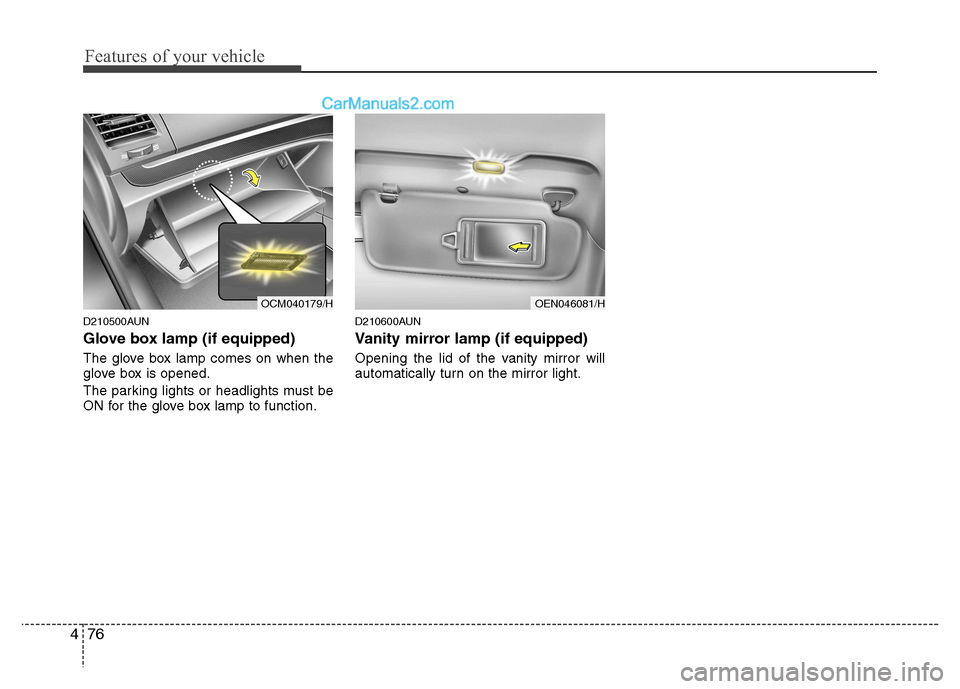
Glove box lamp (if equipped)
The glove box lamp comes on when the
glove box is opened.
The parking lights or headlights must be
ON for the glove box lamp to function. D210600AUN
Vanity mirror lamp (if equipped)
Opening the lid of the vanity mirror will
automatically turn on the mirror light.
OEN046081/HOCM040179/H
Page 252 of 312
549
Driving your vehicle
✽✽NOTICE
The ESP system (if equipped) should be
turned OFF prior to rocking the vehicle.
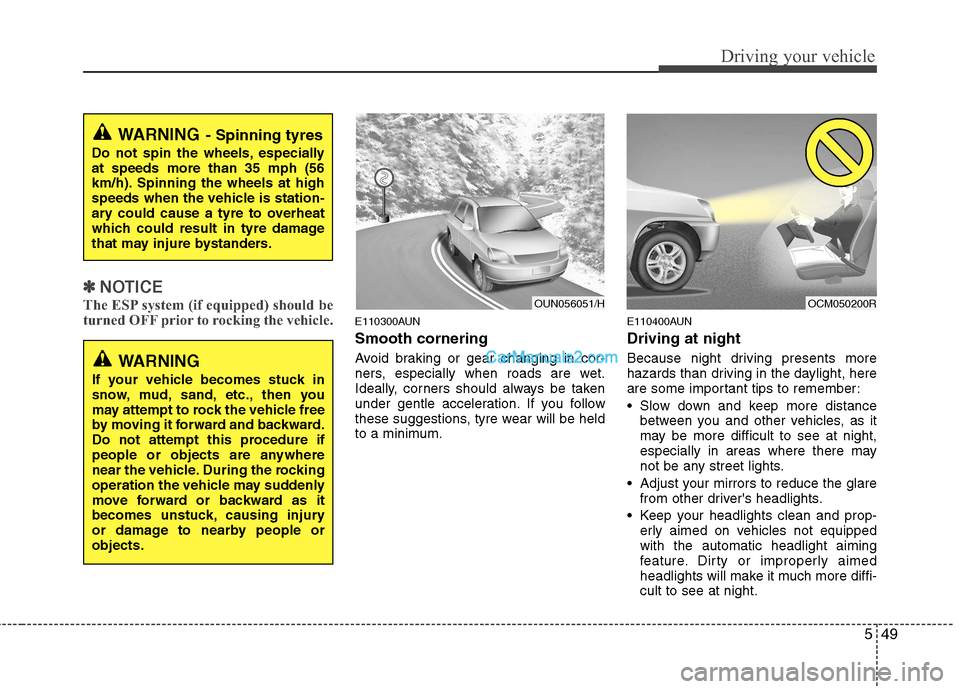
E110300AUN Smooth cornering
Avoid braking or gear changing in cor-
ners, especially when roads are wet.
Ideally, corners should always be taken
under gentle acceleration. If you follow
these suggestions, tyre wear will be held
to a minimum. E110400AUN Driving at night
Because night driving presents more
hazards than driving in the daylight, here
are some important tips to remember:
Slow down and keep more distance
between you and other vehicles, as it
may be more difficult to see at night,
especially in areas where there may
not be any street lights.
Adjust your mirrors to reduce the glare from other driver's headlights.
Keep your headlights clean and prop- erly aimed on vehicles not equippedwith the automatic headlight aiming
feature. Dirty or improperly aimed
headlights will make it much more diffi-cult to see at night.
WARNING - Spinning tyres
Do not spin the wheels, especially at speeds more than 35 mph (56
km/h). Spinning the wheels at high
speeds when the vehicle is station-
ary could cause a tyre to overheat
which could result in tyre damage
that may injure bystanders.
WARNING
If your vehicle becomes stuck in
snow, mud, sand, etc., then you
may attempt to rock the vehicle free
by moving it forward and backward.
Do not attempt this procedure if
people or objects are anywhere
near the vehicle. During the rocking
operation the vehicle may suddenly
move forward or backward as it
becomes unstuck, causing injury
or damage to nearby people orobjects.
OUN056051/HOCM050200R
Page 253 of 312
Driving your vehicle
50
5
Avoid staring directly at the headlights
of oncoming vehicles. You could be
temporarily blinded, and it will take
several seconds for your eyes to read-
just to the darkness.
E110500AUN Driving in the rain
Rain and wet roads can make driving
dangerous, especially if you’re not pre-
pared for the slick pavement. Here are a
few things to consider when driving in the
rain:
A heavy rainfall will make it harder tosee and will increase the distance
needed to stop your vehicle, so slow
down.
Keep your windscreen wiping equip- ment in good shape. Replace your
windscreen wiper blades when they
show signs of streaking or missingareas on the windscreen. If your tyres are not in good condition,
making a quick stop on wet pavement
can cause a skid and possibly lead to
an accident. Be sure your tyres are in
good shape.
Turn on your headlights to make it eas- ier for others to see you.
Driving too fast through large puddles can affect your brakes. If you must go
through puddles, try to drive through
them slowly.
If you believe you may have gotten your brakes wet, apply them lightly
whilst driving until normal braking
operation returns.
E110600AUN Driving in flooded areas
Avoid driving through flooded areas
unless you are sure the water is no high-
er than the bottom of the wheel hub.
Drive through any water slowly. Allowadequate stopping distance because
brake performance may be affected.
After driving through water, dry the
brakes by gently applying them several
times whilst the vehicle is moving slowly.
1VQA3003/H