2011 Hyundai Santa Fe check engine
[x] Cancel search: check enginePage 263 of 312
Driving your vehicle
60
5
E140405AFD
Turn signals when towing a trailer
When you tow a trailer, your vehicle has
to have a different turn signal flasher and
extra wiring. The green arrows on your
instrument panel will flash whenever you
signal a turn or lane change. Properly
connected, the trailer lights will also flash
to alert other drivers you’re about to turn,
change lanes, or stop.
When towing a trailer, the green arrows
on your instrument panel will flash for
turns even if the bulbs on the trailer are
burned out. Thus, you may think drivers
behind you are seeing your signals
when, in fact, they are not. It’s important
to check occasionally to be sure the trail-
er bulbs are still working. You must also
check the lights every time you discon-
nect and then reconnect the wires.
Do not connect a trailer lighting system
directly to your vehicle’s lighting system.
Use only an approved trailer wiring har-
ness.
A HYUNDAI authorised repairer can
assist you in installing the wiring harness. E140406AFD
Driving on grades
Reduce speed and shift to a lower gear
before you start down a long or steep
downgrade. If you don’t shift down, you
might have to use your brakes so much
that they would get hot and no longer
operate efficiently.
On a long uphill grade, shift down and
reduce your speed to around 45 mph (70km/h) to reduce the possibility of engine
and transaxle overheating.
If your trailer weighs more than the max-
imum trailer weight without trailer brakes
and you have an automatic transaxle,
you should drive in D (Drive) when tow-
ing a trailer.
Operating your vehicle in D (Drive) when
towing a trailer will minimise heat build up
and extend the life of your transaxle.
WARNING
Failure to use an approved trailer wiring harness could result in dam-
age to the vehicle electrical system
and/or personal injury.
Page 265 of 312
Driving your vehicle
62
5
When you are ready to leave after park-
ing on a hill
1. With the manual transaxle in Neutral
or automatic transaxle in P (Park),
apply your brakes and hold the brake
pedal down whilst you:
and
2. Slowly remove your foot from the brake pedal.
3. Drive slowly until the trailer is clear of the chocks.
4. Stop and have someone pick up and store the chocks. E140500AUN
Maintenance when trailer towing
Your vehicle will need service more often
when you regularly pull a trailer.
Important items to pay particular atten-tion to include engine oil, automatic
transaxle fluid, axle lubricant and cooling
system fluid. Brake condition is another
important item to frequently check. Each
item is covered in this manual, and the
Index will help you find them quickly. If
you’re trailering, it’s a good idea to review
these sections before you start your trip.
Don’t forget to also maintain your trailer
and towbar. Follow the maintenance
schedule that accompanied your trailer
and check it periodically. Preferably, con-
duct the check at the start of each day’s
driving. Most importantly, all towbar nutsand bolts should be tight.CAUTION
Due to higher load during trailer
usage, overheating might occur
in hot days or during uphill driv- ing. If the coolant gauge indicatesover-heating, switch off the A/Cand stop the vehicle in a safe area
to cool down the engine.
When towing check transaxle fluid more frequently.
If your vehicle is not equipped with the air conditioner, you
should install a condenser fan toimprove engine performancewhen towing a trailer.
Page 272 of 312
What to do in an emergency
4
6
IF THE ENGINE WILL NOT START
F030100AUN If engine cannot be cranked
1. If your vehicle has an automatic transaxle, be sure the shift lever is in N
(Neutral) or P (Park) and the emer-
gency brake is set.
2. Check the battery terminals and con- nections to ensure that these are cleanand also tight.
3. If the interior lights dim when the engine is cranked and the battery ter-
minals have been checked, a dis-
charged battery is indicated.
4. Do not attempt to push or tow start the vehicle, refer to "Jump Starting" for
information regarding engine starting
when the battery is discharged. F030200AFD
If engine turns over normally but
does not start
1. Check fuel level.
2. With the ignition switch in the LOCK/
OFF position, check all connectors at
ignition, coil and spark plugs.
Reconnect any that may be discon-
nected or loose.
3. Check the fuel line in the engine com- partment.
4. If the engine still does not start, call a HYUNDAI authorised repairer or seek
other qualified assistance.
WARNING
If the engine refuses to start, no attempt should be made to push or
tow start the vehicle. Vehicles withautomatic transaxle or fuel injec-
tion will not be able to be started inthis manner since no drive is trans-
mitted through the automatictransaxle whilst the engine is not
running, and in the case of fuel
injected derivatives, the fuel pump
will not operate under tow start
conditions. In addition, if the vehi-
cle is equipped with an exhaust cat-
alyst, damage to the catalyst may
result if the vehicle is tow started.
Page 274 of 312
What to do in an emergency
6
6
F040101AFD
Jump starting procedure
1. Make sure the booster battery is 12-
volt and that its negative terminal is
grounded.
2. If the booster battery is in another vehicle, do not allow the vehicles totouch.
3. Turn off all unnecessary electrical loads.
4. Connect the jumper cables in the exact sequence shown in the illustration.First connect one end of a jumper
cable to the positive terminal of the
discharged battery (1), then connect
the other end to the positive terminal
on the booster battery (2). Proceed toconnect one end of the other jumper
cable to the negative terminal of the
booster battery (3), then the other end
to a solid, stationary, metallic point (for
example, the engine lifting bracket)
away from the battery (4). Do not con-
nect it to or near any part that moves
when the engine is cranked.
Do not allow the jumper cables to con-
tact anything except the correct battery
terminals or the correct ground. Do not
lean over the battery when making
connections. 5. Start the engine of the vehicle with the
booster battery and let it run at 2,000
rpm, then start the engine of the vehi-
cle with the discharged battery.
If the cause of your battery discharging is
not apparent, you should have your vehi-cle checked by a HYUNDAI authorised repairer.
F040200AUN
Push-starting
Your manual transaxle-equipped vehicle
should not be push-started because itmight damage the emission control sys-tem.
Vehicles equipped with automatic
transaxle cannot be push-started.
Follow the directions in this section for
jump-starting.
WARNING
Never tow a vehicle to start it
because the sudden surge forward
when the engine starts could cause
a collision with the tow vehicle.
CAUTION - Battery cables
Do not connect the jumper cable
from the negative terminal of the
booster battery to the negative ter-minal of the discharged battery.This can cause the discharged bat- tery to overheat and crack, releas-
ing battery acid.
Page 275 of 312
67
What to do in an emergency
IF THE ENGINE OVERHEATS
F050000AFD
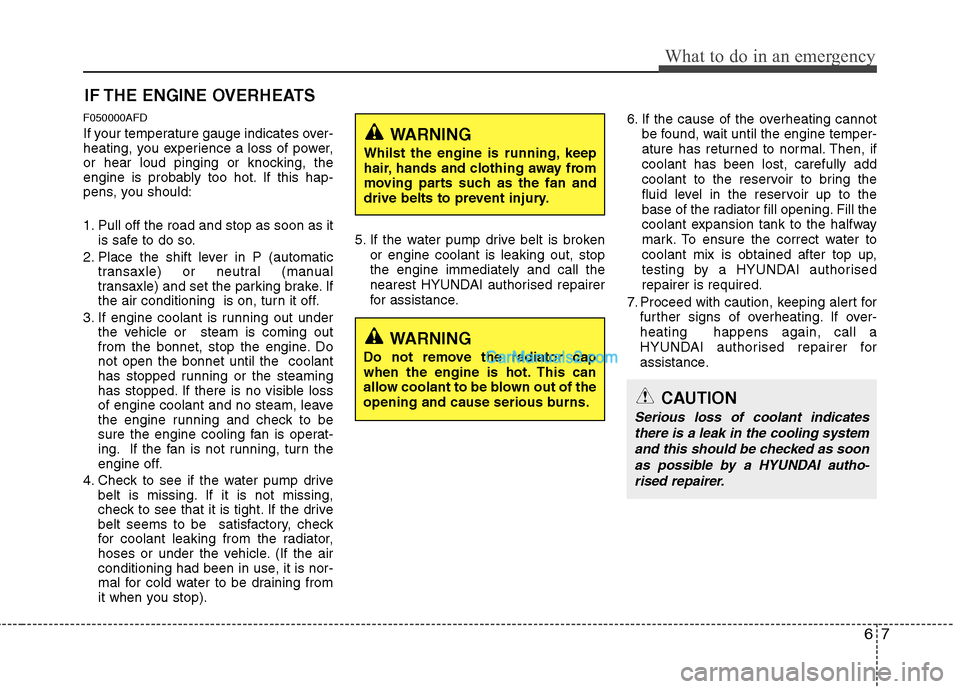
If your temperature gauge indicates over-
heating, you experience a loss of power,
or hear loud pinging or knocking, the
engine is probably too hot. If this hap-
pens, you should:
1. Pull off the road and stop as soon as it is safe to do so.
2. Place the shift lever in P (automatic transaxle) or neutral (manual
transaxle) and set the parking brake. If
the air conditioning is on, turn it off.
3. If engine coolant is running out under the vehicle or steam is coming out
from the bonnet, stop the engine. Donot open the bonnet until the coolant
has stopped running or the steaming
has stopped. If there is no visible loss
of engine coolant and no steam, leave
the engine running and check to be
sure the engine cooling fan is operat-
ing. If the fan is not running, turn the
engine off.
4. Check to see if the water pump drive belt is missing. If it is not missing,
check to see that it is tight. If the drive
belt seems to be satisfactory, check
for coolant leaking from the radiator,
hoses or under the vehicle. (If the air
conditioning had been in use, it is nor-
mal for cold water to be draining from
it when you stop). 5. If the water pump drive belt is broken
or engine coolant is leaking out, stop the engine immediately and call the
nearest HYUNDAI authorised repairer
for assistance. 6. If the cause of the overheating cannot
be found, wait until the engine temper-
ature has returned to normal. Then, ifcoolant has been lost, carefully add
coolant to the reservoir to bring the
fluid level in the reservoir up to the
base of the radiator fill opening. Fill the
coolant expansion tank to the halfway
mark. To ensure the correct water to
coolant mix is obtained after top up,
testing by a HYUNDAI authorisedrepairer is required.
7. Proceed with caution, keeping alert for further signs of overheating. If over-heating happens again, call a
HYUNDAI authorised repairer for
assistance.
CAUTION
Serious loss of coolant indicates
there is a leak in the cooling systemand this should be checked as soonas possible by a HYUNDAI autho- rised repairer.
WARNING
Whilst the engine is running, keep
hair, hands and clothing away from
moving parts such as the fan and
drive belts to prevent injury.
WARNING
Do not remove the radiator cap
when the engine is hot. This can
allow coolant to be blown out of the
opening and cause serious burns.
Page 277 of 312
69
What to do in an emergency
✽✽NOTICE
If the TPMS, Low Tyre Pressure and
Position indicators do not illuminate
for 3 seconds when the ignition
switch is turned to the ON position
or engine is running, or if they
remain illuminated after coming on
for approximately 3 seconds, take
your car to your nearest HYUNDAI
authorised repairer and have the
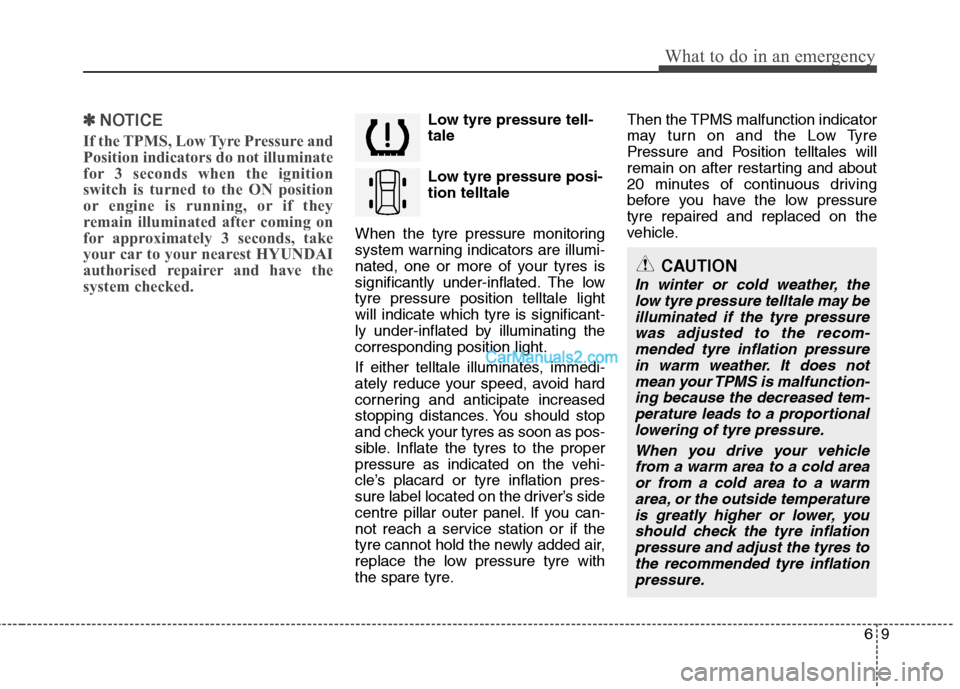
system checked.Low tyre pressure tell- tale
Low tyre pressure posi- tion telltale
When the tyre pressure monitoring
system warning indicators are illumi-
nated, one or more of your tyres is
significantly under-inflated. The lowtyre pressure position telltale lightwill indicate which tyre is significant-
ly under-inflated by illuminating thecorresponding position light.
If either telltale illuminates, immedi-
ately reduce your speed, avoid hard
cornering and anticipate increased
stopping distances. You should stop
and check your tyres as soon as pos-
sible. Inflate the tyres to the proper
pressure as indicated on the vehi-
cle’s placard or tyre inflation pres-
sure label located on the driver’s side
centre pillar outer panel. If you can-
not reach a service station or if the
tyre cannot hold the newly added air,
replace the low pressure tyre with
the spare tyre. Then the TPMS malfunction indicator
may turn on and the Low Tyre
Pressure and Position telltales will
remain on after restarting and about
20 minutes of continuous driving
before you have the low pressuretyre repaired and replaced on the
vehicle.
CAUTION
In winter or cold weather, the
low tyre pressure telltale may beilluminated if the tyre pressurewas adjusted to the recom- mended tyre inflation pressurein warm weather. It does notmean your TPMS is malfunction- ing because the decreased tem-perature leads to a proportionallowering of tyre pressure.
When you drive your vehiclefrom a warm area to a cold area or from a cold area to a warmarea, or the outside temperatureis greatly higher or lower, you should check the tyre inflationpressure and adjust the tyres tothe recommended tyre inflation pressure.
Page 300 of 312
Specifications & Consumer information
6
8
I040100AXM Recommended SAE viscosity
number Engine oil viscosity (thickness) has an
effect on fuel economy and cold weather
operating (engine start and engine oil
flowability). Lower viscosity engine oils
can provide better fuel economy and cold
weather performance, however, higher
viscosity engine oils are required for sat-
isfactory lubrication in hot weather. Using
oils of any viscosity other than those rec-ommended could result in engine dam-
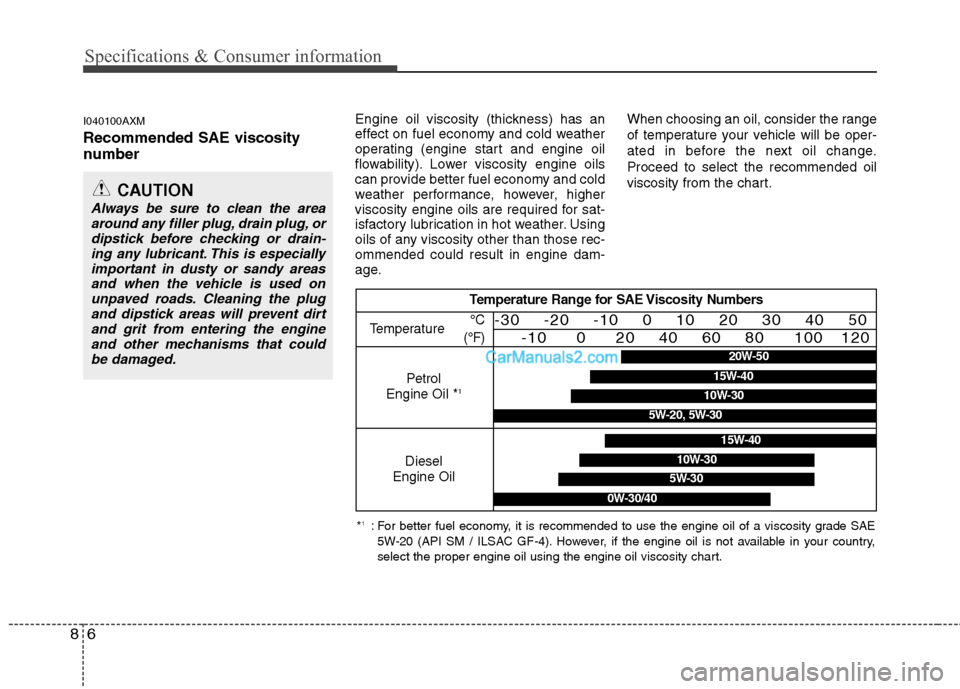
age.When choosing an oil, consider the range
of temperature your vehicle will be oper-
ated in before the next oil change.Proceed to select the recommended oil
viscosity from the chart.
CAUTION
Always be sure to clean the area
around any filler plug, drain plug, ordipstick before checking or drain-ing any lubricant. This is especially
important in dusty or sandy areasand when the vehicle is used on unpaved roads. Cleaning the plugand dipstick areas will prevent dirt
and grit from entering the engine and other mechanisms that couldbe damaged.
Temperature Range for SAE Viscosity Numbers
Temperature
Petrol
Engine Oil * 1°C
(°F)-30 -20 -10 0 10 20 30 40 50 -10 0 20 40 60 80 100 120
Diesel
Engine Oil
5W-30
15W-40
10W-30
0W-30/40
* 1
: For better fuel economy, it is recommended to use the engine oil of a viscosity grade SAE
5W-20 (API SM / ILSAC GF-4). However, if the engine oil is not available in your country,
select the proper engine oil using the engine oil viscosity chart.
20W-50
10W-30
15W-40
5W-20, 5W-30
Page 305 of 312
I3
Index
Position light bulb replacement ·······················7-51, 7-54
Rear combination light bulb replacement ·················7-55
Rear fog light bulb replacement································7-57
Side repeater light bulb replacement·························7-54
Turn signal light bulb replacement ···························7-55
Bulb wattage ·····································································8-2
Button start/stop, see engine start/stop button ··················5-8
Capacities (Lubricants) ·····················································8-4 Care Exterior care ······························································7-60
Interior care ·······························································7-65
Tyre care ····································································7-30
Cargo security screen ··············································4-108
Cargo weight ···································································5-65
Centre console storage ····················································4-98
Central door lock switch ·················································4-13
Changing tyres ································································6-16
Changing a tyre with TPMS ·············································6-8Chains Tyre chains ································································5-53
Checking tyre inflation pressure ·····································7-32
Child restraint system ·····················································3-29 Tether anchor system·················································3-33
ISOFIX system ·························································3-34
Child-protector rear door lock ·······································4-15 Climate control system (Automatic) ·····························4-87
Air conditioning ·······················································4-93Automatic heating and air conditioning ···················4-88
Manual heating and air conditioning ·······················4-89
Outside thermometer ·················································4-91
Climate control system (Manual) ··································4-78 Air conditioning ·······················································4-83
Heating and air conditioning ·····································4-79
Cigarette lighter ····························································4-101
Climate control air filter ········································4-85, 7-22
Clock (Digital) ·····························································4-105
Clothes hanger ······························································4-106
Combined instrument, see instrument cluster ···············4-38
Compact spare tyre ························································6-20Compact spare tyre replacement ····································7-35
Console box cooling ·······················································4-98Coolant ···········································································7-13
Cooling fluid, see engine coolant ··································7-13
Crankcase emission control system ·······························7-66
Cruise control system ····················································5-40
Cup holder ···································································4-102
Curtain air bag ·······························································3-47
Dashboard, see instrument cluster ·································4-38
Dashboard illumination, see instrument panel illumination ·······················································4-39
C
D