2011 HYUNDAI IX35 brakes
[x] Cancel search: brakesPage 5 of 560

15
Introduction
Biodiesel
Commercially supplied Diesel blends of no more than 7% biodiesel, commonly
known as "B7 Diesel" may be used in
your vehicle if Biodiesel meets EN 14214
or equivalent specifications. (EN stands
for "European Norm"). The use of biofu-
els exceeding 7%, made from rapeseed
methyl ester (RME), fatty acid methyl
ester (FAME), vegetable oil methyl ester
(VME) etc. or mixing diesel exceeding7% with biodiesel will cause increased
wear or damage to the engine and fuel
system. Repair or replacement of worn ordamaged components due to the use of
non approved fuels will not be covered by
the manufactures warranty.As with other vehicles of this type, failure
to operate this vehicle correctly mayresult in loss of control, an accident or
vehicle rollover.
Specific design characteristics (higher
ground clearance, track, etc.) give this
vehicle a higher centre of gravity than
other types of vehicles. In other words
they are not designed for cornering at the
same speeds as conventional 2-wheel
drive vehicles. Avoid sharp turns or
abrupt manoeuvres. Again, failure to
operate this vehicle correctly may result
in loss of control, an accident or vehicle
rollover.
Be sure to read the “Reducing
the risk of a rollover” driving guide-
lines, in section 5 of this manual. No special run-in period is needed. By
following a few simple precautions for the
first 600 miles (1,000 km) you may add to
the performance, economy and life of
your vehicle.
Do not race the engine.
Whilst driving, keep your engine speed
(rpm, or revolutions per minute)
between 2,000 rpm and 4,000 rpm.
Do not maintain a single speed for long
periods of time, either fast or slow.
Varying engine speed is needed to
properly run-in the engine.
Avoid hard stops, except in emergen- cies, to allow the brakes to seat prop-
erly.
Don't let the engine idle longer than 3
minutes at one time.
Don't tow a trailer/caravan during the first 1,200 miles (2,000 km) of opera-tion.
CAUTION
Never use any fuel, whether
diesel, B7 biodiesel or otherwise,that fails to meet the latest petro-leum industry specification.
Never use any fuel additives or treatments that are not recom-
mended or approved by the vehi-cle manufacturer.
VEHICLE HANDLING
INSTRUCTIONS VEHICLE RUN-IN PROCESS
EL UK 1.QXP 1/12/2010 2:51 PM Page 5
Page 126 of 560
451
Features of your vehicle
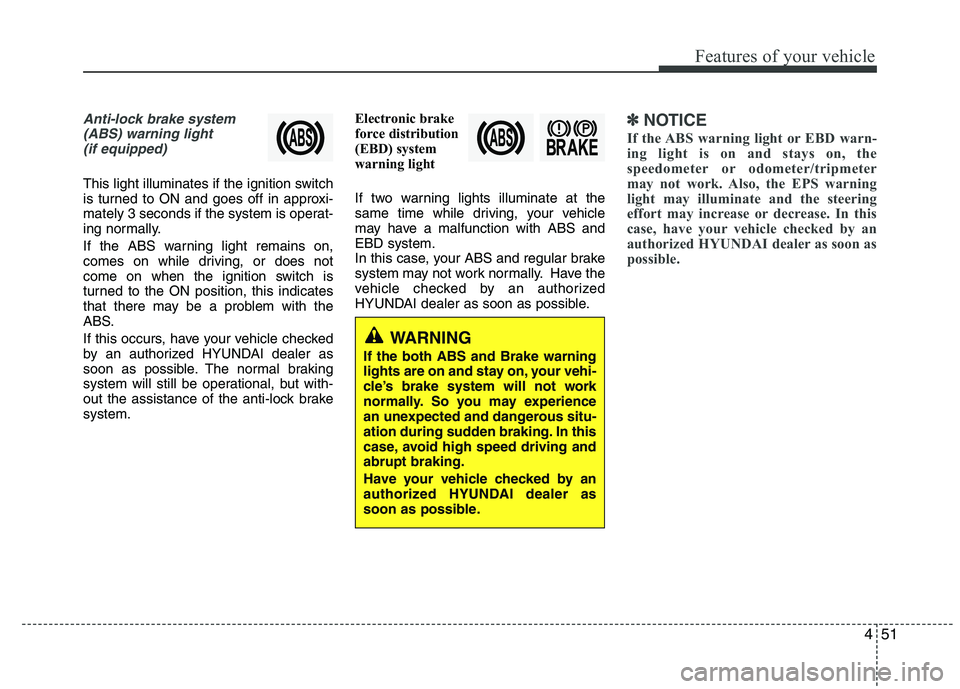
Anti-lock brake system(ABS) warning light (if equipped)
This light illuminates if the ignition switch
is turned to ON and goes off in approxi-
mately 3 seconds if the system is operat-
ing normally.
If the ABS warning light remains on,
comes on while driving, or does not
come on when the ignition switch is
turned to the ON position, this indicates
that there may be a problem with the
ABS.
If this occurs, have your vehicle checked
by an authorized HYUNDAI dealer as
soon as possible. The normal braking
system will still be operational, but with-
out the assistance of the anti-lock brakesystem. Electronic brake
force distribution
(EBD) system
warning light
If two warning lights illuminate at the
same time while driving, your vehicle
may have a malfunction with ABS andEBD system.
In this case, your ABS and regular brake
system may not work normally. Have the
vehicle checked by an authorized
HYUNDAI dealer as soon as possible.
✽✽
NOTICE
If the ABS warning light or EBD warn-
ing light is on and stays on, the
speedometer or odometer/tripmeter
may not work. Also, the EPS warning
light may illuminate and the steering
effort may increase or decrease. In this
case, have your vehicle checked by an
authorized HYUNDAI dealer as soon as
possible.
WARNING
If the both ABS and Brake warning
lights are on and stay on, your vehi-
cle’s brake system will not work
normally. So you may experience
an unexpected and dangerous situ-
ation during sudden braking. In this
case, avoid high speed driving andabrupt braking.
Have your vehicle checked by an
authorized HYUNDAI dealer as
soon as possible.
Page 129 of 560

Features of your vehicle
54
4
Parking brake & brake
fluid warning
Parking brake warning
This light is illuminated when the parking
brake is applied with the ignition switch in
the START or ON position. The warning
light should go off when the parking
brake is released.
Low brake fluid level warning
If the warning light remains on, it may
indicate that the brake fluid level in the
reservoir is low.
If the warning light remains on:
1. Drive carefully to the nearest safe location and stop your vehicle.
2. With the engine stopped, check the brake fluid level immediately and add
fluid as required. Then check all brake
components for fluid leaks.
3. Do not drive the vehicle if leaks are found, the warning light remains on or
the brakes do not operate properly.
Have it towed to any authorized
HYUNDAI dealer for a brake system
inspection and necessary repairs. Your vehicle is equipped with dual-diago-
nal braking systems. This means you still
have braking on two wheels even if one
of the dual systems should fail. With only
one of the dual systems working, more
than normal pedal travel and greaterpedal pressure are required to stop the
car. Also, the car will not stop in as short
a distance with only a portion of the
brake system working. If the brakes fail
while you are driving, shift to a lower gear
for additional engine braking and stop the
car as soon as it is safe to do so.
To check bulb operation, check whether
the parking brake and brake fluid warning
light illuminates when the ignition switchis in the ON position.
WARNING
Driving the vehicle with a warning
light on is dangerous. If the brake
warning light remains on, have the
brakes checked and repaired imme-
diately by an authorized HYUNDAI
dealer.
CAUTION
If the light comes on continuously after adding the engine oil and trav-
eling approximately 50 km, takeyour vehicle to your nearest author-ized HYUNDAI dealer and have the system checked.
Even if this light doesn't come onafter the engine has started, the engine oil should be checked andsupplied periodically.
Page 130 of 560
455
Features of your vehicle
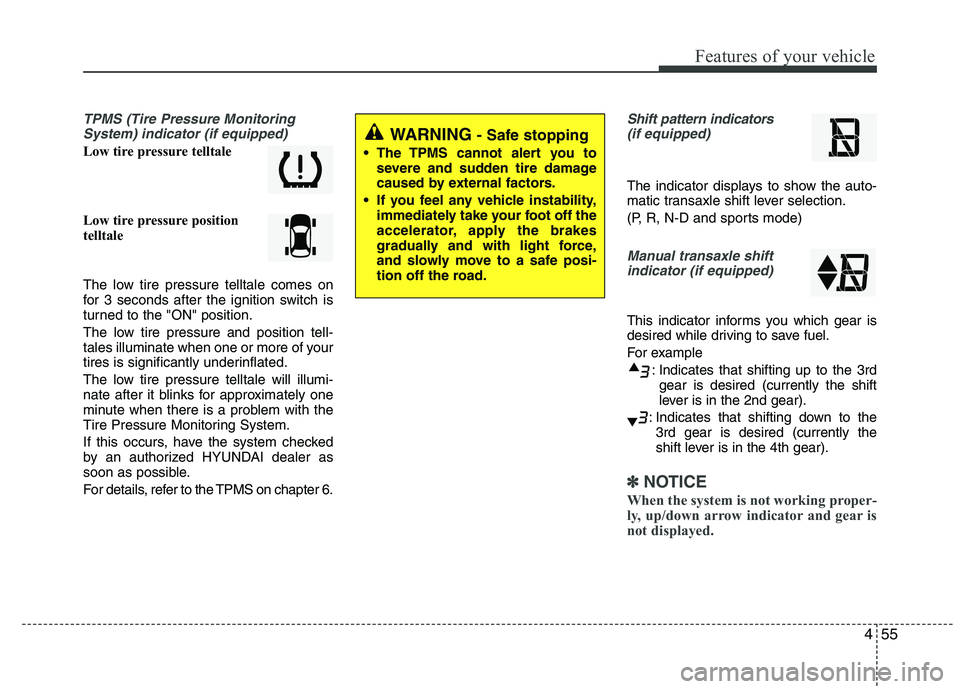
TPMS (Tire Pressure MonitoringSystem) indicator (if equipped)
Low tire pressure telltale
Low tire pressure position
telltale
The low tire pressure telltale comes on
for 3 seconds after the ignition switch is
turned to the "ON" position.
The low tire pressure and position tell-
tales illuminate when one or more of your
tires is significantly underinflated.
The low tire pressure telltale will illumi-
nate after it blinks for approximately one
minute when there is a problem with the
Tire Pressure Monitoring System.
If this occurs, have the system checked
by an authorized HYUNDAI dealer as
soon as possible.
For details, refer to the TPMS on chapter 6.
Shift pattern indicators(if equipped)
The indicator displays to show the auto-
matic transaxle shift lever selection.
(P, R, N-D and sports mode)
Manual transaxle shift indicator (if equipped)
This indicator informs you which gear is
desired while driving to save fuel.
For example
: Indicates that shifting up to the 3rdgear is desired (currently the shift
lever is in the 2nd gear).
: Indicates that shifting down to the 3rd gear is desired (currently the
shift lever is in the 4th gear).
✽✽
NOTICE
When the system is not working proper-
ly, up/down arrow indicator and gear is
not displayed.
WARNING - Safe stopping
The TPMS cannot alert you to severe and sudden tire damage
caused by external factors.
If you feel any vehicle instability, immediately take your foot off the
accelerator, apply the brakes
gradually and with light force,
and slowly move to a safe posi-
tion off the road.
Page 143 of 560
Features of your vehicle
68
4
The sensing distance while the rear
parking assist system is in operation is
approximately 120 cm (47 in.).
When more than two objects are sensed at the same time, the closest
one will be recognized first.
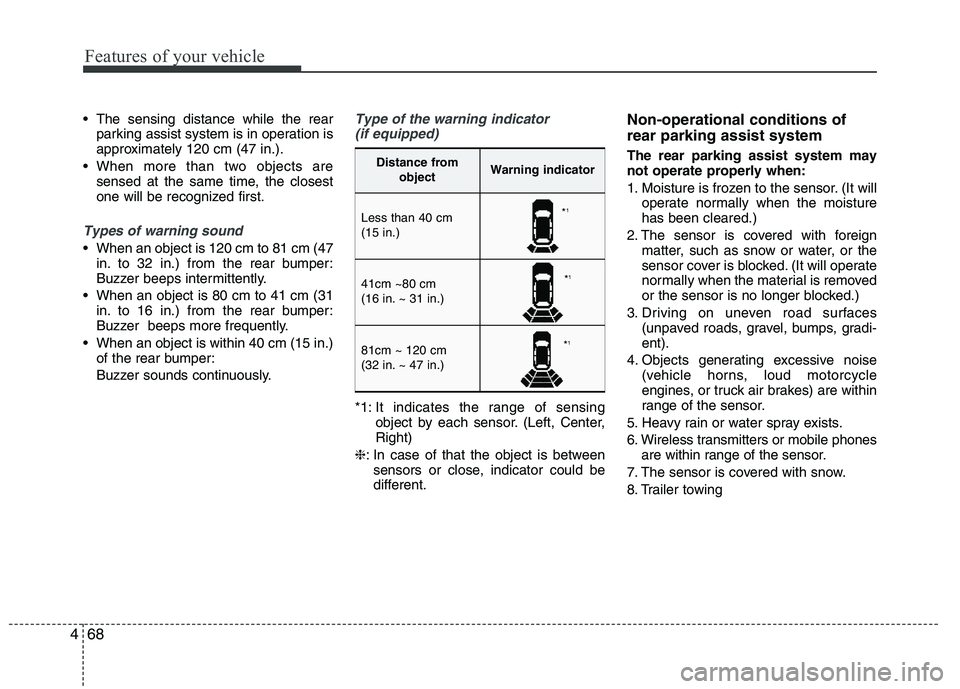
Types of warning sound
When an object is 120 cm to 81 cm (47in. to 32 in.) from the rear bumper:
Buzzer beeps intermittently.
When an object is 80 cm to 41 cm (31 in. to 16 in.) from the rear bumper:
Buzzer beeps more frequently.
When an object is within 40 cm (15 in.) of the rear bumper:
Buzzer sounds continuously.
Type of the warning indicator
(if equipped)
*1: It indicates the range of sensing object by each sensor. (Left, Center, Right)
❈ : In case of that the object is between
sensors or close, indicator could be
different. Non-operational conditions of rear parking assist system The rear parking assist system may not operate properly when:
1. Moisture is frozen to the sensor. (It will
operate normally when the moisture has been cleared.)
2. The sensor is covered with foreign matter, such as snow or water, or the
sensor cover is blocked. (It will operate
normally when the material is removed
or the sensor is no longer blocked.)
3. Driving on uneven road surfaces (unpaved roads, gravel, bumps, gradi-ent).
4. Objects generating excessive noise (vehicle horns, loud motorcycle
engines, or truck air brakes) are within
range of the sensor.
5. Heavy rain or water spray exists.
6. Wireless transmitters or mobile phones are within range of the sensor.
7. The sensor is covered with snow.
8. Trailer towing
Distance from objectWarning indicator
Less than 40 cm (15 in.)
41cm ~80 cm
(16 in. ~ 31 in.)
81cm ~ 120 cm
(32 in. ~ 47 in.)
*1
* 1
* 1
Page 241 of 560
Driving your vehicle
16
5
Downshifting
When you must slow down in heavy traf-
fic or whilst driving up steep hills, down-
shift before the engine starts to labour.
Downshifting reduces the chance of
stalling and gives better acceleration
when you again need to increase your
speed. When the vehicle is travelling
down steep hills, downshifting helps
maintain safe speed and prolongs brake
life. Good driving practices
Never take the vehicle out of gear and
coast down a hill. This is extremely
hazardous. Always leave the vehicle in
gear.
Don't "ride" the brakes. This can cause them to overheat and malfunction.
Instead, when you are driving down a
long hill, slow down and shift to a lower
gear. When you do this, engine braking
will help slow down the vehicle.
Slow down before shifting to a lower gear. This will help avoid over-revving
the engine, which can cause damage.
Slow down when you encounter cross winds. This gives you much better con-
trol of your vehicle.
Be sure the vehicle is completely stopped before you attempt to shift into
reverse. The transaxle can be dam-
aged if you do not. To shift into reverse,
depress the clutch, move the shift lever
to neutral, wait three seconds, then
shift to the reverse position.
Exercise extreme caution when driving on a slippery surface. Be especially
careful when braking, accelerating or
shifting gears. On a slippery surface,
an abrupt change in vehicle speed can
cause the drive wheels to lose traction
and the vehicle to go out of control.WARNING
Always buckle-up! In a collision, an unbelted occupant is signifi-
cantly more likely to be seriously
injured or killed than a properlybelted occupant.
Avoid high speeds when corner- ing or turning.
Do not make quick steering wheel movements, such as sharp
lane changes or fast, sharp turns.
The risk of rollover is greatly increased if you lose control of
your vehicle at highway speeds.
Loss of control often occurs if two or more wheels drop off the
roadway and the driver over-
steers to re-enter the roadway.
In the event your vehicle leaves the roadway, do not steer sharply.
Instead, slow down before pulling
back into the travel lanes.
Never exceed posted speed lim- its.
EL UK 5.QXP 1/25/2010 9:55 AM Page 16
Page 243 of 560
Driving your vehicle
18
5
Automatic transaxle operation
The highly efficient automatic transaxle
has 6 forward speeds and one reverse
speed. The individual speeds are select-
ed automatically, depending on the posi-
tion of the shift lever.
✽✽
NOTICE
The first few shifts on a new vehicle, if the battery has been disconnected, may
be somewhat abrupt. This is a normalcondition, and the shifting sequence will
adjust after shifts are cycled a few times
by the TCM (Transaxle Control
Module) or PCM (Powertrain ControlModule).
For smooth operation, depress the brake pedal when shifting from N (Neutral) to a forward or reverse gear.
Transaxle ranges
The indicator lights in the instrument
cluster displays the shift lever position
when the ignition switch is in the ONposition.
P (Park)
Always come to a complete stop before
shifting into P (Park). This position locks
the transaxle and prevents the frontwheels from rotating.
WARNING - Automatic
transaxle
Always check the surrounding areas near your vehicle for peo-
ple, especially children, before
shifting a vehicle into D (Drive) or
R (Reverse).
Before leaving the driver’s seat, always make sure the shift lever
is in the P (Park) position; then
set the parking brake fully and
shut the engine off. Unexpected
and sudden vehicle movementcan occur if these precautions
are not followed in the order iden-tified.
CAUTION
To avoid damage to your
transaxle, do not accelerate the
engine in R (Reverse) or any for- ward gear position with thebrakes on.
When stopped on an upgrade, do not hold the vehicle stationarywith engine power. Use the serv-ice brake or the parking brake.
Do not shift from N (Neutral) or P (Park) into D (Drive), or R
(Reverse) when the engine is above idle speed.
EL UK 5.QXP 1/25/2010 9:55 AM Page 18
Page 244 of 560
519
Driving your vehicle
R (Reverse)
Use this position to drive the vehicle
backward.N (Neutral)
The wheels and transaxle are not
engaged. The vehicle will roll freely even
on the slightest incline unless the parking
brake or service brakes are applied. D (Drive)
This is the normal forward driving posi-
tion. The transaxle will automatically shift
through a 6-gear sequence, providing the
best fuel economy and power.
For extra power when passing another
vehicle or climbing grades, depress the
accelerator fully, at which time the
transaxle will automatically downshift to
the next lower gear.
✽✽
NOTICE
Always come to a complete stop before shifting into D (Drive).
WARNING
Shifting into P (Park) whilst the vehicle is in motion will cause the
drive wheels to lock which will
cause you to lose control of the
vehicle.
Do not use the P (Park) position in place of the parking brake.
Always make sure the shift lever
is latched in the P (Park) position
and set the parking brake fully.
Never leave a child unattended in a vehicle.
CAUTION
The transaxle may be damaged if
you shift into P (Park) whilst the
vehicle is in motion.
CAUTION
Always come to a complete stopbefore shifting into or out of R
(Reverse); you may damage the transaxle if you shift into R(Reverse) whilst the vehicle is in motion, except as explained in
“Rocking the vehicle”, in this manu- al.
EL UK 5.QXP 1/25/2010 9:55 AM Page 19