2011 HYUNDAI IX35 set clock
[x] Cancel search: set clockPage 188 of 560
4113
Features of your vehicle
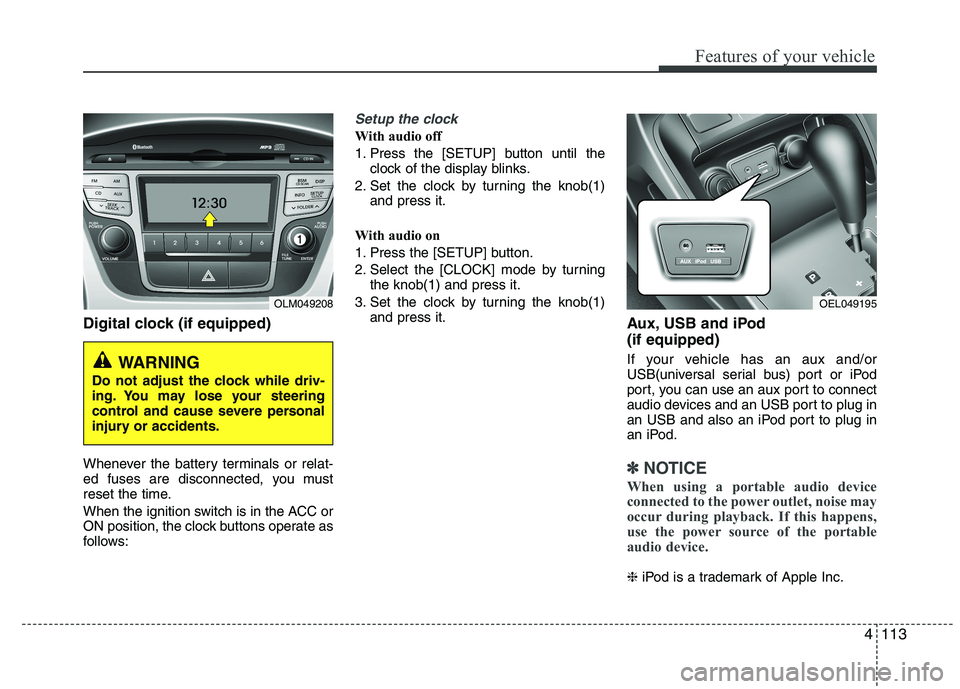
Digital clock (if equipped)
Whenever the battery terminals or relat-
ed fuses are disconnected, you must
reset the time.
When the ignition switch is in the ACC or
ON position, the clock buttons operate as
follows:
Setup the clock
With audio off
1. Press the [SETUP] button until theclock of the display blinks.
2. Set the clock by turning the knob(1) and press it.
With audio on
1. Press the [SETUP] button.
2. Select the [CLOCK] mode by turning the knob(1) and press it.
3. Set the clock by turning the knob(1) and press it. Aux, USB and iPod (if equipped)
If your vehicle has an aux and/or
USB(universal serial bus) port or iPod
port, you can use an aux port to connect
audio devices and an USB port to plug in
an USB and also an iPod port to plug in
an iPod.
✽✽NOTICE
When using a portable audio device
connected to the power outlet, noise may
occur during playback. If this happens,
use the power source of the portable
audio device.
❈ iPod is a trademark of Apple Inc.
OLM049208
WARNING
Do not adjust the clock while driv-
ing. You may lose your steering
control and cause severe personal
injury or accidents.
OEL049195
Page 200 of 560
4125
Features of your vehicle
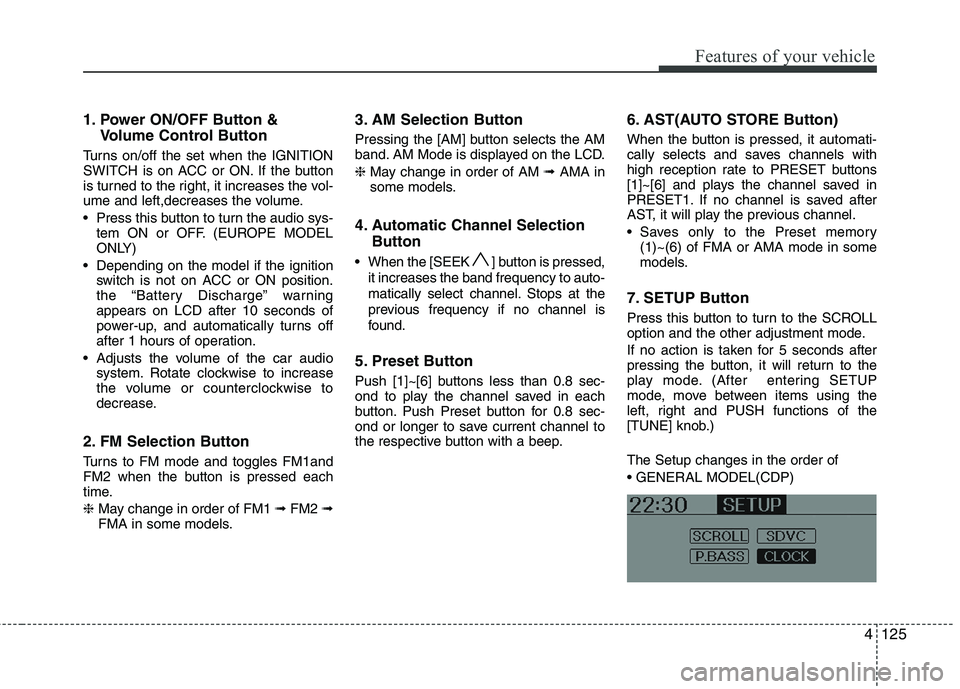
1. Power ON/OFF Button &Volume Control Button
Turns on/off the set when the IGNITION
SWITCH is on ACC or ON. If the button
is turned to the right, it increases the vol-
ume and left,decreases the volume.
Press this button to turn the audio sys- tem ON or OFF. (EUROPE MODEL
ONLY)
Depending on the model if the ignition switch is not on ACC or ON position.
the “Battery Discharge” warningappears on LCD after 10 seconds of
power-up, and automatically turns off
after 1 hours of operation.
Adjusts the volume of the car audio system. Rotate clockwise to increase
the volume or counterclockwise to
decrease.
2. FM Selection Button
Turns to FM mode and toggles FM1and
FM2 when the button is pressed each
time. ❈ May change in order of FM1 ➟FM2 ➟
FMA in some models. 3. AM Selection Button
Pressing the [AM] button selects the AM
band. AM Mode is displayed on the LCD. ❈
May change in order of AM ➟AMA in
some models.
4. Automatic Channel Selection Button
When the [SEEK ] button is pressed, it increases the band frequency to auto-
matically select channel. Stops at the
previous frequency if no channel is
found.
5. Preset Button
Push [1]~[6] buttons less than 0.8 sec-
ond to play the channel saved in each
button. Push Preset button for 0.8 sec-
ond or longer to save current channel to
the respective button with a beep. 6. AST(AUTO STORE Button)
When the button is pressed, it automati-
cally selects and saves channels with
high reception rate to PRESET buttons
[1]~[6] and plays the channel saved in
PRESET1. If no channel is saved after
AST, it will play the previous channel.
Saves only to the Preset memory
(1)~(6) of FMA or AMA mode in some
models.
7. SETUP Button
Press this button to turn to the SCROLL
option and the other adjustment mode.
If no action is taken for 5 seconds after
pressing the button, it will return to the
play mode. (After entering SETUP
mode, move between items using the
left, right and PUSH functions of the
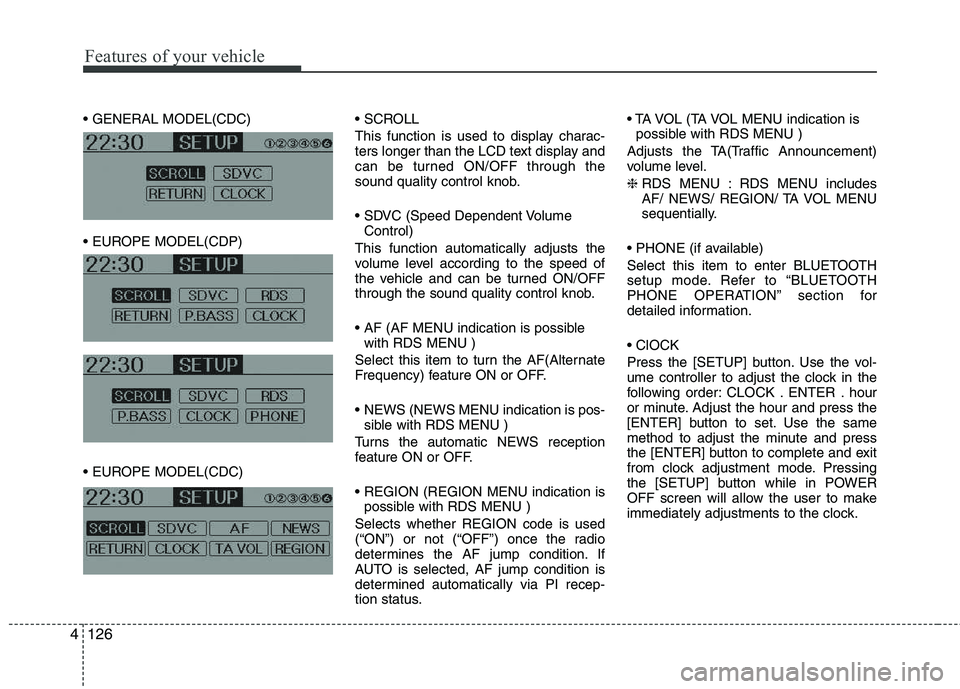
[TUNE] knob.) The Setup changes in the order of
Page 201 of 560
Features of your vehicle
126
4
This function is used to display charac-
ters longer than the LCD text display and
can be turned ON/OFF through the
sound quality control knob.
Control)
This function automatically adjusts the
volume level according to the speed of
the vehicle and can be turned ON/OFF
through the sound quality control knob.
with RDS MENU )
Select this item to turn the AF(Alternate
Frequency) feature ON or OFF.
NEWS (NEWS MENU indication is pos- sible with RDS MENU )
Turns the automatic NEWS reception
feature ON or OFF.
possible with RDS MENU )
Selects whether REGION code is used
(“ON”) or not (“OFF”) once the radio
determines the AF jump condition. If
AUTO is selected, AF jump condition is
determined automatically via PI recep-
tion status.
possible with RDS MENU )
Adjusts the TA(Traffic Announcement)
volume level. ❈ RDS MENU : RDS MENU includes
AF/ NEWS/ REGION/ TA VOL MENU
sequentially.
Select this item to enter BLUETOOTH
setup mode. Refer to “BLUETOOTH
PHONE OPERATION” section for
detailed information.
Press the [SETUP] button. Use the vol-
ume controller to adjust the clock in the
following order: CLOCK . ENTER . hour
or minute. Adjust the hour and press the
[ENTER] button to set. Use the same
method to adjust the minute and press
the [ENTER] button to complete and exit
from clock adjustment mode. Pressing
the [SETUP] button while in POWER
OFF screen will allow the user to make
immediately adjustments to the clock.
Page 214 of 560
4139
Features of your vehicle
In case the iPod exclusive cable is con-
nected to the multiple terminal inside the
console on the right hand side of the dri-
ver's seat. When the iPod is connected,
the 'iPod' icon will be displayed on the top
left corner of the display screen.
1. INFO Selection Button
Displays the information of the file cur-
rently played in the order of Title ➟Artist
➟ Album... (Displays no information if the
file has no song information.)
2. Track Moving Button
Press the [ SEEK(TRACK)] button for less than 0.8 second to play from the beginning of the song currently
played. Press the button for less than0.8 second and press it again within 1
seconds to move and play the previous
track. Press the button for 0.8 second
or longer to play the song in reverse
direction in fast speed.
Press the [SEEK(TRACK) ] button for less than 0.8 second to move to the
next track. Press the button for 0.8 sec-
ond or longer to play the song in for-
ward direction in fast speed. 3. RANDOM Playback Button
Press the button for less than 0.8 second
to activate or deactivate the random play-
back of the songs within the current cat-
egory. Press the button for longer than
0.8 second to randomly play all songs in
the entire album of the iPod.
Press the button once again to cancel
the mode.
4. REPEAT Button
Repeats the song currently played.
5. iPod(AUX) Selection Button
If iPod is connected, it switches to the
iPod mode from the CD mode to play the
song files stored in the iPod. If no CD and
auxiliary device is not connected, it dis-
plays "NO Media" for 3 seconds and
returns to the previous mode.
6. PRESET 6(MENU) Button
MENU(preset6) you will be able to
search through the lower category of the
selected category. The order of iPod's
category is SONG, ALBUMES,
ARTISTS, GENRES, and iPod. 7. Search/ENTER Button
When you turn the button clockwise, it
will display the songs(category) next to
the song currently played(category in the
same level).
Also, when you turn the button counter-
clockwise, it will display the songs(cate-
gory) before the song currently played
(category in the same level).
If you want to listen to the song displayed
in the song category, press the button,then it will skip to the selected song and
play.
Page 307 of 560
615
What to do in an emergency
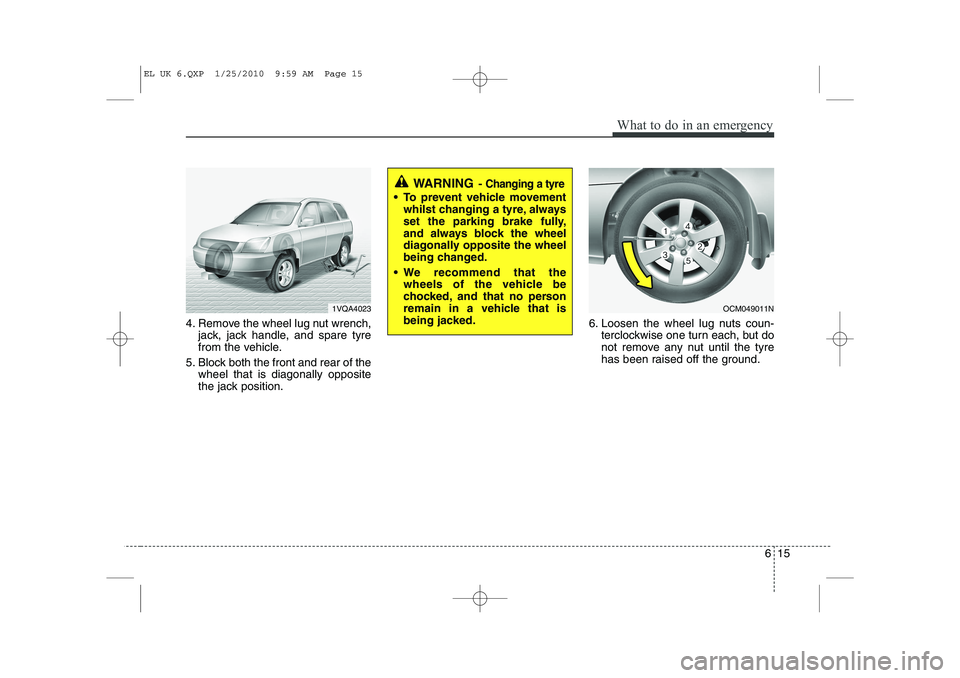
4. Remove the wheel lug nut wrench,jack, jack handle, and spare tyre
from the vehicle.
5. Block both the front and rear of the wheel that is diagonally opposite
the jack position. 6. Loosen the wheel lug nuts coun-
terclockwise one turn each, but do
not remove any nut until the tyre
has been raised off the ground.
WARNING - Changing a tyre
To prevent vehicle movement
whilst changing a tyre, always
set the parking brake fully,
and always block the wheel
diagonally opposite the wheel
being changed.
We recommend that the wheels of the vehicle be
chocked, and that no person
remain in a vehicle that is
being jacked.
1VQA4023OCM049011N
EL UK 6.QXP 1/25/2010 9:59 AM Page 15
Page 317 of 560
625
What to do in an emergency
When towing your vehicle in an emer- gency without wheel dollies :
1. Set the ignition switch in the ACC posi-tion.
2. Place the transaxle shift lever in N (Neutral).
3. Release the parking brake.
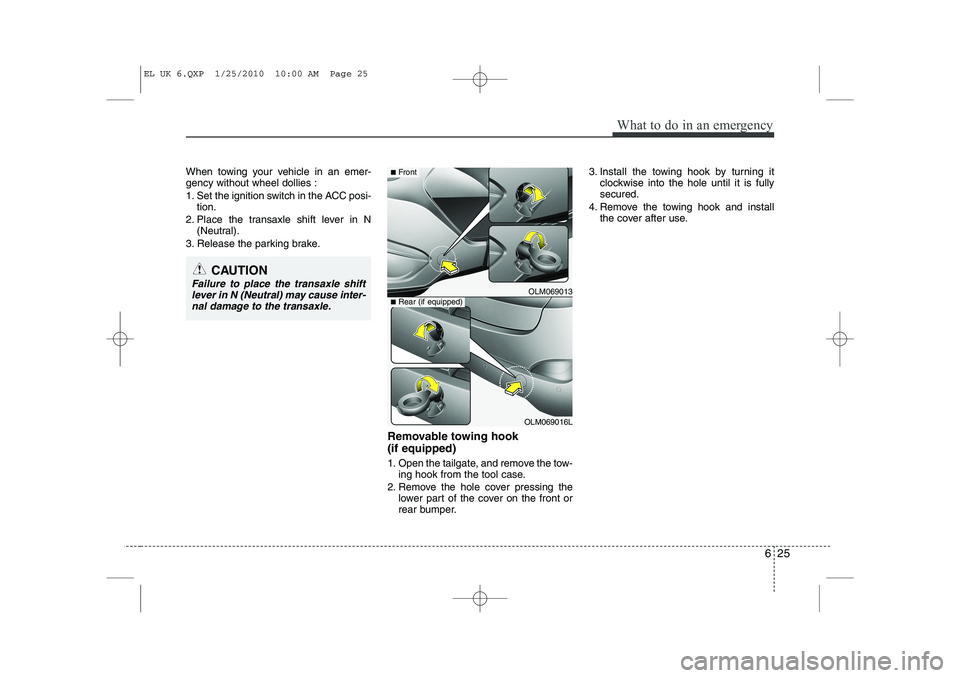
Removable towing hook (if equipped)
1. Open the tailgate, and remove the tow-ing hook from the tool case.
2. Remove the hole cover pressing the lower part of the cover on the front or
rear bumper. 3. Install the towing hook by turning it
clockwise into the hole until it is fullysecured.
4. Remove the towing hook and install the cover after use.
CAUTION
Failure to place the transaxle shift
lever in N (Neutral) may cause inter-
nal damage to the transaxle.OLM069013
OLM069016L
■ Front
■Rear (if equipped)
EL UK 6.QXP 1/25/2010 10:00 AM Page 25
Page 348 of 560
Maintenance
28
7
Reset items
Items should be reset after the battery
has been discharged or the battery hasbeen disconnected.
Auto up/down window (See section 4)
Sunroof (See section 4)
Trip computer (See section 4)
Climate control system
(See section 4)
Clock (See section 4)
Audio (See section 4)(Continued)
Disconnect the battery charger in the following order.
1. Turn off the battery charger
main switch.
2. Unhook the negative clamp from the negative battery ter- minal.
3. Unhook the positive clamp from the positive battery termi-nal.
Before performing maintenance or recharging the battery, turn offall accessories and stop the
engine.
The negative battery cable must be removed first and installed
last when the battery is discon-nected.
EL UK 7.QXP 1/25/2010 10:03 AM Page 28
Page 523 of 560
4 111
Features of your vehicle
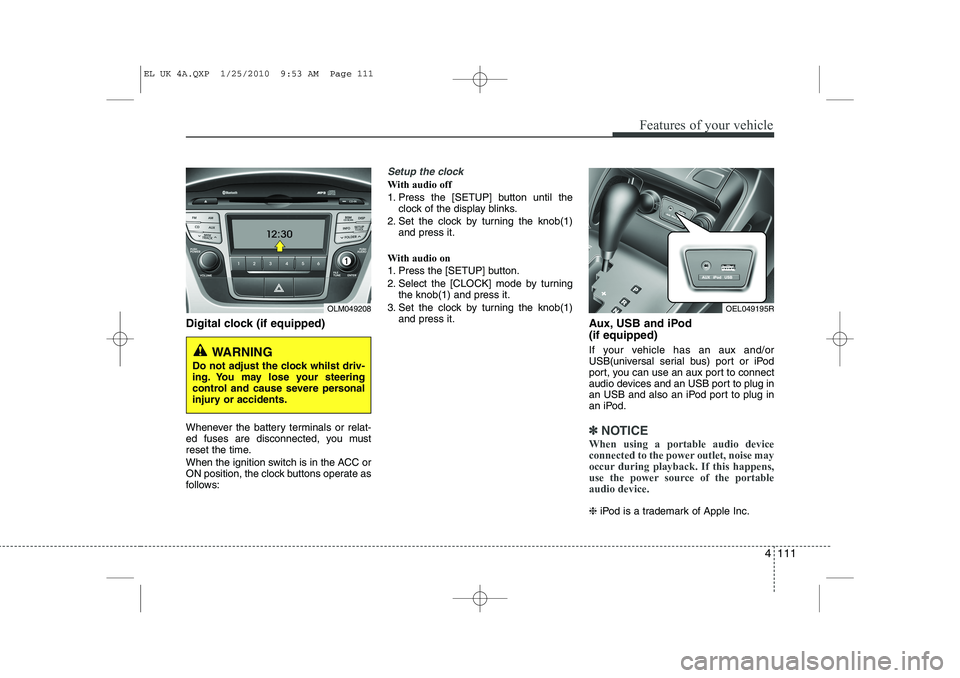
Digital clock (if equipped)
Whenever the battery terminals or relat-
ed fuses are disconnected, you must
reset the time.
When the ignition switch is in the ACC or
ON position, the clock buttons operate as
follows:
Setup the clock
With audio off
1. Press the [SETUP] button until theclock of the display blinks.
2. Set the clock by turning the knob(1) and press it.
With audio on
1. Press the [SETUP] button.
2. Select the [CLOCK] mode by turning the knob(1) and press it.
3. Set the clock by turning the knob(1) and press it. Aux, USB and iPod (if equipped)
If your vehicle has an aux and/or
USB(universal serial bus) port or iPod
port, you can use an aux port to connect
audio devices and an USB port to plug in
an USB and also an iPod port to plug in
an iPod.
✽✽NOTICE
When using a portable audio device
connected to the power outlet, noise may
occur during playback. If this happens,
use the power source of the portableaudio device.
❈ iPod is a trademark of Apple Inc.
OLM049208
WARNING
Do not adjust the clock whilst driv-
ing. You may lose your steering
control and cause severe personal
injury or accidents.
OEL049195R
EL UK 4A.QXP 1/25/2010 9:53 AM Page 111