Page 17 of 420

Your vehicle at a glance
4
2
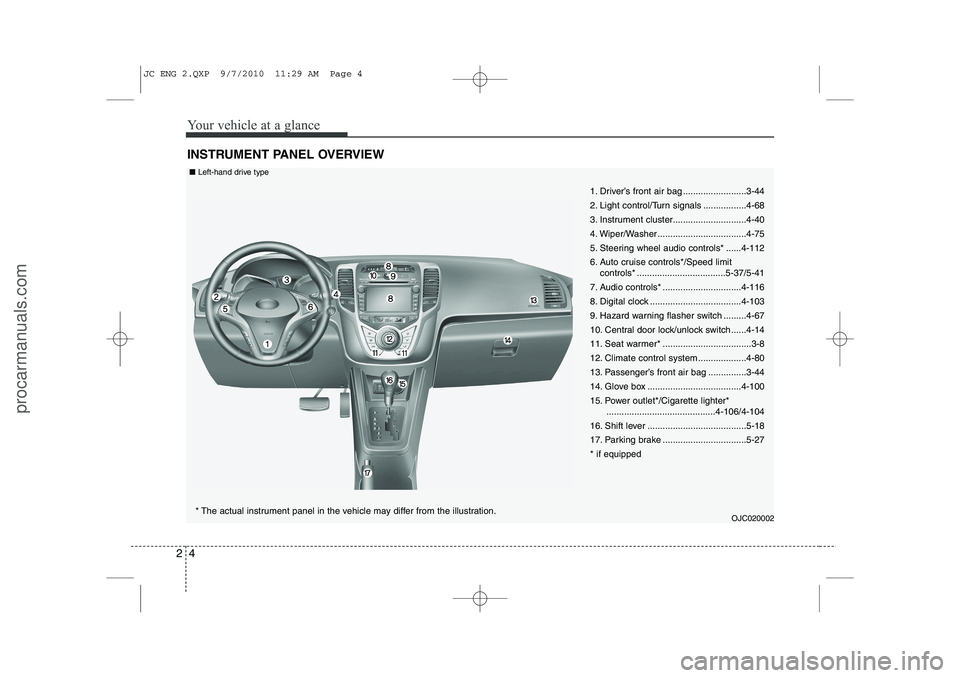
INSTRUMENT PANEL OVERVIEW
1. Driver’s front air bag .........................3-44
2. Light control/Turn signals .................4-68
3. Instrument cluster.............................4-40
4. Wiper/Washer ...................................4-75
5. Steering wheel audio controls* ......4-112
6. Auto cruise controls*/Speed limit
controls* ...................................5-37/5-41
7. Audio controls* ...............................4-116
8. Digital clock ....................................4-103
9. Hazard warning flasher switch .........4-67
10. Central door lock/unlock switch......4-14
11. Seat warmer* ...................................3-8
12. Climate control system ...................4-80
13. Passenger’s front air bag ...............3-44
14. Glove box .....................................4-100
15. Power outlet*/Cigarette lighter* ...........................................4-106/4-104
16. Shift lever .......................................5-18
17. Parking brake .................................5-27* if equipped
OJC020002
* The actual instrument panel in the vehicle may differ from the illustration.
■
Left-hand drive type
JC ENG 2.QXP 9/7/2010 11:29 AM Page 4
procarmanuals.com
Page 18 of 420

25
Your vehicle at a glance
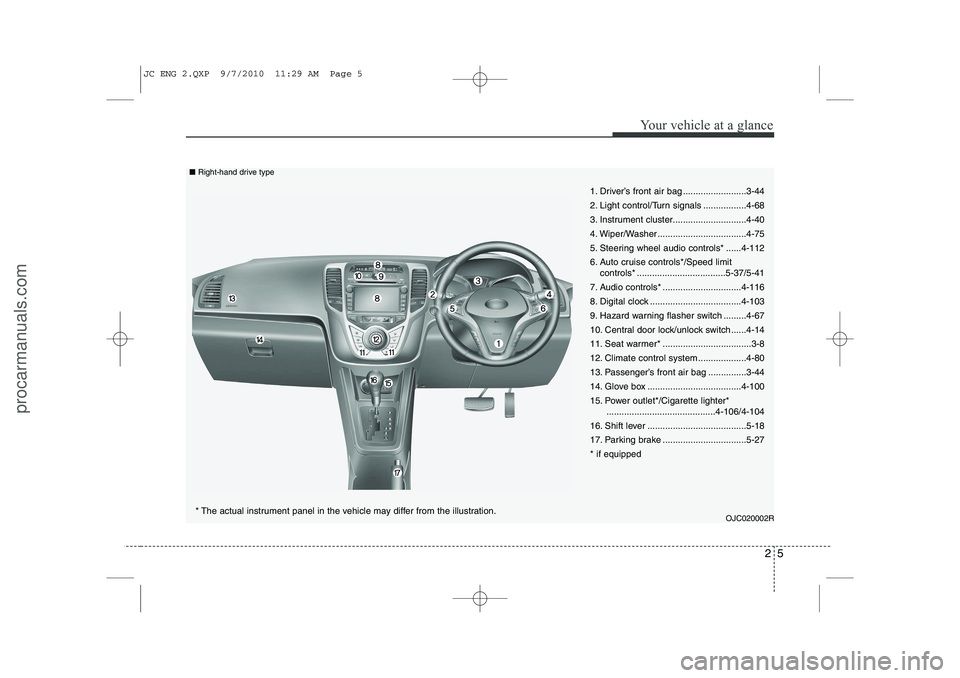
1. Driver’s front air bag .........................3-44
2. Light control/Turn signals .................4-68
3. Instrument cluster.............................4-40
4. Wiper/Washer ...................................4-75
5. Steering wheel audio controls* ......4-112
6. Auto cruise controls*/Speed limitcontrols* ...................................5-37/5-41
7. Audio controls* ...............................4-116
8. Digital clock ....................................4-103
9. Hazard warning flasher switch .........4-67
10. Central door lock/unlock switch......4-14
11. Seat warmer* ...................................3-8
12. Climate control system ...................4-80
13. Passenger’s front air bag ...............3-44
14. Glove box .....................................4-100
15. Power outlet*/Cigarette lighter* ...........................................4-106/4-104
16. Shift lever .......................................5-18
17. Parking brake .................................5-27* if equipped
OJC020002R
* The actual instrument panel in the vehicle may differ from the illustration.
■
Right-hand drive type
JC ENG 2.QXP 9/7/2010 11:29 AM Page 5
procarmanuals.com
Page 101 of 420

423
Features of your vehicle
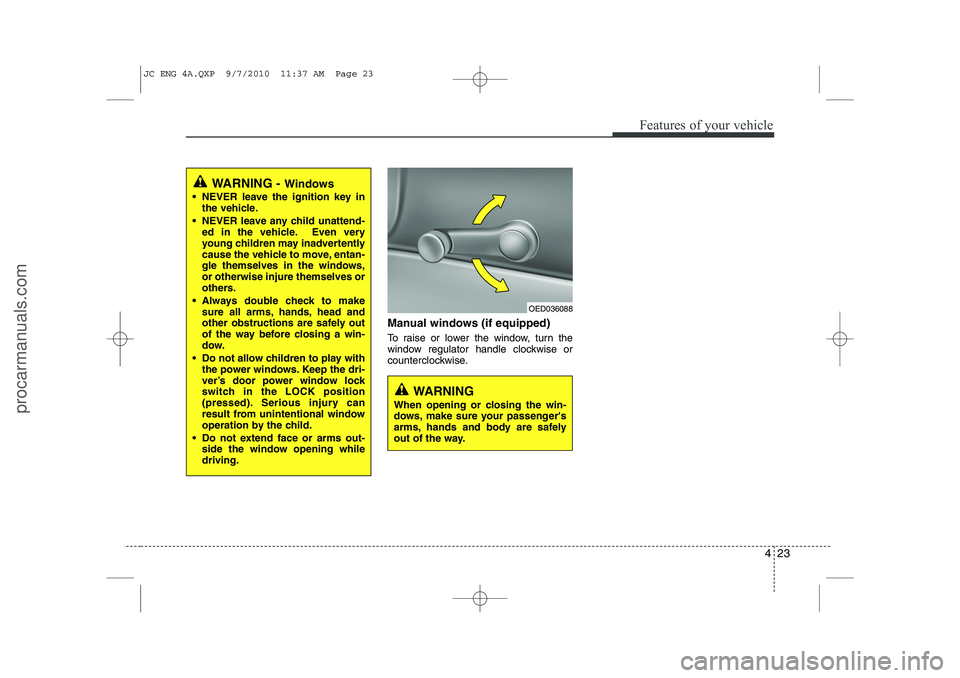
Manual windows (if equipped)
To raise or lower the window, turn the
window regulator handle clockwise or
counterclockwise.
WARNING - Windows
NEVER leave the ignition key in the vehicle.
NEVER leave any child unattend- ed in the vehicle. Even very
young children may inadvertently
cause the vehicle to move, entan-
gle themselves in the windows,or otherwise injure themselves or
others.
Always double check to make sure all arms, hands, head and
other obstructions are safely out
of the way before closing a win-
dow.
Do not allow children to play with the power windows. Keep the dri-
ver’s door power window lock
switch in the LOCK position
(pressed). Serious injury can
result from unintentional window
operation by the child.
Do not extend face or arms out- side the window opening whiledriving.
OED036088
WARNING
When opening or closing the win-
dows, make sure your passenger's
arms, hands and body are safely
out of the way.
JC ENG 4A.QXP 9/7/2010 11:37 AM Page 23
procarmanuals.com
Page 104 of 420

Features of your vehicle
26
4
Opening the fuel filler lid
The fuel filler lid must be opened from
inside the vehicle by pulling up the fuel
filler lid opener.
✽✽
NOTICE
If the fuel filler lid does not open
because ice has formed around it, tap
lightly or push on the lid to break the ice
and release the lid. Do not pry on the lid.
If necessary, spray around the lid with
an approved de-icer fluid (do not use
radiator anti-freeze) or move the vehicleto a warm place and allow the ice tomelt.
1. Stop the engine.
2. To open the fuel filler lid, pull the fuel filler lid opener up.
3. Pull open the fuel filler lid (1).
4. To remove the cap (2), turn the fuel filler cap counterclockwise.
5. Refuel as needed. Closing the fuel filler lid
1. To install the cap, turn it clockwise until
it “clicks” once. This indicates that the cap is securely tightened.
2. Close the fuel filler lid and push it light- ly and make sure that it is securelyclosed.
FUEL FILLER LID
WARNING
- Refueling
If pressurized fuel sprays out, it can cover your clothes or skin
and thus subject you to the risk
of fire and burns. Always remove
the fuel cap carefully and slowly.
If the cap is venting fuel or if you
hear a hissing sound, wait until
the condition stops before com-
pletely removing the cap.
Do not "top off" after the nozzle automatically shuts off whenrefueling.
Always check that the fuel cap is installed securely to prevent fuel
spillage in the event of an acci-dent.
OYN040141OYN049021
JC ENG 4A.QXP 9/7/2010 11:37 AM Page 26
procarmanuals.com
Page 181 of 420
4 103
Features of your vehicle
INTERIOR FEATURES
LCD monitor (Clock and outside temperature) (if equipped)
The monitor displays the clock and out-
side temperature.
■■Clock
Whenever the battery terminals or relat-
ed fuses are disconnected, you must
reset the time.
When the ignition switch is in the ACC or
ON position, the clock buttons operate as
follows:
Page 189 of 420
4 111
Features of your vehicle
✽✽NOTICE
If you install an after market HID head
lamp, your vehicle’s audio and electron-ic device may malfunction.
Antenna
Roof antenna
Your vehicle uses a roof antenna to
receive both AM and FM signals. This
antenna can be removed. To remove the
antenna, turn it counter clockwise, To
install the antenna, turn it clockwise.
AUDIO SYSTEM
OYN049126
CAUTION
• Before entering a place with a low
height clearance or a car wash,
remove the antenna by rotating it counter-clockwise. If not, theantenna may be damaged.
When reinstalling your antenna, it is important that it is fully tight-ened to ensure proper reception.
When cargo is loaded on the roof rack, do not place the cargo nearthe antenna pole to ensure proper
reception.
JC ENG 4B AUDIO.QXP 9/7/2010 11:47 AM Page 111
procarmanuals.com
Page 195 of 420

4 117
Features of your vehicle
Using RADIO, SETUP, VOLUME
and AUDIO CONTROL
1. Button
Turns on FM mode. Each press of thebutton will change the band in
the order of FM1 ➟FM2 ➟FMA ➟FM1...
2. Button
Turns on AM mode. Each press of the button will change the band in
the order of AM ➟AMA ➟AM...
3. Button
TA (Traffic announcement) Channels in
FM, CD, AUX mode, turns on/off the
reception of TA channels of RDS. 4. Button
When the is pressed, it will
automatically tune to the next lower station.
When the is pressed, it will automatically tune to the next higher station.
5. Button & Knob
Turns the audio system on/off when the ignition switch is on ACC or ON.
If the knob is turned clockwise/counter- clockwise, the volume will increase
/decrease.
Depending on the model if the ignition switch is not on ACC or ON position.
the “Battery Discharge” warningappears on LCD after 10 seconds of
power-up, and automatically turns off
after 1 hours of operation. 6. PRESET Buttons
Press ~ buttons
less
than 0.8 seconds to play the station
saved in each button.
Press ~ buttons more
than 0.8 seconds or longer to save the
current station to the respective button
with a beep.
7. Button
Turn the LCD Display&Backlight ON/OFF
when button press.
DARK
DARK
61
61
VOLPOWER
SEEK
TRACK
SEEK
TRACKSEEK
TA
AM
AM
FM
FM
JC_PA710JCE_AUDIO
JC_PA710JCE_AUDIO
JC ENG 4B AUDIO.QXP 9/7/2010 11:47 AM Page 117
procarmanuals.com
Page 198 of 420

Features of your vehicle
120
4
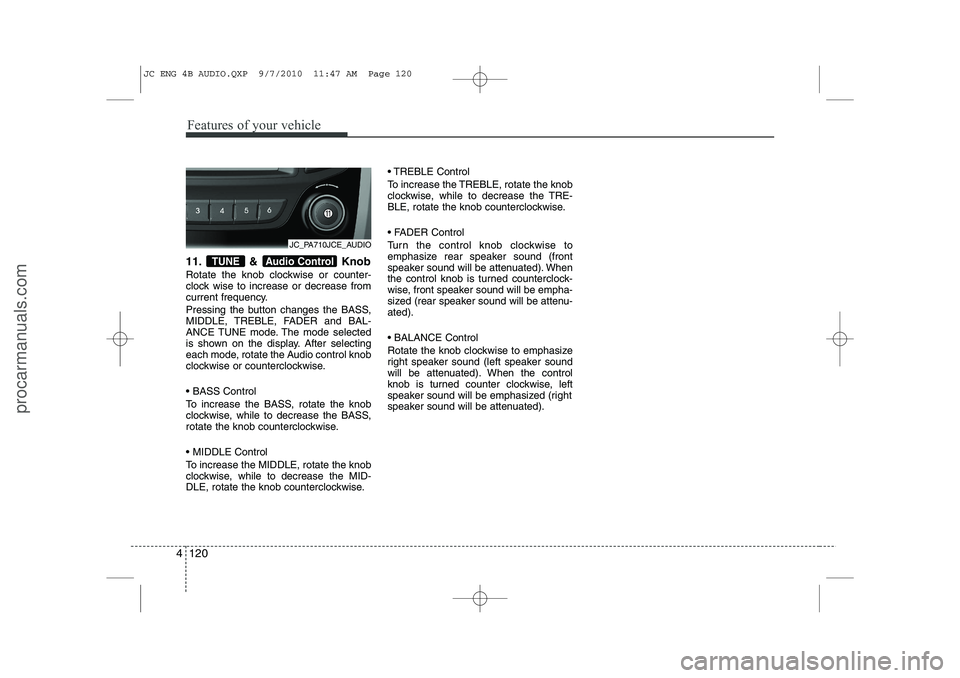
11. & Knob
Rotate the knob clockwise or counter-
clock wise to increase or decrease from
current frequency.
Pressing the button changes the BASS,
MIDDLE, TREBLE, FADER and BAL-
ANCE TUNE mode. The mode selected
is shown on the display. After selecting
each mode, rotate the Audio control knob
clockwise or counterclockwise. BASS Control
To increase the BASS, rotate the knob
clockwise, while to decrease the BASS,
rotate the knob counterclockwise. MIDDLE Control
To increase the MIDDLE, rotate the knob
clockwise, while to decrease the MID-
DLE, rotate the knob counterclockwise. TREBLE Control
To increase the TREBLE, rotate the knob
clockwise, while to decrease the TRE-
BLE, rotate the knob counterclockwise.
FADER Control
Turn the control knob clockwise to
emphasize rear speaker sound (front
speaker sound will be attenuated). When
the control knob is turned counterclock-
wise, front speaker sound will be empha-
sized (rear speaker sound will be attenu-ated). BALANCE Control
Rotate the knob clockwise to emphasize
right speaker sound (left speaker sound
will be attenuated). When the control
knob is turned counter clockwise, left
speaker sound will be emphasized (right
speaker sound will be attenuated).Audio ControlTUNE
JC_PA710JCE_AUDIO
JC ENG 4B AUDIO.QXP 9/7/2010 11:47 AM Page 120
procarmanuals.com