Page 12 of 211
YOUR VEHICLE AT A GLANCE
F12B255A01HR-GAT INDICATOR SYMBOLS ON THE INSTRUMENT CLUSTER * More detailed explanations of these items will be found begining on page 1-26.
Turn Signal Indicator Lights High Beam Indicator Light
Low Oil Pressure Warning Light
Door Ajar Warning Light
Parking Brake/Low Brake Fluid Level Warning Light
Charging System Warning Light Seat Belt Warning Light (If Installed) Fuel Filter Warning Light
Low Fuel Level Warning Light Diesel Pre-heat Indicator Light
Malfunction Indicator Light (If Installed)
Page 35 of 211
1
FEATURES OF YOUR HYUNDAI
23
1. Fuel Gauge
2. Coolant Temperature Gauge
3. Charging System Warning Light
4. Parking Brake/Low Brake Fluid Level Warning Light
5. Turn Signal Indicator Light
6. Seat Belt Warning Light
7. High Beam Indicator Light
8. Digital Clock
9. Malfunction Indicator Light (MIL) (If Installed) 10. Speedometer
11. Digital Clock Reset Switch
12. Door Ajar Warning Light
13. Low Oil Pressure Warning Light
14. Fuel Filter Warning Light
15. Odometer/Trip Odometer
16. Low Fuel Warning Light
17. Diesel Pre-heat Indicator Light
18. Trip Odometer Reset Switch
Page 37 of 211
1
FEATURES OF YOUR HYUNDAI
25
1. Tachometer
2. Charging System Warning Light
3. Parking Brake/Low Brake Fluid Level Warning Light
4. Turn Signal Indicator Light
5. Seat Belt Warning Light
6. High Beam Indicator Light
7. Digital Clock
8. Low Fuel Warning Light
9. Malfunction Indicator Light (MIL) (If Installed)
10. Speedometer 11. Digital Clock Reset Switch
12. Low Oil Pressure Warning Light
13. Door Ajar Warning Light
14. Fuel Filter Warning Light
15. Coolant Temperature Gauge
16. Odometer/Trip Odometer
17. Fuel Gauge
18. Diesel Pre-heat Indicator Light
19. Trip Odometer Reset Switch
Page 38 of 211

1FEATURES OF YOUR HYUNDAI
26WARNING AND INDICATOR LIGHTS
!
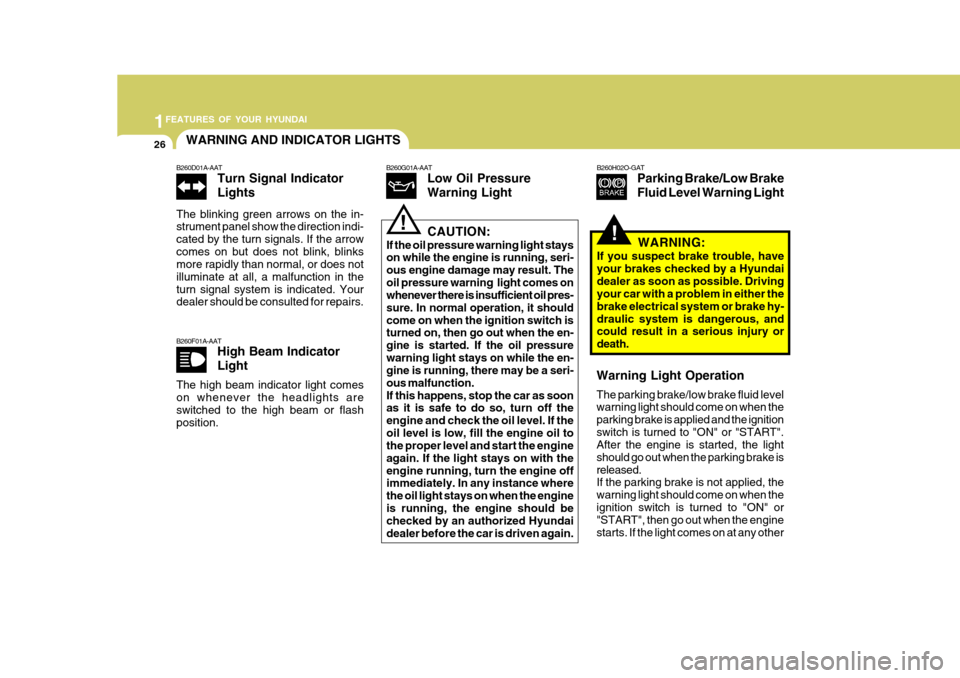
B260F01A-AAT
High Beam Indicator Light
The high beam indicator light comes on whenever the headlights are switched to the high beam or flash position. B260H02O-GAT
Parking Brake/Low Brake Fluid Level Warning Light
B260G01A-AAT
Low Oil PressureWarning Light
!CAUTION:
If the oil pressure warning light stays on while the engine is running, seri- ous engine damage may result. Theoil pressure warning light comes on whenever there is insufficient oil pres- sure. In normal operation, it shouldcome on when the ignition switch is turned on, then go out when the en- gine is started. If the oil pressurewarning light stays on while the en- gine is running, there may be a seri- ous malfunction.If this happens, stop the car as soon as it is safe to do so, turn off the
engine and check the oil level. If the oil level is low, fill the engine oil to the proper level and start the engine again. If the light stays on with theengine running, turn the engine off immediately. In any instance where the oil light stays on when the engineis running, the engine should be checked by an authorized Hyundai dealer before the car is driven again. WARNING:
If you suspect brake trouble, haveyour brakes checked by a Hyundaidealer as soon as possible. Driving your car with a problem in either the brake electrical system or brake hy-draulic system is dangerous, and could result in a serious injury or death.
B260D01A-AAT
Turn Signal Indicator Lights
The blinking green arrows on the in- strument panel show the direction indi- cated by the turn signals. If the arrowcomes on but does not blink, blinks more rapidly than normal, or does not illuminate at all, a malfunction in theturn signal system is indicated. Your dealer should be consulted for repairs.
Warning Light Operation The parking brake/low brake fluid level warning light should come on when the parking brake is applied and the ignitionswitch is turned to "ON" or "START". After the engine is started, the light should go out when the parking brake isreleased. If the parking brake is not applied, the warning light should come on when theignition switch is turned to "ON" or "START", then go out when the engine starts. If the light comes on at any other
Page 44 of 211

1FEATURES OF YOUR HYUNDAI
32
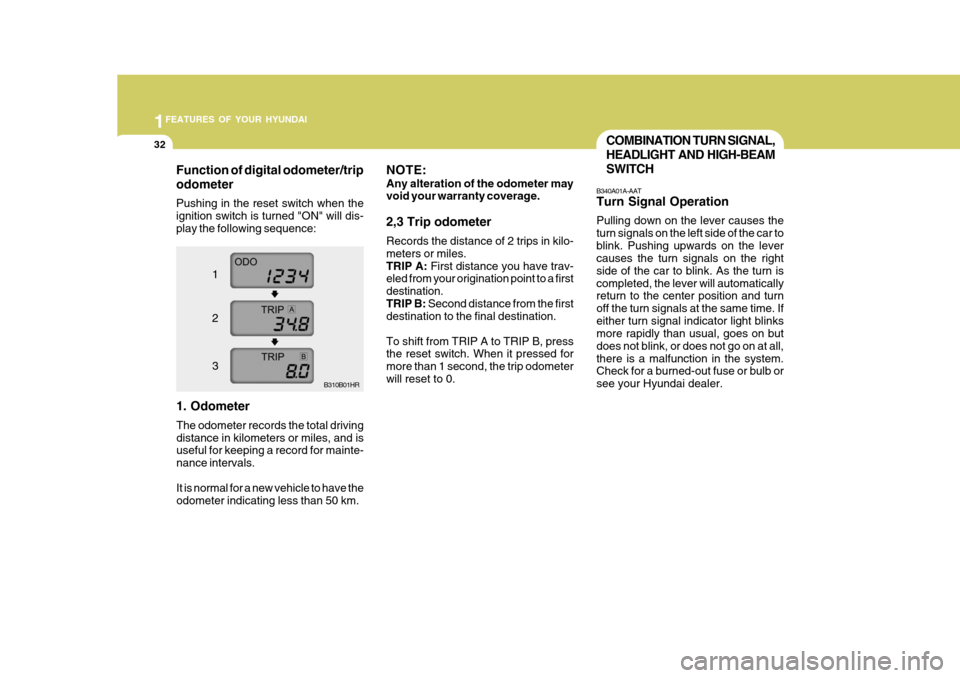
NOTE: Any alteration of the odometer may void your warranty coverage. 2,3 Trip odometer Records the distance of 2 trips in kilo- meters or miles.TRIP A: First distance you have trav-
eled from your origination point to a firstdestination.TRIP B: Second distance from the first
destination to the final destination. To shift from TRIP A to TRIP B, press the reset switch. When it pressed for more than 1 second, the trip odometerwill reset to 0.COMBINATION TURN SIGNAL, HEADLIGHT AND HIGH-BEAMSWITCH
B340A01A-AAT Turn Signal Operation Pulling down on the lever causes the turn signals on the left side of the car toblink. Pushing upwards on the lever causes the turn signals on the right side of the car to blink. As the turn iscompleted, the lever will automatically return to the center position and turn off the turn signals at the same time. Ifeither turn signal indicator light blinks more rapidly than usual, goes on but does not blink, or does not go on at all,there is a malfunction in the system. Check for a burned-out fuse or bulb or see your Hyundai dealer.
Function of digital odometer/trip odometer
Pushing in the reset switch when the ignition switch is turned "ON" will dis-play the following sequence:
1. Odometer The odometer records the total driving distance in kilometers or miles, and is useful for keeping a record for mainte- nance intervals. It is normal for a new vehicle to have the odometer indicating less than 50 km. B310B01HR
1 2 3
Page 45 of 211
1
FEATURES OF YOUR HYUNDAI
33
B340C03FC-GAT Headlight Switch To operate the headlights, turn the bar- rel on the end of the multi-function switch. The first position turns on the parking lights, sidelights, tail lights andinstrument panel lights. The second position turns on the headlights. HHR2001B340B01A-AAT Lane Change Signal To indicate a lane change, move the lever up or down to a point where it begins flashing.The lever will automatically return to the center position when released.OHR0292004
HHR2004
Type A Type B
NOTE: The ignition must be in the "ON" position to turn on the headlights.
OHR0292001
Type A Type B
Page 50 of 211

1FEATURES OF YOUR HYUNDAI
38REAR WINDOW DEFROSTER SWITCH
B380A02HR-GAT (If Installed)
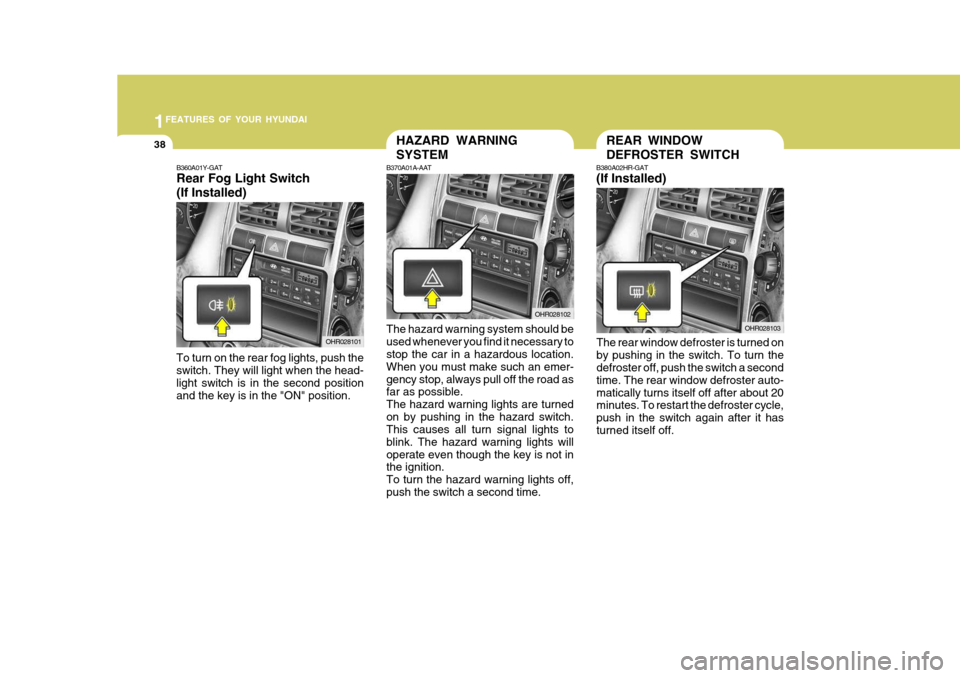
The rear window defroster is turned on by pushing in the switch. To turn the defroster off, push the switch a second time. The rear window defroster auto-matically turns itself off after about 20 minutes. To restart the defroster cycle, push in the switch again after it hasturned itself off. OHR028103HAZARD WARNING SYSTEM
B370A01A-AAT The hazard warning system should be used whenever you find it necessary to stop the car in a hazardous location. When you must make such an emer-gency stop, always pull off the road as far as possible. The hazard warning lights are turnedon by pushing in the hazard switch. This causes all turn signal lights to blink. The hazard warning lights willoperate even though the key is not in the ignition. To turn the hazard warning lights off,push the switch a second time. OHR028102
B360A01Y-GAT Rear Fog Light Switch (If Installed)
To turn on the rear fog lights, push the switch. They will light when the head- light switch is in the second position and the key is in the "ON" position. OHR028101
Page 86 of 211

1FEATURES OF YOUR HYUNDAI
74
K220B01HR-GAT
1. POWER ON-OFF/VOLUMEControl Knob
The radio unit may be operated when the ignition key is in the "ACC" or "ON"position. Rotate the knob clockwise to switch the radio unit on and to increase the volume.The LCD shows the radio frequency in the radio mode. Turn the knob counter- clockwise to reduce the volume and toswitch the radio unit off. BAL (Balance) Control Knob Pull and turn the control knob clockwise to emphasize right speaker sound (left speaker sound will be attenuated). When the control knob is turned counterclock-wise, left speaker sound will be empha- sized (right speaker sound will be at- tenuated).After adjusting the balance, push the knob again to use the other function. SCAN Knob When the scan knob is pressed, the frequency will increase and the receiv-able stations will be tuned in one after another, receiving each station for 5 seconds. To stop scanning, press thescan knob again.
2. TUNE (manual) Select Button Press the ( ) side or ( ) side to increase or to decrease the frequency. With the button held down for 1 secondor more, the stop signal (broadcasting radio wave) is ignored and channel selection continues. SEEK Operation (Automatic Channel Selection) Press the TUNE select button for 1 second or more. When the ( ) side ispressed, the unit will automatically tune to the next higher frequency and when the ( ) side is pressed, it will automati-cally tune to the next lower frequency. 3. BAND Selector Pressing the button changes the AM, FM1 and FM2 bands. The modeselected is displayed on LCD. Each press of the button changes the display as follows;
FM1 � FM2 � AM � FM1
4. BASS Control Knob Press to pop the knob out and turn to the left or right for the desired bass tone. TREBLE Control Knob Pull the bass control knob further out. Turn to the left or right for the desiredtreble tone.
5. PRESET STATION Select But- tons
Six (6) stations for AM, FM1 and FM2 respectively can be preset in the elec- tronic memory circuit on this unit.
FM AM