2011 Hyundai H-100 Truck cooling
[x] Cancel search: coolingPage 120 of 211
3
WHAT TO DO IN AN EMERGENCY
5
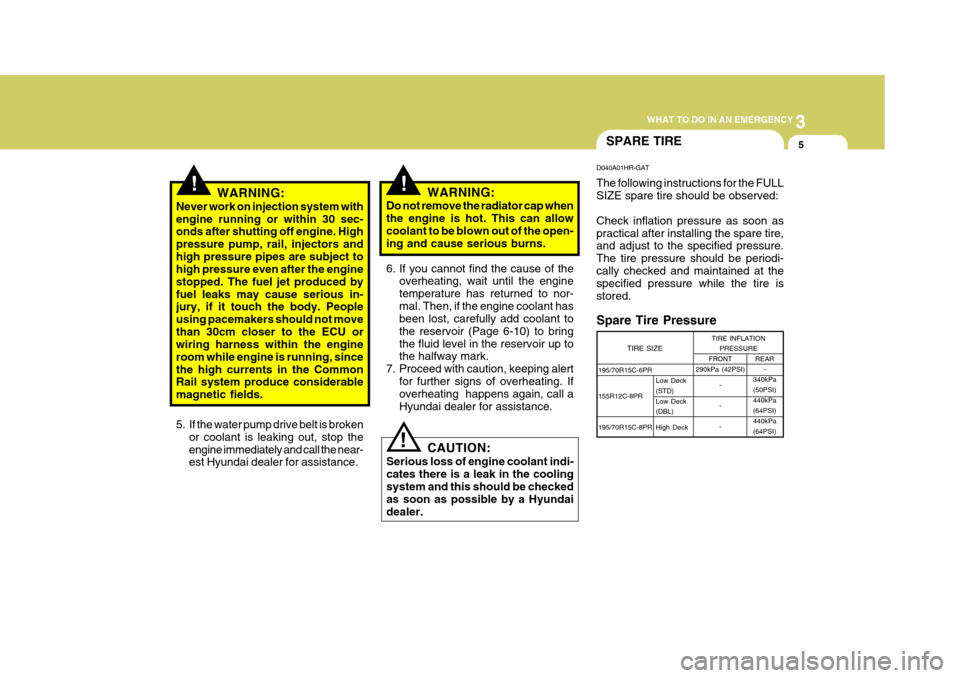
195/70R15C-6PR 155R12C-8PR 195/70R15C-8PR FRONT
290kPa (42PSI)
- - -
!!
SPARE TIRE
WARNING:
Never work on injection system with engine running or within 30 sec- onds after shutting off engine. High pressure pump, rail, injectors andhigh pressure pipes are subject to high pressure even after the engine stopped. The fuel jet produced byfuel leaks may cause serious in- jury, if it touch the body. People using pacemakers should not movethan 30cm closer to the ECU or wiring harness within the engine room while engine is running, sincethe high currents in the Common Rail system produce considerable magnetic fields. WARNING:
Do not remove the radiator cap whenthe engine is hot. This can allowcoolant to be blown out of the open- ing and cause serious burns.
6. If you cannot find the cause of the overheating, wait until the engine temperature has returned to nor-mal. Then, if the engine coolant has been lost, carefully add coolant to the reservoir (Page 6-10) to bringthe fluid level in the reservoir up to the halfway mark.
7. Proceed with caution, keeping alert
for further signs of overheating. Ifoverheating happens again, call a Hyundai dealer for assistance.
!
5. If the water pump drive belt is broken
or coolant is leaking out, stop the engine immediately and call the near- est Hyundai dealer for assistance. D040A01HR-GAT The following instructions for the FULL SIZE spare tire should be observed: Check inflation pressure as soon as practical after installing the spare tire, and adjust to the specified pressure. The tire pressure should be periodi-cally checked and maintained at the specified pressure while the tire is stored.
Spare Tire PressureCAUTION:
Serious loss of engine coolant indi- cates there is a leak in the coolingsystem and this should be checked as soon as possible by a Hyundai dealer. TIRE SIZE
TIRE INFLATION
PRESSURE REAR-
340kPa (50PSI)440kPa(64PSI)440kPa (64PSI)
Low Deck (STD)Low Deck (DBL) High Deck
Page 149 of 211
5VEHICLE MAINTENANCE REQUIREMENTS
10
F060F01A-AAT
o Vacuum and Crankcase
Ventilation Hoses
Inspect the surface of hoses for evi- dence of heat and/or mechanical dam- age. Hard and brittle rubber, cracking, tears, cuts, abrasions, and excessiveswelling indicate deterioration. Particu- lar attention should be paid to examin- ing those hose surfaces nearest tohigh heat sources, such as the ex- haust manifold. Inspect the hose routing to assure that the hoses do not come in contact with any heat source, sharp edges or mov- ing component which might cause heatdamage or mechanical wear. Inspect all hose connections, such as clamps and couplings, to make sure they aresecure, and that no leaks are present. Hoses should be replaced immedi- ately if there is any evidence of dete-rioration or damage. F060B01HR-GAT
o Drive Belts
Inspect all drive belts (water pump andalternator) for evidence of cuts, cracks, excessive wear or oiliness, and re- place if necessary. Drive belts shouldbe checked periodically for proper ten- sion and adjusted as necessary. F060E01A-GAT
o Timing Belt
Inspect all parts related with the timing
belt for damage and deformation. Re- place any damaged parts immediately.
F060H01A-AAT
o Air Cleaner Filter
A Genuine Hyundai air cleaner filter isrecommended when the filter is re-placed.
F060G01A-AAT
o Vapor Hose and Fuel Filler Cap
The vapor hose and fuel filler cap
should be inspected at those intervals specified in the maintenance sched- ule. Make sure that a new vapor hoseor fuel filler cap is correctly replaced.
F070B01A-GAT
o Cooling System
Check the cooling system part, suchas radiator, coolant reservoir, hoses and connections for leakage and dam- age. Replace any damaged parts. F070C01A-AAT
o Coolant
The coolant should be changed at the intervals specified in the mainte- nance schedule. F070D01HP-GAT
o Manual Transmission Oil
Inspect the manual transmission oil
according to the maintenance sched- ule. NOTE:
If the oil level is low, check for
possible leaks before adding oil. Do not overfill.
Page 158 of 211
6
DO-IT-YOURSELF MAINTENANCE
7
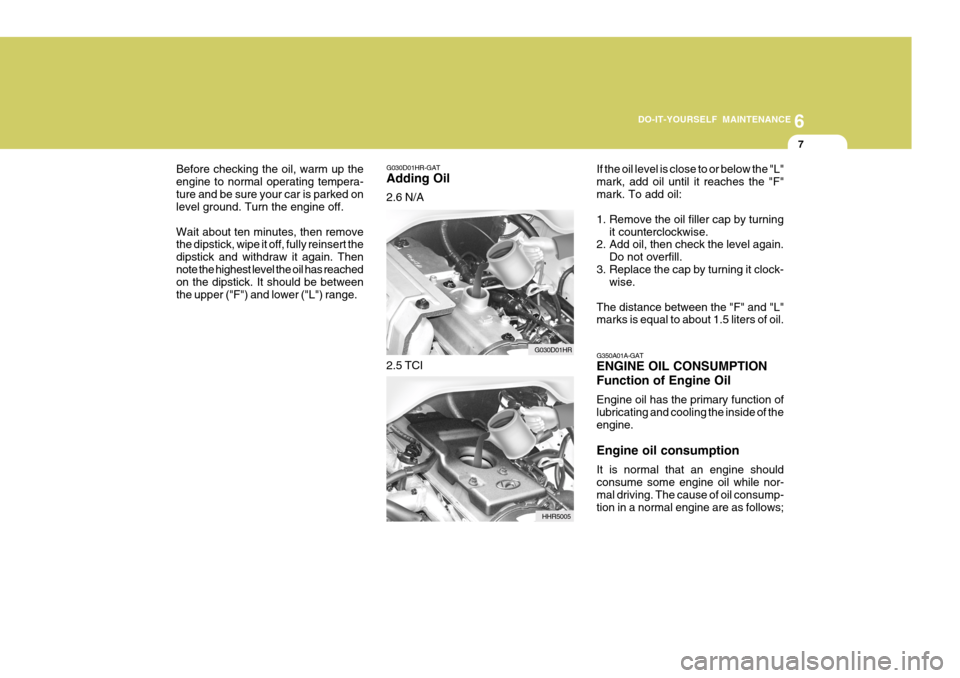
G030D01HR-GAT Adding Oil 2.6 N/A
Before checking the oil, warm up the engine to normal operating tempera-ture and be sure your car is parked on level ground. Turn the engine off. Wait about ten minutes, then remove the dipstick, wipe it off, fully reinsert the dipstick and withdraw it again. Thennote the highest level the oil has reached on the dipstick. It should be between the upper ("F") and lower ("L") range.
G030D01HR
2.5 TCI
HHR5005If the oil level is close to or below the "L"mark, add oil until it reaches the "F"mark. To add oil:
1. Remove the oil filler cap by turning
it counterclockwise.
2. Add oil, then check the level again.
Do not overfill.
3. Replace the cap by turning it clock- wise.
The distance between the "F" and "L" marks is equal to about 1.5 liters of oil. G350A01A-GAT ENGINE OIL CONSUMPTION Function of Engine Oil Engine oil has the primary function of
lubricating and cooling the inside of theengine. Engine oil consumption It is normal that an engine should consume some engine oil while nor- mal driving. The cause of oil consump- tion in a normal engine are as follows;
Page 161 of 211
6 DO-IT-YOURSELF MAINTENANCE
10
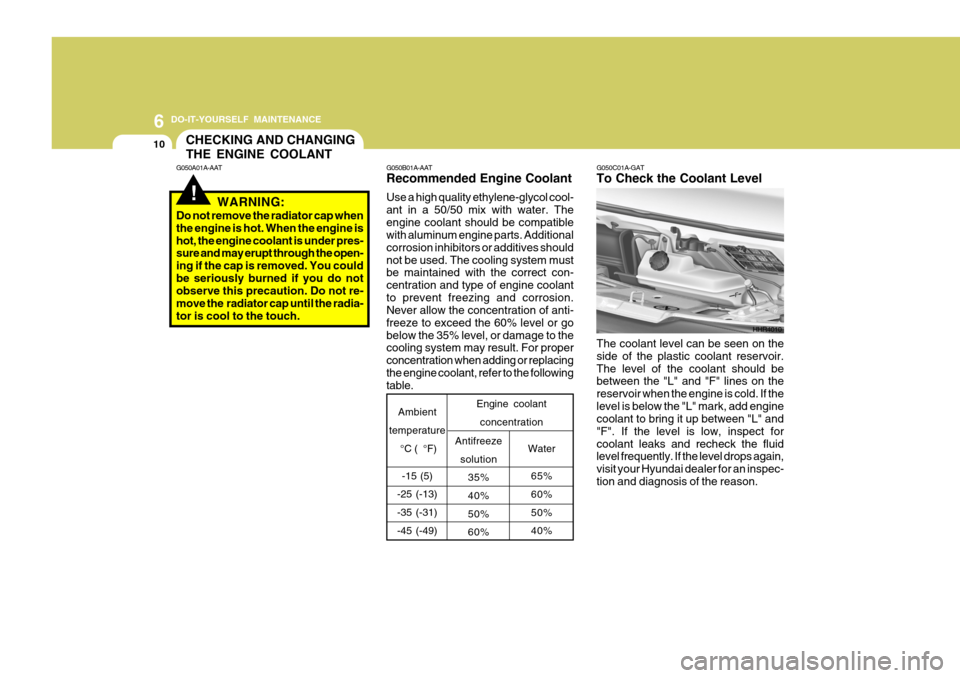
G050B01A-AAT Recommended Engine Coolant Use a high quality ethylene-glycol cool- ant in a 50/50 mix with water. Theengine coolant should be compatible with aluminum engine parts. Additional corrosion inhibitors or additives shouldnot be used. The cooling system must be maintained with the correct con- centration and type of engine coolantto prevent freezing and corrosion. Never allow the concentration of anti- freeze to exceed the 60% level or gobelow the 35% level, or damage to the cooling system may result. For proper concentration when adding or replacingthe engine coolant, refer to the following table.
Water
65% 60% 50% 40%
Antifreeze
solution 35% 40% 50%60%
Ambient
temperature
°C ( °F)
-15 (5)
-25 (-13)-35 (-31) -45 (-49) Engine coolant
concentration HHR4010
G050C01A-GAT To Check the Coolant Level The coolant level can be seen on the side of the plastic coolant reservoir.The level of the coolant should be between the "L" and "F" lines on the reservoir when the engine is cold. If thelevel is below the "L" mark, add engine coolant to bring it up between "L" and "F". If the level is low, inspect forcoolant leaks and recheck the fluid level frequently. If the level drops again, visit your Hyundai dealer for an inspec-tion and diagnosis of the reason.
!
CHECKING AND CHANGING THE ENGINE COOLANT
G050A01A-AAT
WARNING:
Do not remove the radiator cap when the engine is hot. When the engine ishot, the engine coolant is under pres- sure and may erupt through the open- ing if the cap is removed. You couldbe seriously burned if you do not observe this precaution. Do not re- move the radiator cap until the radia-tor is cool to the touch.
Page 162 of 211
6
DO-IT-YOURSELF MAINTENANCE
11
!
G050D01HR
G050D01HR-GAT To Change the Coolant The coolant should be changed at those intervals specified in the vehiclemaintenance schedule in Section 5.
CAUTION:
Engine coolant can damage the fin-ish of your car. If you spill enginecoolant on the car, wash it off thor- oughly with clean water.
!
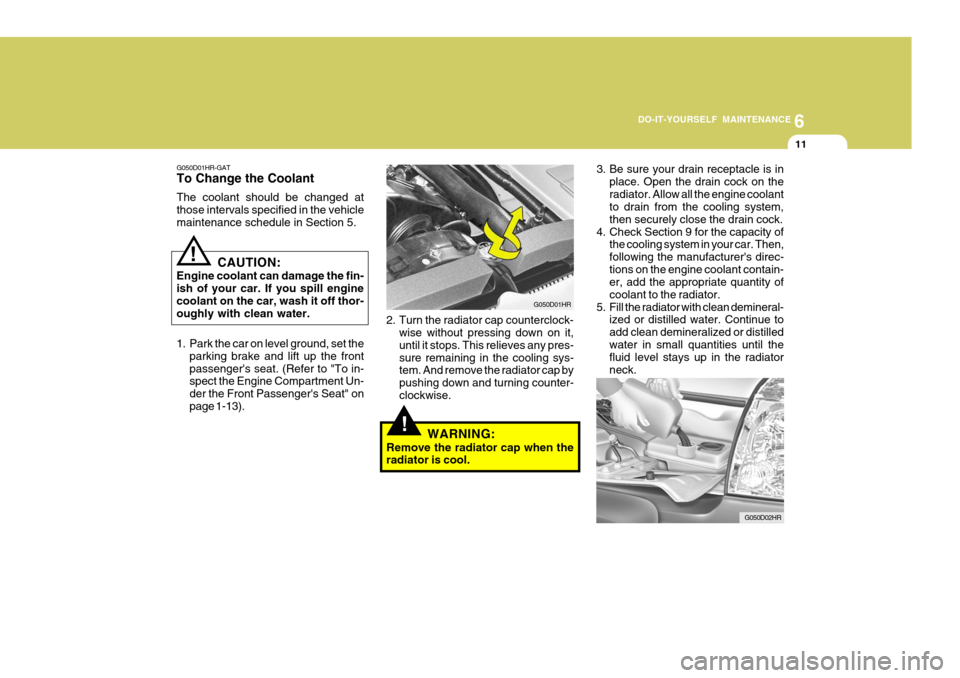
1. Park the car on level ground, set the parking brake and lift up the front passenger's seat. (Refer to "To in- spect the Engine Compartment Un- der the Front Passenger's Seat" onpage 1-13). 2. Turn the radiator cap counterclock-
wise without pressing down on it,until it stops. This relieves any pres-sure remaining in the cooling sys- tem. And remove the radiator cap by pushing down and turning counter-clockwise.
WARNING:
Remove the radiator cap when the radiator is cool. 3. Be sure your drain receptacle is in
place. Open the drain cock on the radiator. Allow all the engine coolant to drain from the cooling system, then securely close the drain cock.
4. Check Section 9 for the capacity of the cooling system in your car. Then,following the manufacturer's direc-tions on the engine coolant contain- er, add the appropriate quantity of coolant to the radiator.
5. Fill the radiator with clean demineral- ized or distilled water. Continue toadd clean demineralized or distilledwater in small quantities until the fluid level stays up in the radiator neck.
G050D02HR
Page 163 of 211
6 DO-IT-YOURSELF MAINTENANCE
12CHANGING THE AIR CLEANER FILTER
G070A01HR-GAT
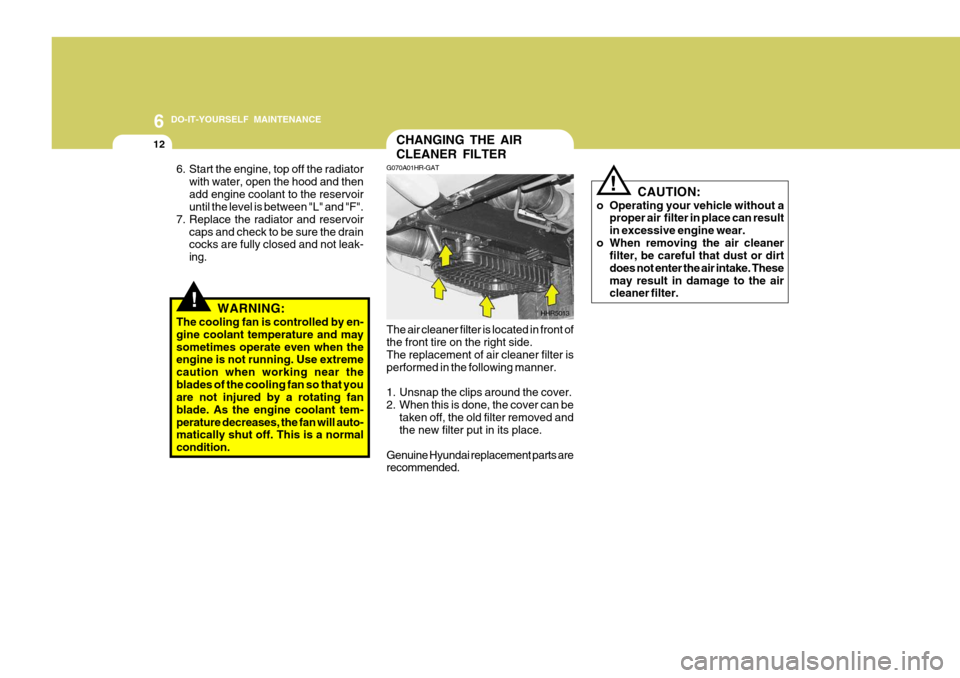
The air cleaner filter is located in front of the front tire on the right side. The replacement of air cleaner filter is performed in the following manner.
1. Unsnap the clips around the cover.
2. When this is done, the cover can be taken off, the old filter removed and the new filter put in its place.
Genuine Hyundai replacement parts arerecommended. CAUTION:
o Operating your vehicle without a proper air filter in place can result in excessive engine wear.
o When removing the air cleaner filter, be careful that dust or dirtdoes not enter the air intake. Thesemay result in damage to the air cleaner filter.
!
HHR5013
!WARNING:
The cooling fan is controlled by en- gine coolant temperature and may sometimes operate even when the engine is not running. Use extreme caution when working near theblades of the cooling fan so that you are not injured by a rotating fan blade. As the engine coolant tem-perature decreases, the fan will auto- matically shut off. This is a normal condition.
6. Start the engine, top off the radiator
with water, open the hood and thenadd engine coolant to the reservoir until the level is between "L" and "F".
7. Replace the radiator and reservoir
caps and check to be sure the draincocks are fully closed and not leak- ing.
Page 169 of 211
6 DO-IT-YOURSELF MAINTENANCE
18
!
G120E01HR-GAT Adding Brake Fluid
WARNING:
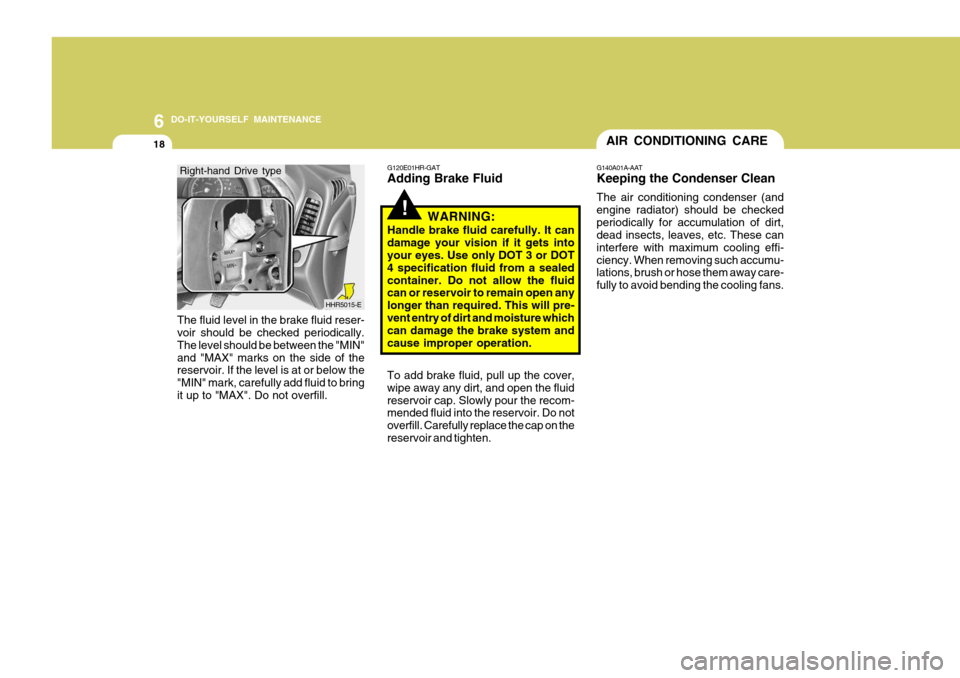
Handle brake fluid carefully. It can damage your vision if it gets into your eyes. Use only DOT 3 or DOT 4 specification fluid from a sealedcontainer. Do not allow the fluid can or reservoir to remain open any longer than required. This will pre-vent entry of dirt and moisture which can damage the brake system and cause improper operation. To add brake fluid, pull up the cover, wipe away any dirt, and open the fluidreservoir cap. Slowly pour the recom- mended fluid into the reservoir. Do not overfill. Carefully replace the cap on thereservoir and tighten.
The fluid level in the brake fluid reser- voir should be checked periodically. The level should be between the "MIN"and "MAX" marks on the side of the reservoir. If the level is at or below the "MIN" mark, carefully add fluid to bringit up to "MAX". Do not overfill.
HHR5015-E
Right-hand Drive type
AIR CONDITIONING CARE
G140A01A-AAT Keeping the Condenser Clean The air conditioning condenser (and engine radiator) should be checkedperiodically for accumulation of dirt, dead insects, leaves, etc. These can interfere with maximum cooling effi-ciency. When removing such accumu- lations, brush or hose them away care- fully to avoid bending the cooling fans.
Page 177 of 211
6 DO-IT-YOURSELF MAINTENANCE
26POWER STEERING FLUID LEVEL
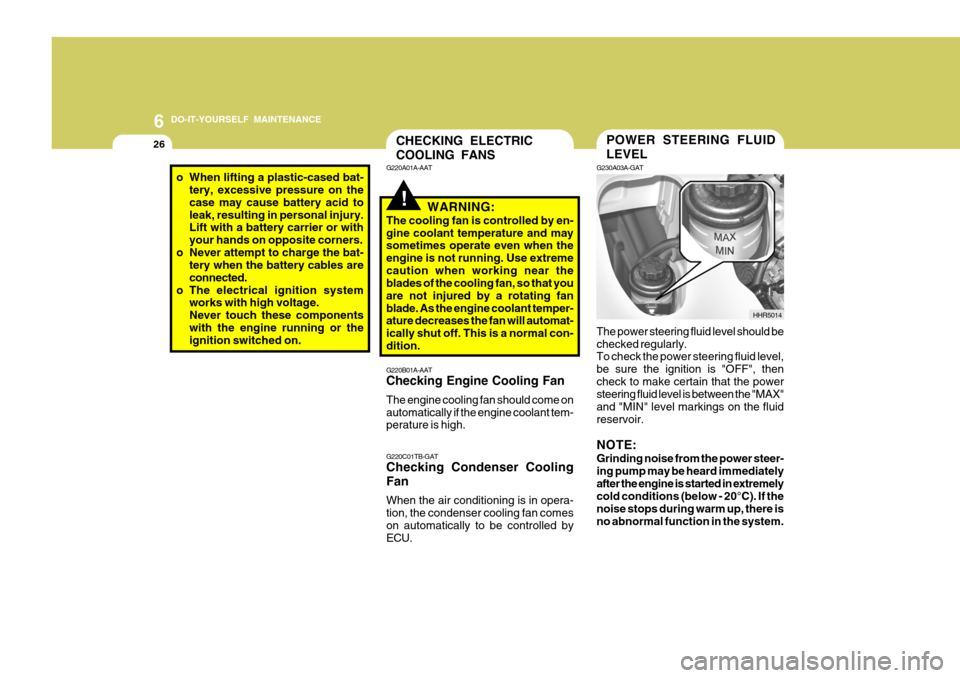
G230A03A-GAT The power steering fluid level should be checked regularly. To check the power steering fluid level, be sure the ignition is "OFF", thencheck to make certain that the power steering fluid level is between the "MAX" and "MIN" level markings on the fluidreservoir. NOTE: Grinding noise from the power steer- ing pump may be heard immediatelyafter the engine is started in extremely cold conditions (below - 20°C). If the noise stops during warm up, there isno abnormal function in the system. HHR5014CHECKING ELECTRIC COOLING FANS
!
G220B01A-AAT Checking Engine Cooling Fan The engine cooling fan should come on automatically if the engine coolant tem- perature is high. G220C01TB-GAT Checking Condenser Cooling Fan When the air conditioning is in opera- tion, the condenser cooling fan comeson automatically to be controlled by ECU.
G220A01A-AAT
WARNING:
The cooling fan is controlled by en- gine coolant temperature and may sometimes operate even when the engine is not running. Use extremecaution when working near the blades of the cooling fan, so that you are not injured by a rotating fanblade. As the engine coolant temper- ature decreases the fan will automat- ically shut off. This is a normal con-dition.
o When lifting a plastic-cased bat- tery, excessive pressure on the case may cause battery acid toleak, resulting in personal injury. Lift with a battery carrier or with your hands on opposite corners.
o Never attempt to charge the bat- tery when the battery cables areconnected.
o The electrical ignition system works with high voltage.Never touch these componentswith the engine running or the ignition switched on.