2011 Hyundai H-1 (Grand Starex) lock
[x] Cancel search: lockPage 143 of 338
473
Features of your vehicle
D270400ATQ
Multi box (if equipped)
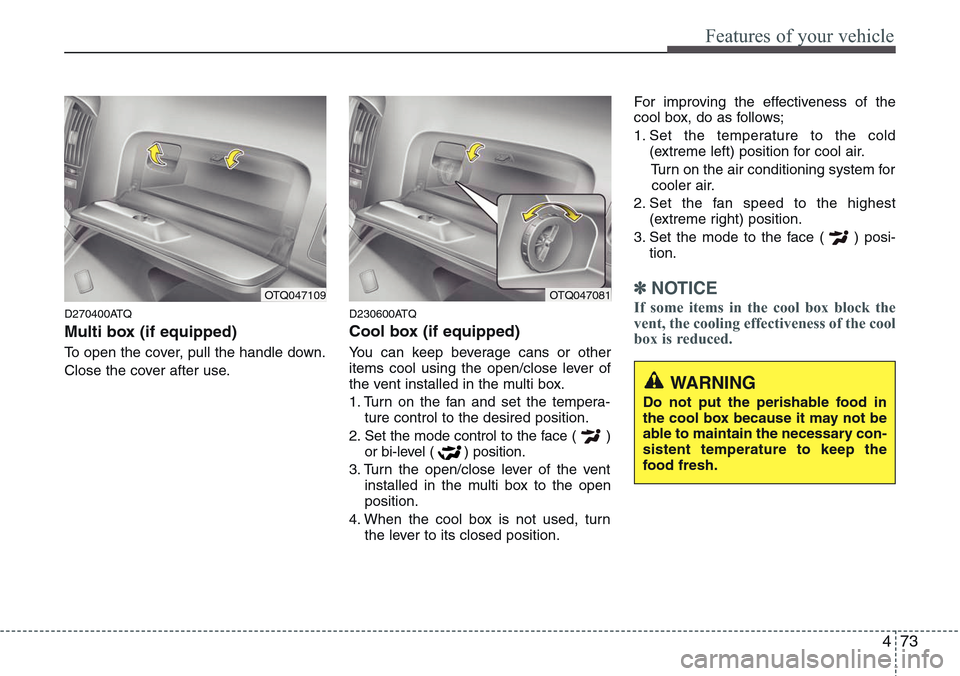
To open the cover, pull the handle down.
Close the cover after use.
D230600ATQ
Cool box (if equipped)
You can keep beverage cans or other
items cool using the open/close lever of
the vent installed in the multi box.
1. Turn on the fan and set the tempera-
ture control to the desired position.
2. Set the mode control to the face ( )
or bi-level ( ) position.
3. Turn the open/close lever of the vent
installed in the multi box to the open
position.
4. When the cool box is not used, turn
the lever to its closed position.For improving the effectiveness of the
cool box, do as follows;
1. Set the temperature to the cold
(extreme left) position for cool air.
Turn on the air conditioning system for
cooler air.
2. Set the fan speed to the highest
(extreme right) position.
3. Set the mode to the face ( ) posi-
tion.
✽NOTICE
If some items in the cool box block the
vent, the cooling effectiveness of the cool
box is reduced.OTQ047109OTQ047081
WARNING
Do not put the perishable food in
the cool box because it may not be
able to maintain the necessary con-
sistent temperature to keep the
food fresh.
Page 147 of 338

477
Features of your vehicle
D280600AEN
Digital clock (if equipped)
Whenever the battery terminals or relat-
ed fuses are disconnected, you must
reset the time.
When the ignition switch is in the ACC or
ON position, the clock buttons operate as
follows:
D280601AUN
Hour (1)
Pressing the H button with your finger, a
pencil or similar object will advance the
time displayed by one hour.
D280602AUN
Minute (2)
Pressing the M button with your finger, a
pencil or similar object will advance the
time displayed by one minute.
D280603AUN
Reset (3)
To clear away minutes, press the R but-
ton with your finger, a pencil or similar
object. Then the clock will be set precise-
ly on the hour.
For example, if the R button is pressed
while the time is between 9:01 and 9:29,
the display will be reset to 9:00.
9:01 ~ 9:29 display changed to 9:00
9:30 ~ 9:59 display changed to 10:00
D280604AEN
Display conversion (if equipped)
To change the 12 hour format to the 24
hour format, press the R button until the
display blinks.
For example, if the R button is pressed
while the time is 10:15 p.m., the display
will be changed to 22:15.
OTQ047119
WARNING
Do not adjust the clock while driv-
ing. You may lose your steering
control and cause an accident that
results in severe personal injury or
death.
CAUTION
• Use the power outlet only when
the engine is running and remove
the accessory plug after use.
Using the accessory plug for pro-
longed periods of time with the
engine off could cause the bat-
tery to discharge.
• Only use 12V electric accessories
which are less than 10A in elec-
tric capacity.
• Adjust the air-conditioner or
heater to the lowest operating
level when using the power outlet.
• Close the cover when not in use.
• Some electronic devices can
cause electronic interference
when plugged into a vehicle’s
power outlet. These devices may
cause excessive audio static and
malfunctions in other electronic
systems or devices used in your
vehicle.
Page 149 of 338
479
Features of your vehicle
✽NOTICE
If you install an aftermarket HID head
lamp, your vehicle’s audio and electron-
ic device may malfunction.
Antenna
D300102ATQ
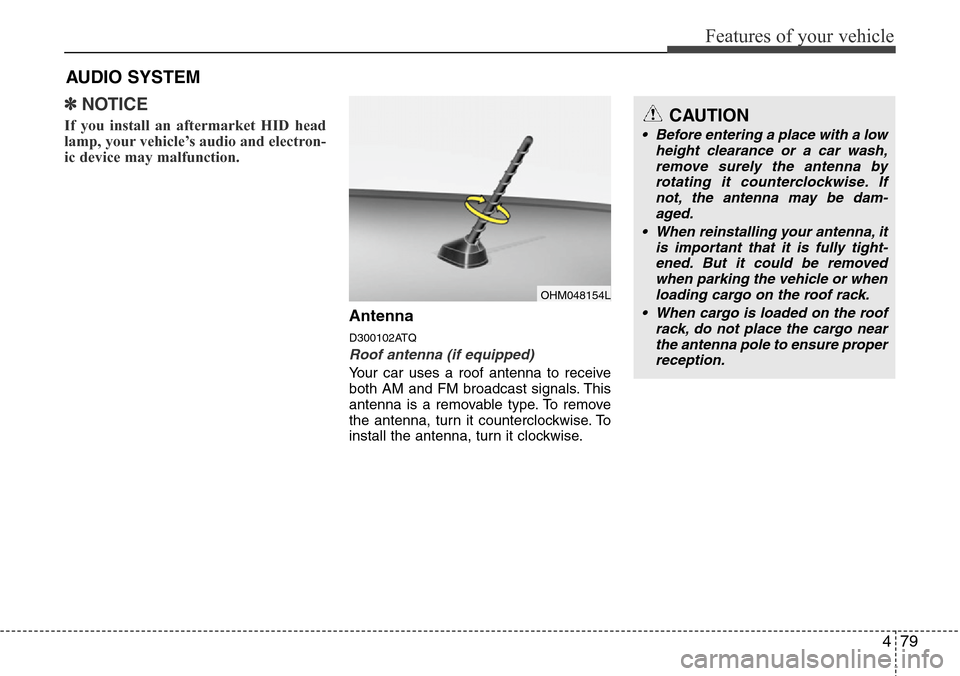
Roof antenna (if equipped)
Your car uses a roof antenna to receive
both AM and FM broadcast signals. This
antenna is a removable type. To remove
the antenna, turn it counterclockwise. To
install the antenna, turn it clockwise.
AUDIO SYSTEM
CAUTION
• Before entering a place with a low
height clearance or a car wash,
remove surely the antenna by
rotating it counterclockwise. If
not, the antenna may be dam-
aged.
• When reinstalling your antenna, it
is important that it is fully tight-
ened. But it could be removed
when parking the vehicle or when
loading cargo on the roof rack.
• When cargo is loaded on the roof
rack, do not place the cargo near
the antenna pole to ensure proper
reception.
OHM048154L
Page 152 of 338
Features of your vehicle
82 4
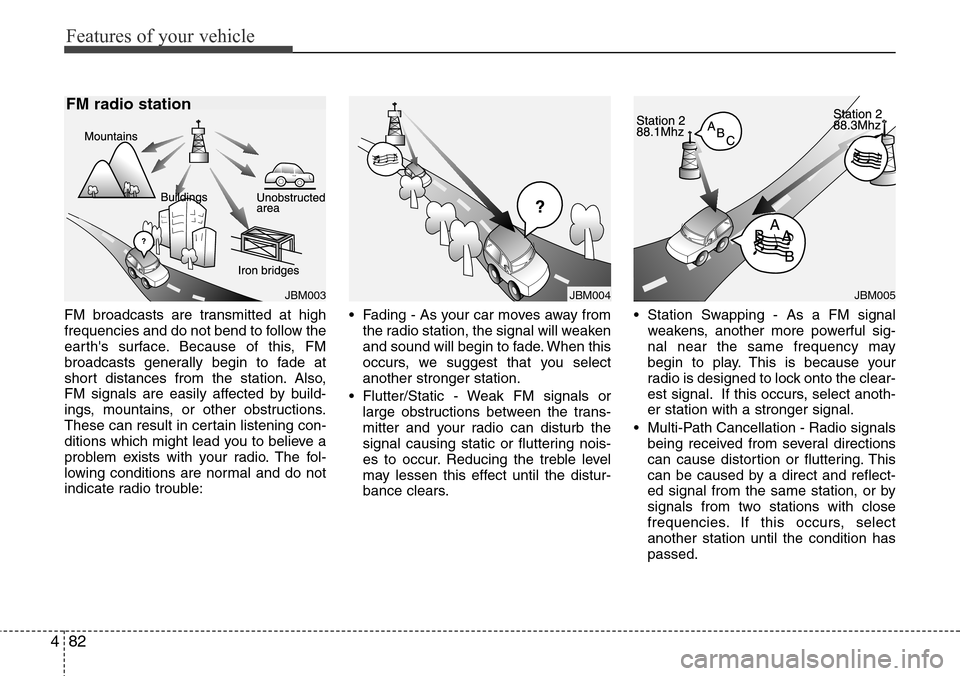
FM broadcasts are transmitted at high
frequencies and do not bend to follow the
earth's surface. Because of this, FM
broadcasts generally begin to fade at
short distances from the station. Also,
FM signals are easily affected by build-
ings, mountains, or other obstructions.
These can result in certain listening con-
ditions which might lead you to believe a
problem exists with your radio. The fol-
lowing conditions are normal and do not
indicate radio trouble:• Fading - As your car moves away from
the radio station, the signal will weaken
and sound will begin to fade. When this
occurs, we suggest that you select
another stronger station.
• Flutter/Static - Weak FM signals or
large obstructions between the trans-
mitter and your radio can disturb the
signal causing static or fluttering nois-
es to occur. Reducing the treble level
may lessen this effect until the distur-
bance clears.• Station Swapping - As a FM signal
weakens, another more powerful sig-
nal near the same frequency may
begin to play. This is because your
radio is designed to lock onto the clear-
est signal. If this occurs, select anoth-
er station with a stronger signal.
• Multi-Path Cancellation - Radio signals
being received from several directions
can cause distortion or fluttering. This
can be caused by a direct and reflect-
ed signal from the same station, or by
signals from two stations with close
frequencies. If this occurs, select
another station until the condition has
passed.
JBM005JBM004JBM003
FM radio station
Page 155 of 338
485
Features of your vehicle
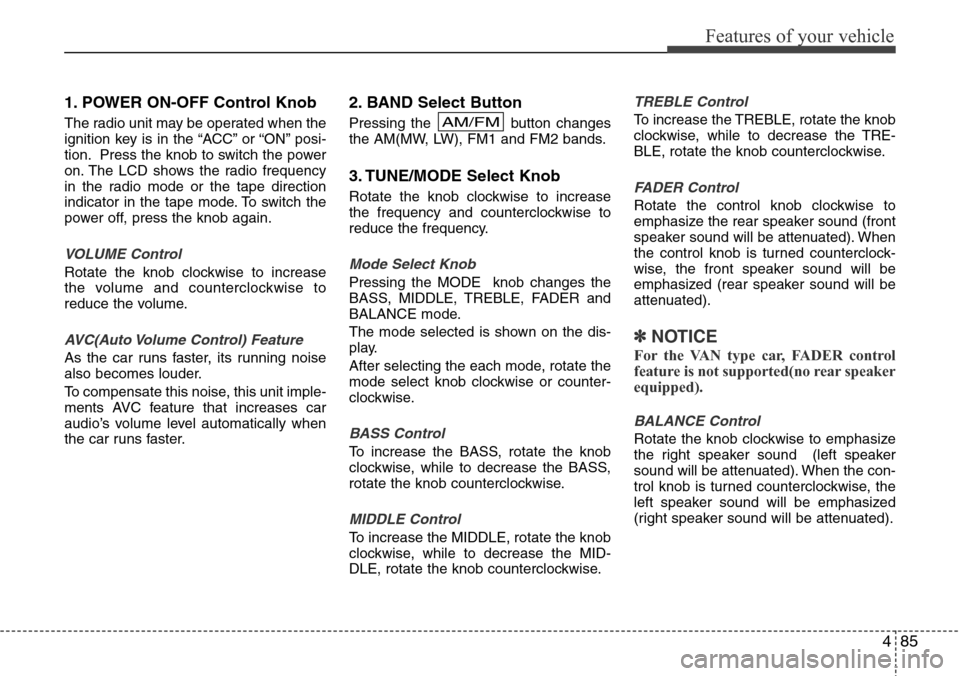
1. POWER ON-OFF Control Knob
The radio unit may be operated when the
ignition key is in the “ACC” or “ON” posi-
tion. Press the knob to switch the power
on. The LCD shows the radio frequency
in the radio mode or the tape direction
indicator in the tape mode. To switch the
power off, press the knob again.
VOLUME Control
Rotate the knob clockwise to increase
the volume and counterclockwise to
reduce the volume.
AVC(Auto Volume Control) Feature
As the car runs faster, its running noise
also becomes louder.
To compensate this noise, this unit imple-
ments AVC feature that increases car
audio’s volume level automatically when
the car runs faster.
2. BAND Select Button
Pressing the button changes
the AM(MW, LW), FM1 and FM2 bands.
3. TUNE/MODE Select Knob
Rotate the knob clockwise to increase
the frequency and counterclockwise to
reduce the frequency.
Mode Select Knob
Pressing the MODE knob changes the
BASS, MIDDLE, TREBLE, FADER and
BALANCE mode.
The mode selected is shown on the dis-
play.
After selecting the each mode, rotate the
mode select knob clockwise or counter-
clockwise.
BASS Control
To increase the BASS, rotate the knob
clockwise, while to decrease the BASS,
rotate the knob counterclockwise.
MIDDLE Control
To increase the MIDDLE, rotate the knob
clockwise, while to decrease the MID-
DLE, rotate the knob counterclockwise.
TREBLE Control
To increase the TREBLE, rotate the knob
clockwise, while to decrease the TRE-
BLE, rotate the knob counterclockwise.
FADER Control
Rotate the control knob clockwise to
emphasize the rear speaker sound (front
speaker sound will be attenuated). When
the control knob is turned counterclock-
wise, the front speaker sound will be
emphasized (rear speaker sound will be
attenuated).
✽NOTICE
For the VAN type car, FADER control
feature is not supported(no rear speaker
equipped).
BALANCE Control
Rotate the knob clockwise to emphasize
the right speaker sound (left speaker
sound will be attenuated). When the con-
trol knob is turned counterclockwise, the
left speaker sound will be emphasized
(right speaker sound will be attenuated).
AM/FM
Page 160 of 338
Features of your vehicle
90 4
1. POWER ON-OFF Control Knob
The radio unit may be operated when the
ignition key is in the "ACC" or “ON” posi-
tion. Press the knob to switch the power
on. The LCD shows the radio frequency
in the radio mode, the tape direction indi-
cator in the tape mode or CD track in
either the CD mode or CD AUTO
CHANGER mode. To switch the power
off, press the knob again.
VOLUME Control
Rotate the knob clockwise to increase
the volume and counterclockwise to
reduce the volume.
AVC(Auto Volume Control) Feature
As the car runs faster, its running noise
also becomes louder.
To compensate this noise, this unit imple-
ments AVC feature that increases car
audio’s volume level automatically when
the car runs faster.
2. BAND Select Button
Pressing the FM/AM button changes the
AM(MW, LW), FM1 and FM2 bands. The
mode selected is shown on the display.
3. TUNE/AUDIO Control Knob
Rotate the knob clockwise to increase
the frequency and counterclockwise to
reduce the frequency.
AUDIO Control Knob
Pressing the AUDIO Mode select button
changes the BASS, MIDDLE, TREBLE,
FADER and BALANCE mode. The mode
selected is shown on the display.
BASS Control
To increase the BASS, rotate the knob
clockwise, while to decrease the BASS,
rotate the knob counterclockwise.
MIDDLE Control
To increase the MIDDLE, rotate the knob
clockwise, while to decrease the MID-
DLE, rotate the knob counterclockwise.
TREBLE Control
To increase the TREBLE, rotate the knob
clockwise, while to decrease the TRE-
BLE, rotate the knob counterclockwise.
FADER Control
Rotate the control knob clockwise to
emphasize the rear speaker sound (front
speaker sound will be attenuated). When
the control knob is turned counterclock-
wise, the front speaker sound will be
emphasized (rear speaker sound will be
attenuated).
✽NOTICE
For the VAN type car, FADER Control
feature is not supported(no rear speaker
equipped).
BALANCE Control
Rotate the knob clockwise to emphasize
the right speaker sound (left speaker
sound will be attenuated). When the con-
trol knob is turned counterclockwise, the
left speaker sound will be emphasized
(right speaker sound will be attenuated).
4. AUTO SEEK Select Button
(Automatic Channel Selection)
Press the AUTO SEEK select button.
When the side is pressed, the unit will
automatically tune to the next higher fre-
quency and when the side is pressed,
it will automatically tune to the next lower
frequency.
Page 161 of 338

491
Features of your vehicle
5. Best Station Memory (BSM)
Button
When the BSM button is pressed, the six
channels from the highest field intensity
are selected next and stored in memory.
The stations selected are stored in the
sequence frequency from the first preset
key.
6. EQ Button
Press the EQ button to select the CLAS-
SIC, POP, ROCK, JAZZ and OFF MODE
for the desired tone quality. Each press of
the button changes the display as fol-
lows;
7. PRESET STATION Select
Buttons
Six stations for AM(MW, LW), FM1 and
FM2 respectively can be preset in the
electronic memory circuit.
HOW TO PRESET STATIONS
Six AM(MW, LW) and twelve FM stations
may be programmed into the memory of
the radio. Then, by simply pressing the
AM(MW, LW) / FM select button and/or
one of the six station select buttons, you
may recall any of these stations instantly.
To program the stations, follow these
steps:
• Press AM(MW, LW)/FM selector to set
the band for AM(MW, LW), FM1 and
FM2.
• Select the desired station to be stored
by seek or manual tuning.
• Determine the preset station select
button you wish to use to access that
station.
• Press the station select button for more
than two seconds. A select button indi-
cator will show in the display indicating
which select button you have
depressed. The frequency display will
flash after it has been stored into the
memory. You should then release the
button, and proceed to program the
next desired station. A total of 24 sta-
tions can be programmed by selecting
one AM(MW, LW) and two FM station
per button.• When completed, any preset station
may be recalled by selecting AM(MW,
LW), FM1 or FM2 band and the appro-
priate station button.
8. AUDIO Mode select Button
Pressing the AUDIO Mode select button
changes the BASS, MIDDLE, TREBLE,
FADER and BALANCE mode. The mode
selected is shown on the display.
After selecting the each mode, rotate the
TUNE knob clockwise or counterclock-
wise.
CLASSIC➟POP➟ROCK➟JAZZ➟DEFEATCAUTION
• Do not place beverages close to
the audio system. The audio sys-
tem mechanism may be damaged
if you spill them.
• Do not strike or allow anything to
impact the audio system, damage
to the system mechanisms could
occur.
Page 164 of 338
Features of your vehicle
94 4
7. MARK (Bookmark) Button
When the CD player unit is operating, the
desired track on the disc can be book-
marked by using the MARK button.
• Press the MARK button for more than
one second to bookmark the desired
track. "M" will be displayed on the LCD
and "MEMORY NO." will display for
approximately five seconds with a
beep sound. To play the bookmarked
tracks, press the MARK button within
one second and select the book-
marked track to play.
• To erase a bookmarked track, press
the MARK button for more than one
second. This will erase the bookmark
with a beep sound.
If you want to delete all tracks stored on
Mark Memory, press FILE SEARCH
knob in the Mark Play mode for more
than one second. You will hear a beep
sound and all tracks will be deleted from
Mark Memory with "MARK DELETE
ALL" displayed on the LCD.
✽NOTICE
Tracks stored on Mark Memory will be
automatically erased after you eject CDs
that contain those tracks.
8. RPT (Repeat) Button
• To repeat the track you are currently
listening to, press the RPT button. To
cancel, press it again. If it is pressed
for more than one second, it will repeat
all tracks within the currently played
CD.
• To repeat the music within currently
played folder, press the RPT button for
more than one second. Then it will
repeat in sequential order within the
currently played folder. To cancel,
press it again. (MP3 CD only)
• If you do not release RPT operation
when the track ends, it will automati-
cally be replayed. This process will
continue until you push the button
again.
9. RDM (Random) Button
• To listen to the music in random order,
press the RDM Button with a beep
sound for more than one second. To
cancel, press it again.
• To listen to the music within the cur-
rently played folder in random order,
press the RDM Button within one sec-
ond.To cancel, press it again within one
second. If it is pressed for more than
one second, it will be played in random
order within currently played CD (MP3
CD only).
10. FILE SEARCH Knob (TUNE
Select Knob)
• You can move through the track by
turning the FILE SEARCH knob clock-
wise or counterclockwise.
• After moving through the desired file,
press the FILE SEARCH knob to play-
back in the selected file.
• If you do not press the FILE SEARCH
knob within five seconds, the file
searching function will be released.
11. FLDR (FOLDER Search)
Button
• You can move through the folder by
pushing the FLDR button to up ( )
and down ( ).
• After moving the desired folder, press
the FILE SEARCH knob to play back in
the selected folder. If you do not press
the FILE SEARCH knob within 5 sec-
onds, the folder searching function will
be released. It is not operated in a sin-
gle folder.