Page 315 of 338

761
Maintenance
G220101BTQ
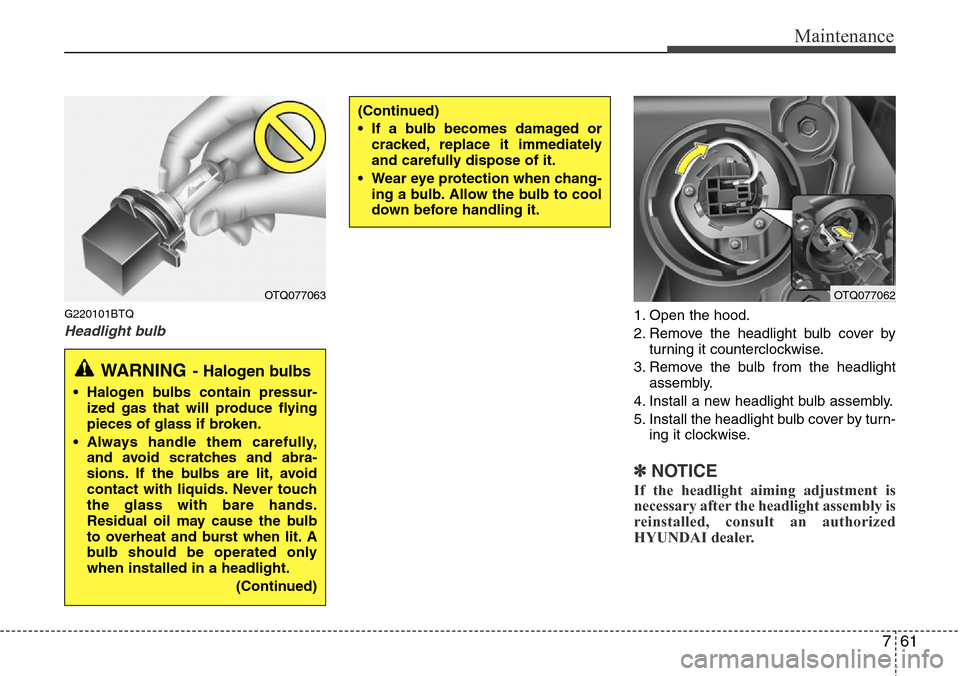
Headlight bulb1. Open the hood.
2. Remove the headlight bulb cover by
turning it counterclockwise.
3. Remove the bulb from the headlight
assembly.
4. Install a new headlight bulb assembly.
5. Install the headlight bulb cover by turn-
ing it clockwise.
✽NOTICE
If the headlight aiming adjustment is
necessary after the headlight assembly is
reinstalled, consult an authorized
HYUNDAI dealer.
(Continued)
• If a bulb becomes damaged or
cracked, replace it immediately
and carefully dispose of it.
• Wear eye protection when chang-
ing a bulb. Allow the bulb to cool
down before handling it.
OTQ077063OTQ077062
WARNING- Halogen bulbs
• Halogen bulbs contain pressur-
ized gas that will produce flying
pieces of glass if broken.
• Always handle them carefully,
and avoid scratches and abra-
sions. If the bulbs are lit, avoid
contact with liquids. Never touch
the glass with bare hands.
Residual oil may cause the bulb
to overheat and burst when lit. A
bulb should be operated only
when installed in a headlight.
(Continued)
Page 316 of 338

Maintenance
62 7
G220102ATQ
Turn signal light/position light, fog
light bulb (if equipped)
Turn signal light
1. If necessary, remove the headlight
assembly by loosening the headlight
installation bolts. When you remove
the headlight assembly, you may need
to remove the bumper according to the
vehicle.
2. Replace the malfunctioned light bulb.
3. Install the headlight assembly.
Fog light bulb (if equipped)
1. Remove the fog light under cover by
loosening the screw.
2. Replace the malfunctioned light bulb.
3. Install the fog light under cover.Position light
1. Open the hood.
2. Remove the socket by turning it coun-
terclockwise.
3. Remove the bulb by pulling it straight
out.
4. Insert a new bulb in the socket.
5. Install the position light socket.
G220200AUN
Side repeater light bulb replace-
ment (if equipped)
1. Remove the light assembly from the
vehicle by prying the lens and pulling
the assembly out.
2. Disconnect the bulb electrical connec-
tor.
3. Separate the socket and the lens parts
by turning the socket counterclockwise
until the tabs on the socket align with
the slots on the lens part.
4. Remove the bulb by pulling it straight
out.
5. Insert a new bulb in the socket.
6. Reassemble the socket and the lens
part.
7. Connect the bulb electrical connector.
8. Reinstall the light assembly to the
body of the vehicle.
OTQ077056OTQ077050
Page 317 of 338
763
Maintenance
G220300ATQ
Rear combination light bulb
replacement
- Without rear fog light
(1) Tail light
(2) Back-up light
(3) Rear turn signal light
(4) Stop light
- With rear fog light
(1) Tail and stop light
(2) Back-up light
(3) Rear turn signal light
(4) Rear fog light
1. Open the tailgate.
2. Loosen the light assembly retaining
screws with a philips head screwdriver.
3. Remove the rear combination light
assembly from the body of the vehicle.
OTQ077052
OTQ077053
OTQ077051
OTQ077051G
Type B
Type A
Page 318 of 338
Maintenance
64 7
4. Remove the socket from the assembly
by turning the socket counterclockwise
until the tabs on the socket align with
the slots on the assembly.
5. Remove the bulb from the socket by
pressing it in and rotating it counter-
clockwise until the tabs on the bulb
align with the slots in the socket. Pull
the bulb out of the socket.6. Insert a new bulb by inserting it into
the socket and rotating it until it locks
into place.
7. Install the socket in the assembly by
aligning the tabs on the socket with the
slots in the assembly. Push the socket
into the assembly and turn the socket
clockwise.
8. Reinstall the light assembly to the
body of the vehicle.G220400ATQ
High mounted stop light
replacement (if equipped)
1. Open the tailgate.
2. Loosen the light assembly retaining
bolts with a proper tool.
OTQ077054
OTQ077055
OTQ077060G
OTQ077091
Page 319 of 338
765
Maintenance
3. Remove the light assembly from the
body of the vehicle.
4. Separate the socket and the lens parts
by removing the screws with a philips
head screwdriver.
5. Remove the bulb by pulling it straight
out.
6. Insert a new bulb in the socket.
7. Reassemble the socket and the lens
part.
8. Reinstall the light assembly to the
body of the vehicle.
G220500AUN
License plate light bulb replace-
ment
1. Loosen the lens retaining screws with
a philips head screwdriver.
2. Remove the lens.
3. Remove the bulb by pulling it straight
out.4. Install a new bulb.
5. Reinstall the lens securely with the
lens retaining screws.
OTQ077092
OEN076039
OTQ077081
Type B
Type A
Page 320 of 338
Maintenance
66 7
G220600AUN
Interior light bulb replacement
1. Using a flat-blade screwdriver, gently
pry the lens from the interior light
housing.
2. Remove the bulb by pulling it straight
out.
3. Install a new bulb in the socket.
4. Align the lens tabs with the interior
light housing notches and snap the
lens into place.
WARNING
Prior to working on the Interior
Lights, ensure that the “OFF” but-
ton is depressed to avoid burning
your fingers or receiving an electric
shock.
CAUTION
Use care not to dirty or damage
lens, lens tab, and plastic housings.
OTQ077065
OTQ077065G
OTQ077065L
Type A
Type B
Type C
Page 321 of 338

767
Maintenance
Exterior care
G230101AUN
Exterior general caution
It is very important to follow the label
directions when using any chemical
cleaner or polish. Read all warning and
caution statements that appear on the
label.
G230102CEN
Finish maintenance
Washing
To help protect your vehicle’s finish from
rust and deterioration, wash it thoroughly
and frequently at least once a month with
lukewarm or cold water.
If you use your vehicle for off-road driv-
ing, you should wash it after each off-
road trip. Pay special attention to the
removal of any accumulation of salt, dirt,
mud, and other foreign materials. Make
sure the drain holes in the lower edges of
the doors and rocker panels are kept
clear and clean.
Insects, tar, tree sap, bird droppings,
industrial pollution and similar deposits
can damage your vehicle’s finish if not
removed immediately.
Even prompt washing with plain water
may not completely remove all these
deposits. A mild soap, safe for use on
painted surfaces, may be used.After washing, rinse the vehicle thor-
oughly with lukewarm or cold water. Do
not allow soap to dry on the finish.
APPEARANCE CARE
WARNING - Wet brakes
After washing the vehicle, test the
brakes while driving slowly to see if
they have been affected by water. If
braking performance is impaired,
dry the brakes by applying them
lightly while maintaining a slow for-
ward speed.
OJB037800
CAUTION
• Do not use strong soap, chemical
detergents or hot water, and do
not wash the vehicle in direct
sunlight or when the body of the
vehicle is warm.
• Be careful when washing the side
windows of your vehicle.
Especially, with high-pressure
water. Water may leak through the
windows and wet the interior.
• To prevent damage to the plastic
parts and lamps, do not clean
with chemical solvents or strong
detergents.
CAUTION
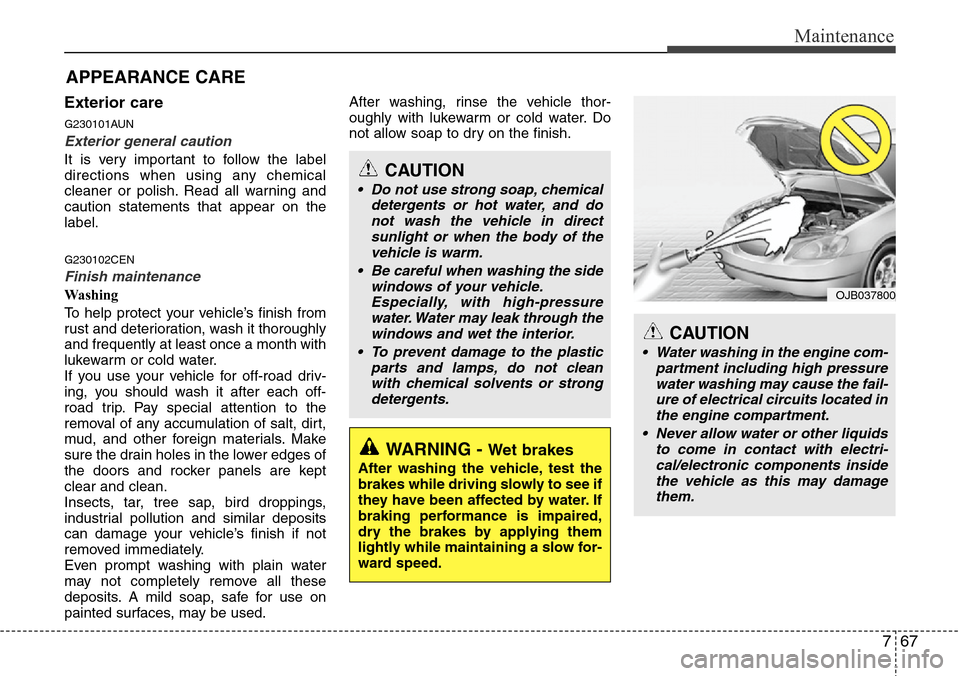
• Water washing in the engine com-
partment including high pressure
water washing may cause the fail-
ure of electrical circuits located in
the engine compartment.
• Never allow water or other liquids
to come in contact with electri-
cal/electronic components inside
the vehicle as this may damage
them.
Page 322 of 338

Maintenance
68 7
Waxing
Wax the vehicle when water will no
longer bead on the paint.
Always wash and dry the vehicle before
waxing. Use a good quality liquid or
paste wax, and follow the manufacturer’s
instructions. Wax all metal trim to protect
it and to maintain its luster.
Removing oil, tar, and similar materials
with a spot remover will usually strip the
wax from the finish. Be sure to re-wax
these areas even if the rest of the vehicle
does not yet need waxing.G230103AUN
Finish damage repair
Deep scratches or stone chips in the
painted surface must be repaired
promptly. Exposed metal will quickly rust
and may develop into a major repair
expense.
✽NOTICE
If your vehicle is damaged and requires
any metal repair or replacement, be sure
the body shop applies anti-corrosion
materials to the parts repaired or
replaced.
G230104AUN
Bright-metal maintenance
• To remove road tar and insects, use a
tar remover, not a scraper or other
sharp object.
• To protect the surfaces of bright-metal
parts from corrosion, apply a coating of
wax or chrome preservative and rub to
a high luster.
• During winter weather or in coastal
areas, cover the bright metal parts with
a heavier coating of wax or preserva-
tive. If necessary, coat the parts with
non-corrosive petroleum jelly or other
protective compound.
G230105AUN
Underbody maintenance
Corrosive materials used for ice and
snow removal and dust control may col-
lect on the underbody. If these materials
are not removed, accelerated rusting can
occur on underbody parts such as the
fuel lines, frame, floor pan and exhaust
system, even though they have been
treated with rust protection.
Thoroughly flush the vehicle underbody
and wheel openings with lukewarm or
cold water once a month, after off-road
driving and at the end of each winter. Pay
special attention to these areas because
it is difficult to see all the mud and dirt. It
will do more harm than good to wet down
the road grime without removing it. The
lower edges of doors, rocker panels, and
frame members have drain holes that
should not be allowed to clog with dirt;
trapped water in these areas can cause
rusting.
CAUTION
• Wiping dust or dirt off the body
with a dry cloth will scratch the
finish.
• Do not use steel wool, abrasive
cleaners, or strong detergents
containing highly alkaline or
caustic agents on chrome-plated
or anodized aluminum parts. This
may result in damage to the pro-
tective coating and cause discol-
oration or paint deterioration.
WARNING
After washing the vehicle, test the
brakes while driving slowly to see if
they have been affected by water. If
braking performance is impaired,
dry the brakes by applying them
lightly while maintaining a slow for-
ward speed.