2011 Hyundai H-1 (Grand Starex) key battery
[x] Cancel search: key batteryPage 60 of 346

341
Safety features of your vehicle
C040400BTQ
Driver's and passenger's front air
bag (if equipped)
Your vehicle is equipped with a
Supplemental Restraint (Air Bag) System
and lap/shoulder belts at both the driver
and passenger seating positions. Theindications of the system's presence are
the letters "SRS AIR BAG" embossed on
the air bag pad cover in the steeringwheel and the passenger's side front
panel pad above the glove box. The SRS consists of air bags installed
under the pad covers in the center of the
steering wheel and the passenger's side
front panel above the glove box.
WARNING
If an air bag deploys, there may be a loud noise followed by a fine
dust released in the vehicle.These conditions are normal and
are not hazardous - the air bags
are packed in this fine powder.
The dust generated during air
bag deployment may cause skin
or eye irritation as well as aggra-
vate asthma for some persons.
Always wash all exposed skin
areas thoroughly with lukewarmwater and a mild soap after an
accident in which the air bags
were deployed.
The SRS can function only when the ignition switch is in the ON
position. If the SRS air bag warn-
ing light does not illuminate, or
continuously remains on after
illuminating for about 6 seconds
when the ignition switch is turned
to the ON position, or after the
engine is started, comes on while
driving, the SRS is not working
properly. If this occurs, have your
vehicle immediately inspected by
an authorized HYUNDAI dealer.
(Continued)(Continued)
Before you replace a fuse or dis-connect a battery terminal, turn
the ignition switch to the LOCK
position and remove the ignition
key. Never remove or replace the
air bag related fuse(s) when the
ignition switch is in the ON posi-
tion. Failure to heed this warning
will cause the SRS air bag warn-
ing light to illuminate.
OTQ037024
Driver’s front air bag
Page 74 of 346
Features of your vehicle
4
4
Remote keyless entry system operations
D020101APA
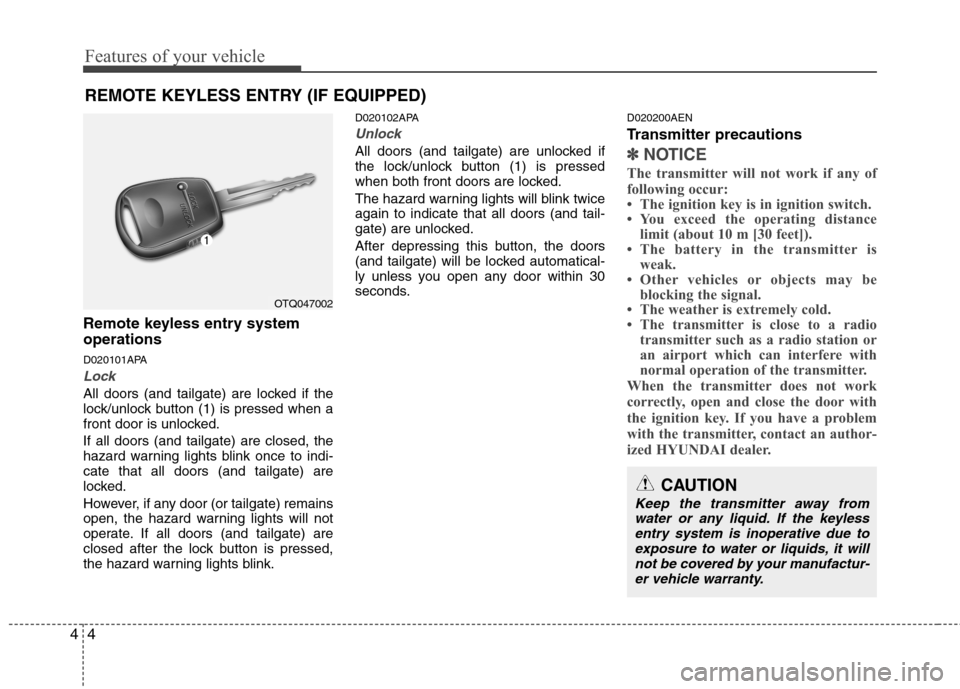
Lock
All doors (and tailgate) are locked if the
lock/unlock button (1) is pressed when a
front door is unlocked. If all doors (and tailgate) are closed, the
hazard warning lights blink once to indi-cate that all doors (and tailgate) are
locked.
However, if any door (or tailgate) remains
open, the hazard warning lights will not
operate. If all doors (and tailgate) are
closed after the lock button is pressed,
the hazard warning lights blink. D020102APA
Unlock
All doors (and tailgate) are unlocked if
the lock/unlock button (1) is pressed
when both front doors are locked.
The hazard warning lights will blink twice again to indicate that all doors (and tail-
gate) are unlocked.
After depressing this button, the doors
(and tailgate) will be locked automatical-
ly unless you open any door within 30
seconds.
D020200AEN
Transmitter precautions✽✽
NOTICE
The transmitter will not work if any of
following occur:
The ignition key is in ignition switch.
You exceed the operating distance limit (about 10 m [30 feet]).
The battery in the transmitter is weak.
Other vehicles or objects may be blocking the signal.
The weather is extremely cold.
The transmitter is close to a radio transmitter such as a radio station or
an airport which can interfere with
normal operation of the transmitter.
When the transmitter does not work
correctly, open and close the door with
the ignition key. If you have a problem
with the transmitter, contact an author-
ized HYUNDAI dealer.
REMOTE KEYLESS ENTRY (IF EQUIPPED)
OTQ047002
CAUTION
Keep the transmitter away from water or any liquid. If the keyless entry system is inoperative due to
exposure to water or liquids, it will not be covered by your manufactur-er vehicle warranty.
Page 75 of 346
45
Features of your vehicle
D020300BTQ
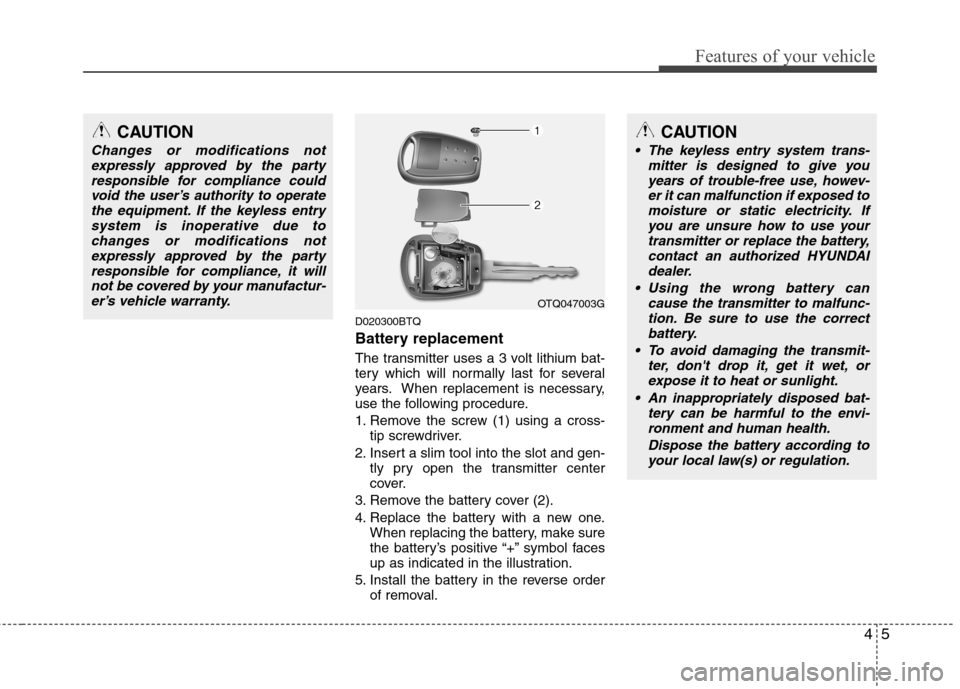
Battery replacement
The transmitter uses a 3 volt lithium bat-
tery which will normally last for several
years. When replacement is necessary,
use the following procedure.
1. Remove the screw (1) using a cross-tip screwdriver.
2. Insert a slim tool into the slot and gen- tly pry open the transmitter center
cover.
3. Remove the battery cover (2).
4. Replace the battery with a new one. When replacing the battery, make sure
the battery’s positive “+” symbol faces
up as indicated in the illustration.
5. Install the battery in the reverse order of removal.
CAUTION
Changes or modifications not
expressly approved by the party
responsible for compliance couldvoid the user’s authority to operatethe equipment. If the keyless entry system is inoperative due to
changes or modifications notexpressly approved by the partyresponsible for compliance, it will
not be covered by your manufactur-er’s vehicle warranty.
OTQ047003G
CAUTION
The keyless entry system trans- mitter is designed to give you
years of trouble-free use, howev- er it can malfunction if exposed tomoisture or static electricity. Ifyou are unsure how to use your
transmitter or replace the battery,contact an authorized HYUNDAI dealer.
Using the wrong battery can cause the transmitter to malfunc-tion. Be sure to use the correctbattery.
To avoid damaging the transmit- ter, don't drop it, get it wet, or
expose it to heat or sunlight.
An inappropriately disposed bat- tery can be harmful to the envi-ronment and human health.
Dispose the battery according toyour local law(s) or regulation.
Page 82 of 346
Features of your vehicle
12
4
D050300AUN
Impact sensing door unlock sys- tem (if equipped)
All doors will be automatically unlocked
when the impact is delivered to impact
sensors while the ignition switch ON.
However, the doors may not be unlocked
if mechanical problems occur with the
door lock system or battery. D050400AFD
Speed sensing door lock system (if equipped)
When the speed of the vehicle keeps
above 40 km/h for 1 second, it will auto-
matically lock all doors. For activation of
this feature, contact an authorized
HYUNDAI dealer.
✽✽
NOTICE
An authorized HYUNDAI dealer can
select some auto door lock/unlock fea-
tures as follows;
Speed sensing auto door locking
Auto door unlock when the ignition key is removed from the ignition
switch
If you want to select a door lock/unlock
feature, consult an authorized
HYUNDAI dealer.
D050500ATQ
Child-protector rear door lock
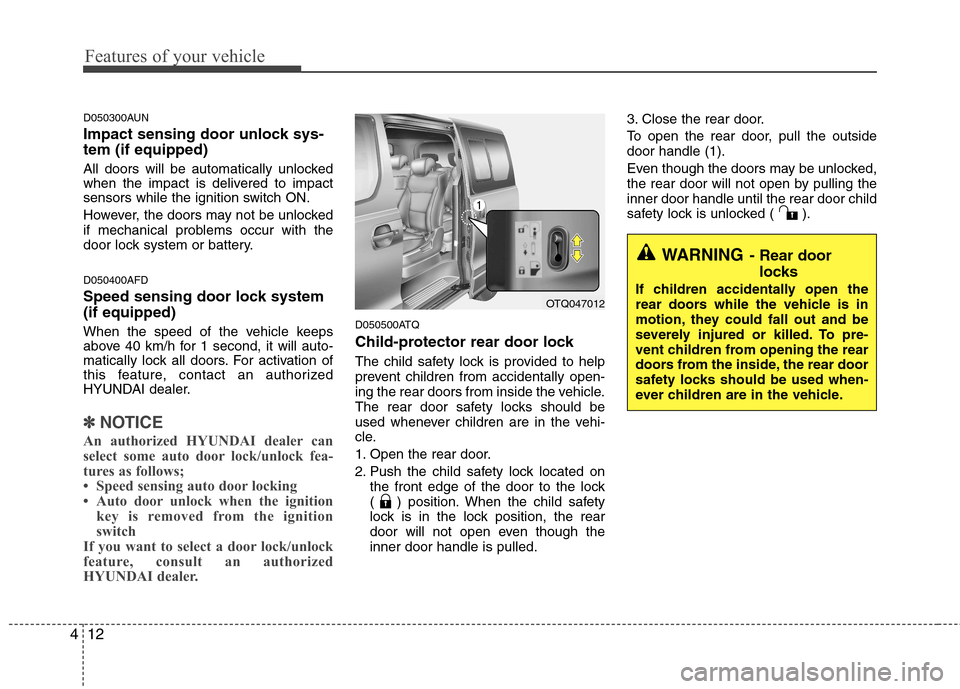
The child safety lock is provided to help
prevent children from accidentally open-
ing the rear doors from inside the vehicle.
The rear door safety locks should be
used whenever children are in the vehi-
cle.
1. Open the rear door.
2. Push the child safety lock located on the front edge of the door to the lock
( ) position. When the child safety
lock is in the lock position, the rear
door will not open even though theinner door handle is pulled. 3. Close the rear door.
To open the rear door, pull the outside door handle (1).
Even though the doors may be unlocked,
the rear door will not open by pulling theinner door handle until the rear door child
safety lock is unlocked ( ).
WARNING
- Rear door
locks
If children accidentally open the
rear doors while the vehicle is in
motion, they could fall out and be
severely injured or killed. To pre-
vent children from opening the rear
doors from the inside, the rear door
safety locks should be used when-
ever children are in the vehicle.
OTQ047012
Page 112 of 346
Features of your vehicle
42
4
ESP
OFFD150327AUN
Key reminder warning chime (if equipped)
If the driver’s door is opened while the
ignition key is left in the ignition switch
(ACC or LOCK position), the key
reminder warning chime will sound. This
is to prevent you from locking your keys
in the vehicle. The chime sounds until the
key is removed from the ignition switch or
the driver’s door is closed.
D150323AUN-EE
ESP indicator (ElectronicStability Program)
(if equipped)
The ESP indicator will illuminate when
the ignition switch is turned ON, but
should go off after approximately 3 sec-
onds. When the ESP is on, it monitors the
driving conditions and under normal driv-
ing conditions, the ESP light will remain
off. When a slippery or low traction con-dition is encountered, the ESP will oper-
ate, and the ESP indicator will blink to
indicate the ESP is operating. D150324AFD
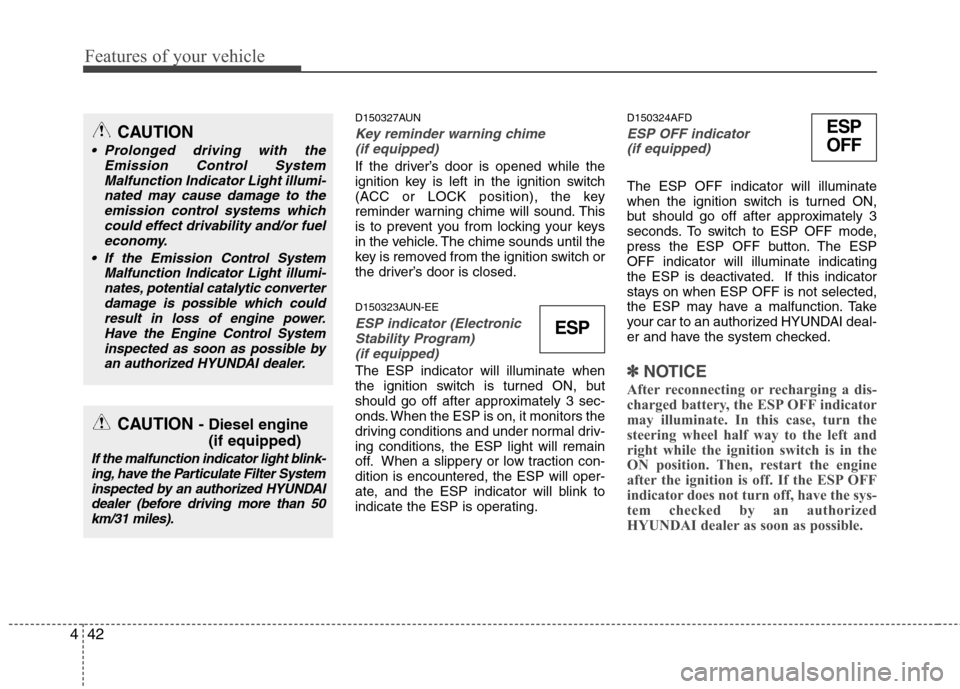
ESP OFF indicator
(if equipped)
The ESP OFF indicator will illuminate
when the ignition switch is turned ON,
but should go off after approximately 3
seconds. To switch to ESP OFF mode,
press the ESP OFF button. The ESPOFF indicator will illuminate indicating
the ESP is deactivated. If this indicator
stays on when ESP OFF is not selected,
the ESP may have a malfunction. Take
your car to an authorized HYUNDAI deal-
er and have the system checked.
✽✽ NOTICE
After reconnecting or recharging a dis-
charged battery, the ESP OFF indicator
may illuminate. In this case, turn the
steering wheel half way to the left and
right while the ignition switch is in the
ON position. Then, restart the engine
after the ignition is off. If the ESP OFF
indicator does not turn off, have the sys-
tem checked by an authorized
HYUNDAI dealer as soon as possible.
CAUTION
Prolonged driving with the Emission Control System
Malfunction Indicator Light illumi-nated may cause damage to theemission control systems which could effect drivability and/or fuel
economy.
If the EmissionControl System
Malfunction Indicator Light illumi-
nates, potential catalytic converterdamage is possible which couldresult in loss of engine power.Have the Engine Control System
inspected as soon as possible byan authorized HYUNDAI dealer.
CAUTION - Diesel engine
(if equipped)
If the malfunction indicator light blink-ing, have the Particulate Filter Systeminspected by an authorized HYUNDAIdealer (before driving more than 50km/31 miles).
ESP
Page 117 of 346
447
Features of your vehicle
The hazard warning lights are turned on
by pushing in the hazard switch. This
causes all turn signal lights to blink. The
hazard warning lights will operate even
though the key is not in the ignition
switch.
To turn the hazard warning lights off,
push the switch a second time.D190100CUN
Battery saver function
The purpose of this feature is to pre-
vent the battery from being dis-
charged. The system automatically
turns off the parking lights when the
driver removes the ignition key and
opens the driver-side door.
With this feature, the parking lights will be turned off automatically if the driver
parks on the side of road at night.
If necessary, to keep the lights on
when the ignition key is removed, per-
form the following:
1) Open the driver-side door.
2) Turn the parking lights OFF and ON again using the light switch on the
steering column.
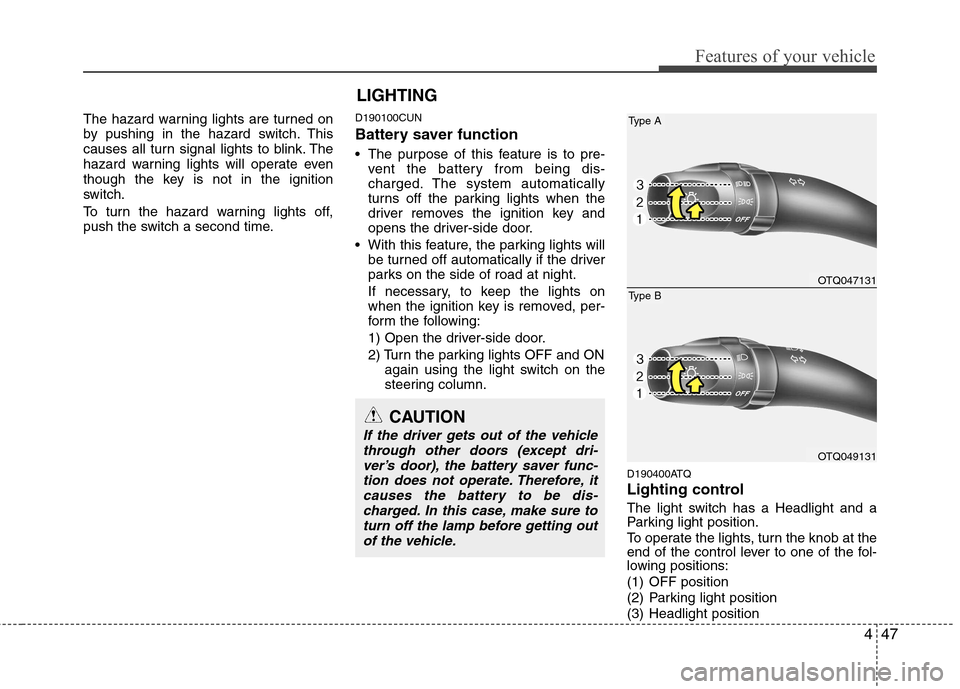
D190400ATQ
Lighting control
The light switch has a Headlight and a
Parking light position.
To operate the lights, turn the knob at the
end of the control lever to one of the fol-
lowing positions:
(1) OFF position
(2) Parking light position
(3) Headlight position
LIGHTING
OTQ047131
OTQ049131
Type B
Type A
CAUTION
If the driver gets out of the vehicle
through other doors (except dri-ver’s door), the battery saver func-
tion does not operate. Therefore, itcauses the battery to be dis-charged. In this case, make sure toturn off the lamp before getting out
of the vehicle.
Page 192 of 346

Driving your vehicle
4
5
E030100AEN
Illuminated ignition switch (if equipped)
Whenever a front door is opened, the
ignition switch will be illuminated for your
convenience, provided the ignition switch
is not in the ON position. The light will go
off immediately when the ignition switch
is turned on or go off after about 30 sec-onds when the door is closed. Ignition switch position
E030201AUN
LOCK
The steering wheel locks to protect
against theft. The ignition key can be
removed only in the LOCK position.
When turning the ignition switch to the
LOCK position, push the key inward at
the ACC position and turn the key towardthe LOCK position.E030202AUN
ACC (Accessory)
The steering wheel is unlocked and elec-
trical accessories are operative.
✽✽
NOTICE
If difficulty is experienced in turning the
ignition switch to the ACC position, turn
the key while turning steering wheel
right and left to release the tension.
E030203AUN
ON
The warning lights can be checked
before the engine is started. This is the
normal running position after the engine
is started.
Do not leave the ignition switch ON if the engine is not running to prevent battery
discharge.
KEY POSITIONS
OTQ057001OTQ057002
Page 342 of 346
Index
6
I
Interior light ···································································4-56
Interior light bulb replacement ······································7-64
Interior overview ······························································2-2
Jack and tools ···································································6-7
Jump starting ····································································6-4
Key positions ···································································5-4
Keys ·················································································4-2 Label
Air bag warning label ···············································3-51
Tire sidewall labeling ···············································7-44
Tire specification and pressure label ··························8-3
Vehicle certification label ···········································8-2
Latch system, see ISOFIX system ·································3-31
License plate light bulb replacement ·····························7-63
Light bulbs ·····································································7-58 Front fog light bulb replacement·······························7-60
Headlight bulb replacement ······································7-59
High mounted stop light replacement ·······················7-62
Interior light bulb replacement··································7-64 License plate light bulb replacement ························7-63
Position light bulb replacement·································7-60
Rear combination light bulb replacement ·················7-61
Rear fog light bulb replacement································7-61
Side repeater light bulb replacement·························7-60
Turn signal light bulb replacement ···························7-60
Lighting ··········································································4-47 Battery saver function ··············································4-47
Locking differential ························································5-28
Lubricants and capacities ·················································9-4
Main fuse ········································································7-51 Maintenance Explanation of scheduled maintenance items ···········7-19Maintenance services ················································· 7-4
Maintenance under severe usage conditions ·············7-17 Normal maintenance schedule ····································7-9
Owner maintenance ····················································7-6
Scheduled maintenance service ·································7-8
Tire maintenance ······················································7-44
Maintenance services ·······················································7-4
Manual climate control system ······································4-59 Air conditioning ·······················································4-64
Climate control air filter ···········································4-69
Heating and air conditioning ····································4-60
Rear heating and air conditioning ····························4-64
L
M
K
J