2011 Hyundai H-1 (Grand Starex) tow
[x] Cancel search: towPage 98 of 346
Features of your vehicle
28
4
D140100AUN
Inside rearview mirror
Adjust the rearview mirror to center on
the view through the rear window. Make
this adjustment before you start driving.
D140101AUN
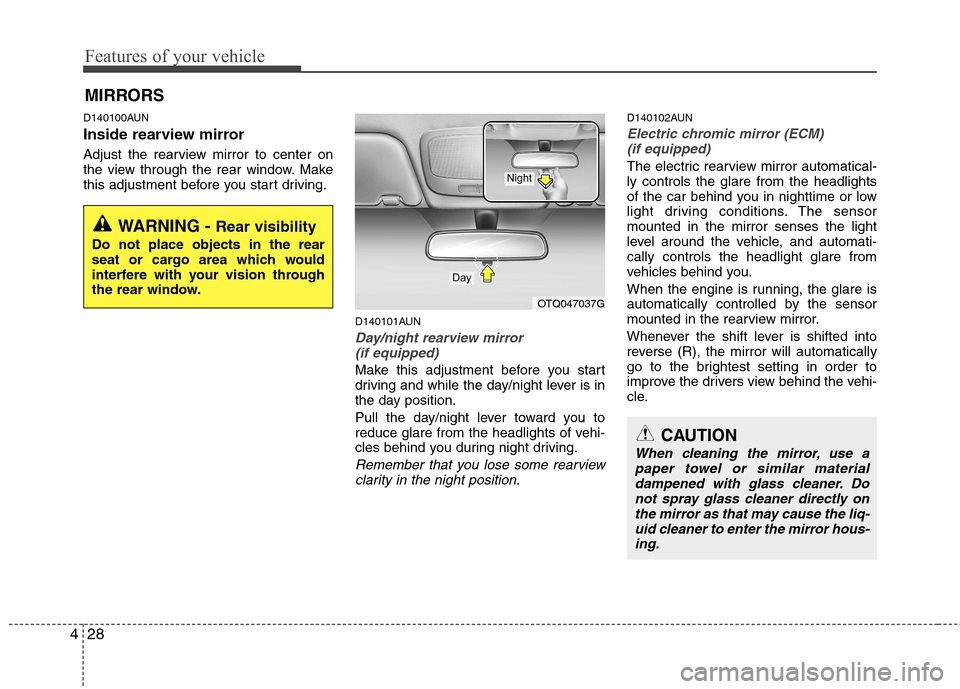
Day/night rearview mirror (if equipped)
Make this adjustment before you start
driving and while the day/night lever is in
the day position.
Pull the day/night lever toward you to
reduce glare from the headlights of vehi-
cles behind you during night driving.
Remember that you lose some rearviewclarity in the night position.
D140102AUN
Electric chromic mirror (ECM) (if equipped)
The electric rearview mirror automatical- ly controls the glare from the headlights
of the car behind you in nighttime or low
light driving conditions. The sensormounted in the mirror senses the light
level around the vehicle, and automati-cally controls the headlight glare from
vehicles behind you.
When the engine is running, the glare is
automatically controlled by the sensor
mounted in the rearview mirror.
Whenever the shift lever is shifted into
reverse (R), the mirror will automatically
go to the brightest setting in order to
improve the drivers view behind the vehi-
cle.
MIRRORS
WARNING -
Rear visibility
Do not place objects in the rear
seat or cargo area which would
interfere with your vision through
the rear window.
OTQ047037G
CAUTION
When cleaning the mirror, use a paper towel or similar materialdampened with glass cleaner. Donot spray glass cleaner directly on the mirror as that may cause the liq-
uid cleaner to enter the mirror hous- ing.
Day
Night
Page 101 of 346
431
Features of your vehicle
D140202ATQ
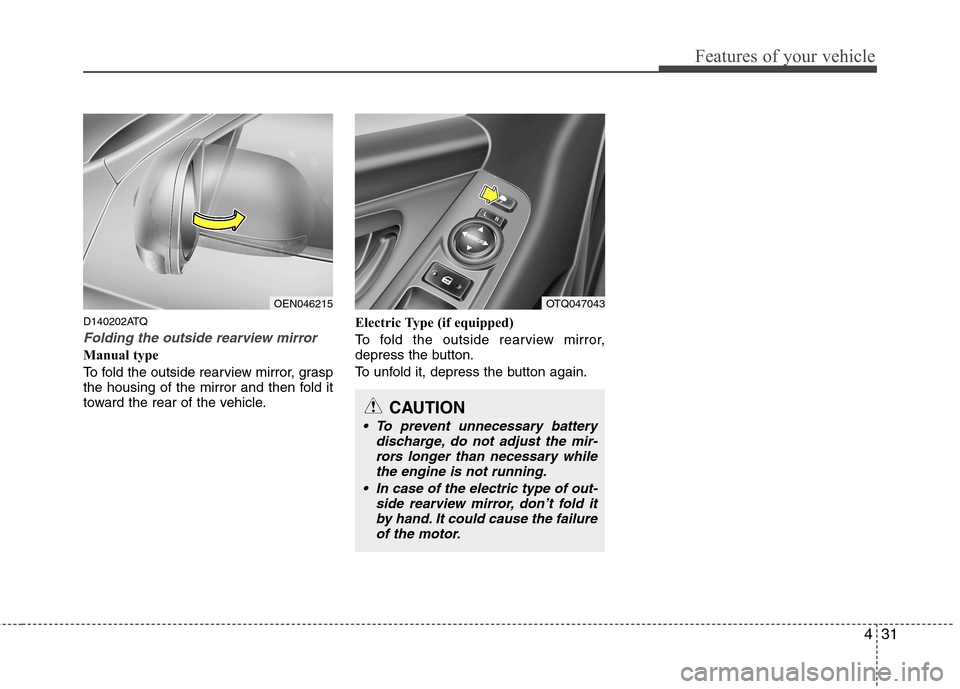
Folding the outside rearview mirror
Manual type
To fold the outside rearview mirror, grasp
the housing of the mirror and then fold it
toward the rear of the vehicle.Electric Type (if equipped)
To fold the outside rearview mirror,
depress the button.
To unfold it, depress the button again.
OEN046215OTQ047043
CAUTION
To prevent unnecessary battery
discharge, do not adjust the mir-rors longer than necessary whilethe engine is not running.
In case of the electric type of out- side rearview mirror, don’t fold it
by hand. It could cause the failureof the motor.
Page 103 of 346
433
Features of your vehicle
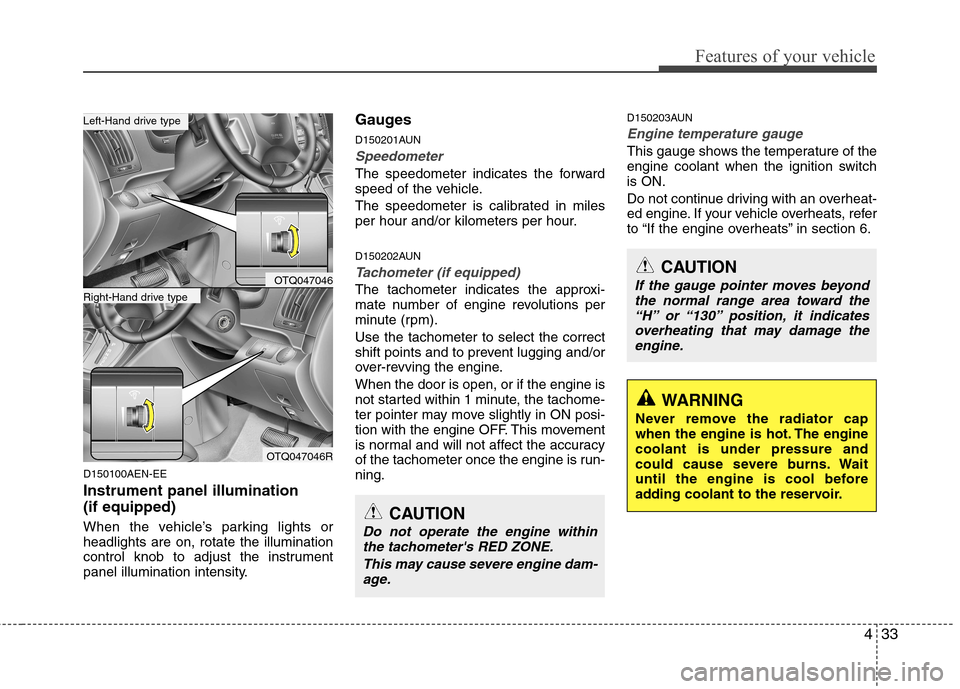
D150100AEN-EE Instrument panel illumination (if equipped)
When the vehicle’s parking lights or headlights are on, rotate the illumination
control knob to adjust the instrument
panel illumination intensity.Gauges
D150201AUN
Speedometer
The speedometer indicates the forward
speed of the vehicle.
The speedometer is calibrated in miles
per hour and/or kilometers per hour.
D150202AUN
Tachometer (if equipped)
The tachometer indicates the approxi-
mate number of engine revolutions per
minute (rpm). Use the tachometer to select the correct
shift points and to prevent lugging and/or
over-revving the engine. When the door is open, or if the engine is
not started within 1 minute, the tachome-
ter pointer may move slightly in ON posi-
tion with the engine OFF. This movement
is normal and will not affect the accuracy
of the tachometer once the engine is run-ning.
D150203AUN
Engine temperature gauge
This gauge shows the temperature of the
engine coolant when the ignition switchis ON.
Do not continue driving with an overheat-
ed engine. If your vehicle overheats, refer
to “If the engine overheats” in section 6.
CAUTION
Do not operate the engine within
the tachometer's RED ZONE.
This may cause severe engine dam-age.
CAUTION
If the gauge pointer moves beyond the normal range area toward the“H” or “130” position, it indicatesoverheating that may damage the engine.
WARNING
Never remove the radiator cap
when the engine is hot. The enginecoolant is under pressure and
could cause severe burns. Wait
until the engine is cool before
adding coolant to the reservoir.
OTQ047046
OTQ047046R
Right-Hand drive type
Left-Hand drive type
Page 110 of 346
Features of your vehicle
40
4
3. Do not drive the vehicle if leaks are
found, the warning light remains on or
the brakes do not operate properly.
Have the vehicle towed to any author-
ized HYUNDAI dealer for a brake sys-
tem inspection and necessary repairs.
Your vehicle is equipped with dual-diago-
nal braking systems. This means you still
have braking on two wheels even if one
of the dual systems should fail. With only
one of the dual systems working, more
than normal pedal travel and greaterpedal pressure are required to stop the
car. Also, the car will not stop in as short
a distance with only a portion of the
brake system working. If the brakes fail
while you are driving, shift to a lower gear
for additional engine braking and stop the
car as soon as it is safe to do so.
To check bulb operation, check whether
the parking brake and brake fluid warning
light illuminates when the ignition switchis in the ON position. Low brake vacuum pressure warning
(diesel engine only, if equipped)
If the warning light remains on, it may
indicate that the brake vacuum pump has
any problem. Therefore you should avoid
high speed driving or sudden stop, and
you should depress the brake pedal
deeper and harder than usual in braking.
Make sure to have the brake system
checked and repaired by an authorized
HYUNDAI dealer.
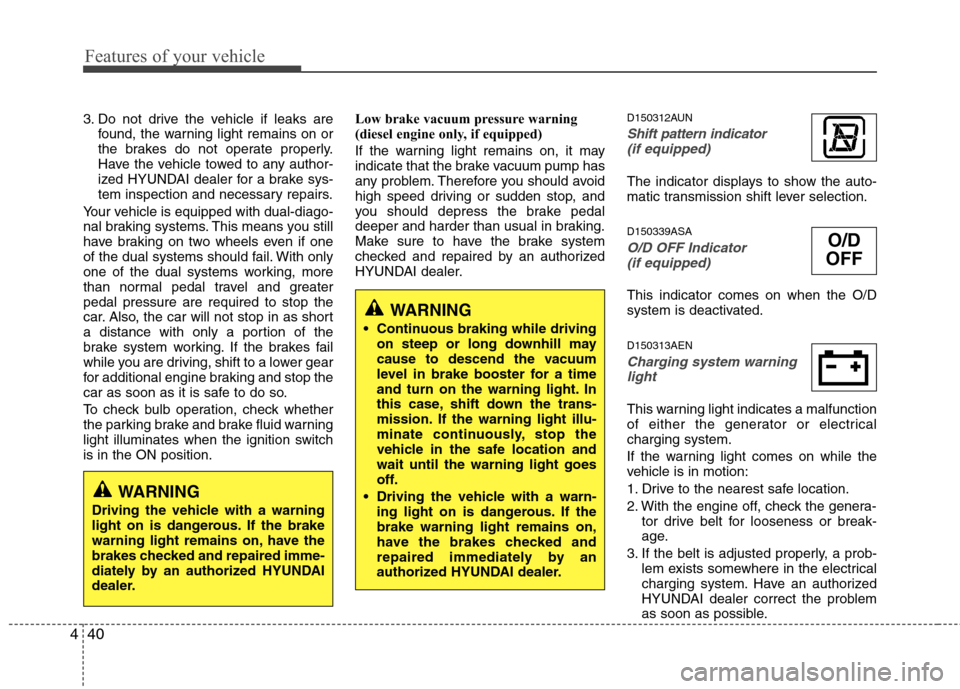
D150312AUNShift pattern indicator
(if equipped)
The indicator displays to show the auto-
matic transmission shift lever selection. D150339ASA
O/D OFF Indicator (if equipped)
This indicator comes on when the O/D
system is deactivated. D150313AEN
Charging system warning
light
This warning light indicates a malfunction
of either the generator or electricalcharging system.
If the warning light comes on while the
vehicle is in motion:
1. Drive to the nearest safe location.
2. With the engine off, check the genera- tor drive belt for looseness or break-
age.
3. If the belt is adjusted properly, a prob- lem exists somewhere in the electrical
charging system. Have an authorized
HYUNDAI dealer correct the problem
as soon as possible.
WARNING
Driving the vehicle with a warning
light on is dangerous. If the brake
warning light remains on, have the
brakes checked and repaired imme-
diately by an authorized HYUNDAI
dealer.
WARNING
Continuous braking while driving on steep or long downhill may
cause to descend the vacuum
level in brake booster for a time
and turn on the warning light. In
this case, shift down the trans-
mission. If the warning light illu-
minate continuously, stop the
vehicle in the safe location andwait until the warning light goes
off.
Driving the vehicle with a warn- ing light on is dangerous. If thebrake warning light remains on,
have the brakes checked and
repaired immediately by an
authorized HYUNDAI dealer.
O/D
OFF
Page 115 of 346
445
Features of your vehicle
D170200AEN Non-operational conditions of rear parking assist system
The rear parking assist system may
not operate properly when:
1. Moisture is frozen to the sensor. (It willoperate normally when the moisture has been cleared.)
2. The sensor is covered with foreign matter, such as snow or water, or the
sensor cover is blocked. (It will operate
normally when the material is removed
or the sensor is no longer blocked.)
3. Driving on uneven road surfaces (unpaved roads, gravel, bumps, gradi-ent).
4. Objects generating excessive noise (vehicle horns, loud motorcycle
engines, or truck air brakes) are within
range of the sensor.
5. Heavy rain or water spray exists.
6. Wireless transmitters or mobile phones are within range of the sensor.
7. The sensor is covered with snow.
8. Trailer towing The detecting range may decrease when:
1. The sensor is stained with foreign mat-
ter such as snow or water. (The sens-
ing range will return to normal when
removed.)
2. Outside air temperature is extremely hot or cold.
The following objects may not be rec-
ognized by the sensor:
1. Sharp or slim objects such as ropes, chains or small poles.
2. Objects which tend to absorb the sen- sor frequency such as clothes, spongy
material or snow.
3. Undetectable objects smaller than 1 m (40 in.) in height and narrower than 14
cm (6 in.) in diameter. D170300AEN Rear parking assist system pre- cautions
The rear parking assist system may
not sound sequentially depending on the speed and shapes of the objectsdetected.
The rear parking assist system may malfunction if the vehicle bumperheight or sensor installation has been
modified or damaged. Any non-factory
installed equipment or accessories
may also interfere with the sensor per-
formance.
The sensor may not recognize objects less than 40 cm (15 in.) from the sen-
sor, or it may sense an incorrect dis-
tance. Use caution.
When the sensor is frozen or stained with snow, dirt, or water, the sensor
may be inoperative until the stains are
removed using a soft cloth.
Do not push, scratch or strike the sen- sor. Sensor damage could occur.
Page 119 of 346
449
Features of your vehicle
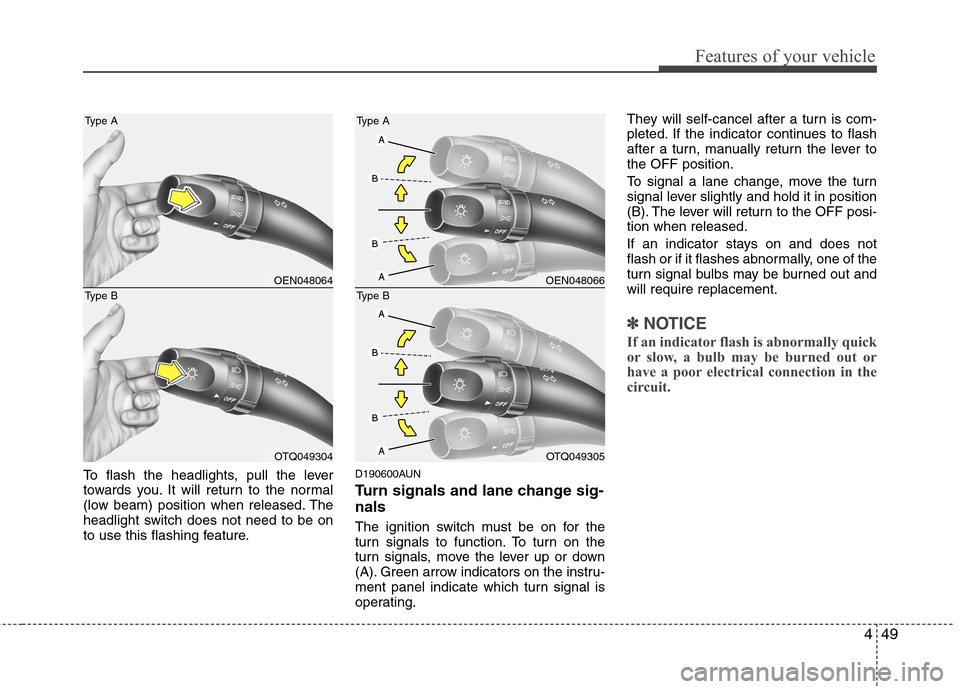
To flash the headlights, pull the lever
towards you. It will return to the normal
(low beam) position when released. The
headlight switch does not need to be on
to use this flashing feature.D190600AUN
Turn signals and lane change sig- nals
The ignition switch must be on for the
turn signals to function. To turn on the
turn signals, move the lever up or down
(A). Green arrow indicators on the instru-
ment panel indicate which turn signal is
operating.They will self-cancel after a turn is com-
pleted. If the indicator continues to flash
after a turn, manually return the lever tothe OFF position.
To signal a lane change, move the turn
signal lever slightly and hold it in position
(B). The lever will return to the OFF posi-tion when released.
If an indicator stays on and does not
flash or if it flashes abnormally, one of the
turn signal bulbs may be burned out andwill require replacement.
✽✽
NOTICE
If an indicator flash is abnormally quick
or slow, a bulb may be burned out or
have a poor electrical connection in the
circuit.
OEN048064
OTQ049304
Type B
Type A
OEN048066
OTQ049305
Type B
Type A
Page 123 of 346
453
Features of your vehicle
D200100BTQ
Windshield wipers
Operates as follows when the ignition
switch is turned ON./ MIST: For a single wiping cycle,
push the lever upward and
release it with the lever in the
OFF (0) position. The wipers
will operate continuously if
the lever is pushed upwardand held.
OFF (0) : Wiper is not in operation
INT (---) : Wiper operates intermittently at the same wiping intervals.
Use this mode in a light rain or
mist. To vary the speed setting,
turn the speed control knob.
LO (1) : Normal wiper speed
HI (2) : Fast wiper speed✽✽ NOTICE
If there is heavy accumulation of snow
or ice on the windshield, defrost the
windshield for about 10 minutes, or
until the snow and/or ice is removed
before using the windshield wipers to
ensure proper operation.
✽
✽ NOTICE
When you operate the wipers, if your vehicle has a problem in any part of
the wiper operation system, the wiper
may operate in the LO mode regard-
less of the wiper switch position. In
this case, have your vehicle checked
by an authorized HYUNDAI dealer as
soon as possible.
When the ignition key is removed, the
wiper blade sometimes may move to
properly position slightly for reducing
the deterioration of the windshield
wipers.
D200200AUN
Windshield washers
In the OFF (0) position, pull the lever
gently toward you to spray washer fluid
on the windshield and to run the wipers
1-3 cycles. Use this function when the windshield is
dirty.
The spray and wiper operation will con-
tinue until you release the lever.
If the washer does not work, check the
washer fluid level. If the fluid level is not
sufficient, you will need to add appropri-
ate non-abrasive windshield washer fluid
to the washer reservoir.
The reservoir filler neck is located in the
front of the engine compartment on the
passenger side.
CAUTION
To prevent possible damage to the
washer pump, do not operate the washer when the fluid reservoir isempty.
Page 131 of 346
461
Features of your vehicle
D230101ATQ
Mode selection
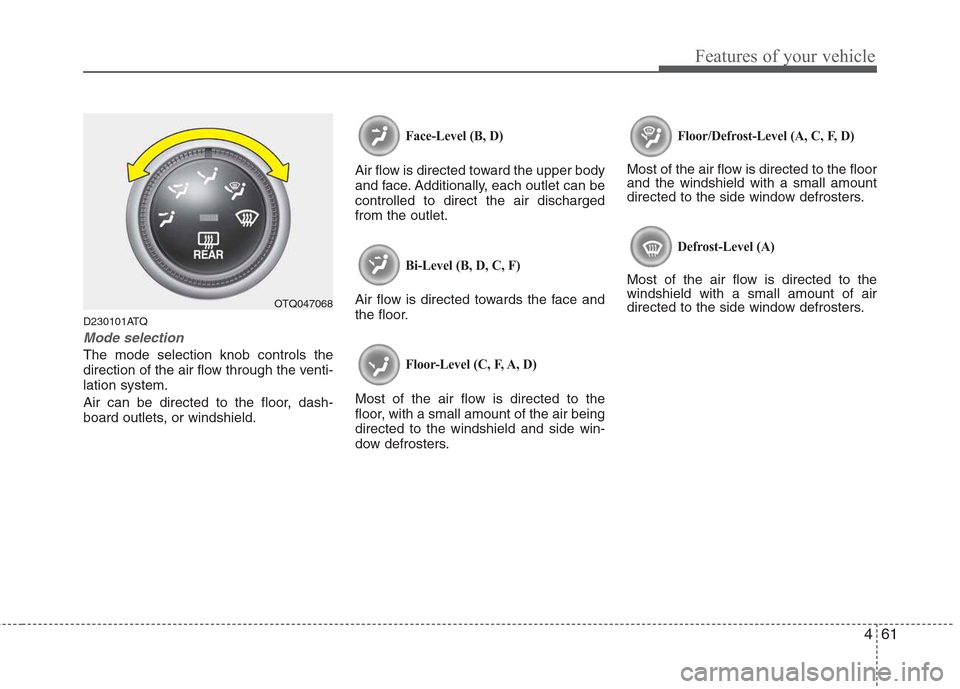
The mode selection knob controls the
direction of the air flow through the venti-lation system.
Air can be directed to the floor, dash-
board outlets, or windshield.
Face-Level (B, D)
Air flow is directed toward the upper body
and face. Additionally, each outlet can becontrolled to direct the air dischargedfrom the outlet.
Bi-Level (B, D, C, F)
Air flow is directed towards the face and
the floor.
Floor-Level (C, F, A, D)
Most of the air flow is directed to the
floor, with a small amount of the air beingdirected to the windshield and side win-
dow defrosters.
Floor/Defrost-Level (A, C, F, D)
Most of the air flow is directed to the floor and the windshield with a small amount
directed to the side window defrosters.
Defrost-Level (A)
Most of the air flow is directed to thewindshield with a small amount of air
directed to the side window defrosters.
OTQ047068