2011 Hyundai H-1 (Grand Starex) ESP
[x] Cancel search: ESPPage 95 of 346
425
Features of your vehicle
D100500AUN
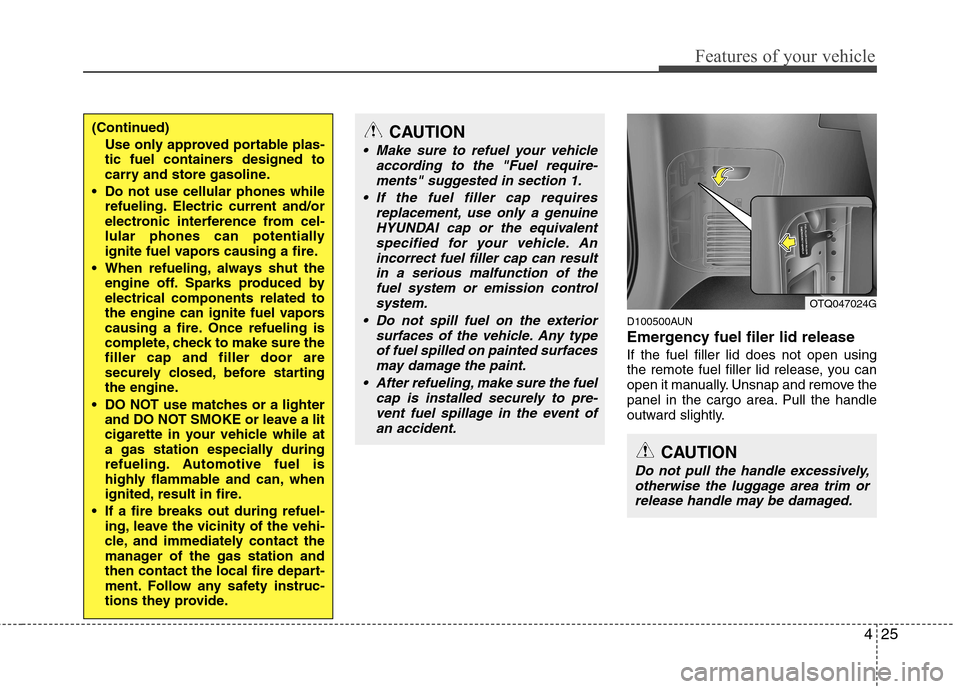
Emergency fuel filer lid release If the fuel filler lid does not open using
the remote fuel filler lid release, you can
open it manually. Unsnap and remove the
panel in the cargo area. Pull the handle
outward slightly.
CAUTION
Make sure to refuel your vehicleaccording to the "Fuel require-
ments" suggested in section 1.
If the fuel filler cap requires replacement, use only a genuineHYUNDAI cap or the equivalent
specified for your vehicle. An incorrect fuel filler cap can resultin a serious malfunction of thefuel system or emission control
system.
Do not spill fuel on the exterior surfaces of the vehicle. Any typeof fuel spilled on painted surfacesmay damage the paint.
After refueling, make sure the fuel cap is installed securely to pre-vent fuel spillage in the event ofan accident.
CAUTION
Do not pull the handle excessively,otherwise the luggage area trim or
release handle may be damaged.
OTQ047024G
(Continued)
Use only approved portable plas-
tic fuel containers designed to
carry and store gasoline.
Do not use cellular phones while refueling. Electric current and/or
electronic interference from cel-
lular phones can potentially
ignite fuel vapors causing a fire.
When refueling, always shut the engine off. Sparks produced byelectrical components related to
the engine can ignite fuel vapors
causing a fire. Once refueling is
complete, check to make sure thefiller cap and filler door are
securely closed, before starting
the engine.
DO NOT use matches or a lighter and DO NOT SMOKE or leave a lit
cigarette in your vehicle while at
a gas station especially during
refueling. Automotive fuel is
highly flammable and can, when
ignited, result in fire.
If a fire breaks out during refuel- ing, leave the vicinity of the vehi-
cle, and immediately contact the
manager of the gas station and
then contact the local fire depart-
ment. Follow any safety instruc-
tions they provide.
Page 100 of 346
Features of your vehicle
30
4
D140201AEN
Remote control (if equipped)
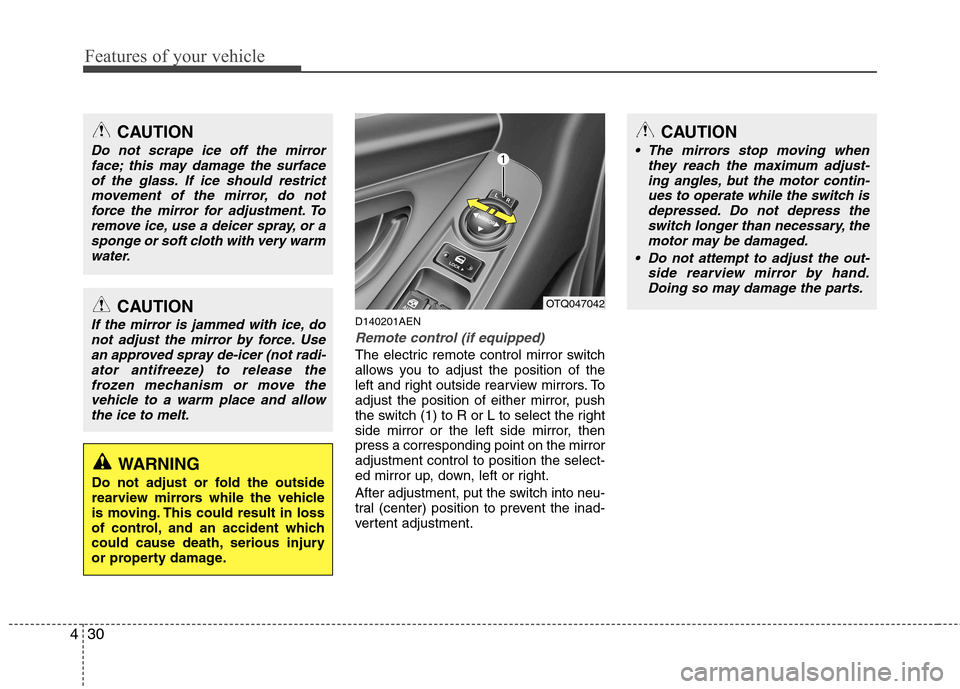
The electric remote control mirror switch
allows you to adjust the position of the
left and right outside rearview mirrors. To
adjust the position of either mirror, push
the switch (1) to R or L to select the right
side mirror or the left side mirror, thenpress a corresponding point on the mirroradjustment control to position the select-
ed mirror up, down, left or right.
After adjustment, put the switch into neu-
tral (center) position to prevent the inad-
vertent adjustment.
CAUTION
Do not scrape ice off the mirror
face; this may damage the surface
of the glass. If ice should restrictmovement of the mirror, do notforce the mirror for adjustment. To remove ice, use a deicer spray, or a
sponge or soft cloth with very warmwater.
CAUTION
If the mirror is jammed with ice, donot adjust the mirror by force. Usean approved spray de-icer (not radi-ator antifreeze) to release the
frozen mechanism or move thevehicle to a warm place and allowthe ice to melt.
WARNING
Do not adjust or fold the outside
rearview mirrors while the vehicle
is moving. This could result in loss
of control, and an accident which
could cause death, serious injury
or property damage.
OTQ047042
CAUTION
The mirrors stop moving when they reach the maximum adjust-
ing angles, but the motor contin- ues to operate while the switch isdepressed. Do not depress theswitch longer than necessary, the
motor may be damaged.
Do not attempt to adjust the out- side rearview mirror by hand.Doing so may damage the parts.
Page 106 of 346
Features of your vehicle
36
4
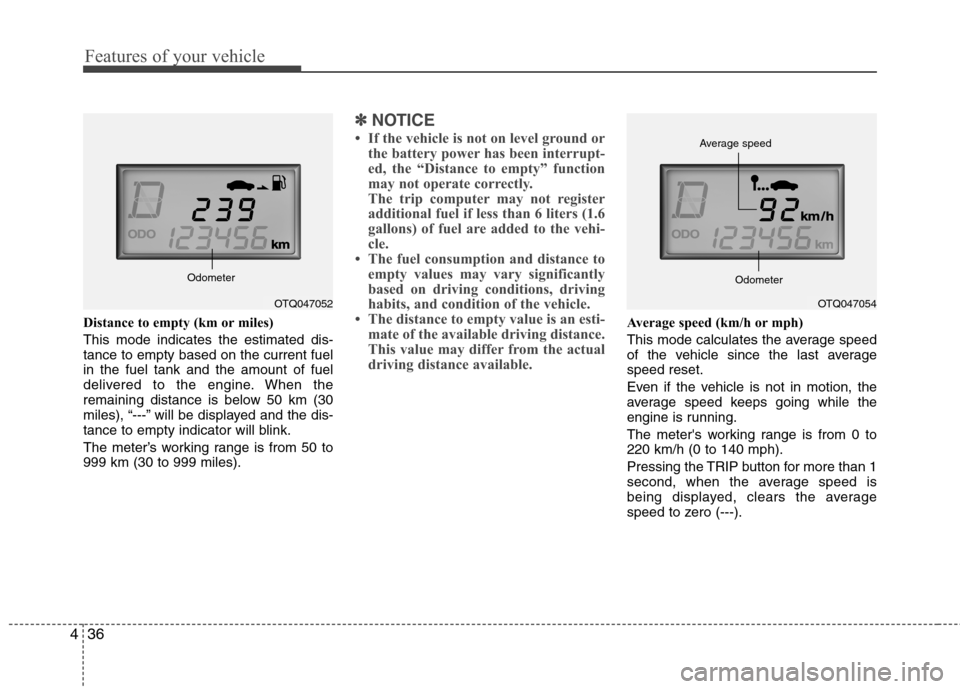
Distance to empty (km or miles) This mode indicates the estimated dis- tance to empty based on the current fuelin the fuel tank and the amount of fuel
delivered to the engine. When the
remaining distance is below 50 km (30
miles), “---” will be displayed and the dis-
tance to empty indicator will blink.
The meter’s working range is from 50 to 999 km (30 to 999 miles).
✽✽
NOTICE
If the vehicle is not on level ground or the battery power has been interrupt-
ed, the “Distance to empty” function
may not operate correctly.
The trip computer may not register
additional fuel if less than 6 liters (1.6
gallons) of fuel are added to the vehi-
cle.
The fuel consumption and distance to
empty values may vary significantly
based on driving conditions, driving
habits, and condition of the vehicle.
The distance to empty value is an esti-
mate of the available driving distance.
This value may differ from the actual
driving distance available.
Average speed (km/h or mph)
This mode calculates the average speed
of the vehicle since the last averagespeed reset.
Even if the vehicle is not in motion, the
average speed keeps going while the
engine is running.
The meter's working range is from 0 to 220 km/h (0 to 140 mph).
Pressing the TRIP button for more than 1
second, when the average speed is
being displayed, clears the average
speed to zero (---).
OTQ047052OTQ047054
Average speed
Odometer
Odometer
Page 112 of 346
Features of your vehicle
42
4
ESP
OFFD150327AUN
Key reminder warning chime (if equipped)
If the driver’s door is opened while the
ignition key is left in the ignition switch
(ACC or LOCK position), the key
reminder warning chime will sound. This
is to prevent you from locking your keys
in the vehicle. The chime sounds until the
key is removed from the ignition switch or
the driver’s door is closed.
D150323AUN-EE
ESP indicator (ElectronicStability Program)
(if equipped)
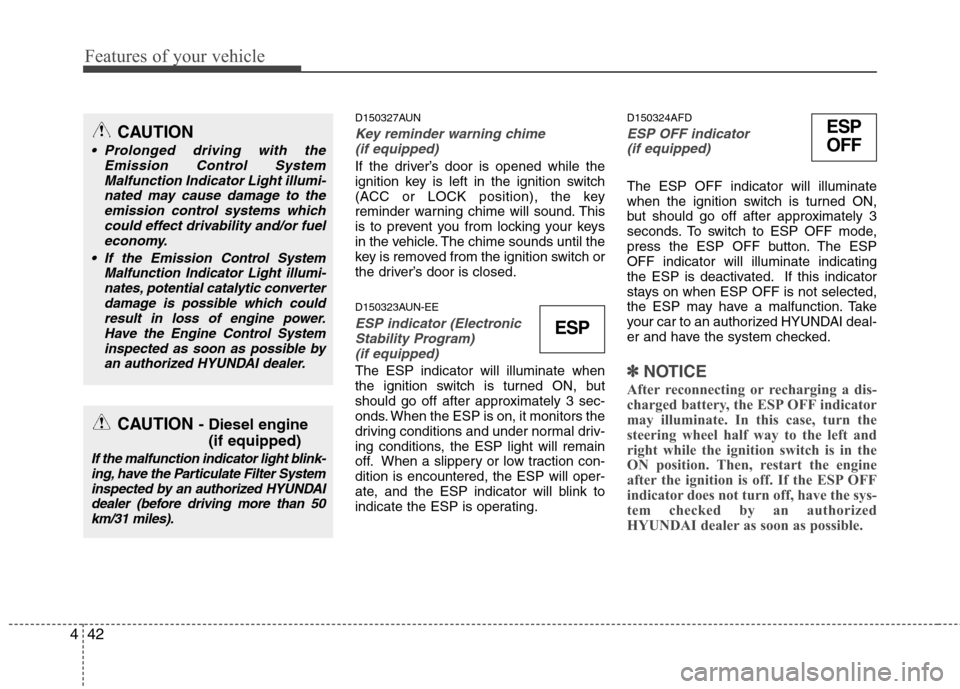
The ESP indicator will illuminate when
the ignition switch is turned ON, but
should go off after approximately 3 sec-
onds. When the ESP is on, it monitors the
driving conditions and under normal driv-
ing conditions, the ESP light will remain
off. When a slippery or low traction con-dition is encountered, the ESP will oper-
ate, and the ESP indicator will blink to
indicate the ESP is operating. D150324AFD
ESP OFF indicator
(if equipped)
The ESP OFF indicator will illuminate
when the ignition switch is turned ON,
but should go off after approximately 3
seconds. To switch to ESP OFF mode,
press the ESP OFF button. The ESPOFF indicator will illuminate indicating
the ESP is deactivated. If this indicator
stays on when ESP OFF is not selected,
the ESP may have a malfunction. Take
your car to an authorized HYUNDAI deal-
er and have the system checked.
✽✽ NOTICE
After reconnecting or recharging a dis-
charged battery, the ESP OFF indicator
may illuminate. In this case, turn the
steering wheel half way to the left and
right while the ignition switch is in the
ON position. Then, restart the engine
after the ignition is off. If the ESP OFF
indicator does not turn off, have the sys-
tem checked by an authorized
HYUNDAI dealer as soon as possible.
CAUTION
Prolonged driving with the Emission Control System
Malfunction Indicator Light illumi-nated may cause damage to theemission control systems which could effect drivability and/or fuel
economy.
If the EmissionControl System
Malfunction Indicator Light illumi-
nates, potential catalytic converterdamage is possible which couldresult in loss of engine power.Have the Engine Control System
inspected as soon as possible byan authorized HYUNDAI dealer.
CAUTION - Diesel engine
(if equipped)
If the malfunction indicator light blink-ing, have the Particulate Filter Systeminspected by an authorized HYUNDAIdealer (before driving more than 50km/31 miles).
ESP
Page 113 of 346
443
Features of your vehicle
D150328AEN
Glow indicator (Dieselengine)
The indicator light illuminates when the
ignition switch is placed at the ON posi-
tion. The engine can be started after the
preheat indicator light goes off. The illu-
minating time varies with the water tem-
perature, air temperature and batterycondition.
✽✽ NOTICE
If the engine was not started within 10
seconds after the preheating is complet-
ed, turn the ignition switch once more to
the LOCK position during 10 seconds,
and then to the ON position, in order to
preheat again.
D150329AEN
Fuel filter warning light (Diesel engine)
This warning light illuminates for 3 sec-
onds after the ignition switch is set to the
ON position and then it will go out. If it
lights up while the engine is running, it
indicates that water has accumulated
inside the fuel filter. If this happens,
remove the water from the fuel filter. For
more information, refer to “Fuel filter” insection 7. D150330AEN
Overspeed warning
(if equipped)
Overspeed warning light
If you drive with the speed of 120 km/h or
more, the overspeed warning light will
blink. This is to prevent you from driving
your vehicle with overspeed.
Overspeed warning chime
If you drive with the speed of 120 km/h or
more, the overspeed warning chime will
sound for about 5 seconds. This is to pre-
vent you from driving your vehicle with
overspeed.
CAUTION
If the preheat indicator light contin-
ues to illuminate or flash on and offafter the engine has warmed up orwhile driving, check the system byan authorized HYUNDAI dealer as
soon as possible.
CAUTION
When the fuel filter warning light isilluminated, engine power (vehiclespeed & idle speed) may decrease.
If you keep driving with the warning light on, you can damage your vehi-cle's engine parts and injection sys-tem of the Common Rail. If this
occurs, have your vehicle checkedby an authorized HYUNDAI dealeras soon as possible.
120km/h
Page 114 of 346
Features of your vehicle
44
4
D170000AEN
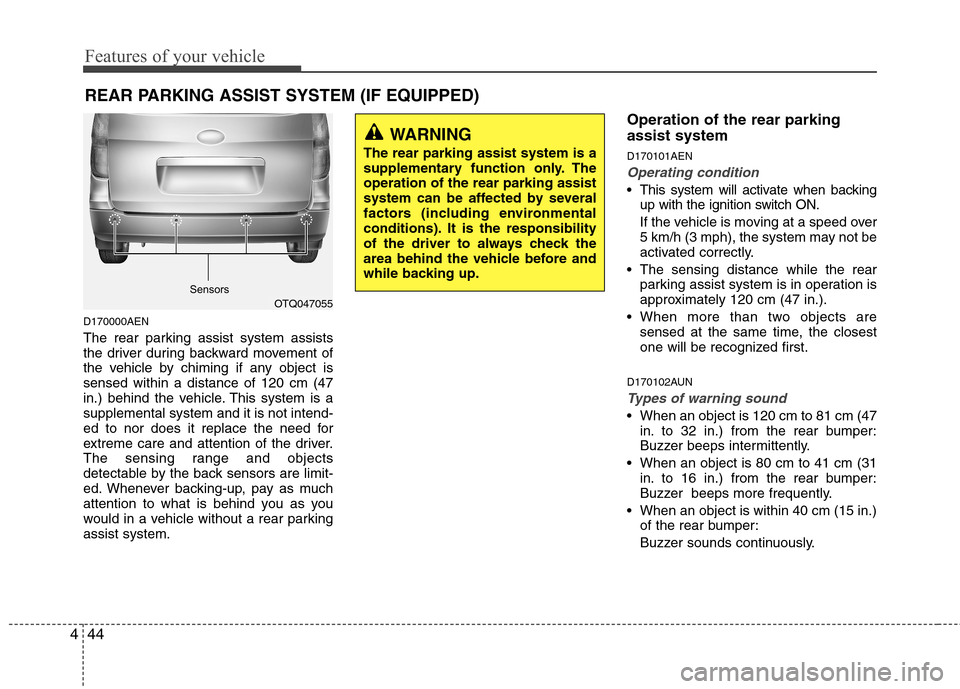
The rear parking assist system assists
the driver during backward movement of
the vehicle by chiming if any object issensed within a distance of 120 cm (47
in.) behind the vehicle. This system is asupplemental system and it is not intend-
ed to nor does it replace the need for
extreme care and attention of the driver.
The sensing range and objects
detectable by the back sensors are limit-
ed. Whenever backing-up, pay as much
attention to what is behind you as you
would in a vehicle without a rear parkingassist system. Operation of the rear parking assist system D170101AEN
Operating condition
This system will activate when backing
up with the ignition switch ON.
If the vehicle is moving at a speed over
5 km/h (3 mph), the system may not be
activated correctly.
The sensing distance while the rear parking assist system is in operation is
approximately 120 cm (47 in.).
When more than two objects are sensed at the same time, the closest
one will be recognized first.
D170102AUN
Types of warning sound
When an object is 120 cm to 81 cm (47 in. to 32 in.) from the rear bumper:
Buzzer beeps intermittently.
When an object is 80 cm to 41 cm (31 in. to 16 in.) from the rear bumper:
Buzzer beeps more frequently.
When an object is within 40 cm (15 in.) of the rear bumper:
Buzzer sounds continuously.
REAR PARKING ASSIST SYSTEM (IF EQUIPPED)
OTQ047055
WARNING
The rear parking assist system is a
supplementary function only. Theoperation of the rear parking assist
system can be affected by several
factors (including environmental
conditions). It is the responsibility
of the driver to always check the
area behind the vehicle before and
while backing up.
Sensors
Page 116 of 346
Features of your vehicle
46
4
✽✽
NOTICE
This system can only sense objects with-
in the range and location of the sensors;
It can not detect objects in other areas
where sensors are not installed. Also,
small or slim objects, such as poles or
objects located between sensors may not
be detected by the sensors.
Always visually check behind the vehi-
cle when backing up.
Be sure to inform any drivers of the
vehicle that may be unfamiliar with the
system regarding the systems capabili-
ties and limitations.D170400AEN
Self-diagnosis
If you don’t hear an audible warning
sound or if the buzzer sounds intermit-tently when shifting the gear to the R
(Reverse) position, this may indicate a
malfunction in the rear parking assist sys-
tem. If this occurs, have your vehicle
checked by an authorized HYUNDAI
dealer as soon as possible.
D180000AUN
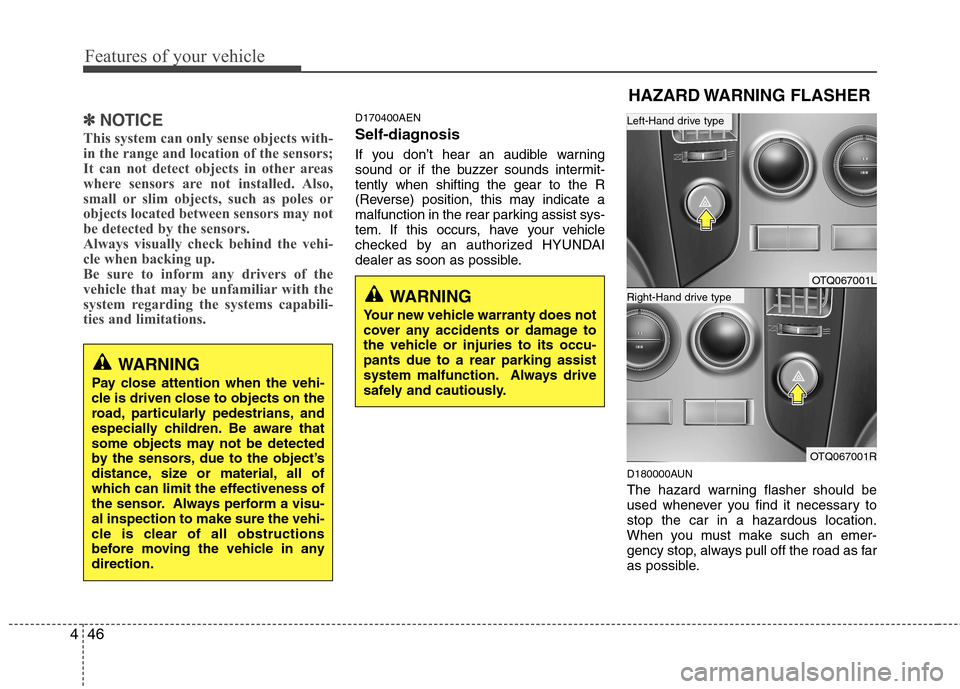
The hazard warning flasher should be
used whenever you find it necessary tostop the car in a hazardous location.
When you must make such an emer-
gency stop, always pull off the road as far
as possible.
WARNING
Pay close attention when the vehi-
cle is driven close to objects on the
road, particularly pedestrians, and
especially children. Be aware that
some objects may not be detected
by the sensors, due to the object’s
distance, size or material, all of
which can limit the effectiveness of
the sensor. Always perform a visu-al inspection to make sure the vehi-
cle is clear of all obstructions
before moving the vehicle in anydirection.
WARNING
Your new vehicle warranty does not
cover any accidents or damage to
the vehicle or injuries to its occu-pants due to a rear parking assist
system malfunction. Always drive
safely and cautiously.
HAZARD WARNING FLASHER
OTQ067001L
OTQ067001R
Right-Hand drive type
Left-Hand drive type
Page 121 of 346

451
Features of your vehicle
The rear fog lights turn on when the rear
fog switch is pressed after the front fog
switch is turned to ON and the headlight
switch to the parklight position. (ifequipped)
To turn the rear fog lights off, press the
rear fog light switch again or turn the
headlight switch to the OFF position.
D190900AUN
Daytime running light (if equipped)
Daytime Running Lights (DRL) can make
it easier for others to see the front of your
vehicle during the day. DRL can be help-
ful in many different driving conditions,
and it is especially helpful after dawn and
before sunset.
The DRL system will make the head-
lights turn OFF when:
1. The parklight switch is ON.
2. Engine stops.Headlight leveling device (if equipped)
D191001ATQ
Manual type
To adjust the headlight beam level
according to the number of the passen-
gers and the loading weight in the lug-
gage area, turn the beam leveling switch.The higher the number of the switch
position, the lower the headlight beam
level. Always keep the headlight beam at
the proper leveling position, or headlights
may dazzle other road users.
Listed below are the examples of proper
switch settings. For loading conditions
other than those listed below, adjust the
switch position so that the beam level
may be the nearest as the conditionobtained according to the list.
OTQ047133
OTQ047133R
Right-Hand drive type
Left-Hand drive type
Loading condition
Driver only
Driver + Front passenger
Driver + Front passenger
+ 4th row passengerFull passengers
(including driver)Full passengers (including
driver) + Maximum per-
missible loading
Driver + Maximum per-
missible loading
Switch position
Wagon Van 0000 1- 1- 21 31