Page 22 of 402

35
Safety features of your vehicle
C010103AUN
Seat cushion height (for driver’s seat)
(if equipped)
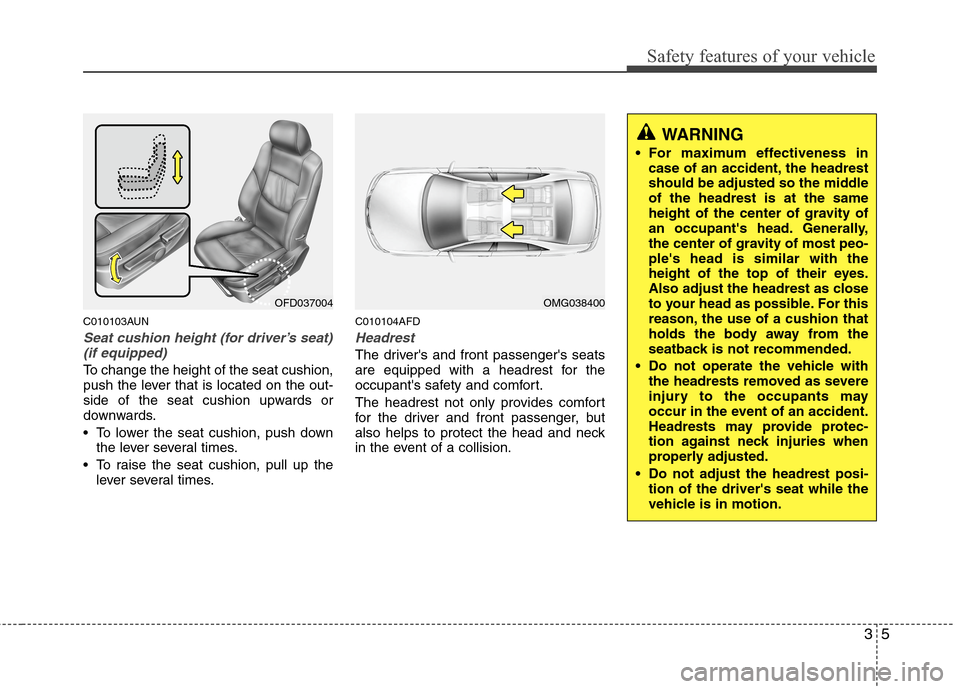
To change the height of the seat cushion,
push the lever that is located on the out-
side of the seat cushion upwards or
downwards.
• To lower the seat cushion, push down
the lever several times.
To raise the seat cushion, pull up the
lever several times.
C010104AFD
Headrest
The driver's and front passenger's seats
are equipped with a headrest for the
occupant's safety and comfort.
The headrest not only provides comfort
for the driver and front passenger, but
also helps to protect the head and neck
in the event of a collision.
OFD037004OMG038400
WARNING
For maximum effectiveness in
case of an accident, the headrest
should be adjusted so the middle
of the headrest is at the same
height of the center of gravity of
an occupant's head. Generally,
the center of gravity of most peo-
ple's head is similar with the
height of the top of their eyes.
Also adjust the headrest as close
to your head as possible. For this
reason, the use of a cushion that
holds the body away from the
seatback is not recommended.
Do not operate the vehicle with
the headrests removed as severe
injury to the occupants may
occur in the event of an accident.
Headrests may provide protec-
tion against neck injuries when
properly adjusted.
Do not adjust the headrest posi-
tion of the driver's seat while the
vehicle is in motion.
Page 24 of 402

37
Safety features of your vehicle
Removal
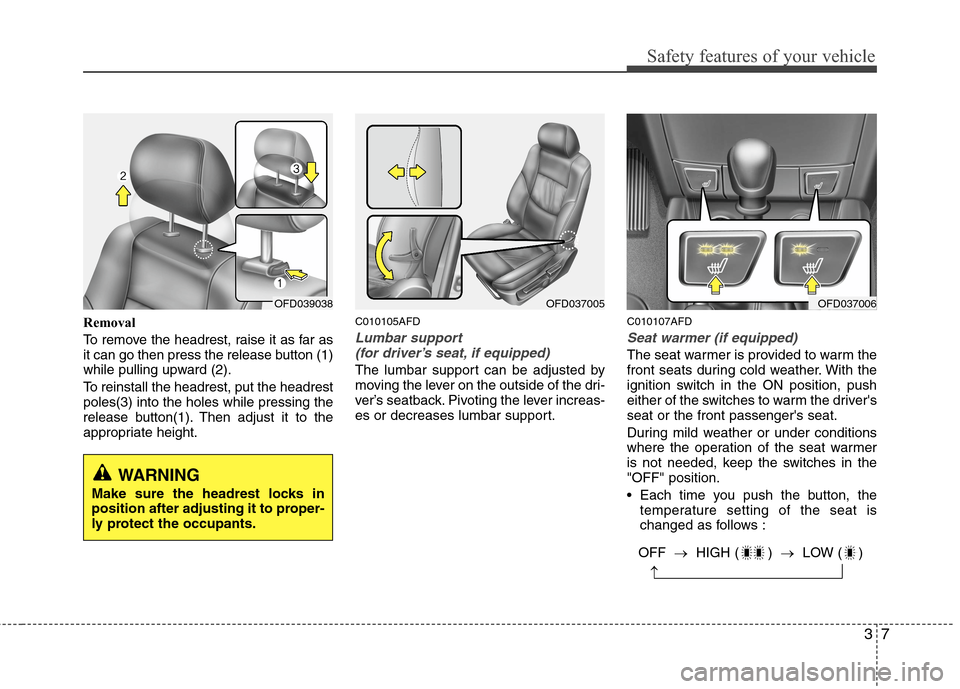
To remove the headrest, raise it as far as
it can go then press the release button (1)
while pulling upward (2).
To reinstall the headrest, put the headrest
poles(3) into the holes while pressing the
release button(1). Then adjust it to the
appropriate height.C010105AFD
Lumbar support
(for driver’s seat, if equipped)
The lumbar support can be adjusted by
moving the lever on the outside of the dri-
ver’s seatback. Pivoting the lever increas-
es or decreases lumbar support.
C010107AFD
Seat warmer (if equipped)
The seat warmer is provided to warm the
front seats during cold weather. With the
ignition switch in the ON position, push
either of the switches to warm the driver's
seat or the front passenger's seat.
During mild weather or under conditions
where the operation of the seat warmer
is not needed, keep the switches in the
"OFF" position.
Each time you push the button, the
temperature setting of the seat is
changed as follows :
OFD039038
WARNING
Make sure the headrest locks in
position after adjusting it to proper-
ly protect the occupants.
OFD037005OFD037006
OFF →HIGH ( ) →LOW ( )
→
Page 47 of 402

Safety features of your vehicle
30 3
5. Remove as much slack from the belt
as possible by pushing down on the
child restraint system while feeding the
shoulder belt back into the retractor.
6. Push and pull on the child restraint
system to confirm that the seat belt is
holding it firmly in place. If it is not,
release the seat belt and repeat steps
2 through 6.
7. Double check that the retractor is in
the “Auto Lock” mode by attempting to
pull more of the seat belt out of the
retractor. If you cannot, the retractor is
in the “Auto Lock” mode.
To remove the child restraint, press the
release button on the buckle and then
pull the lap/shoulder belt out of the
restraint and allow the seat belt to retract
fully.When the seat belt is allowed to
retract to its fully stowed position, the
retractor will automatically switch
from the “Auto Lock” mode to the
emergency lock mode for normal
adult usage.C030103AFD
Securing a child restraint seat with
tether anchor system
Child restraint hook holders are located
on the floor behind the rear seats.
OEN036104
WARNING- Auto lock
mode
The lap/shoulder belt automatically
returns to the “emergency lock
mode” whenever the belt is allowed
to retract fully. Therefore, the pre-
ceding seven steps must be fol-
lowed each time a child restraint is
installed.
If the retractor is not in the
Automatic Locking mode, the child
restraint can move when your vehi-
cle turns or stops suddenly. A child
can be seriously injured or killed if
the child restraint is not properly
anchored to the car, including set-
ting the retractor to the Automatic
Locking mode.
OFD037015
Page 379 of 402

Maintenance
64 7
Interior care
G230201BUN
Interior general precautions
Prevent caustic solutions such as per-
fume and cosmetic oil from contacting
the dashboard because they may cause
damage or discoloration. If they do con-
tact the dashboard, wipe them off imme-
diately. See the instructions that follow for
the proper way to clean vinyl.
G230202AUN
Cleaning the upholstery and interior
trim
Vinyl
Remove dust and loose dirt from vinyl
with a whisk broom or vacuum cleaner.
Clean vinyl surfaces with a vinyl cleaner.
Fabric
Remove dust and loose dirt from fabric
with a whisk broom or vacuum cleaner.
Clean with a mild soap solution recom-
mended for upholstery or carpets.
Remove fresh spots immediately with a
fabric spot cleaner. If fresh spots do not
receive immediate attention, the fabric
can be stained and its color can be
affected. Also, its fire-resistant properties
can be reduced if the material is not
properly maintained.
G230203AUN
Cleaning the lap/shoulder belt web-
bing
Clean the belt webbing with any mild
soap solution recommended for cleaning
upholstery or carpet. Follow the instruc-
tions provided with the soap. Do not
bleach or redye the webbing because
this may weaken it.
G230204AUN
Cleaning the interior window glass
If the interior glass surfaces of the vehi-
cle become fogged (that is, covered with
an oily, greasy or waxy film), they should
be cleaned with glass cleaner. Follow the
directions on the glass cleaner container.CAUTION
Never allow water or other liquids
to come in contact with
electrical/electronic components
inside the vehicle as this may dam-
age them.
CAUTION
Using anything but recommended
cleaners and procedures may affect
the fabric’s appearance and fire-
resistant properties.
CAUTION
Do not scrape or scratch the inside
of the rear window. This may result
in damage to the rear window
defroster grid.CAUTION
When cleaning leather products
(steering wheel, seats etc.), use
neutral detergents or low alcohol
content solutions. If you use high
alcohol content solutions or
acid/alkaline detergents, the color
of the leather may fade or the sur-
face may get stripped off.