Page 187 of 356
FOLDER SCAN�This feature
samples the first file in each folder in
the order they are stored. To activate
the folder scan feature, press and
hold the SCAN button. You will see‘‘ FOLDER SCAN ’’in the display. You
will also see the folder number
blinking. You will get a 10 second
sampling of each first file in the
folder(s). Press the SCAN button to
get out of the scan mode. The system
plays the last file sampled. To Stop Playing a USB Flash
Memory Device
To play the radio when a USB flash
memory device is playing, press the
AM/FM button or touch the FM1,
FM2, or AM icon. If a disc is in the
audio unit, press the CD/AUX button
or touch the CD icon to play the disc.
If a PC card is in the audio unit, press
the CD/AUX button or touch the
CARD icon to play a PC card.
Press the CD/AUX button again or
touch the AUX icon to switch back to
the USB flash memory device.Disconnecting a USB Flash Memory
Device
You can disconnect the USB flash
memory device in any time even if
the USB mode is selected on the
audio system. Always follow the USB
flash memory device's instructions
when you remove it.
When you disconnect the USB flash
memory device while it is playing,
the navigation screen shows ‘‘NO
DATA. ’’
If you reconnect the same USB flash
memory device, the system will
begin playing where it left off.
USB Flash Memory Device Error Messages
If you see an error message on the
screen, see page 184.
Playing a USB Flash Memory Device (Models with navigation system)
183
Features
Main MenuTable of Contents
Page 189 of 356
Radio Frequencies
The radio can receive the complete
AM and FM bands.
Those bands cover thesefrequencies:
AM band: 530 to 1,710 kHz
FM band: 87.7 to 107.9 MHz
Radio stations on the AM band are
assigned frequencies at least 10 kHz
apart (530, 540, 550). Stations on the
FM band are assigned frequencies at
least 0.2 MHz apart (87.9, 88.1, 88.3).
Stations must use these exact
frequencies. It is fairly common for
stations to round-off the frequency in
their advertising, so your radio could
display a frequency of 100.9 even
though the announcer may identify
the station as‘‘FM101. ’’ Radio Reception
How well the radio receives stations
is dependent on many factors, such
as the distance from the station's
transmitter, nearby large objects, and
atmospheric conditions.
A radio station's signal gets weaker
as you get farther away from its
transmitter. If you are listening to an
AM station, you will notice the sound
volume becoming weaker, and the
station drifting in and out. If you are
listening to an FM station, you will
see the stereo indicator flickering off
and on as the signal weakens.
Eventually, the stereo indicator will
go off and the sound will fade
completely as you get out of range of
the station's signal.
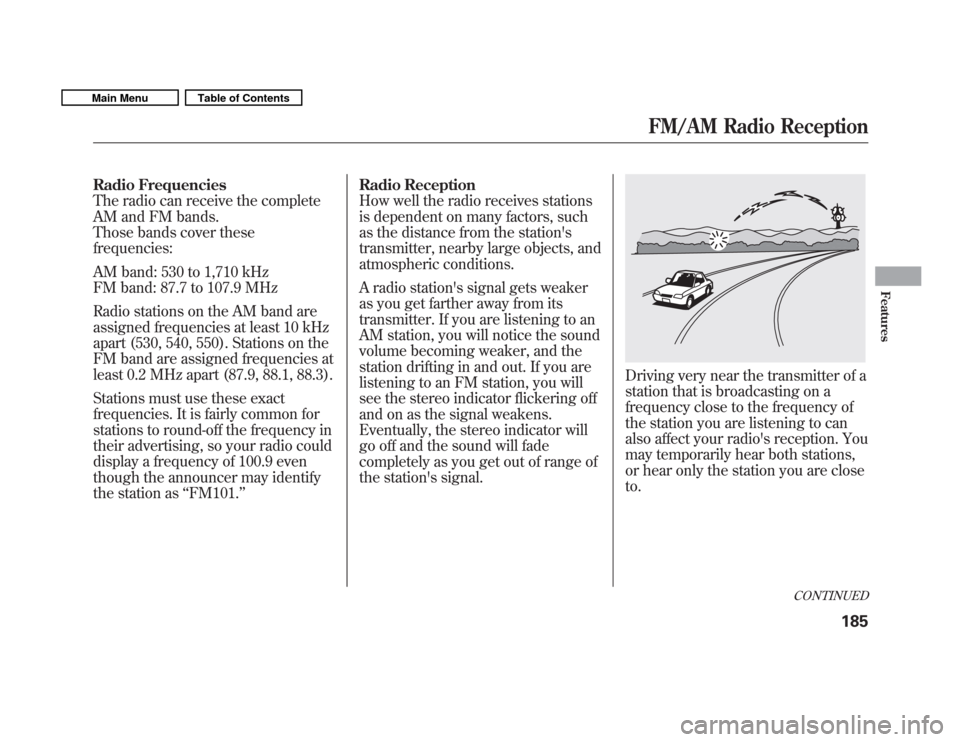
Driving very near the transmitter of a
station that is broadcasting on a
frequency close to the frequency of
the station you are listening to can
also affect your radio's reception. You
may temporarily hear both stations,
or hear only the station you are closeto.
CONTINUED
FM/AM Radio Reception
185
Features
Main MenuTable of Contents
Page 190 of 356
Radio signals, especially on the FM
band, are deflected by large objects
such as buildings and hills. Your
radio then receives both the direct
signal from the station's transmitter,
and the deflected signal. This causes
the sound to distort or flutter. This is
a main cause of poor radio reception
in city driving.Radio reception can be affected by
atmospheric conditions such as
thunderstorms, high humidity, and
even sunspots. You may be able to
receive a distant radio station one
day and not receive it the next day
because of a change in conditions.Electrical interference from passing
vehicles and stationary sources can
cause temporary reception problems.
As required by the FCC:
Changes or modifications not expresslyapproved by the party responsible for compliance could void the user'sauthority to operate the equipment.
FM/AM Radio Reception
186
Main MenuTable of Contents
Page 194 of 356
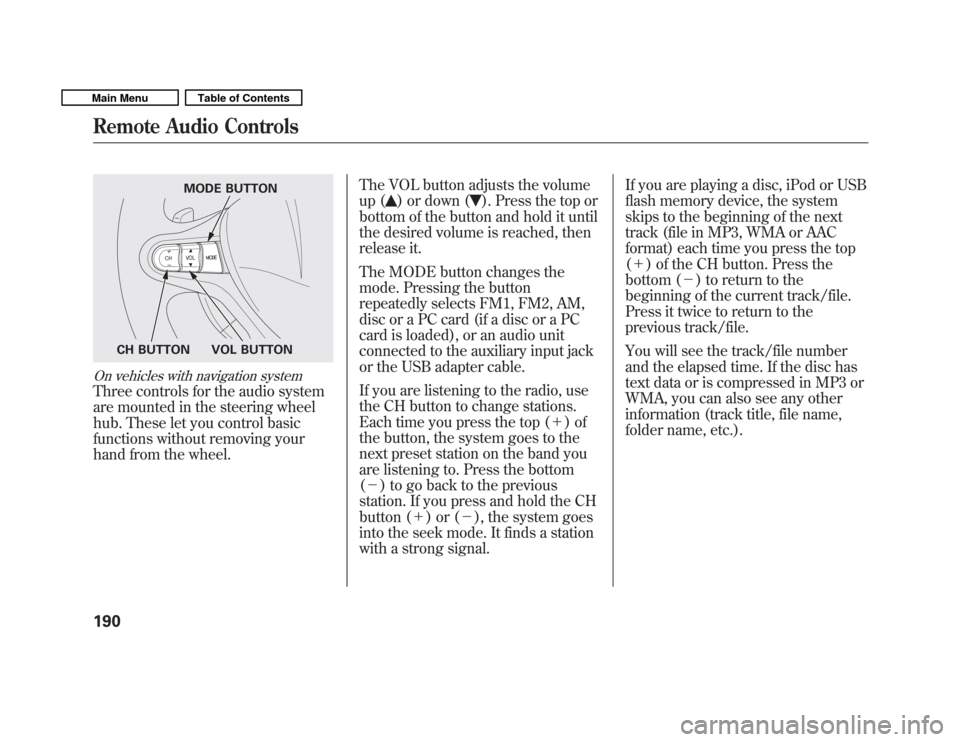
On vehicles with navigation system
Three controls for the audio system
are mounted in the steering wheel
hub. These let you control basic
functions without removing your
hand from the wheel.The VOL button adjusts the volume
up (
) or down (). Press the top or
bottom of the button and hold it until
the desired volume is reached, then
release it.
The MODE button changes the
mode. Pressing the button
repeatedly selects FM1, FM2, AM,
disc or a PC card (if a disc or a PC
card is loaded), or an audio unit
connected to the auxiliary input jack
or the USB adapter cable.
If you are listening to the radio, use
the CH button to change stations.
Each time you press the top ( +)of
the button, the system goes to the
next preset station on the band you
are listening to. Press the bottom( � ) to go back to the previous
station. If you press and hold the CH
button ( +)or( �), the system goes
into the seek mode. It finds a station
with a strong signal. If you are playing a disc, iPod or USB
flash memory device, the system
skips to the beginning of the next
track (file in MP3, WMA or AAC
format) each time you press the top(
+ ) of the CH button. Press the
bottom ( �) to return to the
beginning of the current track/file.
Press it twice to return to the
previous track/file.
You will see the track/file number
and the elapsed time. If the disc has
text data or is compressed in MP3 or
WMA, you can also see any other
information (track title, file name,
folder name, etc.).
MODE BUTTON
VOL BUTTON
CH BUTTON
Remote Audio Controls
190
Main MenuTable of Contents
Page 196 of 356
Your vehicle's audio system will
disable itself if it is disconnected
from electrical power for any reason.
To make it work again, you must
enter a specific digit code using the
preset buttons. Because there are
hundreds of number combinations
possible from specific digits, making
the system work without knowing
the exact code is nearly impossible.
You should have received a card that
lists your audio system's code and
serial numbers. It is best to store this
card in a safe place at home. In
addition, you should write the audio
system's serial number in this
owner's manual.
If you lose the card, you must obtain
the code number from a dealer. To
do this, you will need the system's
serial number.If your vehicle's battery is
disconnected or goes dead, the audio
system will disable itself. If this
happens, you will see
‘‘ENTER
CODE ’’in the frequency display the
next time you turn on the system.
Use the preset buttons to enter the
code. On vehicles with navigation
system, touch the Done icon to set
the code. The code is on the radio
code card included in your owner's
manual kit. When it is entered
correctly, the radio will start playing.
If you make a mistake entering the
code, do not start over; complete the
sequence, then enter the correct
code. You have 10 tries to enter the
correct code. If you are unsuccessful
in 10 attempts, you must then leave
the system on for 1 hour before
trying again.
Radio Theft Protection
192
Main MenuTable of Contents
Page 212 of 356
Modifying your vehicle, or installing
some non-Honda accessories, can
make it unsafe. Before you make any
modifications or add any accessories,
be sure to read the followinginformation. Accessories
Your dealer has Honda accessories
that allow you to personalize your
vehicle. These accessories have been
designed and approved for your
vehicle, and are covered by warranty.
Although non-Honda accessories
may fit on your vehicle, they may not
meet factory specifications, and could
adversely affect your vehicle's
handling, stability, and reliability.
Improper accessories or
modifications can affect your
vehicle's handling, stability, and
performance, and cause a
crash in which you can be hurt
or killed.
Follow all instructions in this
owner's manual regarding
accessories and modifications.
When properly installed, cellular
phones, alarms, two-way radios, and
low-powered audio systems should
not interfere with your vehicle's
computer controlled systems, such
as your airbags, anti-lock brakes, and
tire pressure monitoring system (ifequipped). Before installing any accessory:
� Make sure the accessory does not
obscure any lights, or interfere
with proper vehicle operation or
performance.
� Be sure electronic accessories do
not overload electrical circuits (see
page 309) or interfere with proper
operation of your vehicle.
� Before installing any electronic
accessory, have the installer
contact your dealer for assistance.
If possible, have your dealer
inspect the final installation.
� Do not install accessories on the
side pillars or across the rear
windows. Accessories installed in
these areas may interfere with
proper operation of the side
curtain airbags.
Accessories and Modifications
208
Main MenuTable of Contents
Page 245 of 356
5. Release the parking brake.
Manual transmission:
1. Move the shift lever into theneutral position.
2. Release the parking brake.
Leave the ignition switch in the
ACCESSORY (I) position so the
steering wheel does not lock. Make
sure the radio and any items plugged
into the accessory power sockets are
turned off so you do not run down
the battery.
When you stop towing your vehicle
and shift out of the neutral position,
you may not be able to move the shift
lever from neutral to reverse or Park.
If this happens, press the brake pedal
and turn the ignition switch to the
ON (II) position, then shift out ofneutral.
Extended Towing
If you tow more than 8 hours in one
day, you should repeat the above
procedure at least every 8 hours
(when you stop for fuel, etc.).
Failure to follow the recommended
instructions exactly will result in severe
automatic transmission damage. If you
cannot shift the transmission or start
the engine, your vehicle must be
transported on a flat-bed truck ortrailer.
CONTINUED
Towing Your Vehicle Behind a Motorhome
241
Driving
Main MenuTable of Contents
Page 246 of 356
When towing your vehicle for long
periods, remove the 30 A Radio fuse
to reduce drain on battery. This fuse
is located in the interior fuse box and
shown as number 61 below.Only remove the fuse after you have
performed the transmission shifting
procedure, and the key is in the
ACCESSORY (I) position. Store the
fuse in an obvious location (center
pocket, etc) as a reminder to re-
install the fuse before driving thevehicle.
RADIO FUSE
Towing Your Vehicle Behind a Motorhome
242
Main MenuTable of Contents