Page 72 of 445
If equipped
Canadian models only
This indicator comes on when the
security system is set. See page
f or more inf ormation on the
security system.
This indicator comes on f or a f ew
seconds when you turn the ignition
switch to the ON (II) position. It
remindsyouthatitistimetotake
your vehicle in f or scheduled
maintenance. The maintenance main
items and sub items will be displayed
in the inf ormation display. See page
f or more inf ormation on the
Maintenance Minder .
This indicator goes of f when your
dealer resets it after completing the
required maintenance service. This indicator comes on when the washer f luid level is low. Add washer
f luid when you see this indicator
(see page ).
341
354264
Security System Indicator
Maintenance Minder
Indicator Washer Level Indicator
Instrument Panel Indicators
Inst rument s and Cont rols
67
SECURITY SYSTEM INDICATOR
WASHER LEVEL INDICATOR
TM
Main MenuTable of Contents
Page 78 of 445
If your f uel f ill cap is loose or
missing, a ‘‘CHECK FUEL CAP’’
message appears on the inf ormation
display af ter you start the engine.
For more inf ormation, see page .The inf ormation display in the
instrument panel shows you the
engine oil lif e and maintenance
service items when the ignition
switch is in the ON (II) position. This
inf ormation helps to keep you aware
of the periodic maintenance your
vehicle needs f or continued trouble-
f ree driving. Ref er to page f or
more inf ormation.
296
341
Gauges
Maintenance Minder
Check Fuel Cap Message
Inst rument s and Cont rols
73
TM
Main MenuTable of Contents
Page 79 of 445
�Î �Î�Î
�Î
�Î
�Î
�Î �Î �Î�Î �Î
To use the horn, press the center pad of the steering wheel.
If equipped.
Ref er to the navigation system manual.
1:2:3:
Controls Near the Steering Wheel
74
PARKING BRAKE PEDAL
HORN
REMOTE AUDIO CONTROLS
STEERING WHEEL
ADJUSTMENTS HEATED MIRROR BUTTON
NAVIGATION SYSTEM
VOICE CONTROL BUTTONS
BLUETOOTH HANDSFREELINK SYSTEM
VOICE CONTROL BUTTONS
(P.325)
(P.255) (P.81)
(P.269)
(P.81)
(P.123)
(P.266)
(P.76)
ACCESSORY POWER SOCKET(P.111)
MIRROR CONTROLS (P.115) HEADLIGHTS/
TURN SIGNALS
VEHICLE STABILITY
ASSIST (VSA) SYSTEM
OFF SWITCH
SEAT HEATER SWITCHESREAR WINDOW DEFOGGER BUTTON (P.80)
(P.115)
HAZARD WARNING
BUTTON
PASSENGER AIRBAG
OFF INDICATOR
INSTRUMENT PANEL BRIGHTNESS
(P.79)
WINDSHIELD
WIPERS/WASHERS
(P.75)
(P.33)
CRUISE CONTROL BUTTONS (P.79)
(P.194)
(P.315)
(P.145, 157) CLOCK
(P.259)
AUDIO SYSTEM
AUDIO SYSTEM
SHIFT LEVER1
2
2
3 2 22 2
Main MenuTable of Contents
Page 82 of 445

�µ
�µ �µ�µ
Push down on the
lever to signal a lef t turn and up to
signal a right turn. To signal a lane
change, push lightly on the lever,
and hold it. The lever will return to
center when you release it or
complete a turn.
Turning the switch to
the ‘‘ ’’ position turns on the
parking lights, taillights, instrument
panel lights, side-marker lights, and
rear license plate light.
Turning the switch to the ‘‘ ’’
position turns on the headlights. If
you leave the lights on with the key
removed f rom the ignition switch,
you will hear a reminder chime when
you open the driver’s door. When the light switch is in either of
these positions, the lights on
indicator comes on as a reminder.
This indicator stays on if you leave
the lights on and turn the ignition
switch to the ACCESSORY (I) or
LOCK (0) position.
Push the lever
f orward and the high beam indicator
will come on (see page ). Pull it
back to return to low beams.
To f lash the high beams, pull the
lever back lightly, then release it.
The high beams will stay on as long
as you hold the lever back. The automatic lighting
f eature turns on the headlights and
all other exterior lights, when it
senses low ambient light.
To turn on automatic lighting, turn
the light switch to AUTO. The lights
will come on automatically when the
outside light level becomes low (at
dusk, f or example). The lights on
indicator comes on as a reminder.
The lights and indicator will turn of f
automatically when the system
senses high ambient light.
The lights will remain on when you
turn of f the ignition switch. They will
turn of f automatically when you
remove the key and open the driver’s
door. To turn them on again, either
turn the ignition switch to the ON
(II) position or turn the light switch
to the position.
65
CONT INUED
EX-L models onlyTurn Signal
Headlights
High BeamsAUTO
Turn Signals and Headlights
Inst rument s and Cont rols
77
Main MenuTable of Contents
Page 84 of 445

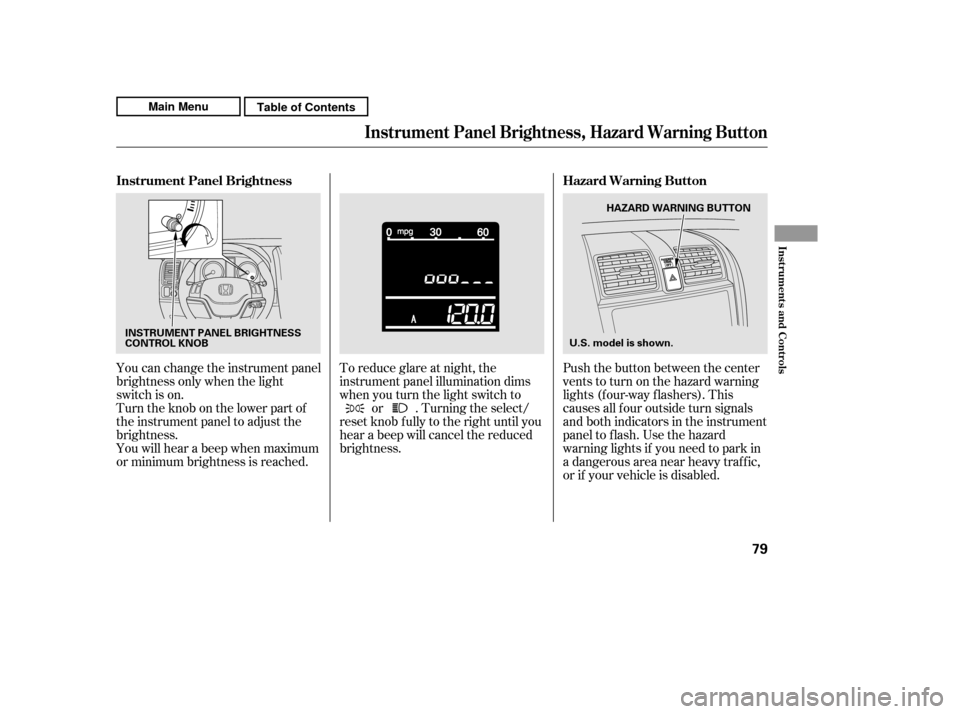
Push the button between the center
vents to turn on the hazard warning
lights (f our-way f lashers). This
causes all f our outside turn signals
and both indicators in the instrument
panel to f lash. Use the hazard
warning lights if you need to park in
a dangerous area near heavy traffic,
or if your vehicle is disabled.
To reduce glare at night, the
instrument panel illumination dims
when you turn the light switch to
or . Turning the select/
reset knob f ully to the right until you
hear a beep will cancel the reduced
brightness.
You can change the instrument panel
brightness only when the light
switch is on.
Turntheknobonthelowerpartof
the instrument panel to adjust the
brightness.
You will hear a beep when maximum
or minimum brightness is reached. Hazard Warning Button
Instrument Panel Brightness
Instrument Panel Brightness, Hazard Warning Button
Inst rument s and Cont rols
79
INSTRUMENT PANEL BRIGHTNESS
CONTROL KNOB U.S. model is shown.HAZARD WARNING BUTTON
Main MenuTable of Contents
Page 86 of 445

Push the lever under the steering
column all the way down.
Make any steering wheel adjustment
bef ore you start driving.
To apply the parking brake, push the
pedal down with your f oot. To
release it, push on the pedal again.
The parking brake indicator on the
instrument panel should go out when
the parking brake is f ully released
(see page ). Move the steering wheel up or
down, and in or out, so it points
toward your chest, not toward
your f ace. Make sure you can see
the instrument panel gauges and
indicators.
1. 2.
62
CONT INUED
Parking Brake Steering Wheel A djustment
Parking Brake, Steering Wheel A djustment
Inst rument s and Cont rols
81
PARKING BRAKE PEDAL
Adjusting the steering wheel
position while driving may
cause you to lose control of the
vehicle and be seriously injured
inacrash.
Adjust the steering wheel only
when the vehicle is stopped.
Driving the vehicle with the parking
brake applied can damage the rear
brakes and hubs. A beeper will sound if
the vehicle is driven with the parking
brake on.
Main MenuTable of Contents
Page 89 of 445

�µ�µ
�µ
�µ
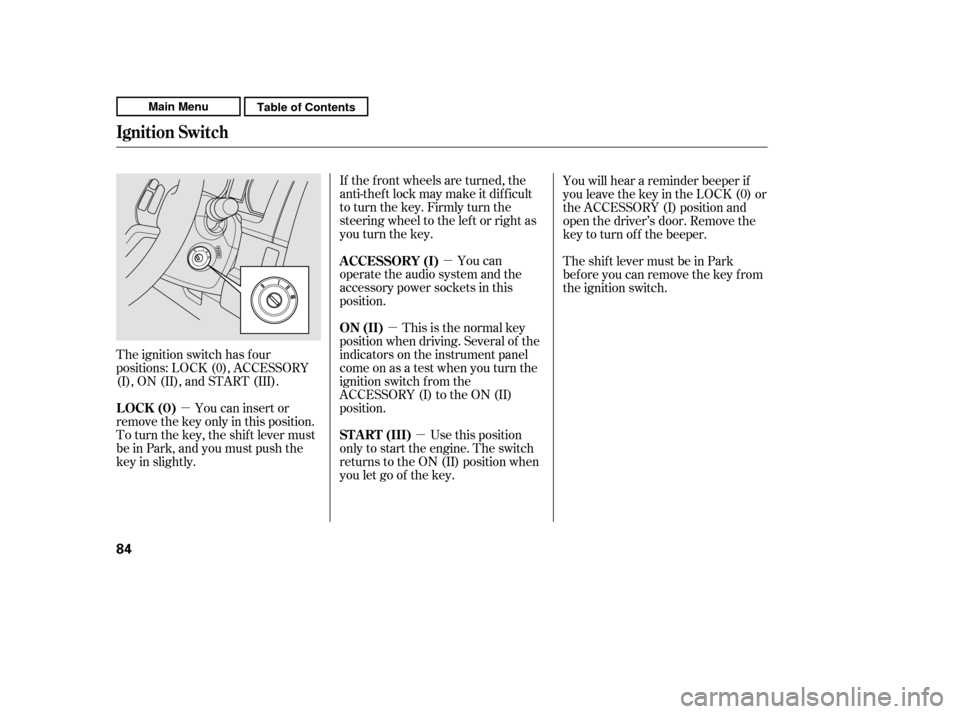
The ignition switch has f our
positions: LOCK (0), ACCESSORY
(I), ON (II), and START (III). If the f ront wheels are turned, the
anti-theft lock may make it difficult
to turn the key. Firmly turn the
steering wheel to the lef t or right as
you turn the key.
This is the normal key
position when driving. Several of the
indicators on the instrument panel
come on as a test when you turn the
ignition switch f rom the
ACCESSORY (I) to the ON (II)
position. You can
operate the audio system and the
accessory power sockets in this
position.
Use this position
only to start the engine. The switch
returns to the ON (II) position when
you let go of the key. You will hear a reminder beeper if
you leave the key in the LOCK (0) or
the ACCESSORY (I) position and
open the driver’s door. Remove the
key to turn of f the beeper.
TheshiftlevermustbeinPark
bef ore you can remove the key f rom
the ignition switch.
You can insert or
remove the key only in this position.
To turn the key, the shift lever must
be in Park, and you must push the
key in slightly. ON (II)
A CCESSORY (I)
ST A RT (III)
LOCK (0)
Ignition Switch
84
Main MenuTable of Contents
Page 153 of 445

�µ
�µ �µ
�µ
�µ Adjusts the volume level
basedonthevehiclespeed.
Press the SOUND (TUNE) knob
repeatedly to display the BASS,
TREBLE, FADER, BALANCE, and
SVC (speed-sensitive volume
compensation) settings. Eachmodeisshowninthedisplayas
it changes. Turn the TUNE knob to
adjust the setting to your liking.
The SVC has f our modes: SVC OFF,
SVC LOW, SVC MID, and SVC
HIGH. Turn the TUNE knob toadjust the setting to your liking. If
you f eel the sound is too loud,
choose low. If you f eel the sound is
too quiet, choose high.
The SVC mode controls the volume
based on vehicle speed. The f aster
you go, the louder the audio volume
becomes. As you slow down, the
audio volume decreases.
The system will return to the audio
display about 5 seconds af ter you
stop adjusting a mode.
When the level reaches the center,
you will see ‘‘C’’ in the display.
Adjusts the bass.
Adjusts the treble.
Adjusts the front-to-back
strength of the sound.
Adjusts the side-to-
side strength of the sound. You can use the instrument panel
brightness control knob to adjust the
illumination of the audio system (see
page ). The audio system
illuminates when the parking lights
are on, even if the radio is turned of f .
Except SVC adjustment
79
Adjusting the Sound SVC
BASS
TREBLE
FADER
BA L A NCE
A udio System L ighting
Speed-sensit ive Volume
Compensat ion (SVC)
Playing the AM/FM Radio (LX model)
148
Main MenuTable of Contents