Page 262 of 369
Make sure all windows, mirrors,
and outside lights are clean and
unobstructed. Remove f rost, snow,
or ice.Check that any items you may be
carrying are stored properly or
f astened down securely.
Check the seat adjustment (see
page ).
Check the adjustment of the
inside and outside mirrors (see
page ).
Check the steering wheel
adjustment (see page ).
Make sure the doors are securely
closed and locked.Fasten your seat belt. Check that
your passengers have f astened
their seat belts (see page ).
Youshoulddothefollowingchecks
and adjustments bef ore you drive
your vehicle.
When you start the engine, check
the gauges and indicators in the
instrument panel (see page ).
Check that the hood and trunk are
f ully closed.
Visually check the tires. If a tire
looks low, use a gauge to check its
pressure (see page ).
1. 2. 3.
8.
7.
6. 9.
4. 5.
57
10.
91
98 77
303 15
Preparing to Drive
258
Main Menu
Page 267 of 369

Remove the key from the ignition
switch.
Set the parking brake.
If you need to use the shif t lock
release, it means your vehicle is
developing a problem. Have it
checked by your dealer.
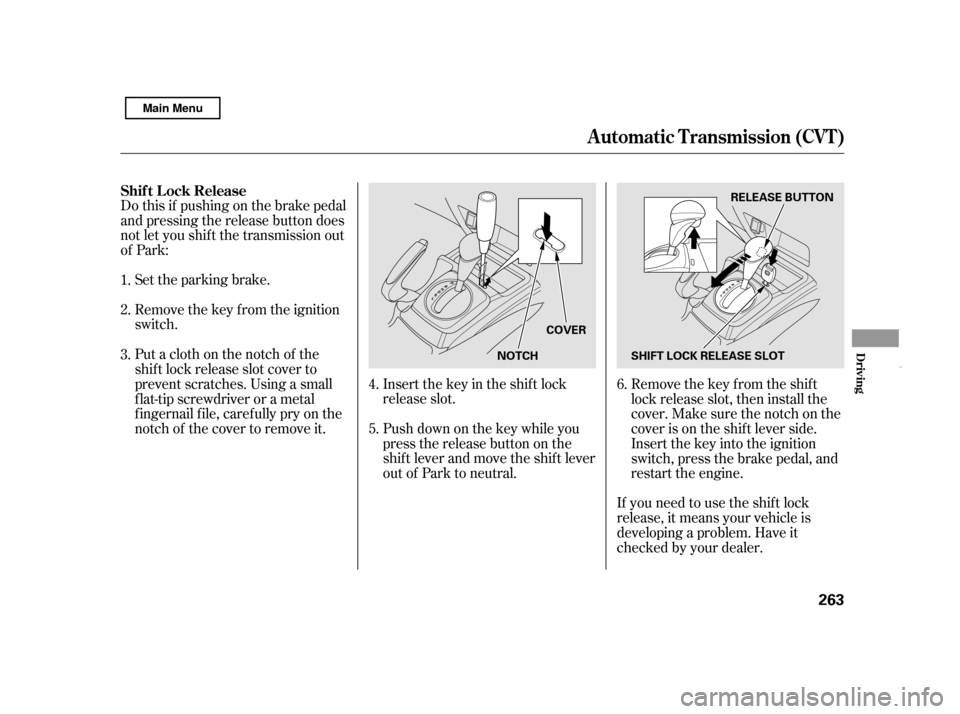
Do this if pushing on the brake pedal
and pressing the release button does
not let you shif t the transmission out
of Park:
Push down on the key while you
pressthereleasebuttononthe
shif t lever and move the shif t lever
out of Park to neutral.
Insert the key in the shift lock
release slot.
Putaclothonthenotchof the
shif t lock release slot cover to
prevent scratches. Using a small
f lat-tip screwdriver or a metal
f ingernail f ile, caref ully pry on the
notch of the cover to remove it. Remove the key from the shift
lock release slot, then install the
cover. Make sure the notch on the
cover is on the shif t lever side.
Insert the key into the ignition
switch, press the brake pedal, and
restart the engine.
1. 2. 3.
4.5.6.
Shif t L ock Release
Automatic Transmission (CVT)
Driving
263
NOTCH
COVER RELEASE BUTTON
SHIFT LOCK RELEASE SLOT
Main Menu
Page 271 of 369

Your vehicle is equipped with f ront
disc brakes. The brakes on the rear
wheels are drum. A power assist
helps reduce the ef f ort needed on
thebrakepedal.TheABShelpsyou
retain steering control when braking
very hard.
Resting your f oot on the pedal keeps
the brakes applied lightly, builds up
heat, reduces their ef f ectiveness and
reduces brake pad lif e. In addition,
f uel economy can be reduced. It also
keeps your brake lights on all the
time, conf using drivers behind you.Check the brakes after driving
through deep water. Apply the
brakes moderately to see if they f eel
normal. If not, apply them gently and
f requently until they do. Be extra
cautious in your driving.
Your vehicle is equipped with an
advanced hydraulic booster.
The advanced hydraulic booster has
some f eatures.
This f eature enables you to press the
brakepedalwithlessforcebythe
help of hydraulic pressure in the oil
pressure pump.This f eature controls the braking
pressure appropriately, coordinating
with the regenerating brake of the
IMA motor.
When you release the brake pedal
while the Auto Idle Stop f unction is
activated, this f eature keeps the
braking pressure until the engine
starts, and prevents the vehicle from
dropping back.
This f eature helps you apply the
brakes with less f orce during an
emergency braking situation.
Constant application of the brakes
when going down a long hill builds
up heat and reduces their ef f ective-
ness. Use the engine to assist the
brakes by taking your f oot of f the
accelerator and downshif ting to a
lower gear.
Power-Assist Cooperative Control with Regenerative
Brake
Creep Aid System
Brake-Assist
Braking System
Driving
267
Main Menu
Page 276 of 369

When the low tire pressure indicator
is on, one or more of your tires is
signif icantly underinf lated. You
should stop and check your tires as
soon as possible, and inflate them to
the proper pressure as indicated on
the vehicle’s tire inf ormation placard.
If you think you can saf ely drive a
short distance to a service station,
proceed slowly, and inf late the tire to
the recommended pressure shown
on the driver’s doorjamb.
If the tire is f lat, or if the tire
pressure is too low to continue
driving, replace the tire with the
compact spare tire (see page ).
If you cannot make the low tire
pressure indicator go out af ter
inf lating the tires to the specif ied
values, have your dealer check the
system as soon as possible.Driving on a signif icantly under
inf lated tire causes the tire to
overheat and can lead to tire f ailure.
Underinf lation also reduces f uel
efficiency and tire tread life, and may
af f ect the vehicle’s handling and
stopping ability.
Becausetirepressurevariesby
temperature and other conditions,
the low tire pressure indicator may
come on unexpectedly.
Each tire has its own pressure
sensor (not including the spare tire).
If the air pressure of a tire becomes
signif icantly low while driving, the
sensor in that tire immediately sends
a signal that causes the low tire
pressure indicator to come on.
Your vehicle is equipped with a tire
pressure monitoring system (TPMS)
that turns on every time you start the
engine and monitors the pressure in
your tires while driving.
312
U.S. models onlyLow Tire Pressure
Indicator
Tire Pressure Monitoring System (TPMS)
272
Main Menu
Page 279 of 369

This section explains why it is
important to keep your vehicle well
maintained and how to f ollow basic
maintenance saf ety precautions.
This section also includes
instructions on how to read the
Maintenance Minder messages on
the information display, and
instructions f or simple maintenance
tasks you may want to take care of
yourself .
If you have the skills and tools to
perf orm more complex maintenance
tasks on your vehicle, you may want
to purchase the service manual. See
page f or inf ormation on how to
obtain a copy, or see your dealer.U.S. Vehicles:
......................
Maintenance Saf ety . 276
.................
Maintenance Minder . 277
..............................
Fluid Locations . 284
........................
Adding Engine Oil . 285
.........
Changing the Oil and Filter . 286
..............................
Engine Coolant . 288
....................
Windshield Washers . 290
........................
Transmission Fluid .291
Continuously Variable ............
Transmission (CVT) . 291
....................................
Brake Fluid . 292
.............................................
Lights . 293
................................
Roof Antenna . 298
................
Cleaning the Seat Belts . 299
.....................................
Floor Mats . 299
..................
DustandPollenFilter .300
.................................
Wiper Blades . 300
...........................................
Wheels . 303
...............................................
Tires . 303
......
Checking the 12 Volt Battery . 308
.............................
Vehicle Storage . 309
..................................
Interior Care . 310
355
Maintenance
Maintenance, replacement, or
repair of emissions control
devices and systems may be done
by any automotive repair
establishment or individual using
parts that are ‘‘certif ied’’ to EPA
standards.
Maint enance
275
TM
Main Menu
Page 285 of 369

If you have the required service
done but do not reset the display, or
reset the display without doing the
service, the system will not show the
correct maintenance intervals. This
canleadtoseriousmechanical
problems because you will no longer
have an accurate record of when
maintenance is needed.
Your authorized Honda dealer
knows your vehicle best and can
provide competent, ef f icient service.
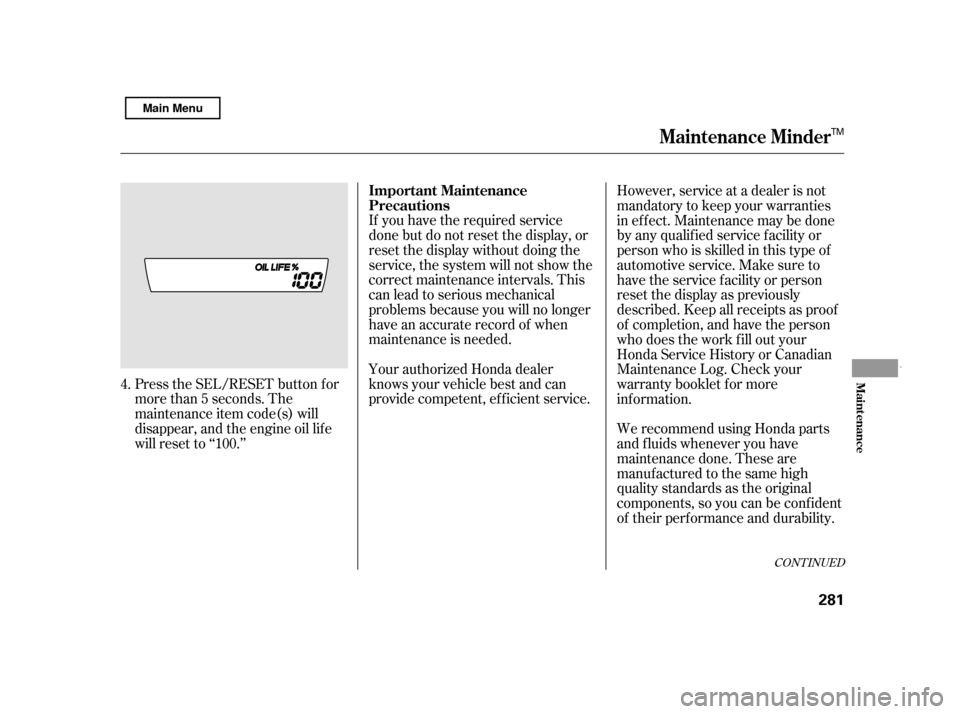
Press the SEL/RESET button f or
more than 5 seconds. The
maintenance item code(s) will
disappear, and the engine oil lif e
will reset to ‘‘100.’’ However, service at a dealer is not
mandatory to keep your warranties
in ef f ect. Maintenance may be done
by any qualif ied service f acility or
person who is skilled in this type of
automotive service. Make sure to
have the service facility or person
reset the display as previously
described. Keep all receipts as proof
of completion, and have the person
who does the work f ill out your
Honda Service History or Canadian
Maintenance Log. Check your
warranty booklet f or more
inf ormation.
We recommend using Honda parts
and fluids whenever you have
maintenance done. These are
manuf actured to the same high
quality standards as the original
components, so you can be conf ident
of their performance and durability.
4.
CONT INUED
Maintenance Minder
Important Maintenance
Precautions
Maint enance
281
TM
Main Menu
Page 286 of 369

�µ�µ�µ
�µ
�µ �µ
�Ì Youshouldcheckthefollowing
items at the specif ied intervals. If
you are unsure of how to perf orm
any check, turn to the appropriate
page listed.
Engine oil level Check every
time you fill the fuel tank. See
page .
Engine coolant level Check the
radiator reserve tank every time
youfillthefueltank.Seepage .
Automatic transmission Check
the f luid level monthly. See page .
Brakes Check the f luid level
monthly. See page .
Tires Check the tire pressure
monthly. Examine the tread f or
wear and foreign objects. See page . Lights Check the operation of
the headlights, parking lights,
taillights, high-mount brake light,
turn signals, brake lights, and
license plate light monthly. See
page .
According to state and federal
regulations, f ailure to perf orm
maintenance on the items marked
with will not void your emissions
warranties. However, all
maintenance services should be
perf ormed in accordance with the
intervals indicated by the
inf ormation display.
U.S. Vehicles:
245246
291
303 293
292
Maintenance Minder
Owner’s Maintenance Checks
282
TM
Main Menu
Page 287 of 369

�Î �Î
�Ì �Ì
�Ì
�Î
Maintenance Minder
283
:
TM
See information on maintenance and emissions warranty on page .
If the message ‘‘SERVICE’’ does not appear more than 12 months after the
display is reset, change the engine oil every year.
Independent of the maintenance messages on the information display,
replace the brake fluid every 3 years.
Adjust the valves during services A, B, 1, 2, or 3 only if they are noisy.
Inspect idle speed every 160,000 miles (256,000 km).
NOTE:
282
: Maintenance Main Items
Replace engine oil
Replace engine oil and oil filter
Inspect front and rear brakes
Check parking brake adjustment
Inspect these items: Tie rod ends, steering gear box, and boots
Suspension components
Driveshaft boots
Brake hoses and lines (including ABS/VSA)
All fluid levels and condition of fluids
Exhaust system
Fuel lines and connections Maintenance Sub Items
Rotate tires
Replace air cleaner element
If you drive in dusty conditions, replace every 15,000
miles (24,000 km).
Replace dust and pollen filter If you drive primarily in urban areas that have high
concentrations of soot in the air from industry and
from diesel-powered vehicles, replace every 15,000
miles (24,000 km).
Inspect drive belt
Replace transmission fluid
Replace spark plugs
Inspect valve clearance
Replace engine coolant
AB
Symbol
Symbol
12 3 4 5
Maintenance Minder
Main Menu