Page 258 of 456

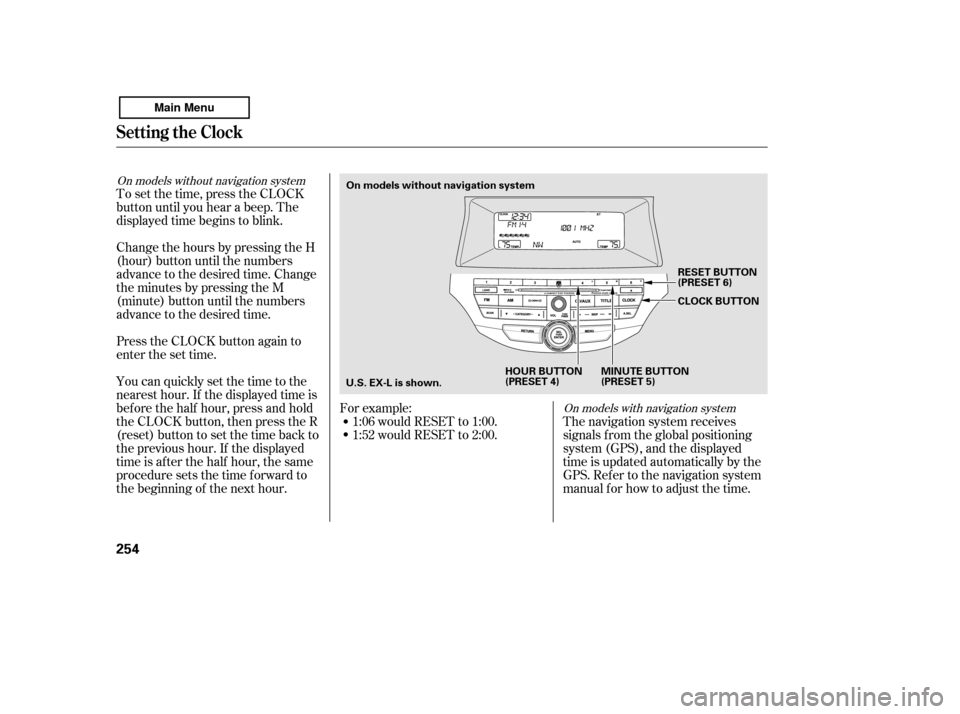
To set the time, press the CLOCK
button until you hear a beep. The
displayed time begins to blink.
Change the hours by pressing the H
(hour) button until the numbers
advance to the desired time. Change
the minutes by pressing the M
(minute) button until the numbers
advance to the desired time.
Press the CLOCK button again to
enter the set time.
You can quickly set the time to the
nearest hour. If the displayed time is
bef ore the half hour, press and hold
the CLOCK button, then press the R
(reset) button to set the time back to
the previous hour. If the displayed
time is af ter the half hour, the same
procedure sets the time f orward to
the beginning of the next hour.The navigation system receives
signals f rom the global positioning
system (GPS), and the displayed
time is updated automatically by the
GPS. Ref er to the navigation system
manual f or how to adjust the time.
1:06 would RESET to 1:00.
1:52 would RESET to 2:00.
For example:
On models with navigation system
On models without navigation system
Setting the Clock
254
On models without navigation system
MINUTE BUTTON
(PRESET 5)CLOCK BUTTON
RESET BUTTON
(PRESET 6)
HOUR BUTTON
(PRESET 4)
U.S. EX-L is shown.
Main Menu
Page 260 of 456
Turn the selector knob to change
the setting between 12H and 24H.
Press the selector knob (ENTER)
to enter your selection. The
display will return to the clock
adjusting display.
To set the time, turn the selector
knob and select the hours or the
minutes, then press the knob to
enter your selection. The display
changes to the setting display.Turn the selector knob to count
the numbers up or down.
Press the selector knob (ENTER)
to enter your selection. The
display will return to the clock
adjusting display.
Pressing the MENU button again
will cancel this setting mode.
While setting the clock, pressing
the RETURN button will go back
to the previous display. To enter the clock setting, turn
the selector knob to select ‘‘SET,’’
then press the knob. The display
will return to the menu item
display.
Press either the RETURN or
MENUbuttontogobacktothe
normal display.
5. 6. 7. 8. 9.
10.
11.
Setting the Clock
256
MINUTE S ETTING
Main Menu
Page 275 of 456
�Ì�Ì�Ì�Ì
Try to reduce all background
noise. If the microphone picks up
voices other than yours,
commands may be misinterpreted. Many commands can be spoken
together. For example, you can
say ‘‘Call 123-456- ’’ or
‘‘Dial Peter.’’
Press and release the HFL Talk
button each time you want to
make a command. Af ter the beep,
speak in a clear, natural tone.
When HFL is in use, navigation
voice commands cannot be
recognized.
To change the volume level of
HFL, use the audio system volume
knob or the steering wheel volume
controls.
Airorwindnoisefromthe
dashboard and side vents,
windows and moonroof may
interf ere with the microphone.
Adjust or close them as necessary.
CONT INUED
Voice Cont rol T ips
BluetoothHandsFreeL ink
Features
271
MICROPHONE
Main Menu
Page 279 of 456
�Î�Î
CONT INUED
BluetoothHandsFreeL ink
Features
275
‘‘Change Language’’
‘‘System
Set up’’
‘‘Tutorial’’ ‘‘Clear’’
‘‘Auto Transfer’’
‘‘Call Notification’’ ‘‘Security’’
‘‘Change Passcode’’
Press HFL
Talk button
Press and release the HFL Talk button each time you give a command.
: Canadian models Apply a security passcode to the system that must be input at each key
cycle to access the system (See page 291)
Change your security passcode (See page 292)
Set how you would like to be notified of an incoming call
(See page 292)
(See page 292)
Set calls to automatically transfer from your phone to HFL when you
enter the vehicle
Clear the system of all paired phones, phonebook entries and security
passcode (See page 293)
Change language from English to French (See page 293)
Hear a tutorial for general rules on using the system (See page 272)
‘‘Hands Free Help’’ Hear a list of available commands and additional information describing each command
(See page 272)
Main Menu
Page 282 of 456

Press and release the HFL Talk
button bef ore a command.Say ‘‘ .’’
Say‘‘ ’’aftertheprompts.
HFL will tell you which phone is
linked to the system. Press and release the HFL Talk
button bef ore a command.
Say ‘‘ .’’ Say ‘‘ .’’
Press and release the HFL Talk
button bef ore a command.
Say ‘‘ ’’ af ter the
prompts.
HFL disconnects the linked phone
and searches for another paired
phone.
Once another phone is f ound, it is
linked to the system. HFL will
inf orm you which phone is now
linked.
If no other phones are f ound or
paired, HFL will inf orm you that the
original phone is linked again. Say ‘‘ ’’ af ter the
prompts.
If you want HFL to create a
random code each time you pair a
phone, say ‘‘ .’’ If you want
to choose your own 4-digit code to
be used each time, say ‘‘ ’’
and f ollow the HFL prompts.
1. 2.3.
1.2. 3.1. 2. 3.
4.
BluetoothHandsFreeL ink
T o hear which paired phone is current ly linked: To change f rom the currently linked
phone t o anot her paired phone: T o change t he pairing code set t ing:
Phone setup
StatusPhone setup
Phone setup
Next phone Set pairing code
Random Fixed
278
Main Menu
Page 295 of 456
This command group allows you to
change or customize HFL basic
settings.Press and release the HFL Talk
button bef ore a command.
Say ‘‘ .’’ Once a passcode is set, you
will need to enter it to use HFL each
time you start the vehicle. If you
f orget the code, your dealer will have
toresetitforyou,oryouwillhaveto
clear the entire system (see page ).
Follow the HFL prompts and say
the 4-digit passcode you want to
set.
Say‘‘ ’’aftertheprompts.
Follow the HFL prompts to
conf irm the number.
1. 2.3. 4.
293
CONT INUED
System Setup
System setup
SecurityT o set a 4-digit passcode t o lock t heHFL syst em f or security purposes:
BluetoothHandsFreeL ink
Features
291
NOTE:
Main Menu
Page 300 of 456

Help assure your vehicle’s f uture
reliability and perf ormance by paying
extra attention to how you drive
during the f irst 600 miles (1,000 km).
During this period:Avoid full-throttle starts and rapid
acceleration.
Do not change the oil until the
scheduled maintenance time.
Avoidhardbrakingforthefirst
200 miles (300 km).
Do not tow a trailer.
You should also f ollow these
recommendations with an
overhauled or exchanged engine, or
when the brakes are replaced. Your vehicle is designed to operate
on unleaded gasoline with a pump
octane number of 87 or higher. Use
of a lower octane gasoline can cause
a persistent, heavy, metallic rapping
noise that can lead to engine damage.
Use of gasoline with these additives
may adversely af f ect perf ormance,
and cause the malfunction indicator
lamp on your instrument panel to
come on. If this happens, contact
your dealer f or service.
In addition, in order to maintain good
perf ormance, f uel economy, and
emissions control, we strongly
recommend, in areas where it is
available, the use of gasoline that
does NOT contain manganese-based
f uel additives such as MMT.
We recommend using quality
gasolines containing detergent
additives that help prevent fuel
system and engine deposits.
You may hear a knocking noise from
the engine if you drive the vehicle at
low engine speed (below about 1,000
rpm) in a higher gear. To stop this,
raise the engine speed by shif ting to
a lower gear.
On models with manual transmission
Break-in Period, Fuel Recommendation
Break-in Period Fuel Recommendation
296
Main Menu
Page 302 of 456

Stop f illing the tank af ter the f uel
nozzle automatically clicks of f . Do
not try to ‘‘top off’’ the tank. This
leaves some room in the f uel tank
for the fuel to expand with
temperature changes.
Remove the f uel f ill cap slowly.
You may hear a hissing sound as
pressure inside the tank equalizes.
The fuel fill cap is attached to the
f uel f iller with a tether. Place the
cap in the holder on the f uel f ill
door.
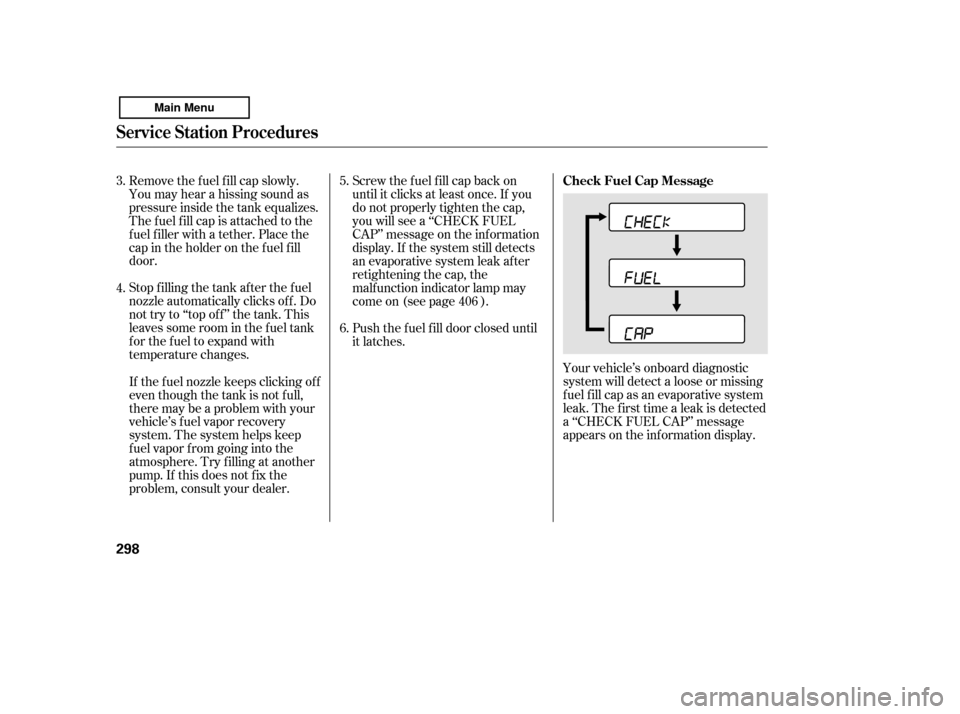
Your vehicle’s onboard diagnostic
system will detect a loose or missing
f uel f ill cap as an evaporative system
leak. The f irst time a leak is detected
a ‘‘CHECK FUEL CAP’’ message
appears on the information display.
Screw the f uel f ill cap back on
until it clicks at least once. If you
do not properly tighten the cap,
you will see a ‘‘CHECK FUEL
CAP’’ message on the inf ormation
display. If the system still detects
an evaporative system leak af ter
retightening the cap, the
malf unction indicator lamp may
come on (see page ).
Push the f uel f ill door closed until
it latches.
If thefuelnozzlekeepsclickingoff
even though the tank is not f ull,
there may be a problem with your
vehicle’s fuel vapor recovery
system. The system helps keep
f uel vapor f rom going into the
atmosphere. Try f illing at another
pump. If this does not f ix the
problem, consult your dealer.
3. 4.
5. 6.
406Check Fuel Cap Message
Service Station Procedures
298
Main Menu