Page 364 of 478
Black plate (36,1)GMC Acadia/Acadia Denali Owner Manual - 2011
10-36 Vehicle Care
Fuse Side
The vehicle may not be equipped
with all of the fuses, relays, and
features shown. Fuses Usage
AIRBAG Airbag AMP Amplifier
BCK/
UP/STOP Back‐up
Lamp/Stoplamp
BCM Body Control
Module
CNSTR/ VENT Canister Vent
CTSY Courtesy
DR/LCK Door Locks
DRL Daytime Running
Lamps
DRL 2 GMC HID Only
(If Equipped)/
Rear Fog
Lamps-China Only
DSPLY Display
FRT/WSW Front Windshield
Washer
HTD/
COOL SEAT Heated/
Cooling Seats Fuses Usage
HVAC Heating,
Ventilation and
Air Conditioning
INADV/
PWR/LED Inadvertent
Power LED
INFOTMNT Infotainment
LT/TRN/SIG Driver Side Turn
Signal
MSM Memory Seat
Module
PDM Power Mirrors,
Liftgate Release
PWR MODE Power Mode
PWR/MIR Power Mirrors RDO Radio
REAR WPR Rear Wiper
RT/TRN/SIG Passenger Side
Turn Signal
SPARE Spare
STR/WHL/ ILLUM Steering Wheel
Illumination
Page 392 of 478

Black plate (64,1)GMC Acadia/Acadia Denali Owner Manual - 2011
10-64 Vehicle Care
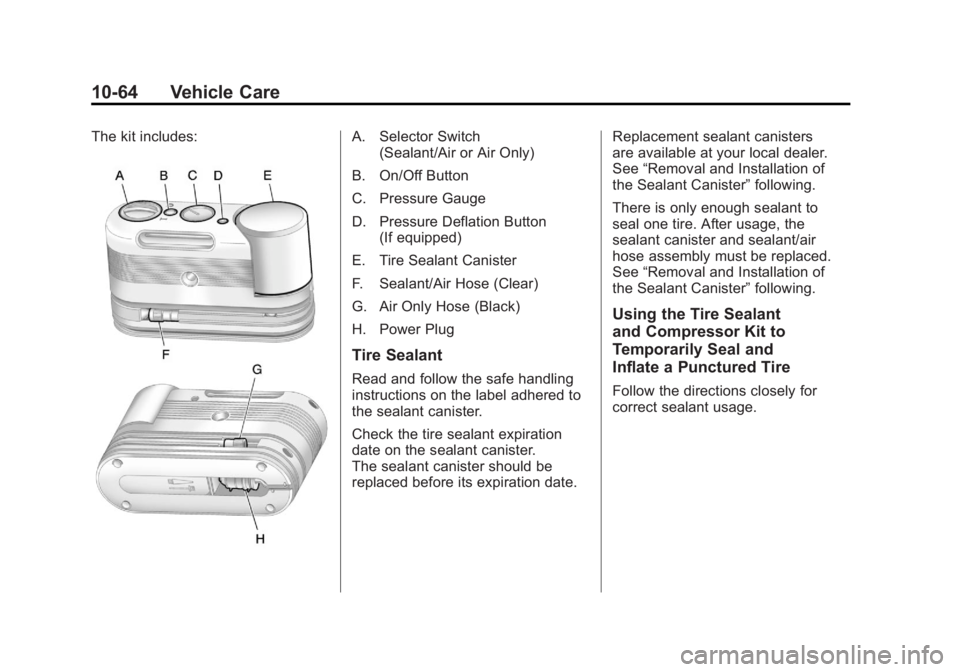
The kit includes:A. Selector Switch(Sealant/Air or Air Only)
B. On/Off Button
C. Pressure Gauge
D. Pressure Deflation Button (If equipped)
E. Tire Sealant Canister
F. Sealant/Air Hose (Clear)
G. Air Only Hose (Black)
H. Power Plug
Tire Sealant
Read and follow the safe handling
instructions on the label adhered to
the sealant canister.
Check the tire sealant expiration
date on the sealant canister.
The sealant canister should be
replaced before its expiration date. Replacement sealant canisters
are available at your local dealer.
See
“Removal and Installation of
the Sealant Canister” following.
There is only enough sealant to
seal one tire. After usage, the
sealant canister and sealant/air
hose assembly must be replaced.
See “Removal and Installation of
the Sealant Canister” following.
Using the Tire Sealant
and Compressor Kit to
Temporarily Seal and
Inflate a Punctured Tire
Follow the directions closely for
correct sealant usage.
Page 395 of 478

Black plate (67,1)GMC Acadia/Acadia Denali Owner Manual - 2011
Vehicle Care 10-67
12. Unplug the power plug (H) fromthe accessory power outlet in
the vehicle.
13. Turn the sealant/air hose (F) counterclockwise to remove it
from the tire valve stem.
14. Replace the tire valve stem cap.
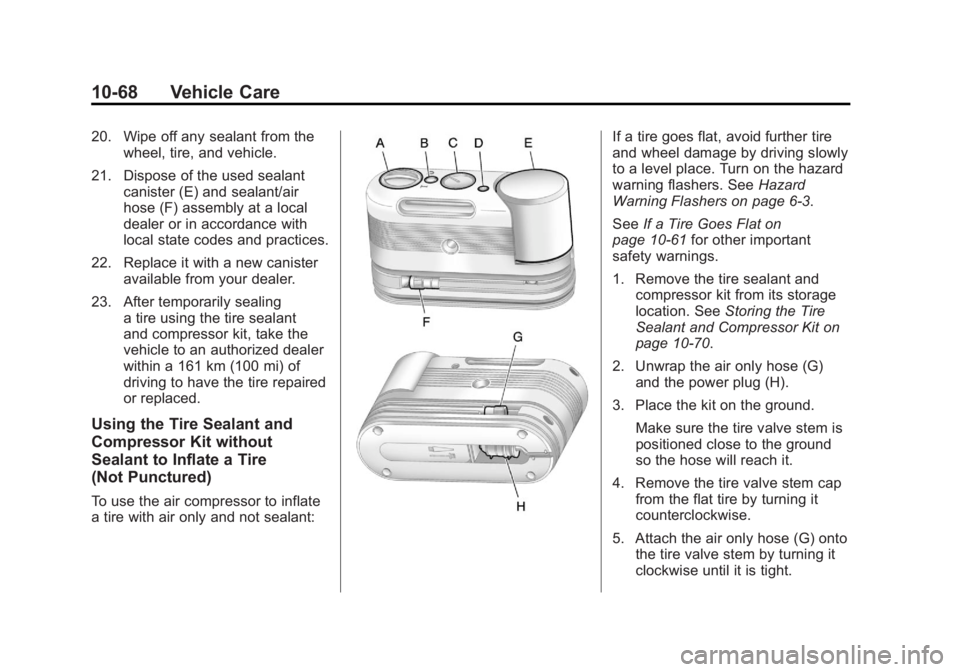
15. Replace the sealant/air hose (F), and the power
plug (H) back in their original
location.
16. If the flat tire was able toinflate to the recommended
inflation pressure, remove the
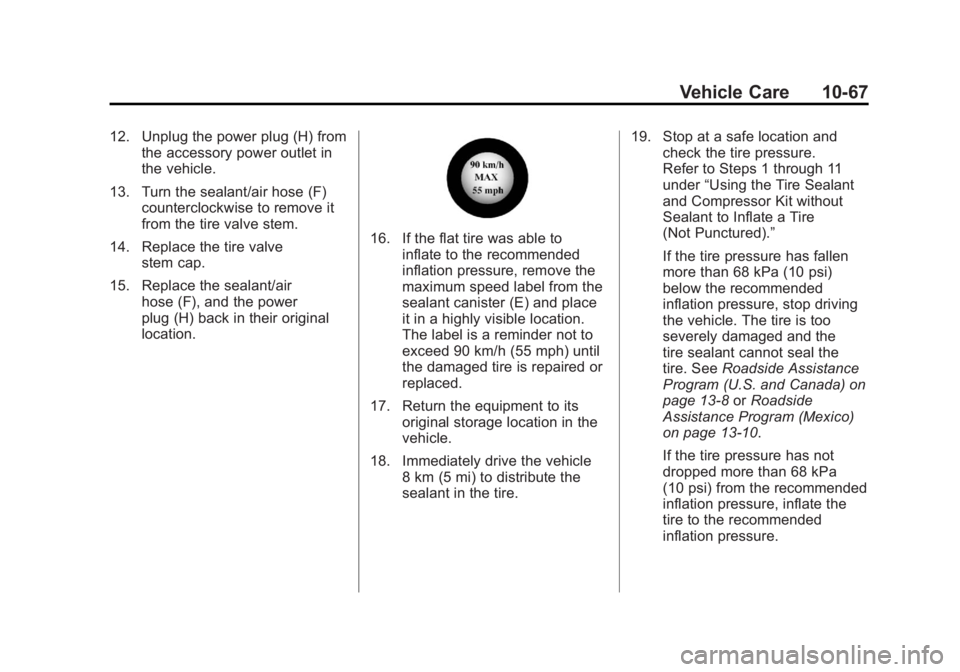
maximum speed label from the
sealant canister (E) and place
it in a highly visible location.
The label is a reminder not to
exceed 90 km/h (55 mph) until
the damaged tire is repaired or
replaced.
17. Return the equipment to its original storage location in the
vehicle.
18. Immediately drive the vehicle 8 km (5 mi) to distribute the
sealant in the tire. 19. Stop at a safe location and
check the tire pressure.
Refer to Steps 1 through 11
under “Using the Tire Sealant
and Compressor Kit without
Sealant to Inflate a Tire
(Not Punctured).”
If the tire pressure has fallen
more than 68 kPa (10 psi)
below the recommended
inflation pressure, stop driving
the vehicle. The tire is too
severely damaged and the
tire sealant cannot seal the
tire. See Roadside Assistance
Program (U.S. and Canada) on
page 13‑8 orRoadside
Assistance Program (Mexico)
on page 13‑10.
If the tire pressure has not
dropped more than 68 kPa
(10 psi) from the recommended
inflation pressure, inflate the
tire to the recommended
inflation pressure.
Page 396 of 478

Black plate (68,1)GMC Acadia/Acadia Denali Owner Manual - 2011
10-68 Vehicle Care
20. Wipe off any sealant from thewheel, tire, and vehicle.
21. Dispose of the used sealant canister (E) and sealant/air
hose (F) assembly at a local
dealer or in accordance with
local state codes and practices.
22. Replace it with a new canister available from your dealer.
23. After temporarily sealing a tire using the tire sealant
and compressor kit, take the
vehicle to an authorized dealer
within a 161 km (100 mi) of
driving to have the tire repaired
or replaced.
Using the Tire Sealant and
Compressor Kit without
Sealant to Inflate a Tire
(Not Punctured)
To use the air compressor to inflate
a tire with air only and not sealant:
If a tire goes flat, avoid further tire
and wheel damage by driving slowly
to a level place. Turn on the hazard
warning flashers. See Hazard
Warning Flashers on page 6‑3.
See If a Tire Goes Flat on
page 10‑61 for other important
safety warnings.
1. Remove the tire sealant and compressor kit from its storage
location. See Storing the Tire
Sealant and Compressor Kit on
page 10‑70.
2. Unwrap the air only hose (G) and the power plug (H).
3. Place the kit on the ground. Make sure the tire valve stem is
positioned close to the ground
so the hose will reach it.
4. Remove the tire valve stem cap from the flat tire by turning it
counterclockwise.
5. Attach the air only hose (G) onto the tire valve stem by turning it
clockwise until it is tight.
Page 398 of 478
Black plate (70,1)GMC Acadia/Acadia Denali Owner Manual - 2011
10-70 Vehicle Care
15. Place the equipment in theoriginal storage location in the
vehicle.
The tire sealant and compressor kit
has an accessory adapter located in
a compartment on the bottom of its
housing that may be used to inflate
air mattresses, balls, etc.
Removal and Installation of the
Sealant Canister
To remove the sealant canister:
1. Unwrap the sealant hose.
2. Press the canister releasebutton.
3. Pull up and remove the canister.
4. Replace with a new canister which is available from your
dealer.
5. Push the new canister into place.
Storing the Tire Sealant
and Compressor Kit
The tire sealant and compressor
kit is located in the storage
compartment on the driver side,
at the rear of the vehicle.
1. Press down on the latch tab andpull the cover off to access the
storage compartment.
Page 424 of 478

Black plate (96,1)GMC Acadia/Acadia Denali Owner Manual - 2011
10-96 Vehicle Care
Fabric/Carpet
Use a vacuum cleaner with a soft
brush attachment to remove dust
and loose dirt. A canister vacuum
with rotating brushes in the nozzle
may only be used on floor carpet
and carpeted floor mats. For soils,
always try to remove them first with
plain water or club soda. Before
cleaning, gently remove as much of
the soil as possible using one of the
following techniques:
.For liquids: gently blot the
remaining soil with a paper
towel. Allow the soil to absorb
into the paper towel until no
more can be removed.
.For solid dry soils: remove as
much as possible and then
vacuum.
To clean:
1. Saturate a lint-free, clean white cloth with water or club soda.
2. Remove excess moisture. 3. Start on the outside edge of the
soil and gently rub toward the
center. Continue cleaning, using
a clean area of the cloth each
time it becomes soiled.
4. Continue to gently rub the soiled area.
5. If the soil is not completely removed, use a mild soap
solution and repeat the cleaning
process with plain water.
If any of the soil remains, a
commercial fabric cleaner or spot
lifter may be necessary. Test a
small hidden area for colorfastness
before using a commercial
upholstery cleaner or spot lifter.
If the locally cleaned area gives
any impression that a ring formation
may result, clean the entire surface.
A paper towel can be used to blot
excess moisture from the fabric or
carpet after the cleaning process.
Leather
Leather, and lighter colored leather
in particular, will need more frequent
cleaning to prevent the buildup of
dust, dirt, and colors transferred
from other items so that these do
not become permanent stains.
To remove dust, a soft cloth
dampened with water can be used.
If a more thorough cleaning is
necessary, a soft cloth dampened
with a mild soap solution can
be used. Your dealer has a GM
approved leather cleaner available
that provides superior cleaning
performance when used regularly
on finished automotive leathers.
Allow the leather to dry naturally.