Page 11 of 406
Vehicle Symbol Glossary
Power Windows
Front/Rear
Power Window Lockout
Child Safety Door
Lock/UnlockInterior Luggage
Compartment Release
Panic AlarmEngine Oil
Engine CoolantEngine Coolant
Temperature
Do Not Open When HotBattery
Avoid Smoking, Flames,
or SparksBattery Acid
Explosive GasFan Warning
Power Steering FluidMaintain Correct Fluid
LevelMAX
MIN
Service Engine SoonEngine Air Filter
Passenger Compartment
Air FilterJack
Check Fuel CapLow Tire Pressure
Warning
Introduction
11
2011 Taurus(500)
Owners Guide, 1st Printing
USA(fus)
Page 14 of 406
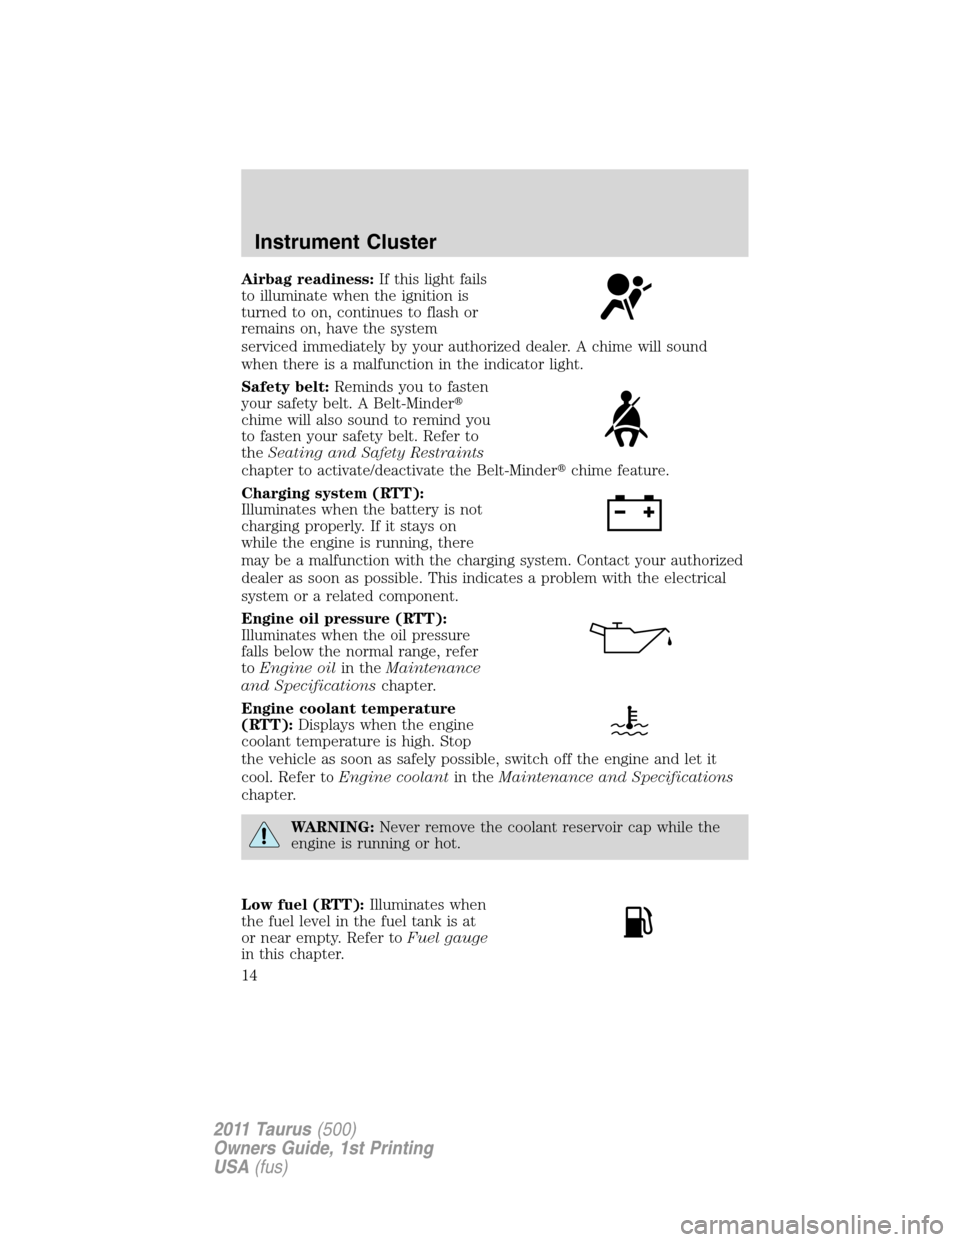
Airbag readiness:If this light fails
to illuminate when the ignition is
turned to on, continues to flash or
remains on, have the system
serviced immediately by your authorized dealer. A chime will sound
when there is a malfunction in the indicator light.
Safety belt:Reminds you to fasten
your safety belt. A Belt-Minder�
chime will also sound to remind you
to fasten your safety belt. Refer to
theSeating and Safety Restraints
chapter to activate/deactivate the Belt-Minder�chime feature.
Charging system (RTT):
Illuminates when the battery is not
charging properly. If it stays on
while the engine is running, there
may be a malfunction with the charging system. Contact your authorized
dealer as soon as possible. This indicates a problem with the electrical
system or a related component.
Engine oil pressure (RTT):
Illuminates when the oil pressure
falls below the normal range, refer
toEngine oilin theMaintenance
and Specificationschapter.
Engine coolant temperature
(RTT):Displays when the engine
coolant temperature is high. Stop
the vehicle as soon as safely possible, switch off the engine and let it
cool. Refer toEngine coolantin theMaintenance and Specifications
chapter.
WARNING:Never remove the coolant reservoir cap while the
engine is running or hot.
Low fuel (RTT):Illuminates when
the fuel level in the fuel tank is at
or near empty. Refer toFuel gauge
in this chapter.
Instrument Cluster
14
2011 Taurus(500)
Owners Guide, 1st Printing
USA(fus)
Page 21 of 406
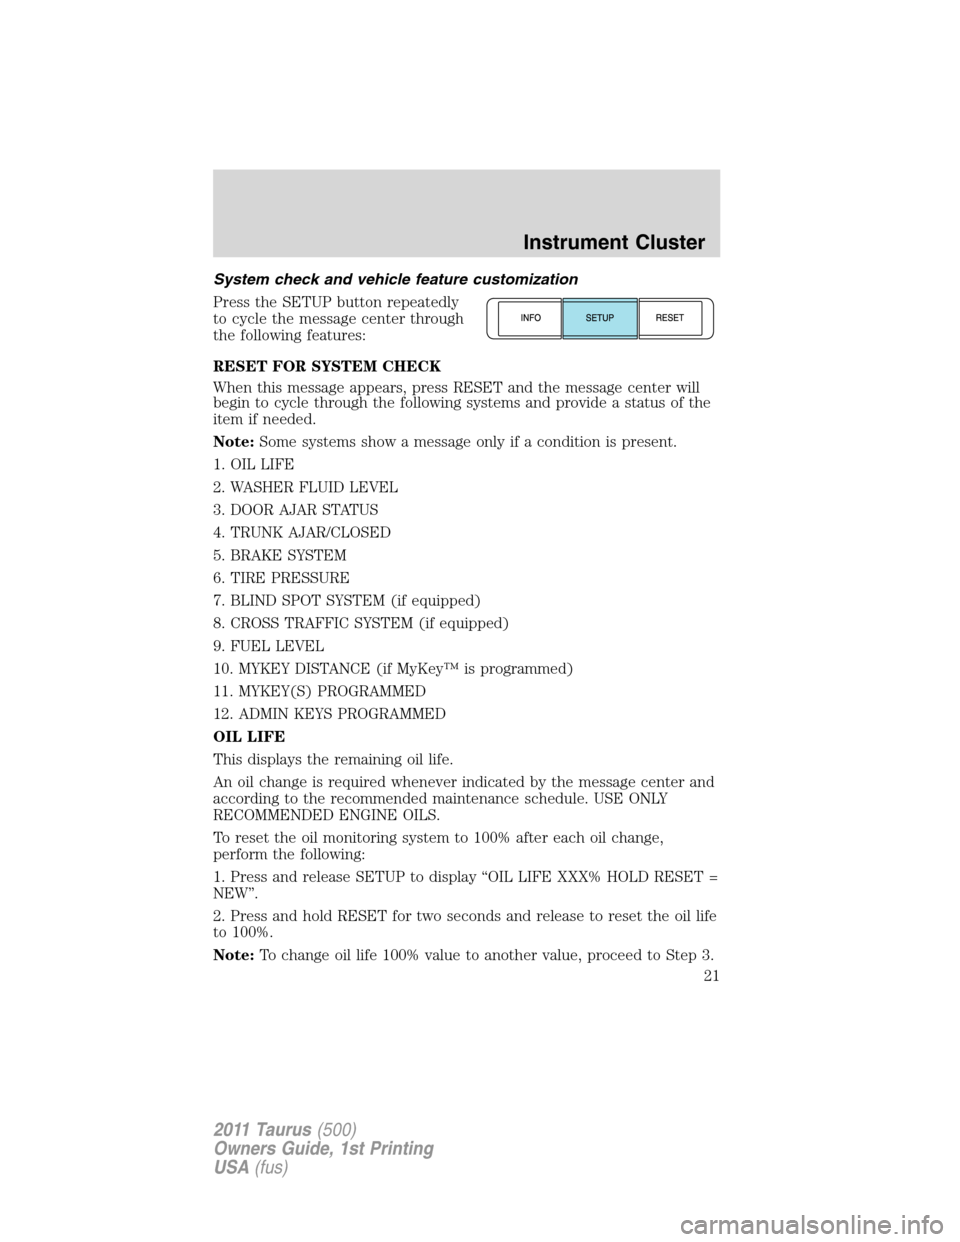
System check and vehicle feature customization
Press the SETUP button repeatedly
to cycle the message center through
the following features:
RESET FOR SYSTEM CHECK
When this message appears, press RESET and the message center will
begin to cycle through the following systems and provide a status of the
item if needed.
Note:Some systems show a message only if a condition is present.
1. OIL LIFE
2. WASHER FLUID LEVEL
3. DOOR AJAR STATUS
4. TRUNK AJAR/CLOSED
5. BRAKE SYSTEM
6. TIRE PRESSURE
7. BLIND SPOT SYSTEM (if equipped)
8. CROSS TRAFFIC SYSTEM (if equipped)
9. FUEL LEVEL
10. MYKEY DISTANCE (if MyKey™ is programmed)
11. MYKEY(S) PROGRAMMED
12. ADMIN KEYS PROGRAMMED
OIL LIFE
This displays the remaining oil life.
An oil change is required whenever indicated by the message center and
according to the recommended maintenance schedule. USE ONLY
RECOMMENDED ENGINE OILS.
To reset the oil monitoring system to 100% after each oil change,
perform the following:
1. Press and release SETUP to display “OIL LIFE XXX% HOLD RESET =
NEW”.
2. Press and hold RESET for two seconds and release to reset the oil life
to 100%.
Note:To change oil life 100% value to another value, proceed to Step 3.
Instrument Cluster
21
2011 Taurus(500)
Owners Guide, 1st Printing
USA(fus)
Page 330 of 406
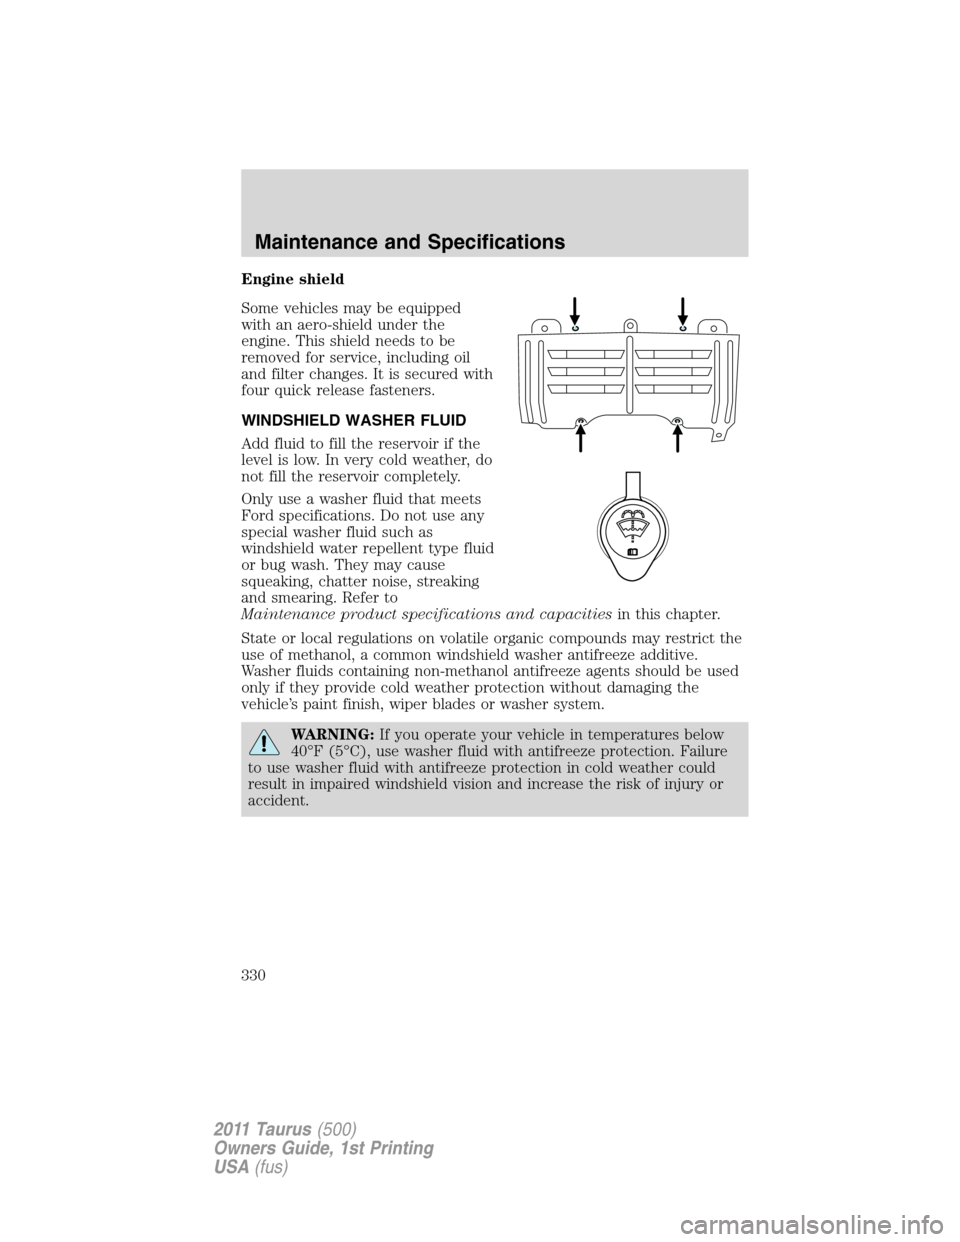
Engine shield
Some vehicles may be equipped
with an aero-shield under the
engine. This shield needs to be
removed for service, including oil
and filter changes. It is secured with
four quick release fasteners.
WINDSHIELD WASHER FLUID
Add fluid to fill the reservoir if the
level is low. In very cold weather, do
not fill the reservoir completely.
Only use a washer fluid that meets
Ford specifications. Do not use any
special washer fluid such as
windshield water repellent type fluid
or bug wash. They may cause
squeaking, chatter noise, streaking
and smearing. Refer to
Maintenance product specifications and capacitiesin this chapter.
State or local regulations on volatile organic compounds may restrict the
use of methanol, a common windshield washer antifreeze additive.
Washer fluids containing non-methanol antifreeze agents should be used
only if they provide cold weather protection without damaging the
vehicle’s paint finish, wiper blades or washer system.
WARNING:If you operate your vehicle in temperatures below
40°F (5°C), use washer fluid with antifreeze protection. Failure
to use washer fluid with antifreeze protection in cold weather could
result in impaired windshield vision and increase the risk of injury or
accident.
Maintenance and Specifications
330
2011 Taurus(500)
Owners Guide, 1st Printing
USA(fus)
Page 331 of 406
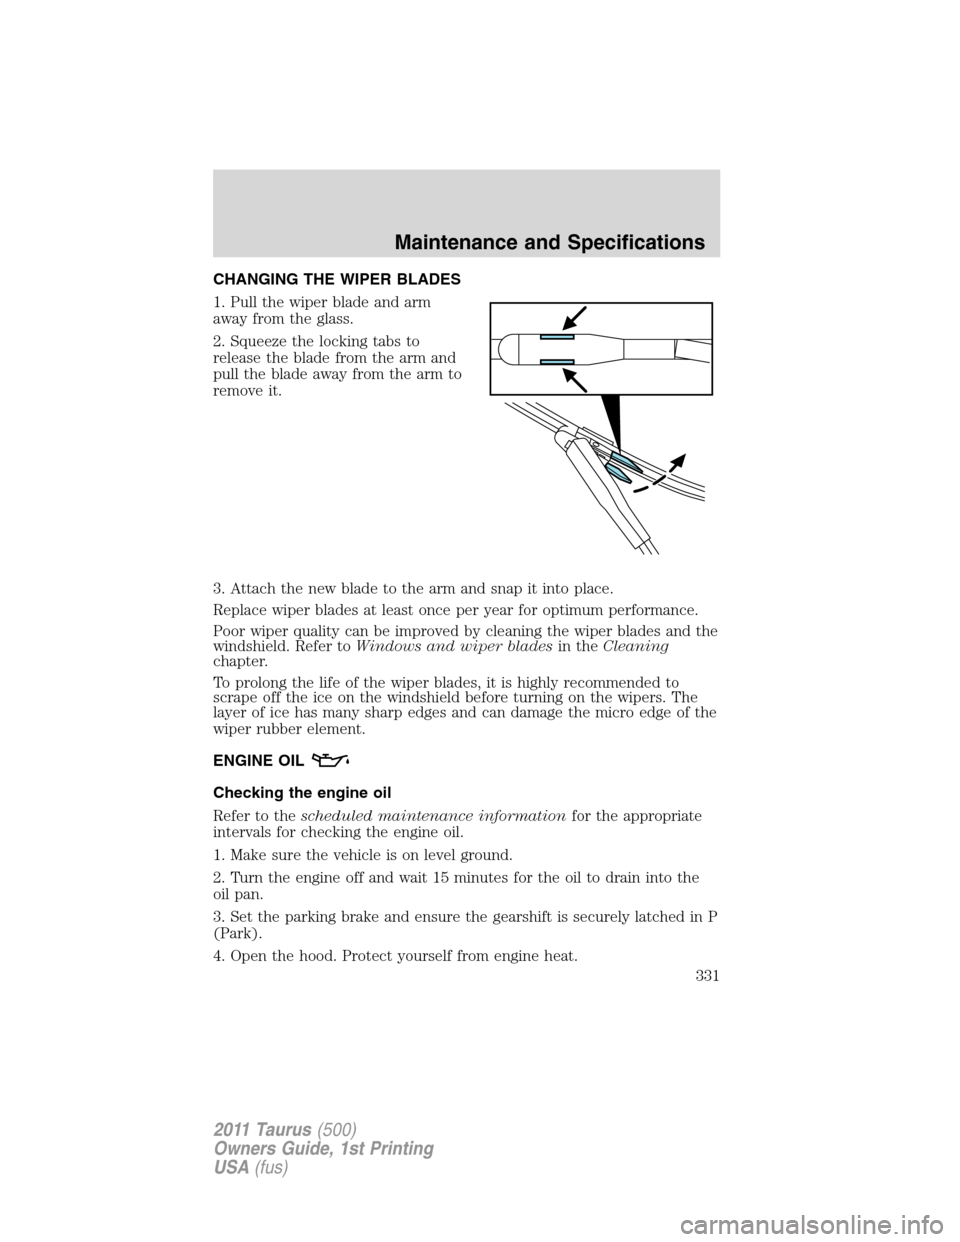
CHANGING THE WIPER BLADES
1. Pull the wiper blade and arm
away from the glass.
2. Squeeze the locking tabs to
release the blade from the arm and
pull the blade away from the arm to
remove it.
3. Attach the new blade to the arm and snap it into place.
Replace wiper blades at least once per year for optimum performance.
Poor wiper quality can be improved by cleaning the wiper blades and the
windshield. Refer toWindows and wiper bladesin theCleaning
chapter.
To prolong the life of the wiper blades, it is highly recommended to
scrape off the ice on the windshield before turning on the wipers. The
layer of ice has many sharp edges and can damage the micro edge of the
wiper rubber element.
ENGINE OIL
Checking the engine oil
Refer to thescheduled maintenance informationfor the appropriate
intervals for checking the engine oil.
1. Make sure the vehicle is on level ground.
2. Turn the engine off and wait 15 minutes for the oil to drain into the
oil pan.
3. Set the parking brake and ensure the gearshift is securely latched in P
(Park).
4. Open the hood. Protect yourself from engine heat.
Maintenance and Specifications
331
2011 Taurus(500)
Owners Guide, 1st Printing
USA(fus)
Page 332 of 406
5. Locate and carefully remove the
engine oil level dipstick.
6. Wipe the dipstick clean. Insert the dipstick fully, then remove it again.
•If the oil level iswithin this
range,the oil level is acceptable.
DO NOT ADD OIL.
•If the oil level isbelow this
mark,engineoil must be added
to raise the level within the
normal operating range.
•If required, add engine oil to the
engine. Refer toAdding engine
oilin this chapter.
Maintenance and Specifications
332
2011 Taurus(500)
Owners Guide, 1st Printing
USA(fus)
Page 333 of 406
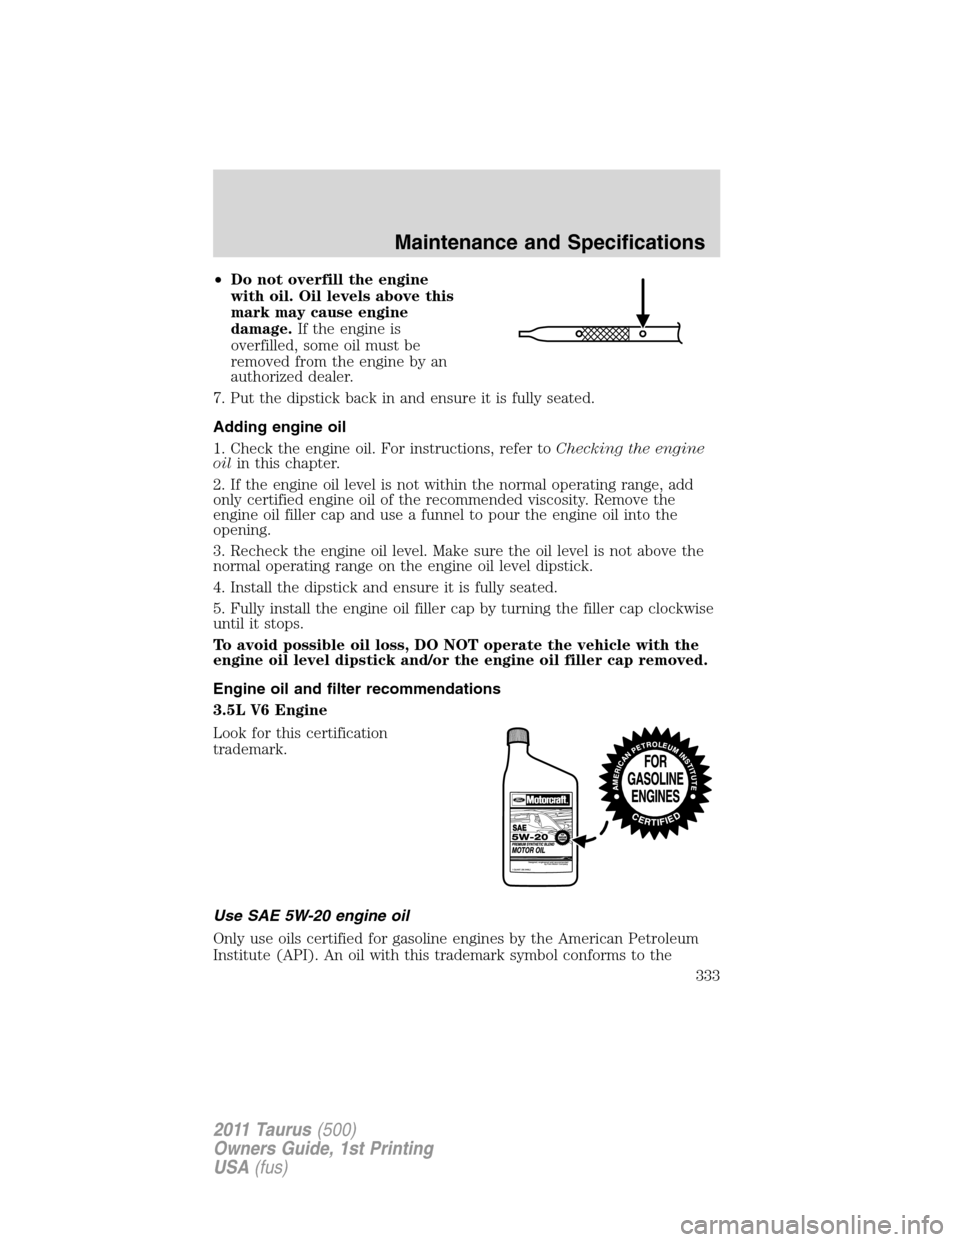
•Do not overfill the engine
with oil. Oil levels above this
mark may cause engine
damage.If the engine is
overfilled, some oil must be
removed from the engine by an
authorized dealer.
7. Put the dipstick back in and ensure it is fully seated.
Adding engine oil
1. Check the engine oil. For instructions, refer toChecking the engine
oilin this chapter.
2. If the engine oil level is not within the normal operating range, add
only certified engine oil of the recommended viscosity. Remove the
engine oil filler cap and use a funnel to pour the engine oil into the
opening.
3. Recheck the engine oil level. Make sure the oil level is not above the
normal operating range on the engine oil level dipstick.
4. Install the dipstick and ensure it is fully seated.
5. Fully install the engine oil filler cap by turning the filler cap clockwise
until it stops.
To avoid possible oil loss, DO NOT operate the vehicle with the
engine oil level dipstick and/or the engine oil filler cap removed.
Engine oil and filter recommendations
3.5L V6 Engine
Look for this certification
trademark.
Use SAE 5W-20 engine oil
Only use oils certified for gasoline engines by the American Petroleum
Institute (API). An oil with this trademark symbol conforms to the
Maintenance and Specifications
333
2011 Taurus(500)
Owners Guide, 1st Printing
USA(fus)
Page 337 of 406
6. Release the parking brake. With your foot on the brake pedal and with
the A/C on, put the vehicle in D (Drive) and allow the engine to idle for
at least one minute.
7. Drive the vehicle to complete the relearning process.
•The vehicle may need to be driven 10 miles (16 km) or more to
relearn the idle and fuel trim strategy.
•If you do not allow the engine to relearn its idle trim, the idle
quality of your vehicle may be adversely affected until the idle
trim is eventually relearned.
If the battery has been disconnected or a new battery has been installed,
the clock and radio settings must be reset once the battery is
reconnected.
•Always dispose of automotive
batteries in a responsible manner.
Follow your local authorized
standards for disposal. Call your
local authorized recycling center
to find out more about recycling
automotive batteries.
ENGINE COOLANT
Checking engine coolant
The concentration and level of engine coolant should be checked at the
intervals listed inscheduled maintenance information.The coolant
concentration should be maintained at 50/50 coolant and distilled water,
which equates to a freeze point of -34°F (-36°C). Coolant concentration
testing is possible with a hydrometer or antifreeze tester. The level of
coolant should be maintained at the FULL COLD level or within the
COLD FILL RANGE in the coolant reservoir. If the level falls below, add
coolant per the instructions in theAdding engine coolantsection.
Your vehicle was factory-filled with a 50/50 engine coolant and water
concentration. If the concentration of coolant falls below 40% or above
60%, the engine parts could become damaged or not work properly.A
50/50 mixture of coolant and water provides the following:
•Freeze protection down to -34°F (-36°C).
•Boiling protection up to 265°F (129°C).
L
E
A
D
RETURN
RECYCLE
Maintenance and Specifications
337
2011 Taurus(500)
Owners Guide, 1st Printing
USA(fus)