Page 309 of 441
Snowplowing with your airbag-equipped vehicle
Your vehicle is equipped with a driver and passenger airbag
Supplemental Restraint System (SRS) The SRS is designed to activate in
certain frontal and offset frontal collisions when the vehicle sustains
sufficient longitudinal deceleration.
Careless or high speed driving while plowing snow which results in
sufficient vehicle decelerations can deploy the airbag. Such driving also
increases the risk of accidents.
WARNING:All occupants of the vehicle, including the driver,
should always properly wear their safety belts, even when an air
bag supplemental restraint system (SRS) is provided.
Never remove or defeat the “tripping mechanisms” designed into the
snow removal equipment by its manufacturer. Doing so may cause
damage to the vehicle and the snow removal equipment as well as
possible airbag deployment.
WARNING:Do not attempt to service, repair, or modify the air
bag supplemental restraint system (SRS) or its fuses. See your
Ford or Lincoln Mercury dealer.
WARNING:Additional equipment such as snowplow equipment
may effect the performance of the airbag sensors increasing the
risk of injury. Please refer to theBody Builders Layout Bookfor
instructions about the appropriate installation of additional equipment.
Transmission operation while plowing
Operate the vehicle with the automatic transmission gearshift lever in
the D (Overdrive) position and tow/haul off.
•Shift transfer case to 4L (4x4 Low) when plowing in small areas at
speeds below 5 mph (8 km/h).
•Shift transfer case to 4H (4x4 High) when plowing larger areas or light
snow at higher speeds. Do not exceed 15 mph (24 km/h).
•Do not shift the transmission from a forward gear to R (Reverse) until
the engine is at idle and the wheels are stopped.
•If the vehicle is stuck, shift the transmission in a steady motion
between forward and reverse gears. Do not rock the vehicle for more
than a few minutes. The transmission and tires may be damaged or
the engine can overheat.
Driving
309
2011 F-250/350/450/550(f23)
Owners Guide, 1st Printing
USA(fus)
Page 310 of 441
Do not rock the vehicle if the engine is not at normal operating
temperature. Do not rock the vehicle for more than a minute. The
transmission and tires may be damaged or the engine may
overheat.
Refer toGaugesin theInstrument Clusterchapter for transmission
fluid temperature information.
WARNING:Do not spin the wheels at over 35 mph (55 km/h).
The tires may fail and injure a passenger or bystander.
Driving
310
2011 F-250/350/450/550(f23)
Owners Guide, 1st Printing
USA(fus)
Page 321 of 441
Fuse/Relay
LocationFuse Amp
RatingProtected Circuits
38 Relay Powertrain control module
(PCM) (diesel engine),
Electronic control module (ECM)
(gas engine)
39 10A** 4x4 hub lock
40 15A** 4x4 electronic lock
41 — Not used
42 — Not used
43 — Not used
44 — Not used
45 10A** Run/start relay coil
46 10A** Transmission control module
(TCM) keep-alive power
47 10A** A/C clutch feed
48 Relay Run/start
49 10A** Rearview camera system
50 10A** Blower motor relay coil
51 — Not used
52 10A** PCM/ECM/TCM run/start
53 10A** 4x4 module
54 10A** Anti-lock brake system (ABS)
run/start
55 10A** Rear window defroster coil,
Battery charge coil
56 20A** Passenger compartment fuse
panel run/start feed
57 Relay Fuel pump
58 — Not used
59 — Not used
60 — Not used
61 — Not used
62 — Not used
Roadside Emergencies
321
2011 F-250/350/450/550(f23)
Owners Guide, 1st Printing
USA(fus)
Page 326 of 441
Spare tire information
Note:If your vehicle is equipped the tire pressure monitoring system
(TPMS), the system indicator light will illuminate when the spare is in
use. To restore the full functionality of the TPMS system, all road wheels
equipped with the tire pressure monitoring sensors must be mounted on
the vehicle.
If your vehicle is equipped with TPMS, have a flat tire serviced by an
authorized dealer in order to prevent damage to the TPMS sensor; refer
toTire Pressure Monitoring System (TPMS)in theTires, Wheel and
Loadingchapter. Replace the spare tire with the road tire as soon as
possible.
Stopping and securing the vehicle
WARNING:To help prevent the vehicle from moving when you
change a tire, be sure the parking brake is set, then block (in
both directions) the wheel that is diagonally opposite to the tire being
changed.
Refer to the instruction sheet (located under the jack tool kit) for
detailed tire change instructions.
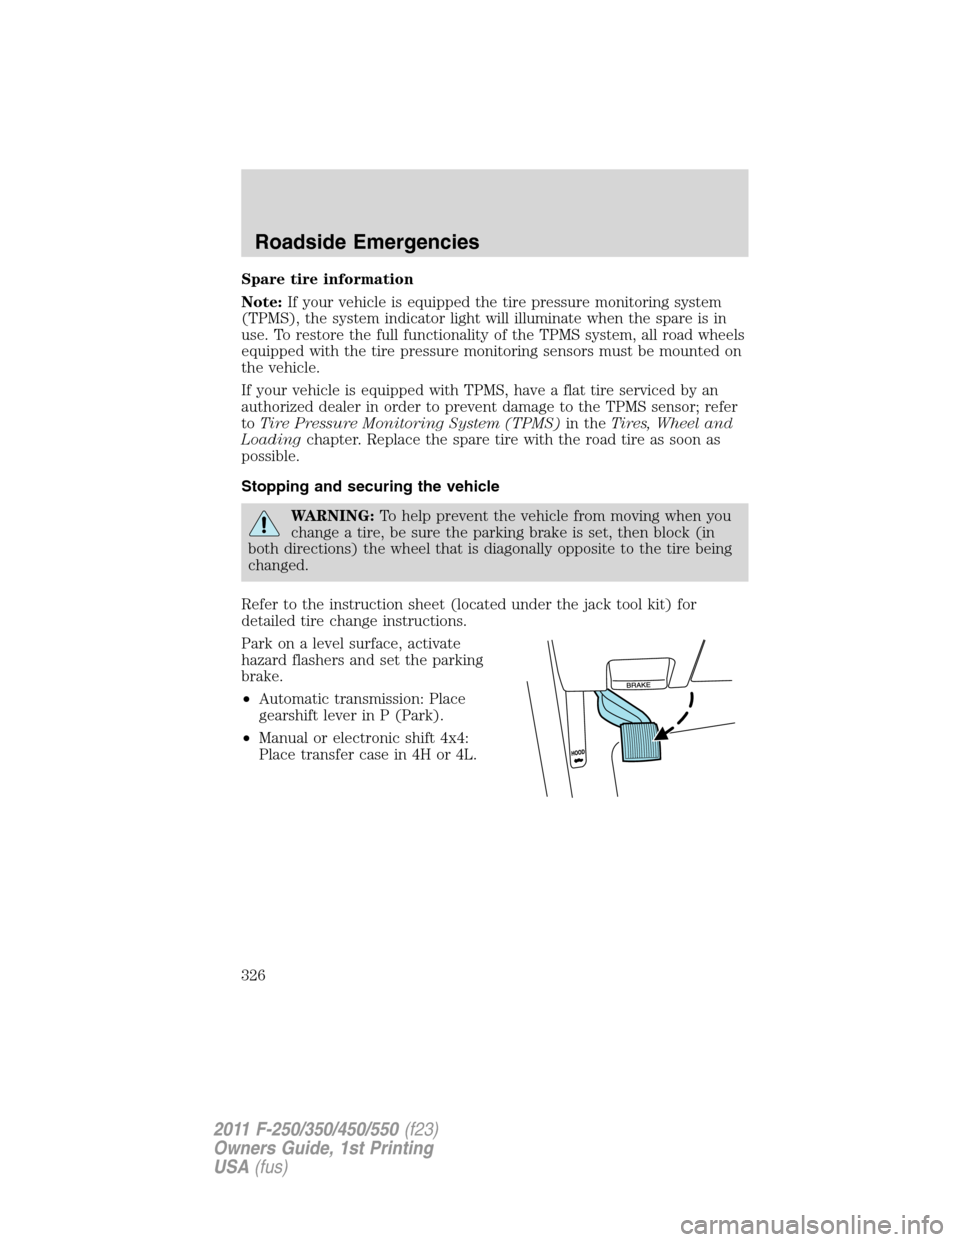
Park on a level surface, activate
hazard flashers and set the parking
brake.
•Automatic transmission: Place
gearshift lever in P (Park).
•Manual or electronic shift 4x4:
Place transfer case in 4H or 4L.
Roadside Emergencies
326
2011 F-250/350/450/550(f23)
Owners Guide, 1st Printing
USA(fus)
Page 329 of 441
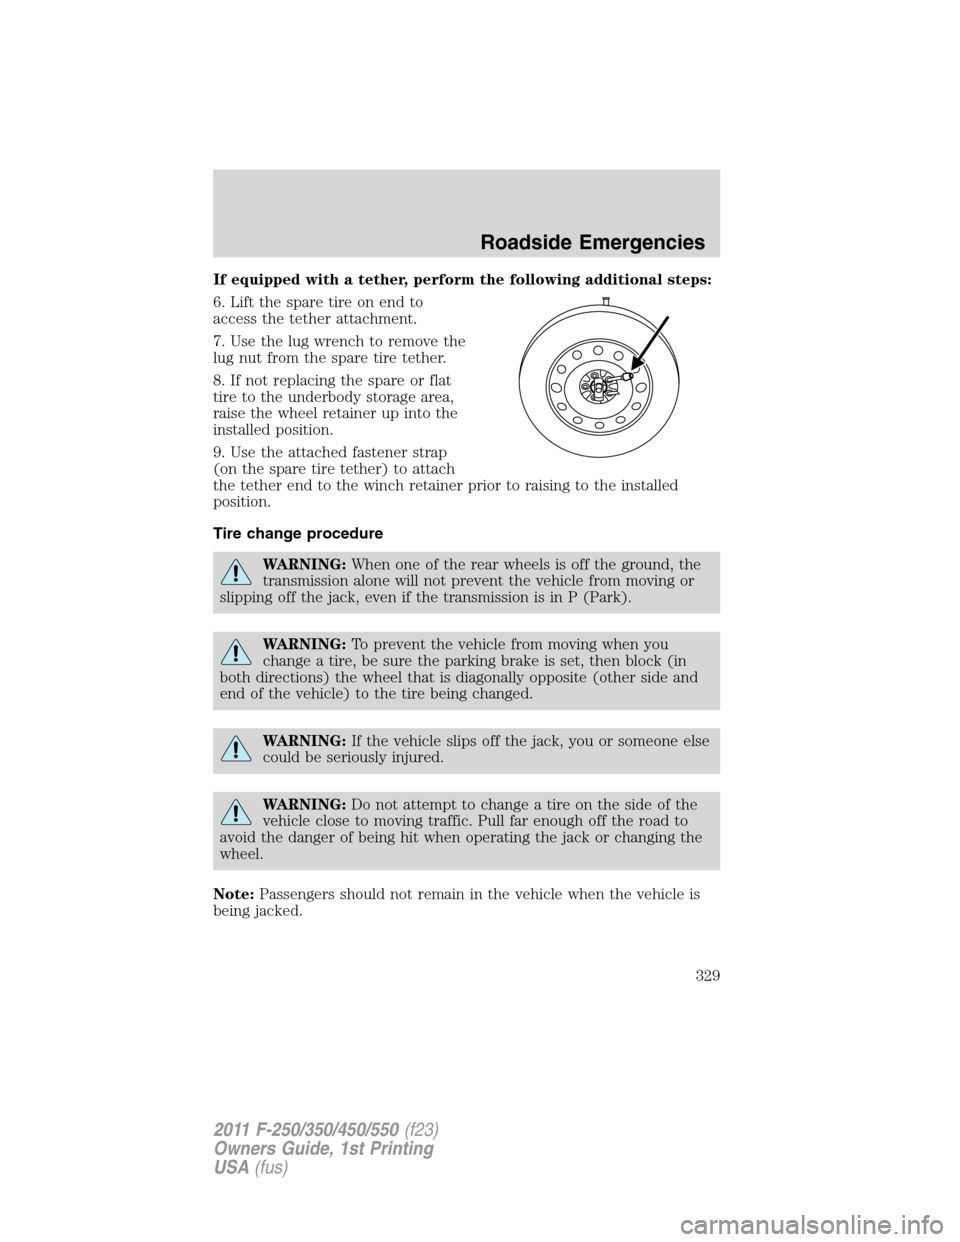
If equipped with a tether, perform the following additional steps:
6. Lift the spare tire on end to
access the tether attachment.
7. Use the lug wrench to remove the
lug nut from the spare tire tether.
8. If not replacing the spare or flat
tire to the underbody storage area,
raise the wheel retainer up into the
installed position.
9. Use the attached fastener strap
(on the spare tire tether) to attach
the tether end to the winch retainer prior to raising to the installed
position.
Tire change procedure
WARNING:When one of the rear wheels is off the ground, the
transmission alone will not prevent the vehicle from moving or
slipping off the jack, even if the transmission is in P (Park).
WARNING:To prevent the vehicle from moving when you
change a tire, be sure the parking brake is set, then block (in
both directions) the wheel that is diagonally opposite (other side and
end of the vehicle) to the tire being changed.
WARNING:If the vehicle slips off the jack, you or someone else
could be seriously injured.
WARNING:Do not attempt to change a tire on the side of the
vehicle close to moving traffic. Pull far enough off the road to
avoid the danger of being hit when operating the jack or changing the
wheel.
Note:Passengers should not remain in the vehicle when the vehicle is
being jacked.
Roadside Emergencies
329
2011 F-250/350/450/550(f23)
Owners Guide, 1st Printing
USA(fus)
Page 340 of 441
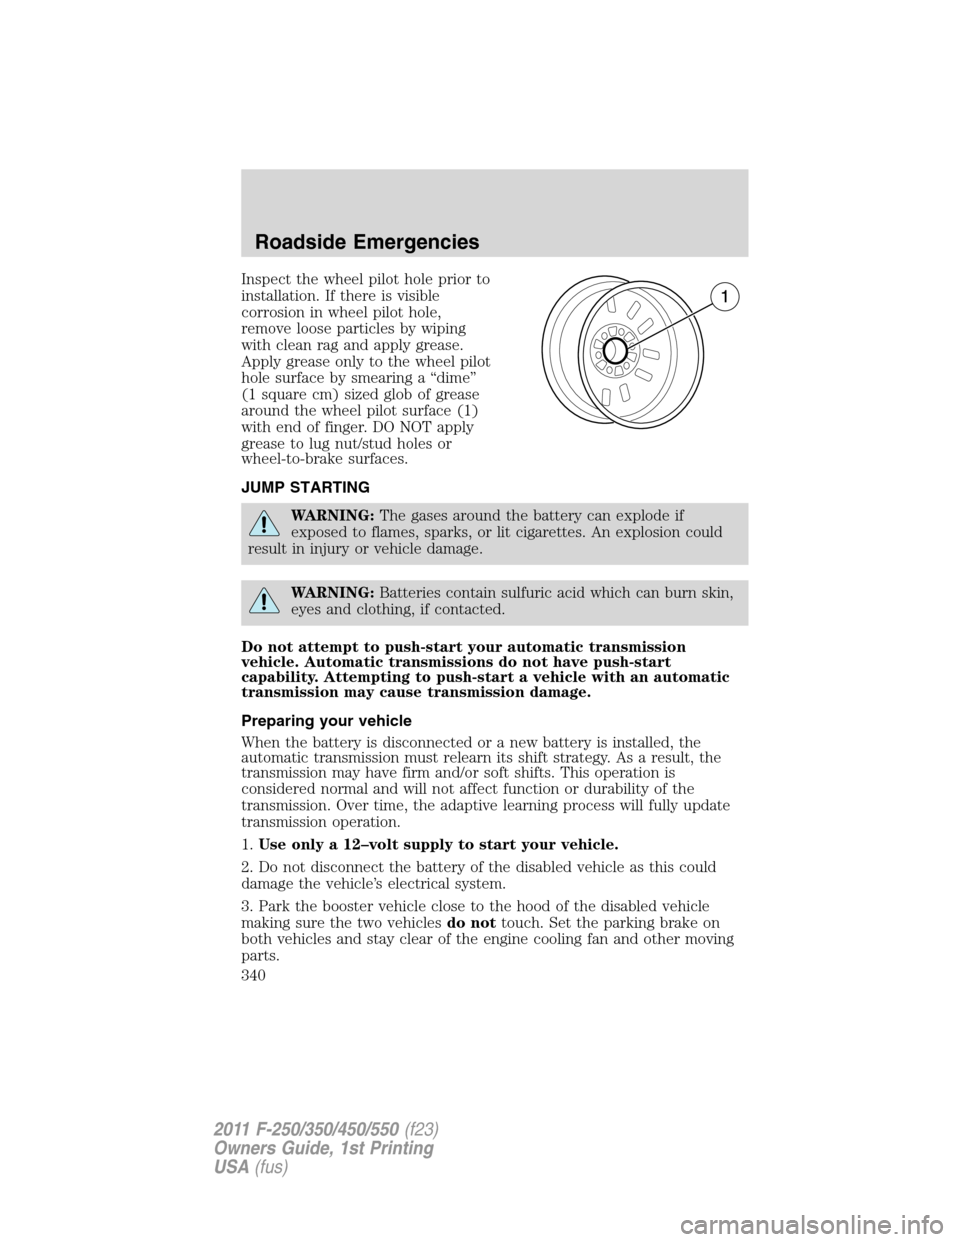
Inspect the wheel pilot hole prior to
installation. If there is visible
corrosion in wheel pilot hole,
remove loose particles by wiping
with clean rag and apply grease.
Apply grease only to the wheel pilot
hole surface by smearing a “dime”
(1 square cm) sized glob of grease
around the wheel pilot surface (1)
with end of finger. DO NOT apply
grease to lug nut/stud holes or
wheel-to-brake surfaces.
JUMP STARTING
WARNING:The gases around the battery can explode if
exposed to flames, sparks, or lit cigarettes. An explosion could
result in injury or vehicle damage.
WARNING:Batteries contain sulfuric acid which can burn skin,
eyes and clothing, if contacted.
Do not attempt to push-start your automatic transmission
vehicle. Automatic transmissions do not have push-start
capability. Attempting to push-start a vehicle with an automatic
transmission may cause transmission damage.
Preparing your vehicle
When the battery is disconnected or a new battery is installed, the
automatic transmission must relearn its shift strategy. As a result, the
transmission may have firm and/or soft shifts. This operation is
considered normal and will not affect function or durability of the
transmission. Over time, the adaptive learning process will fully update
transmission operation.
1.Use only a 12–volt supply to start your vehicle.
2. Do not disconnect the battery of the disabled vehicle as this could
damage the vehicle’s electrical system.
3. Park the booster vehicle close to the hood of the disabled vehicle
making sure the two vehiclesdo nottouch. Set the parking brake on
both vehicles and stay clear of the engine cooling fan and other moving
parts.
Roadside Emergencies
340
2011 F-250/350/450/550(f23)
Owners Guide, 1st Printing
USA(fus)
Page 344 of 441
Note:Towing an ESOF 4x4 vehicle with the front wheels on the ground
without disengaging the front hubs may cause damage to the automatic
transmission.
Note:Towing a 4x2 or an ESOF 4x4 vehicle with the rear wheels on the
ground for more than 50 miles (80 km) and/or in excess of 35 mph
(56 km/h) may cause damage to the automatic transmission.
Note:On Dual Rear Wheel (DRW) vehicles, an outer rear wheel must be
removed prior to using a wheel lift wrecker.
Ford Motor Company produces a towing manual for all authorized tow
truck operators. Have your tow truck operator refer to this manual for
proper hook-up and towing procedures for your vehicle.
If the vehicle is towed by other means or incorrectly, vehicle
damage may occur.
Emergency towing
In case of a roadside emergency with a disabled vehicle (without access
to wheel dollies, car hauling trailer, or flatbed transport vehicle) your
vehicle (regardless of transmission powertrain configuration) can be flat
towed (all wheels on the ground) under the following conditions:
•Vehicle is facing forward so that it is being towed in a forward
direction.
•Place the transmission in N (Neutral). Refer toBrake-shift interlock
in theDrivingchapter for specific instructions if you cannot move the
gear shift lever into N (Neutral).
•Maximum speed is not to exceed 35 mph (56 km/h).
•Maximum distance is 50 miles (80 km).
Roadside Emergencies
344
2011 F-250/350/450/550(f23)
Owners Guide, 1st Printing
USA(fus)
Page 363 of 441
6.2L V8 gasoline engine
1. Windshield washer fluid reservoir
2. Engine oil dipstick
3. Automatic transmission fluid dipstick
4. Brake fluid reservoir
5. Engine coolant reservoir
6. Power distribution box (not shown)
7. Air filter assembly
8. Power steering fluid reservoir
9. Engine oil filler cap
10. Battery
123456
10987
Maintenance and Specifications
363
2011 F-250/350/450/550(f23)
Owners Guide, 1st Printing
USA(fus)